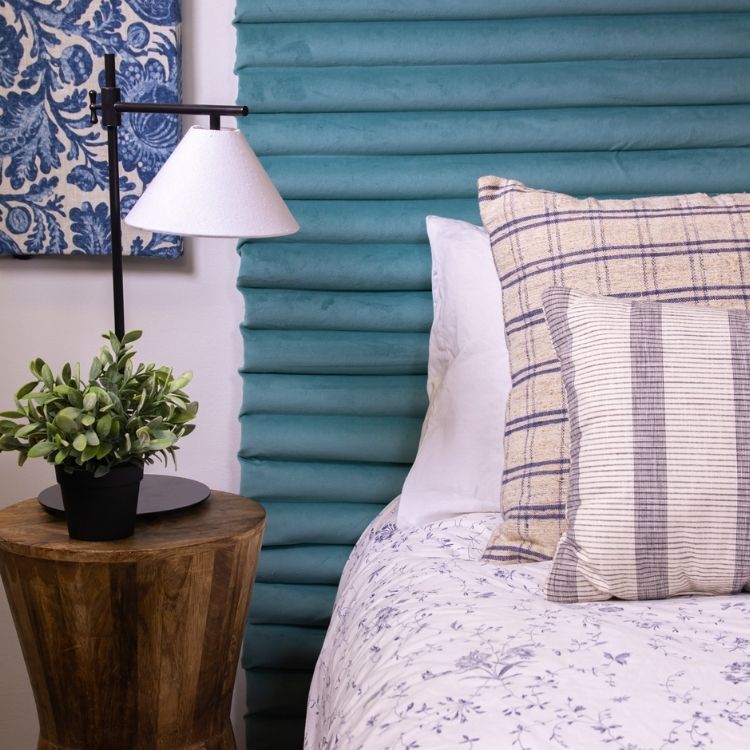
How To Make a Headboard Out of Pool Noodles
- By Mikayla
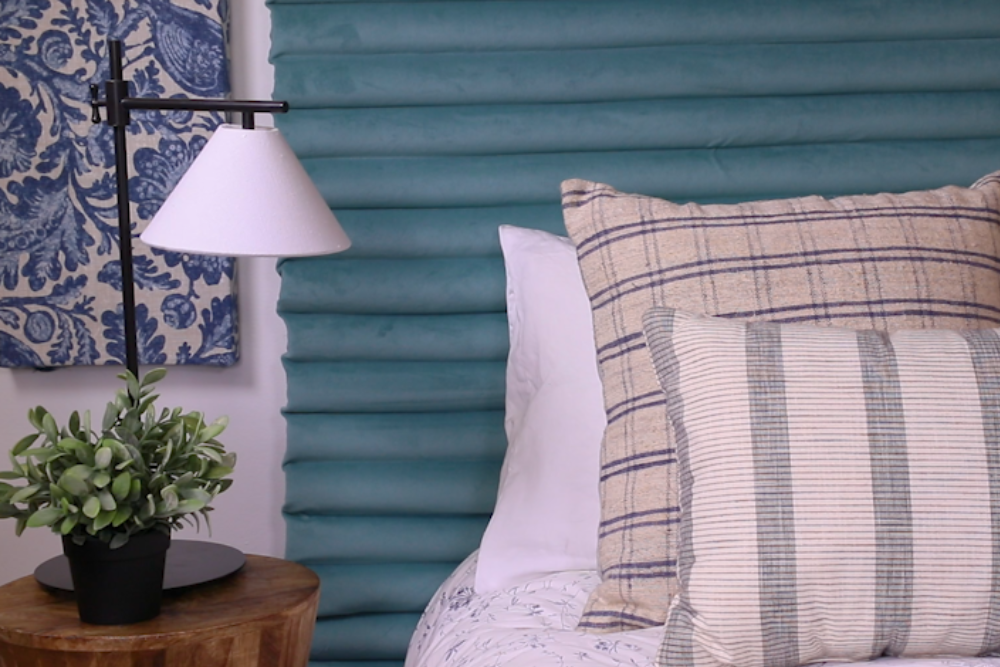
Let’s jump into this fun and viral DIY project. Using a simple list of materials, we are making a headboard out of pool noodles! This will give you a fresh new look in your bedroom for a fraction of the price. We know you’re going to love the end result as much as we do.
You can download our PDF directions by signing up to our mailing list.
Let’s get started!
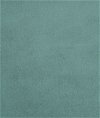
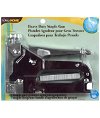
Materials
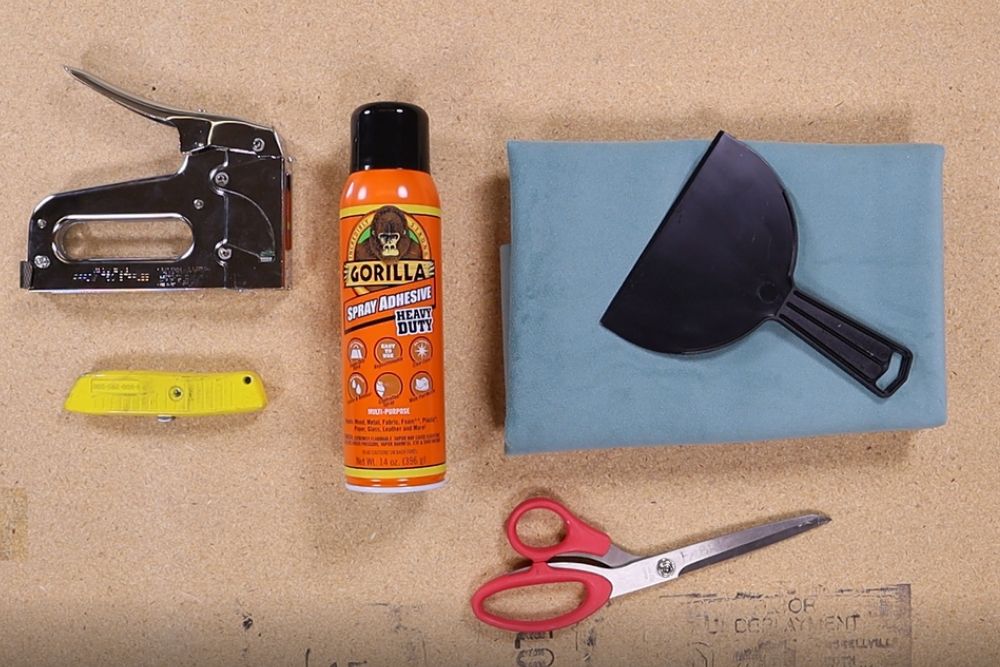
Related Products
Video
Instructions
Beginning Note
Depending on what size headboard you’re making, measure the length of particle board to establish fabric yardage. You will need about 24” extra on each end to account for the material being pushed into each seam. Make sure you have at least a 4” overhang on edges as well so there is enough fabric to wrap around to the back.
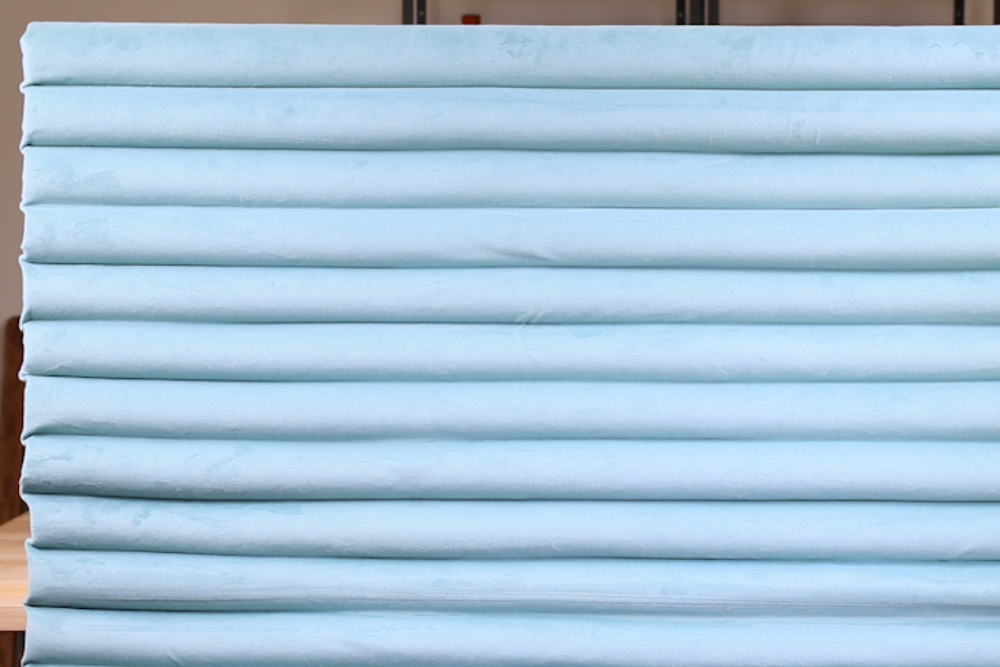
Step 1: Mark Your Noodles
First collect all of your pool noodles and mark their center point on each end with a pen. This gives a guide when starting your cuts in Step 2.
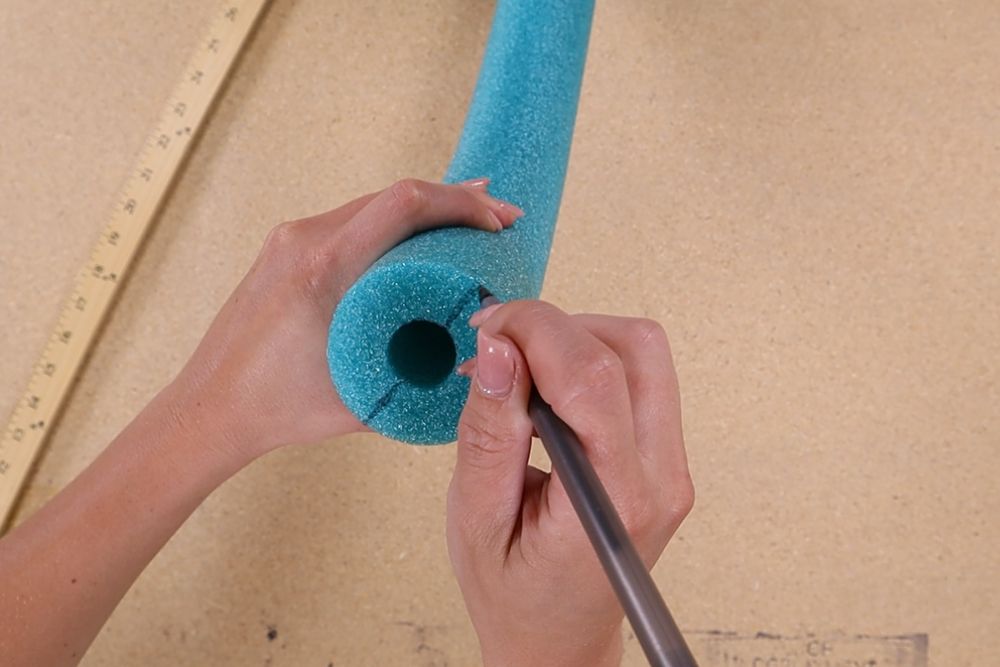
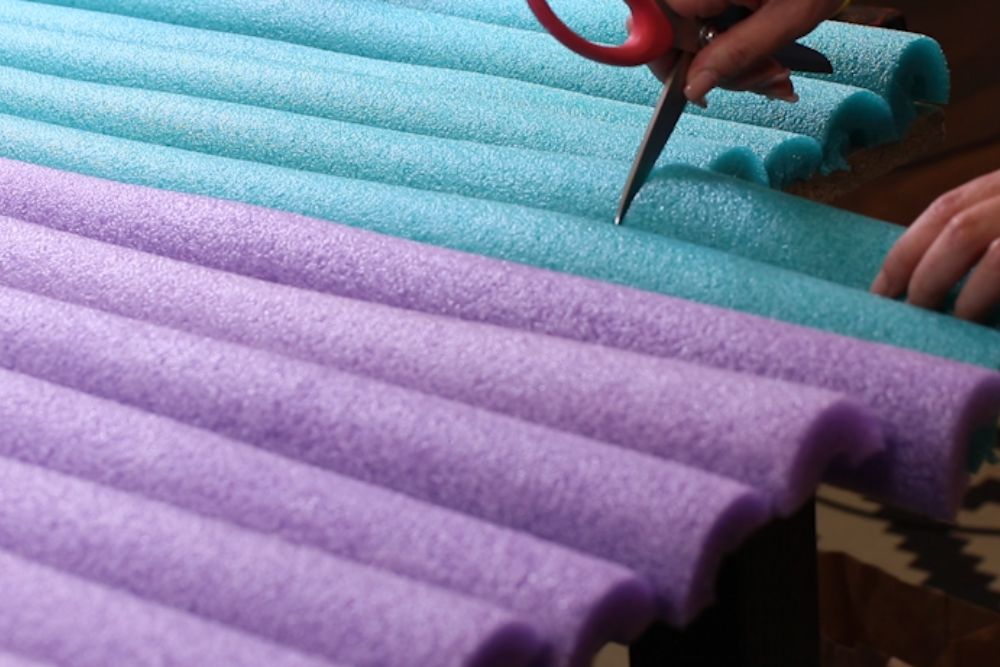
Step 2: Cutting the Noodle
Now that you have all of your noodles marked, using a box cutter or a pair of scissors you can begin cutting. Start cutting the long way on one side using your center mark as a guide. Once you’ve cut all the way down to the other end, flip the noodle over and do the same to the other side.

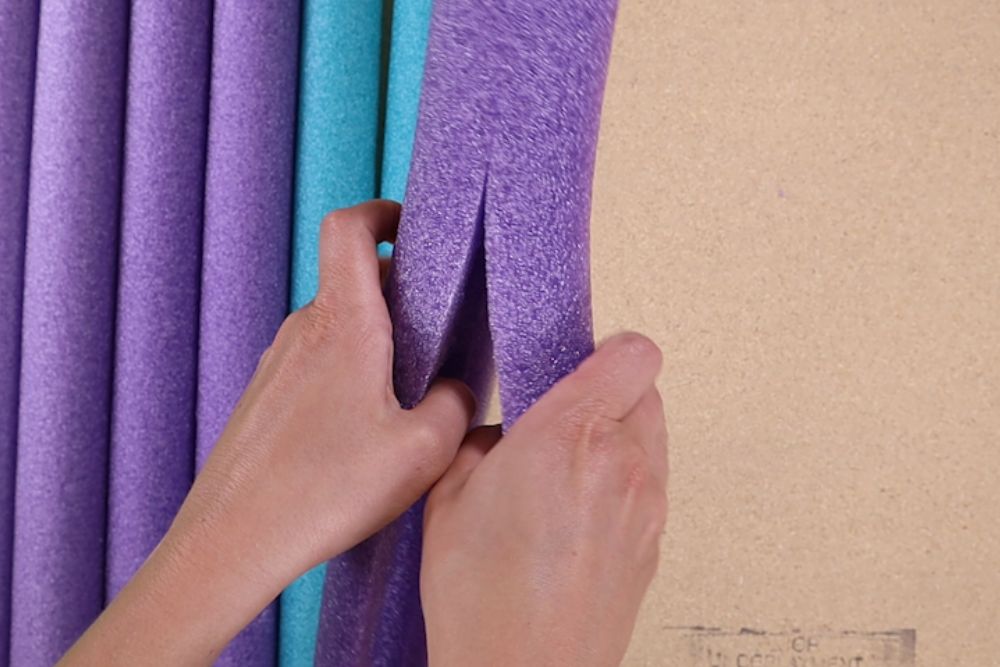
Step 3: Split in Half
After both sides are cut, wiggle your fingers into the cut and gently pull the noodle apart. You should now have two halves of the noodle both with a rounded and a flat side. Repeat this for all of your noodles.

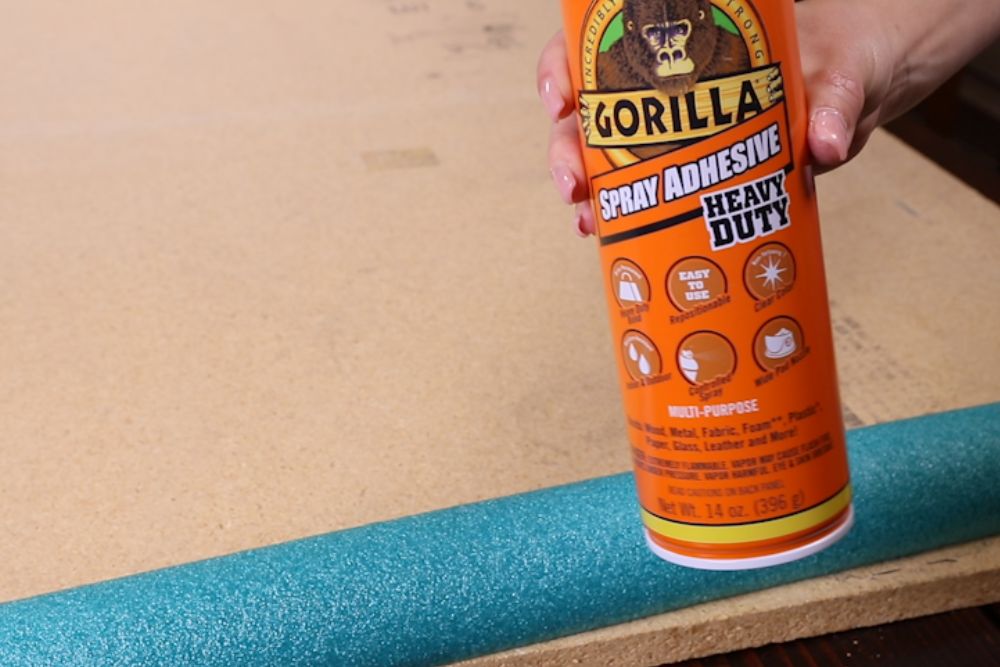
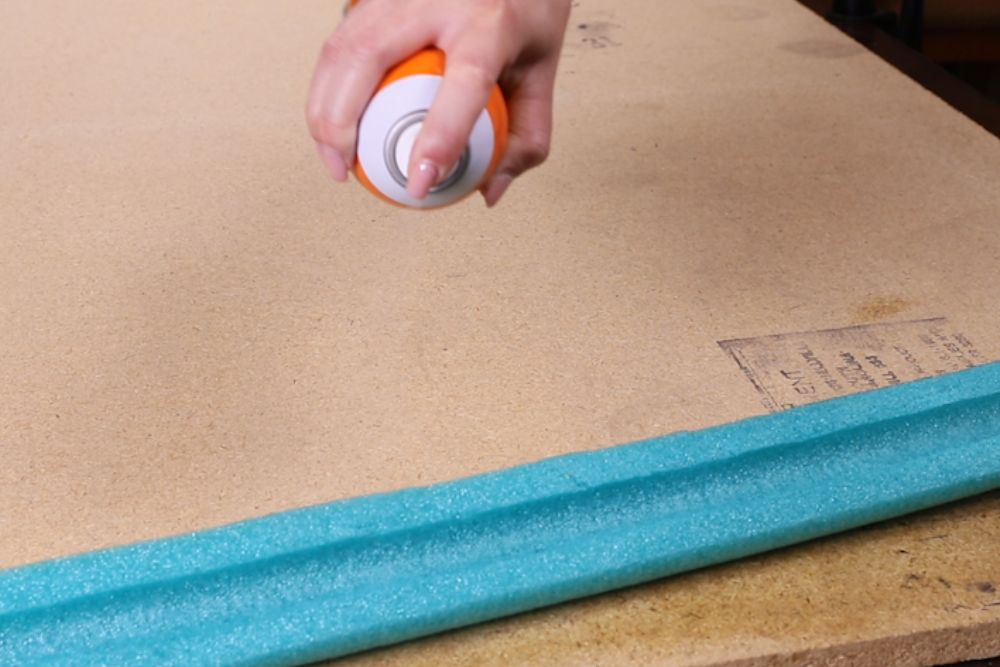
Step 4: Adhere To Particle Board
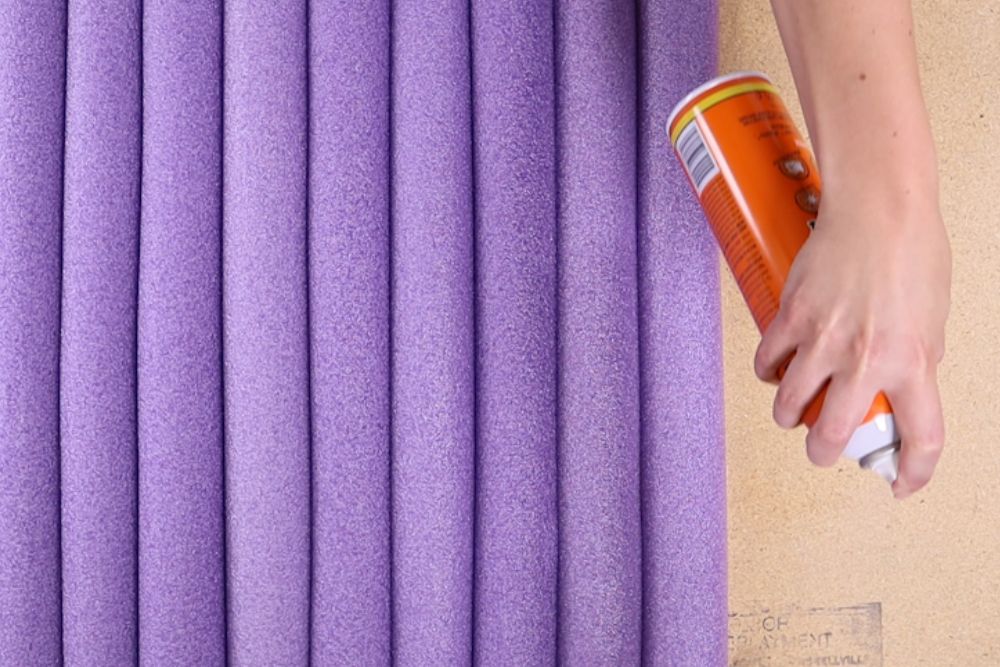
Now that all of your noodles are cut, you can start adhering your noodles to the particle board. Using an adhesive, spray the particle board and spray the flat side of the noodle. We sprayed one area at a time rather than a large area, to make sure it dried evenly. Once you place the flat side onto the particle board, press down firmly. Repeat this step until all noodles are stuck to the particle board.
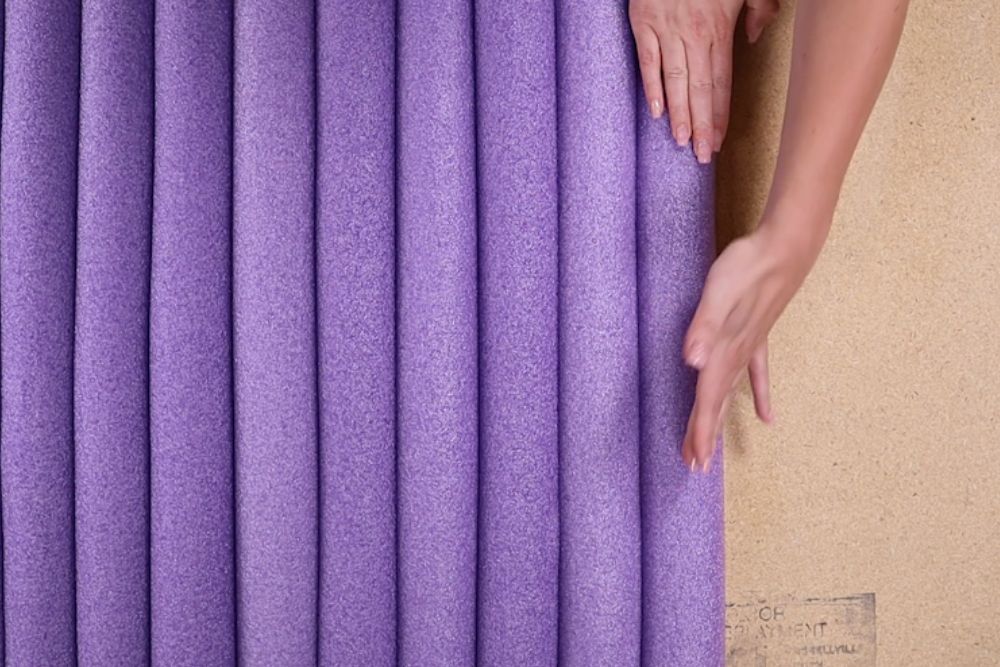
Step 5: Remove Overhang
Depending on the size of your headboard, you may have overhang from your noodles. If you do, like we did, take your box cutter or sharp sheers and cut off the excess using the edge of your particle board as a guide.
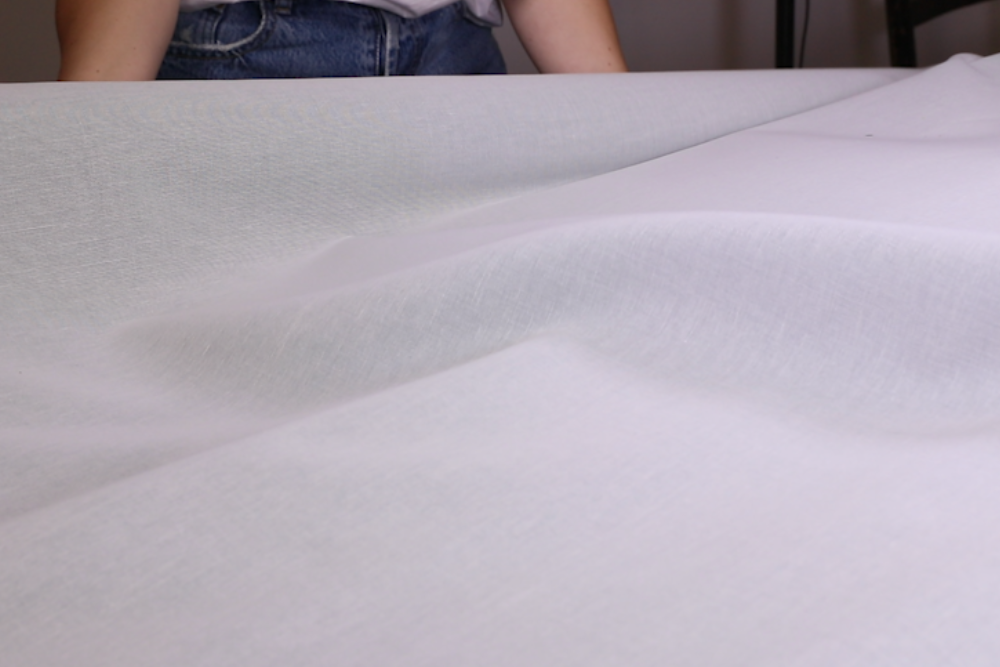
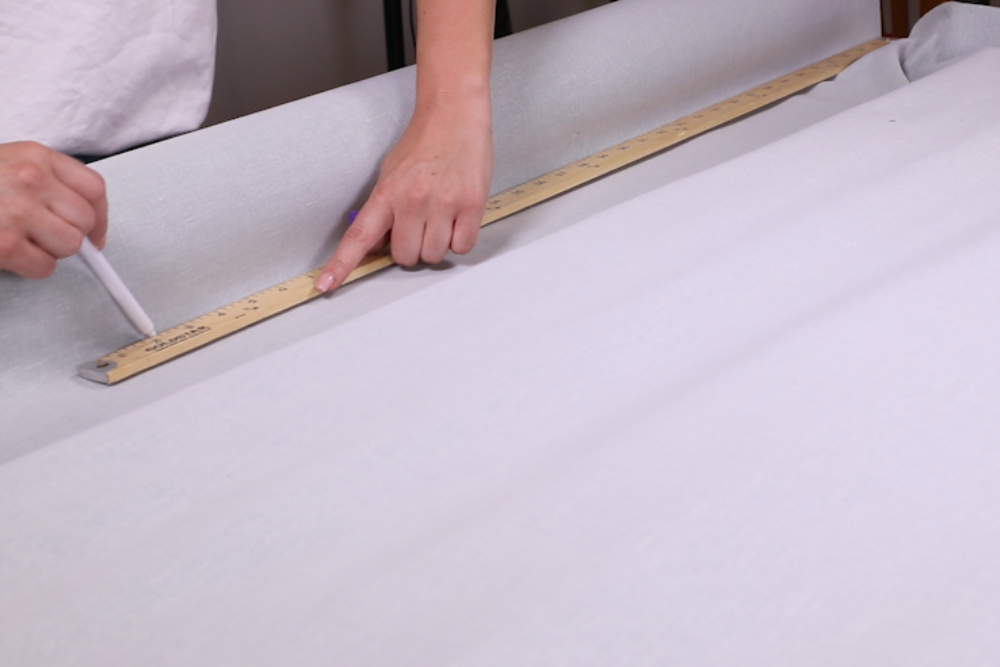
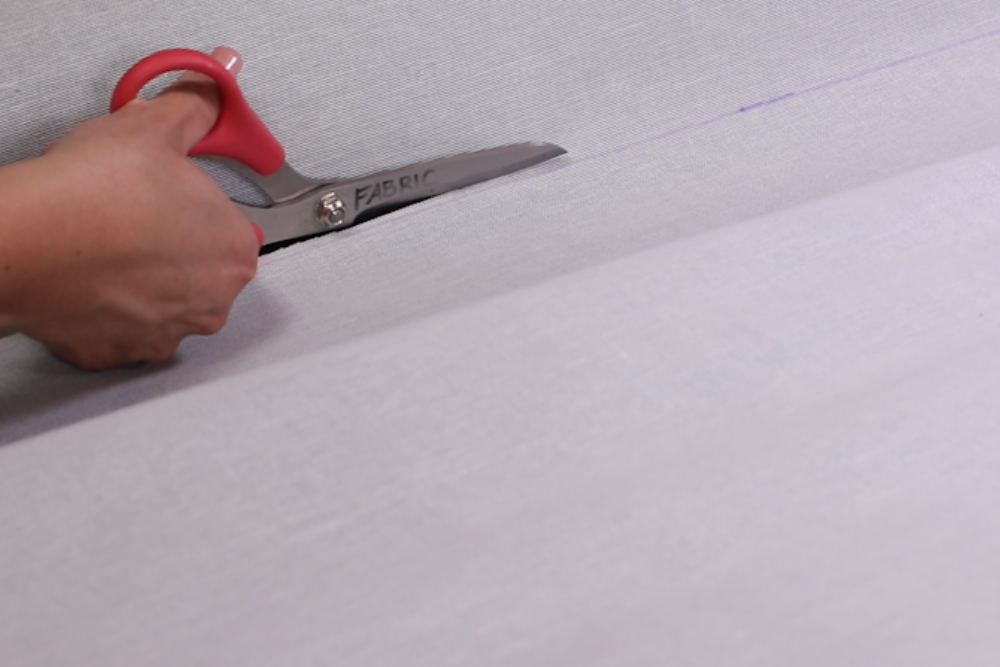
Step 6: Rolling Out Your Fabric
Now that your noodles are adhered and cut to size, it’s time to roll out your fabric. Roll out your fabric on top of your headboard and make sure it’s covering your whole headboard with enough material on all four sides to eventually wrap at the end. We recommend having at least 24” on the top and bottom and 8” on both sides. If you need to trim any excess fabric, we recommend turning your fabric over and using a fabric marker and ruler to mark a straight cut.
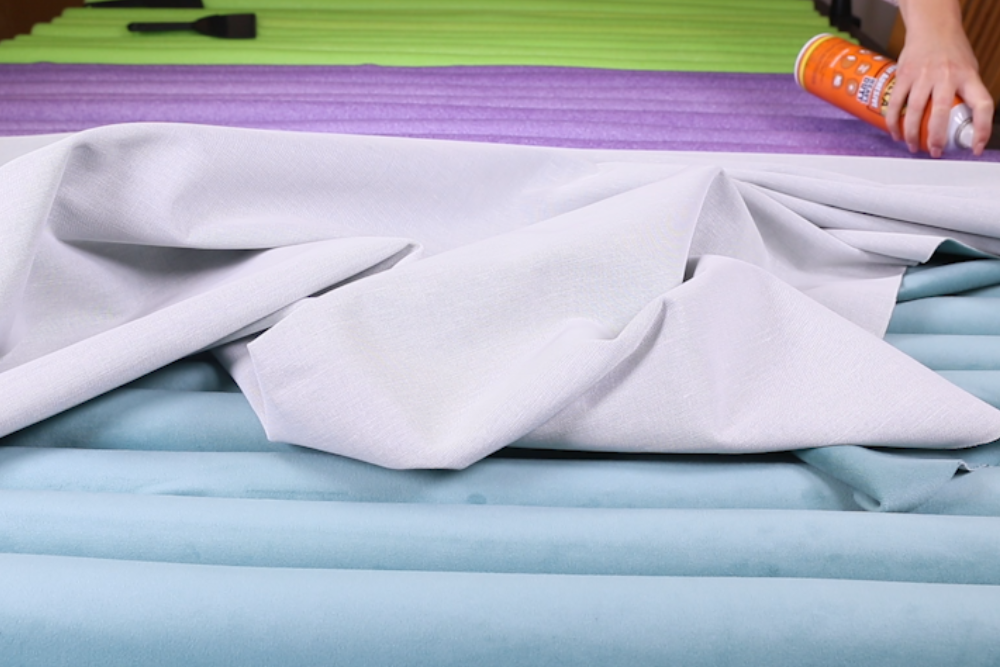
Step 7: Adding the Fabric
Once your fabric is cut to size, it’s time to adhere your fabric to your noodles! This part requires a lot of patience. Take your time! It’s much easier if you have an extra set of hands to help. Using the spray adhesive, coat one noodle at a time. Once coated, gently lay your fabric on top of the noodle. Guiding your fabric to lay without creasing, adjust as needed and push into the crease between the noodles. Once your fabric is where you want it, use your plastic spackle knife to push into the crease even more to help the fabric stick. Repeat this step for the rest of the headboard.

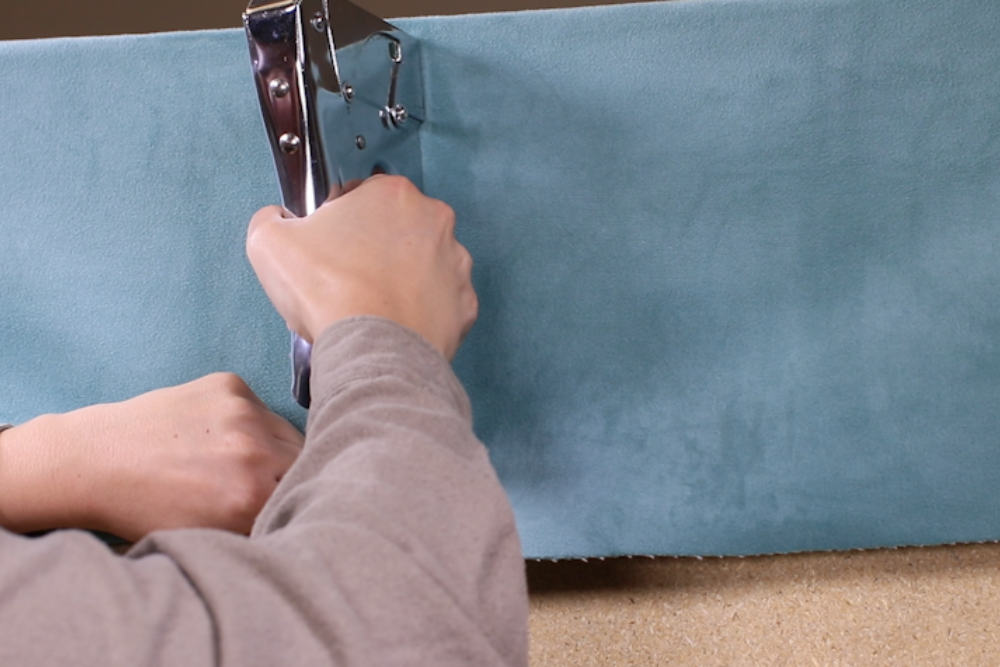
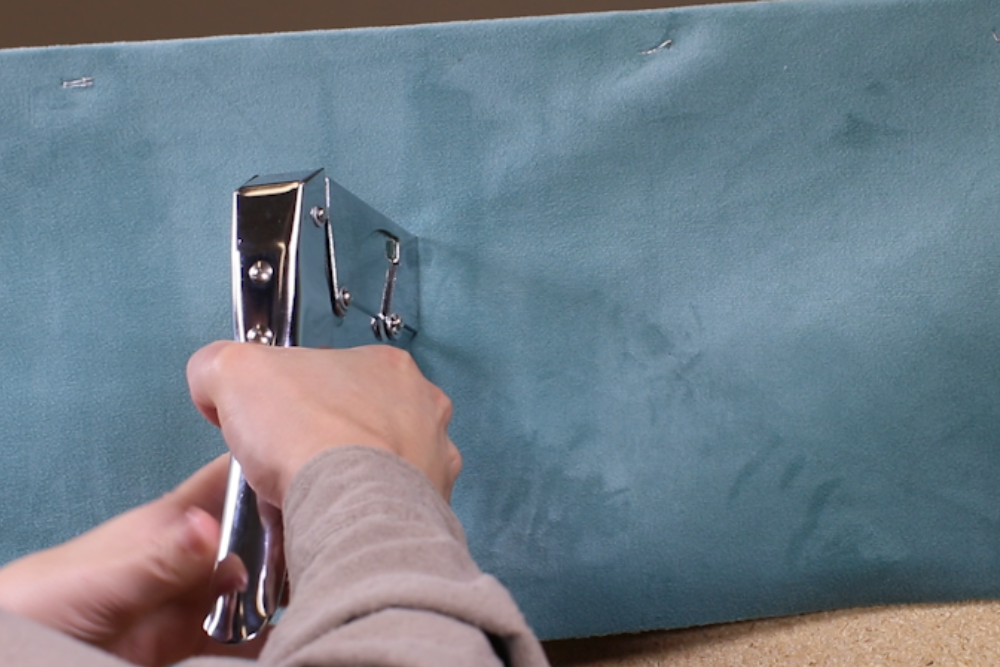
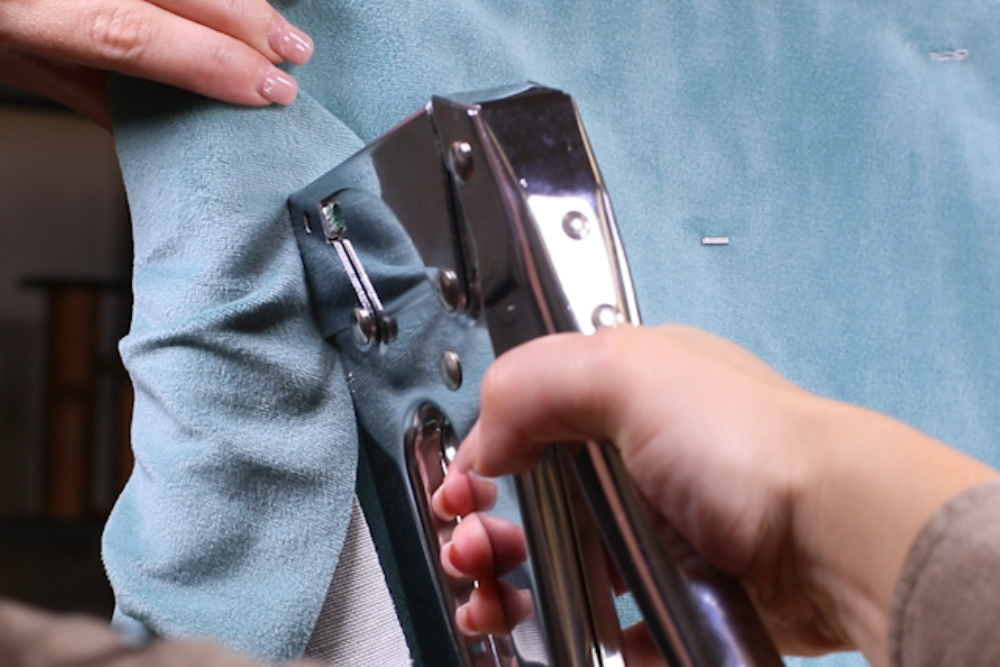
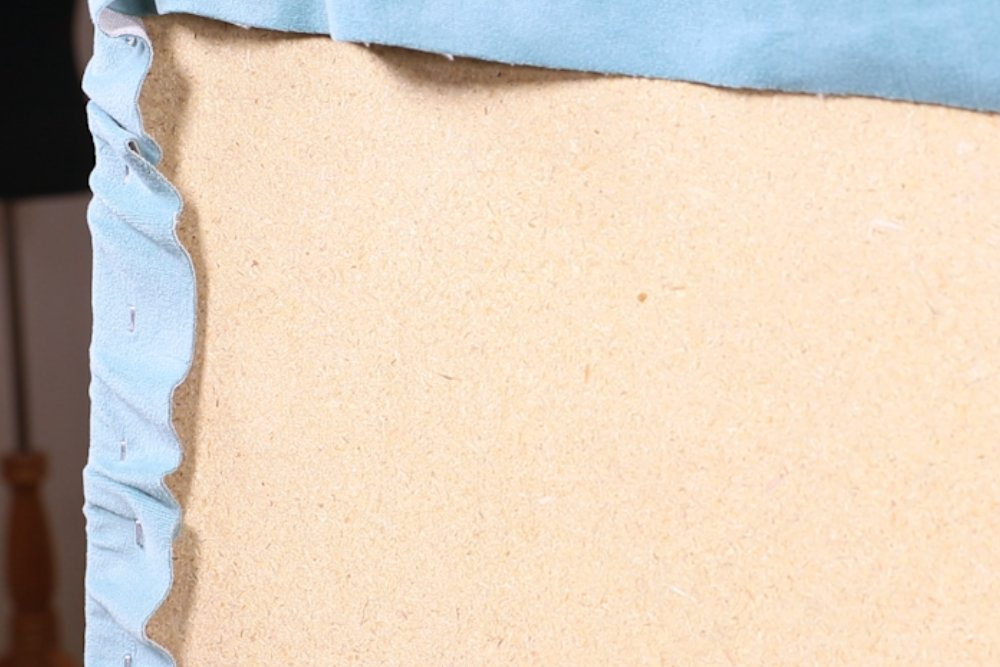
Step 8: Upholstering Fabric to The Back
After getting your fabric perfectly in place, it’s time to work with that extra fabric. If you’re working with your headboard laying down, stand it up and turn it around so the back of the particle board is accessible. Starting at the top, pull the extra fabric over to the back of the board. Begin at the middle and pull the extra fabric until there is a bit of tension. You want the fabric to be wrapped tight. Secure this spot to the particle board using a staple gun. Repeat all the way across the top leaving an inch from the corner. You can add any additional staples if you have loose spots. Do this to the extra fabric at the other end as well.
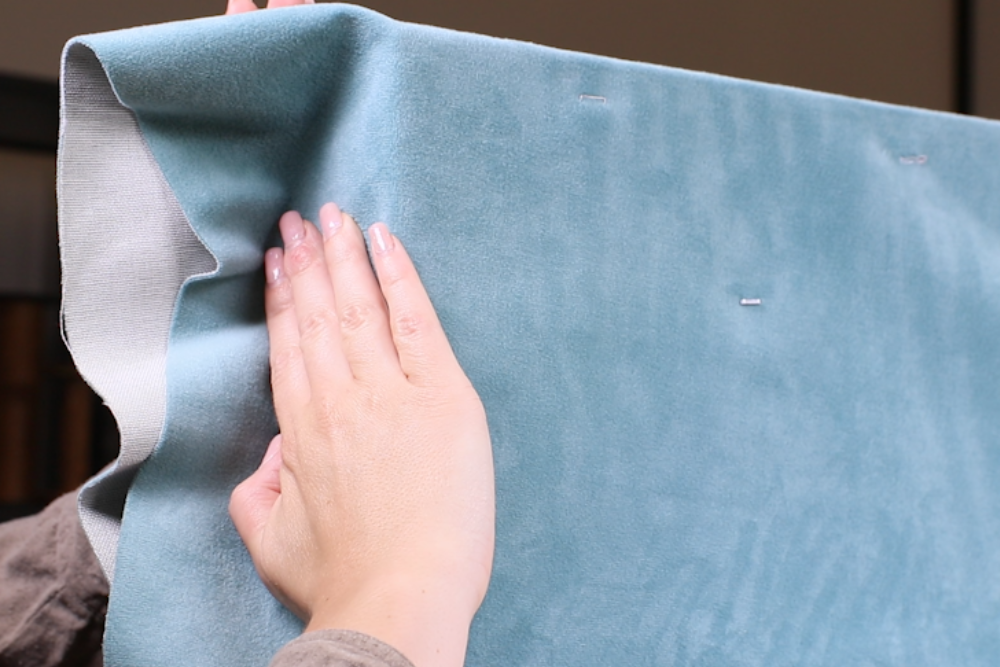
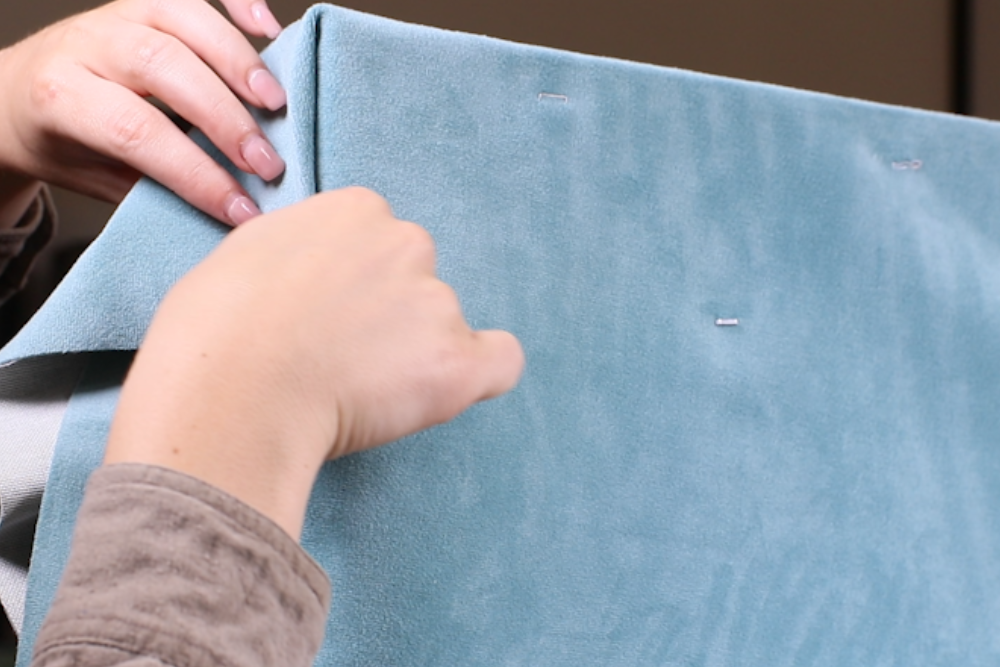
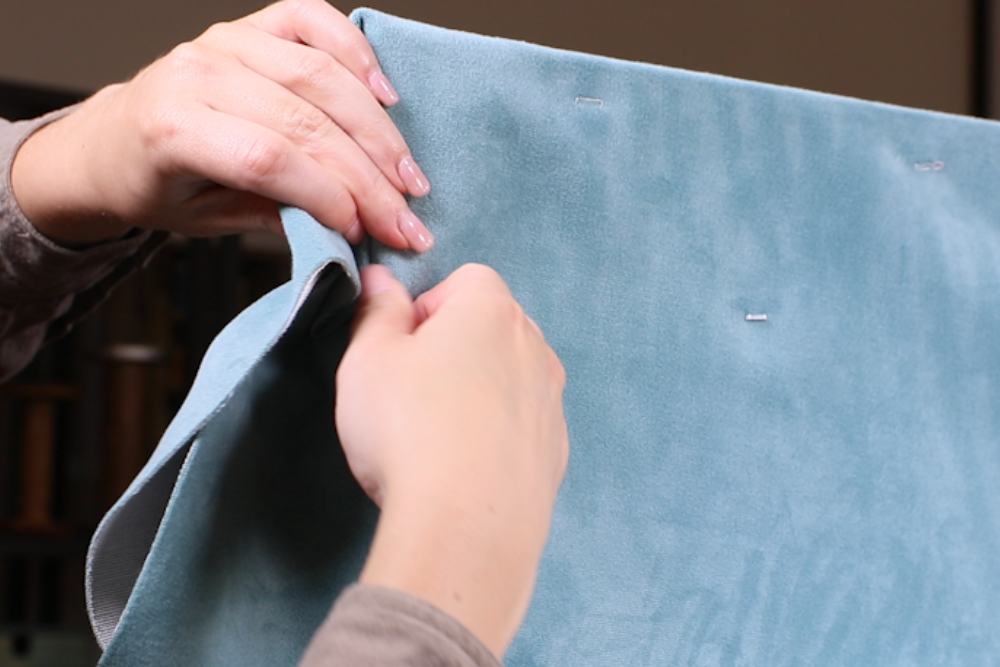
Step 9: Corners
Grabbing the extra fabric at the corner fold in half and then pull down. Grab the front of the fold and pull backward to the back of the board. Using your staple gun, secure this fold to the board. Repeat this for all 4 corners but work in a rotation from this corner, down the side, and onto the next corner.
*Do the top corners first.
Step 10: Upholstering the Sides
Using the same grab and pull method, work your way down both sides. Grabbing the extra fabric, pulling tight towards the back, and stapling in place.
Step 11: Setting up Your Headboard
You did it! Now that your headboard is complete, you can push it between your bed and the wall like we did or you can optionally add wall mounting brackets to the back of the headboard and mount it to your wall behind your bed.
Check out these fabrics and give this project a try!
-
{{#each productSuggestedQueries.results}}
- {{query}} {{/each}}
-
{{#each categories.results}}
- {{html title}} {{/each}}
{{html attributes.description}}
{{/if}}-
{{#each queries.results}}
- {{query}} {{/each}}