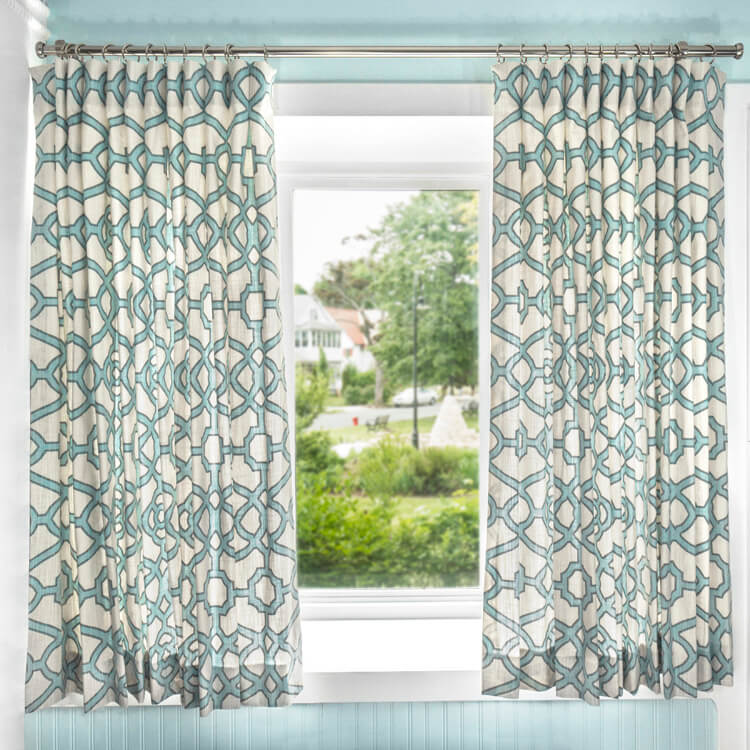
How to Make Inverted Box Pleat Curtains
- By Clara
- Intermediate
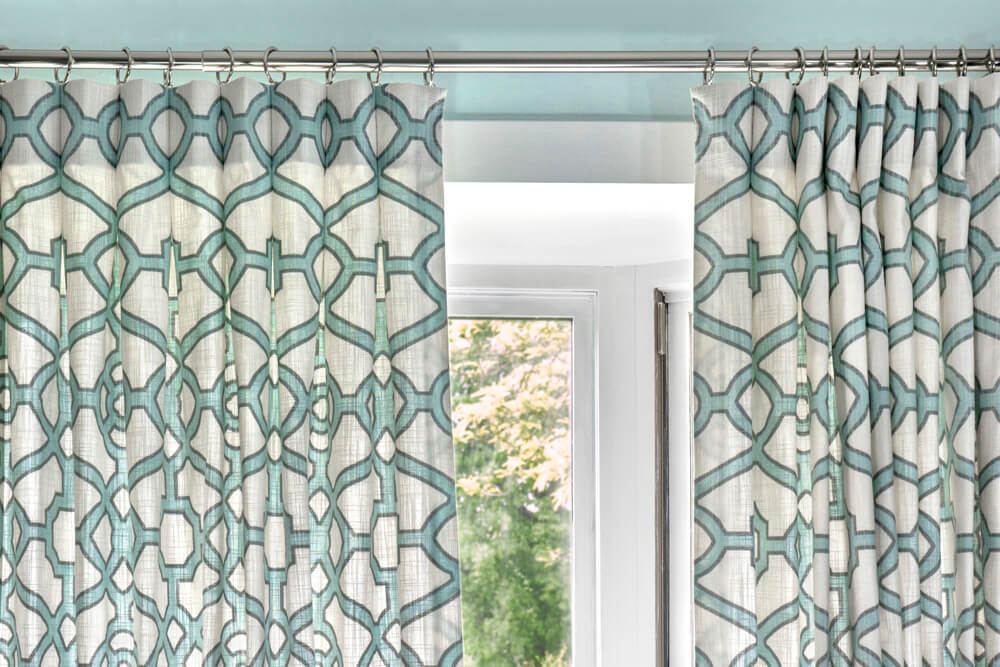
Many of our curtain tutorials have been at more of a DIY level, but for these inverted box pleat curtains, we’re going to take it up a notch. The difference is that with professional looking curtains, you won’t see any visible topstitching on the front and more of the work will be done by hand. This takes more time, but still, any patient DIY-er can do it.
You can use these techniques with any other heading style to create many different kinds of professional looking curtains. Take a look at our other drapery tutorials for more ways to make curtains.
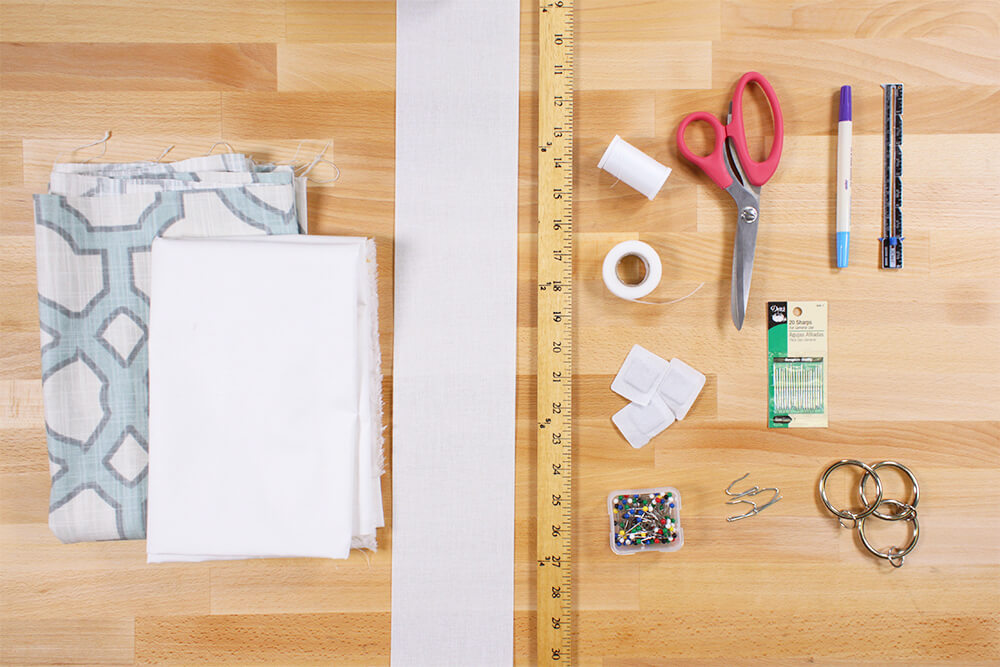
Materials
Related Products
-
 Rain No Stain White Drapery Lining
-
 Stitch Witchery Regular Weight - 5/8" x 20 Yards
-
 Sewing Gauge with Sliding Marker
-
 Dual Duty XP Thread - Winter White, 500 Yards
-
 4" Drapery Buckram - 76 x 76
-
 1" Cloth Covered Drapery Weights - 10 Pack
-
 1" Pin-On Drapery Hooks - 14 Pack
-
 75 Long Ball Point Pins - Size 24
-
 Dual Tipped Marking Pen - Blue & Purple
-
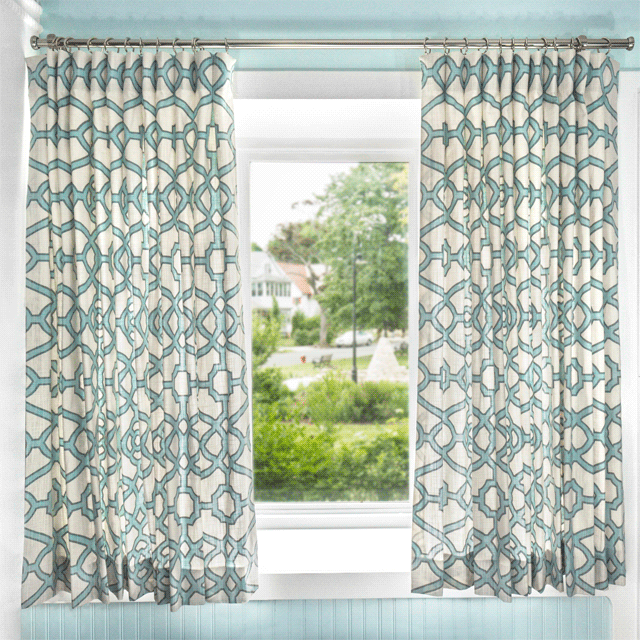
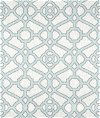 Pavilion Fretwork Tropical Blue
Video
Instructions
Step 1: Plan the pleats
Before cutting any fabric, you’ll want to figure out the size of your pleats. I suggest cutting a strip of fabric to play with.
For this geometric print, I want the pattern to repeat every other pleat. This constrained my options, but I ended up with 3 ¾” pleats with 1 ½” pleats on the back.
If your curtains are more decorative than functional, you can go with the same size pleats on the front and back for maximum fullness. If you want your curtains to be functional, meaning you will be opening and closing them, going with a smaller pleat on the back is best. This will make the curtains look better when open because the pleats will stack nicely.
This is an inverted box pleat, but if you make the pleats on the back and front the same size, there’s no difference between regular and inverted.
Step 2: Determine the dimensions
Now that I know the pleat size, it’s time to figure out what dimensions to cut the fabric to.
The length is easy, just add 13” to the desired finished length for the hems.
The width isn’t as straightforward and will be different for everyone.
Add 4” to the width to account for the amount needed to finish the sides.
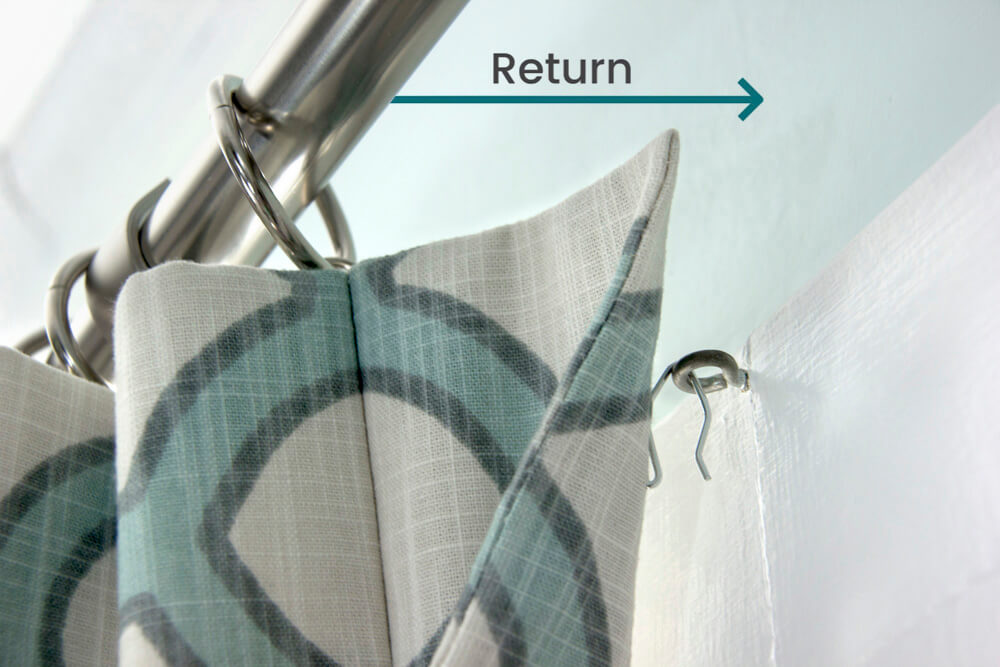
If you want the fabric to attach to the wall on the sides, measure the “return” which is the distance from where the fabric hangs on the curtain rod to the wall. Having returns looks professional and eliminates the gap between the wall and the curtain. Make sure to add this distance to each panel if you want a return. For my curtain, it’s 3 ½ inches.
Also add the leading edge, which is the distance from the inner edge (opposite from the return) to the first pleat. This is generally about 4″ or so. Mine’s going to be 3 ½”.
So all together the extras you need to take into consideration are:
Return + Leading Edge + 4″ for sewing the sides
My curtain: 3.5 + 3.5 + 4 = 11″
As a starting place for the amount of fabric needed for the pleats, you can multiply the distance you want the curtain panel to cover by about 2 or 3, depending on how full you want the curtains. Or start with the maximum width of fabric you want to use, which is what I did.
To minimize the number of yards needed, I don’t want the width before sewing to be more than a width of the fabric plus a half width. For standard 54” wide drapery fabric that’s 54 + 27 = 81”. Then subtract the extra inches figured out before, which is 11″ for me. So I have 70″ to work with for my pleats.
Figure out the amount of fabric one pleat takes up. That’s the amount you see from the front plus double the size of pleat on the back.
My pleats: 3.75 + (1.5 x 2) = 6.75
Take your rough number for the total width needed for the pleats and divide by the total pleat size. For me: 70 / 6.75 = 10.4 and round down to 10. This means I can fit 10 pleats with some extra left over.
(Total pleat size x Number of pleats) + Return + Leading Edge + Amount needed to sew sides = Total width
Mock this up on a strip of the fabric to see if it all works out. If you’re using a solid fabric or don’t care where the pleats fall exactly, this is all a little more forgiving because you can make adjustments after the panel is sewn, before pleating it. But in my case, it’s important to be precise before sewing.
If you need to seam pieces together, matching the fabric up usually only takes about ½”. But you also have to take into consideration the seam location because you want the seam to be on the back of a pleat. This means you may have to shift the pleats.
If you have a pattern that you want to repeat evenly on the pleats, you may have to start the pleats in a certain spot and some of the fabric on the edges may not be usable.
Even though you have a certain amount of fullness created by the pleats, you can still make the finished width of the pleated panel larger than the distance you need to cover. This will give it extra fullness and means you don’t have to pull the curtain taught to close it all the way.
Those are the steps I took when figuring out the width and pleats, but it will be different for everyone. I hope that’s somewhat helpful!
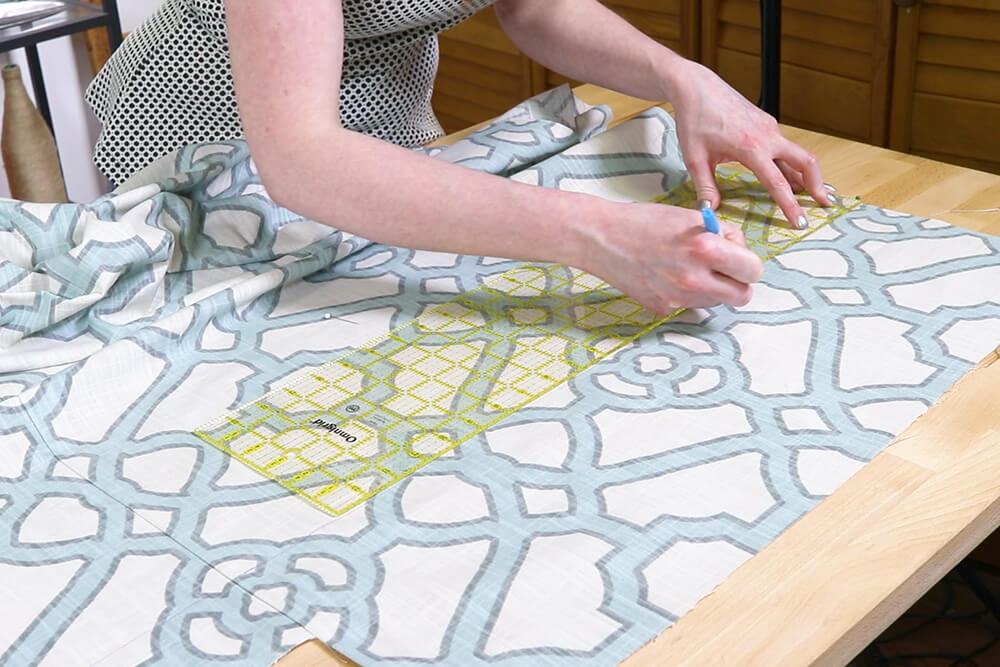
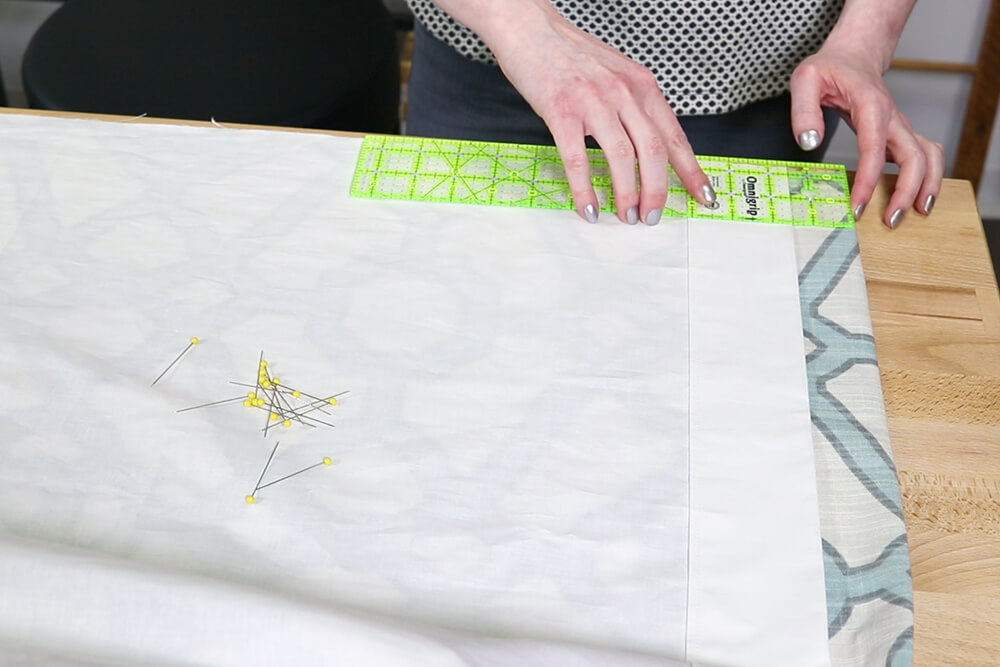
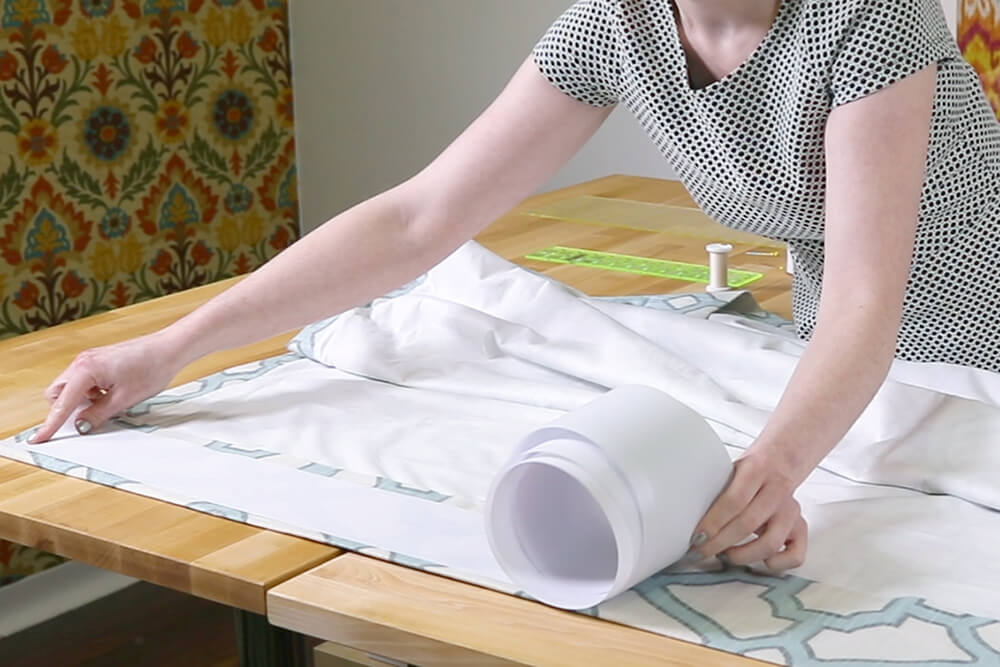
Step 3: Seam and cut the face fabric
Since most drapery fabric is 54” wide, you may have to seam pieces together to get the correct width.
If you’re making 2 curtain panels per window, it looks best to have the full width pieces on the inner section where the edges will meet and the narrower pieces on the outside.
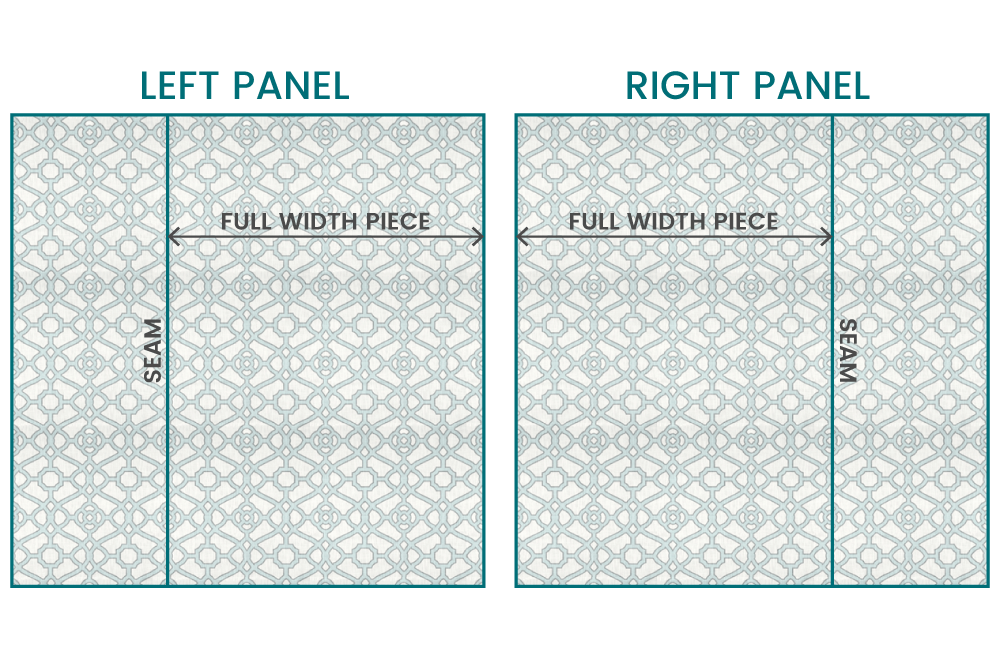
Join the pieces before cutting the fabric to the exact dimensions.
If you’re using a solid fabric, seaming the pieces together is easy with a plain seam. For patterned fabric, you’ll want to match up the pattern, which requires more steps.
Start by cutting a full width piece of fabric that’s 13″ longer than the finished length. I like to add a couple extra inches to be safe.
When cutting the length, be aware of how the pattern will look when the hems are sewn so it’s not cut off in an awkward way.
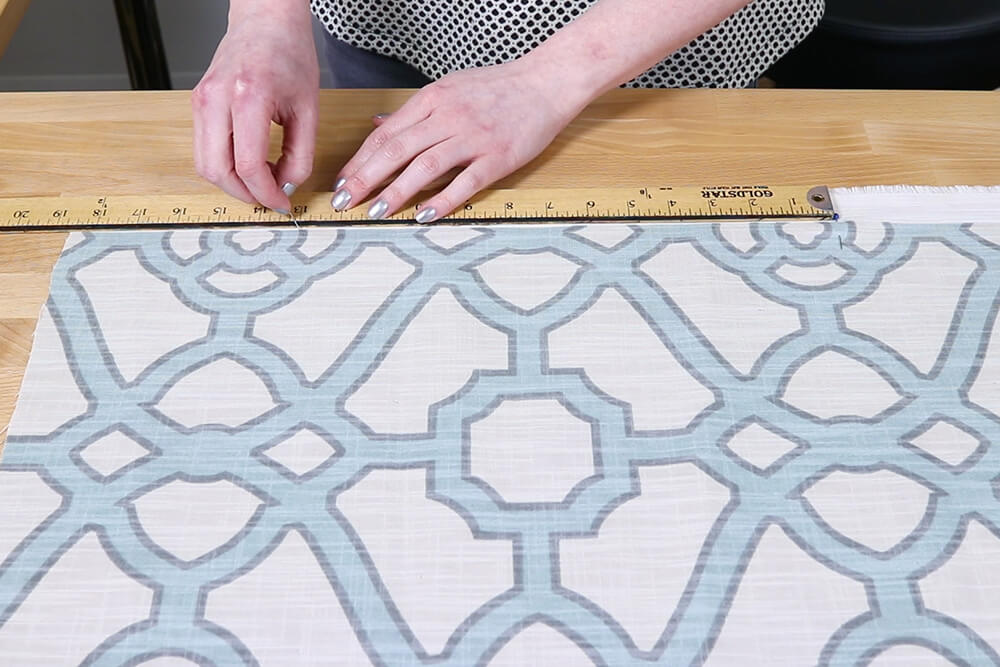
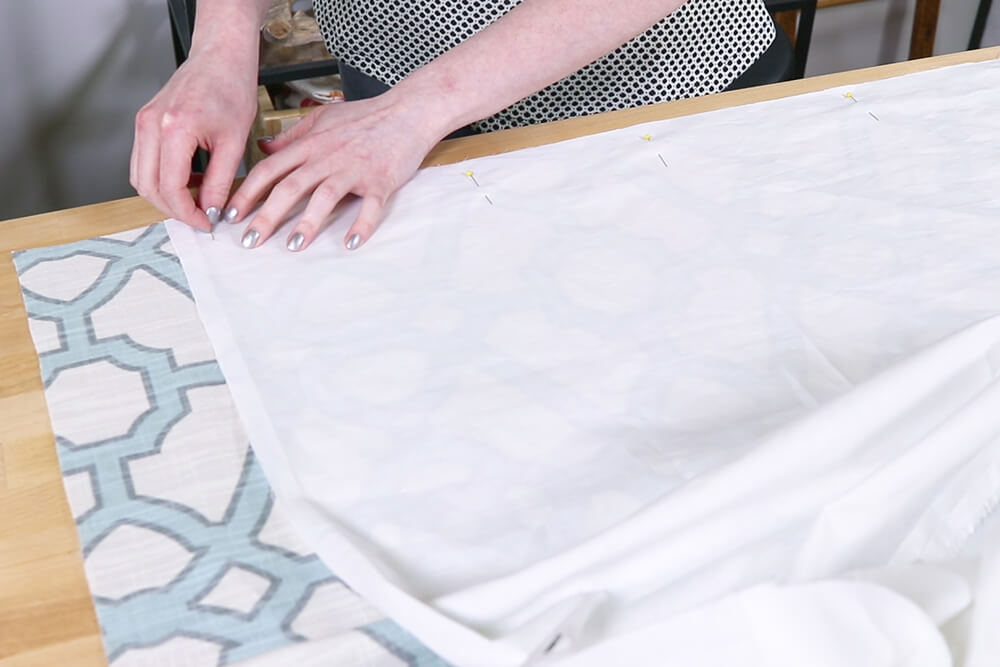
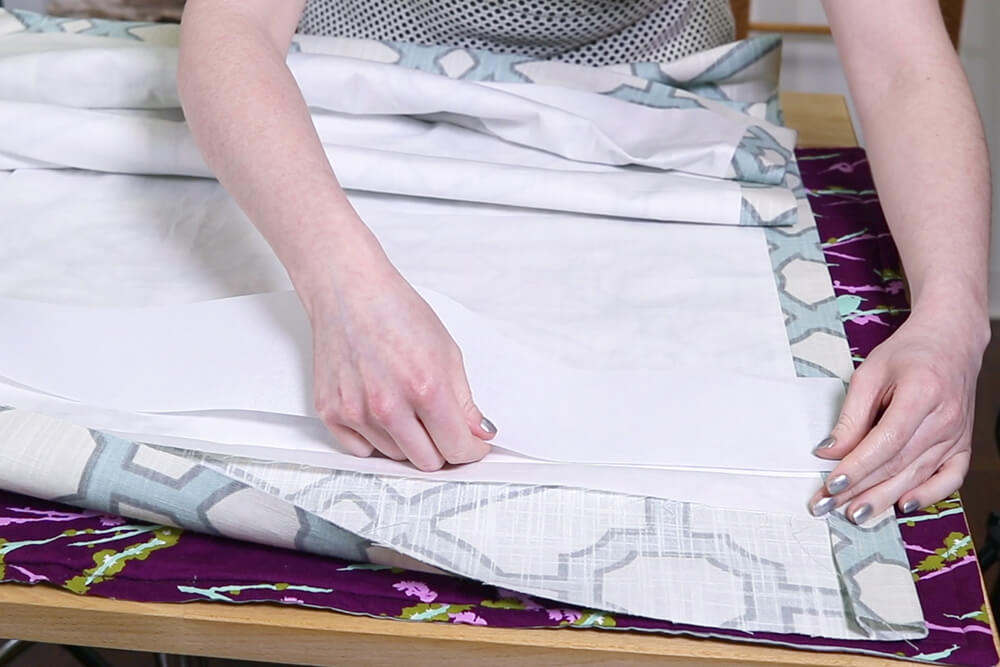
Take another piece of fabric and overlap it with the selvage edge of the first. Move it up and down until it’s lined it up vertically. This second piece will likely need to be longer than the first in order to match the pattern. If the narrower piece will be less than half the width of the fabric, you can cut it in half now. I already did when making the first curtain panel.
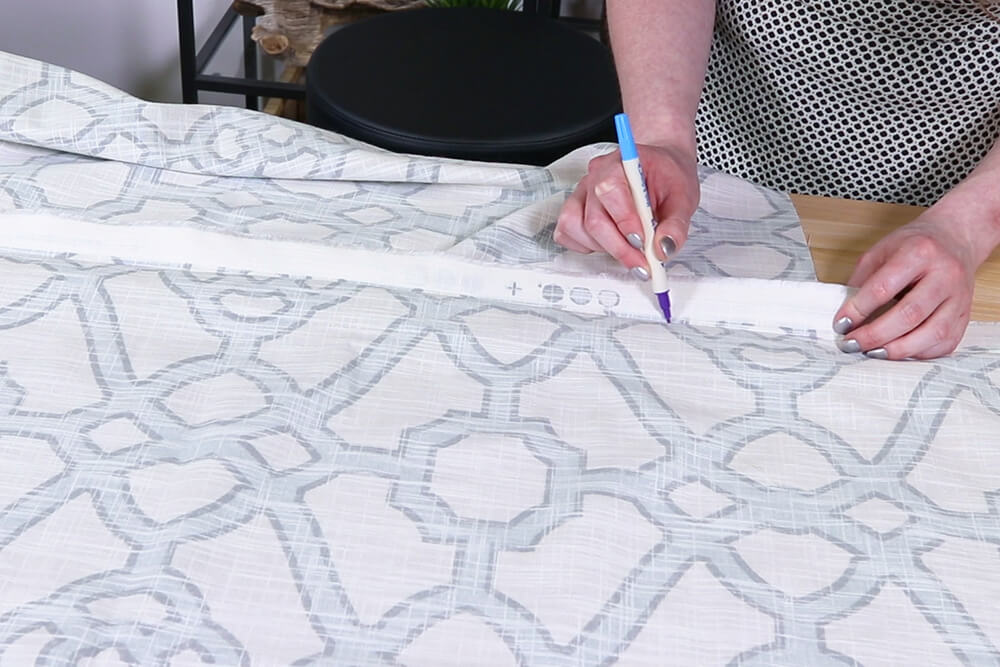
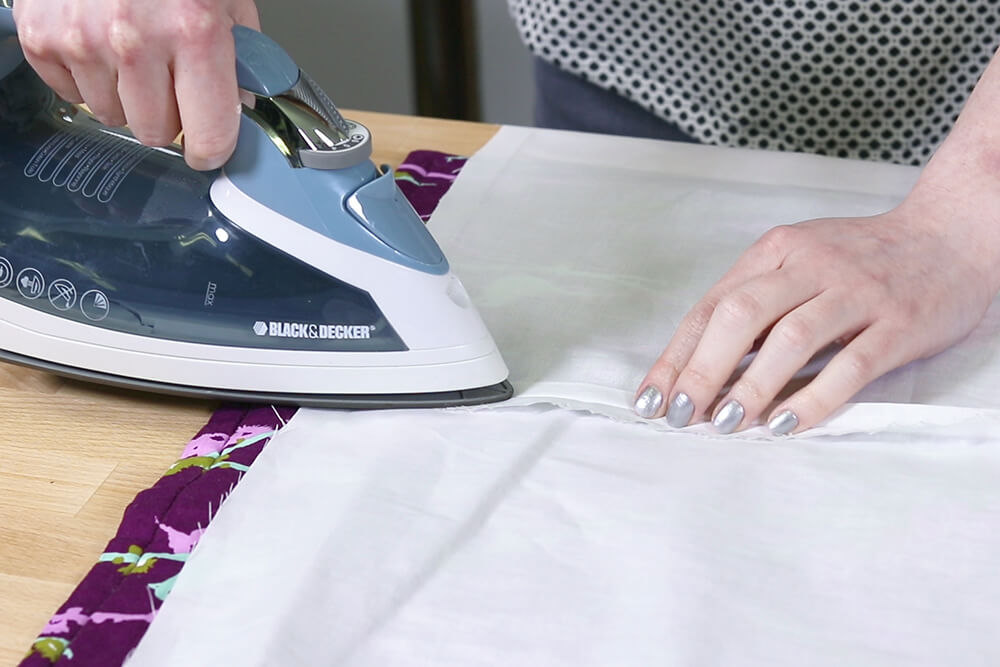
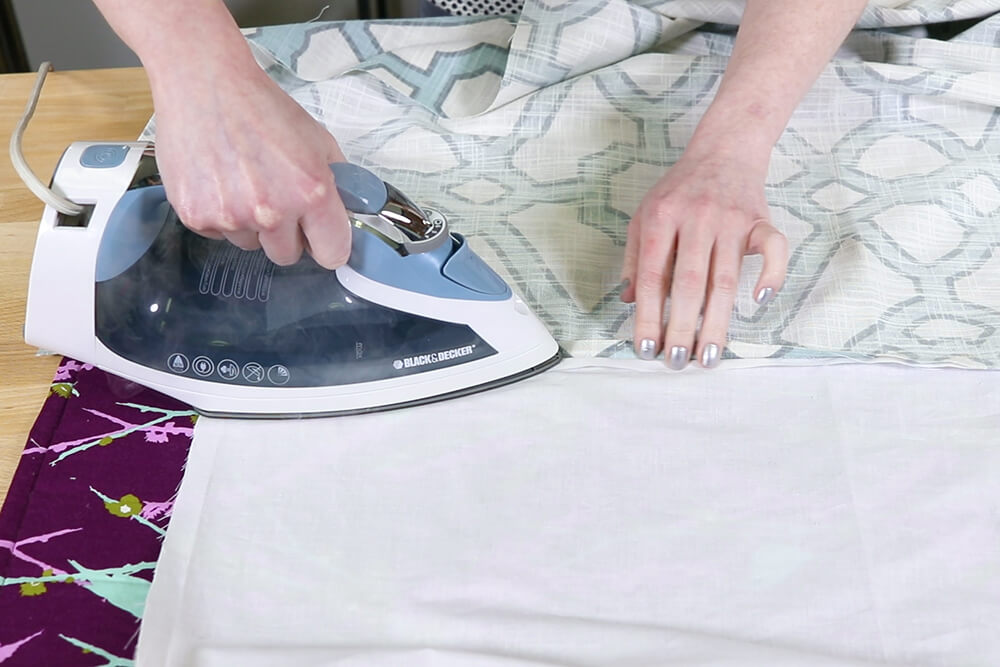
Fold under the selvage edge of the overlapping piece so the patterns are lined up. Take note of this distance, then iron a crease the same distance down the length of the fabric.
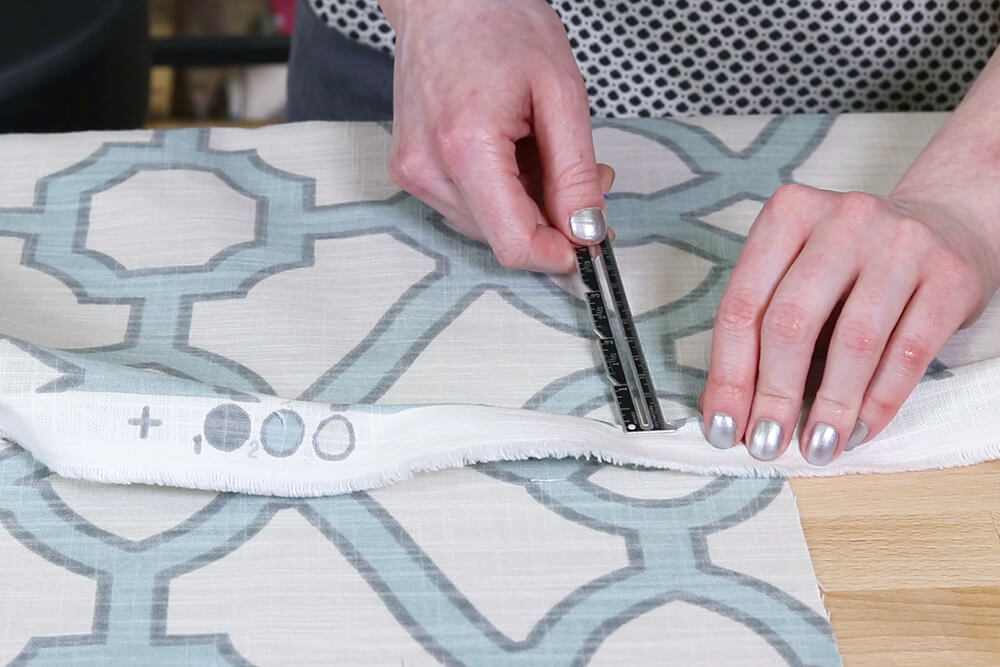
Try not to drag the iron because this will cause the fabric to stretch. It’s a good idea when precision is important to always pick up the iron slightly and move it instead of sliding it.
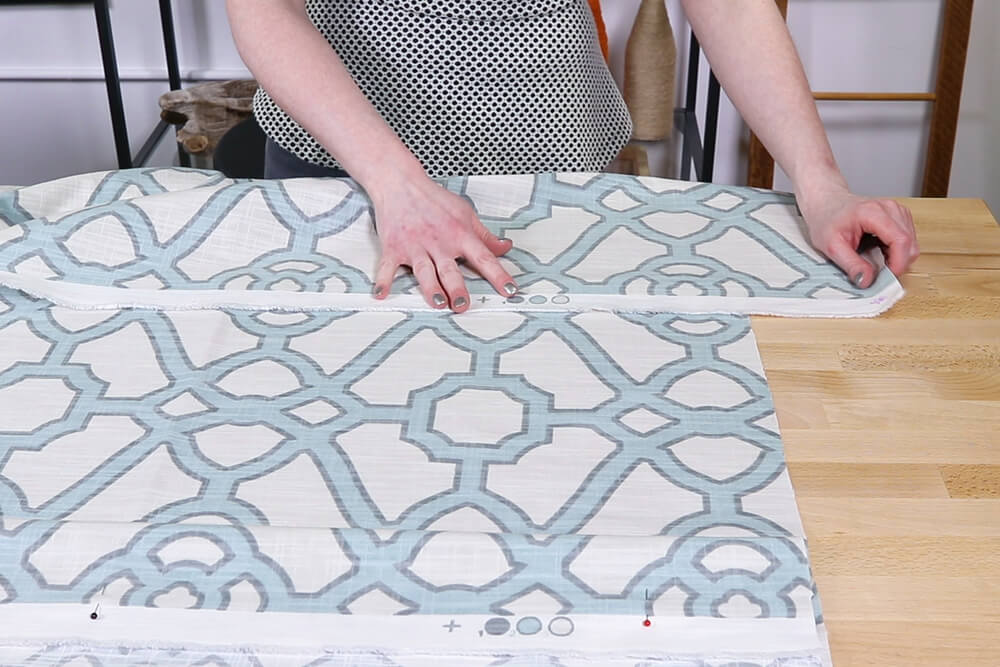
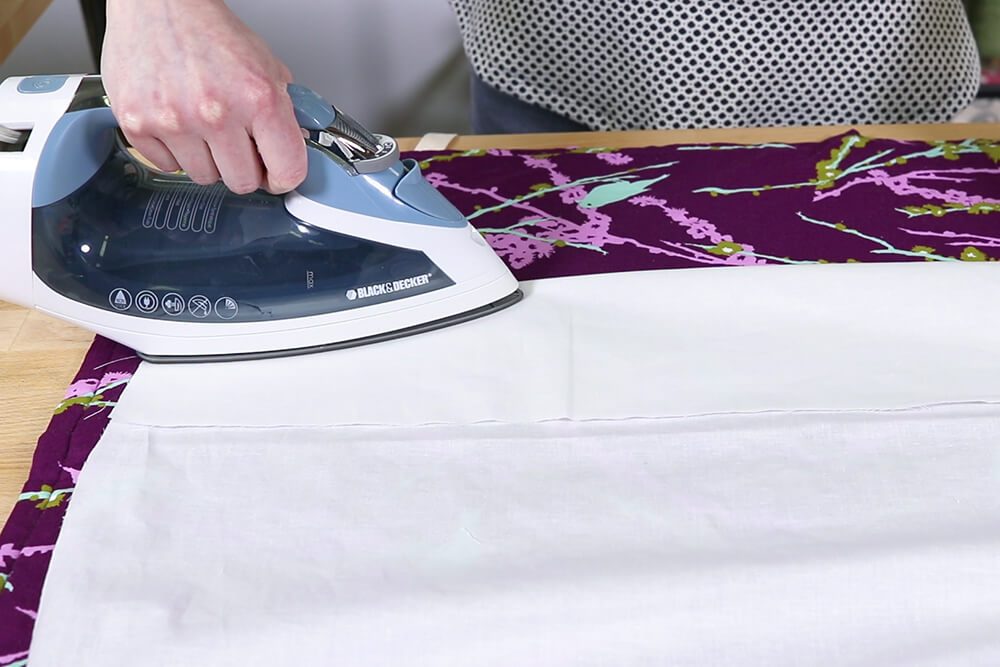
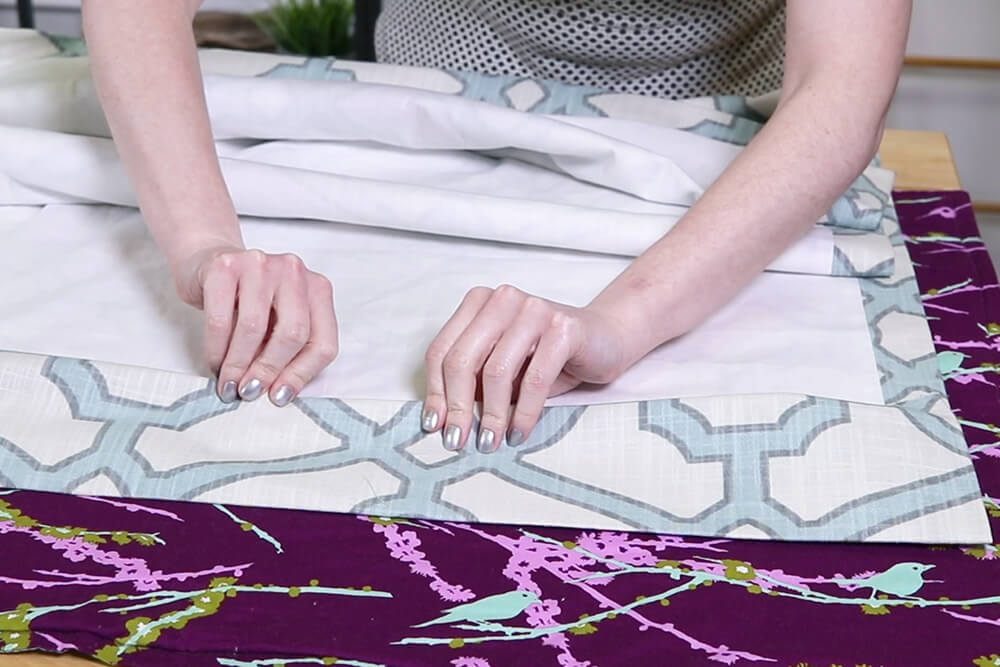
Line up the patterns again. Slide bonding tape under the edge of the fabric. Check the alignment one more time before placing the iron on the seam. Leave it for about 10 seconds, then lift it, align the fabric and iron the next section. Continue down the length of the fabric.
You could use pins instead of bonding tape, but the fabric is more likely to shift when sewing. Bonding tape makes creating an exact match easier.
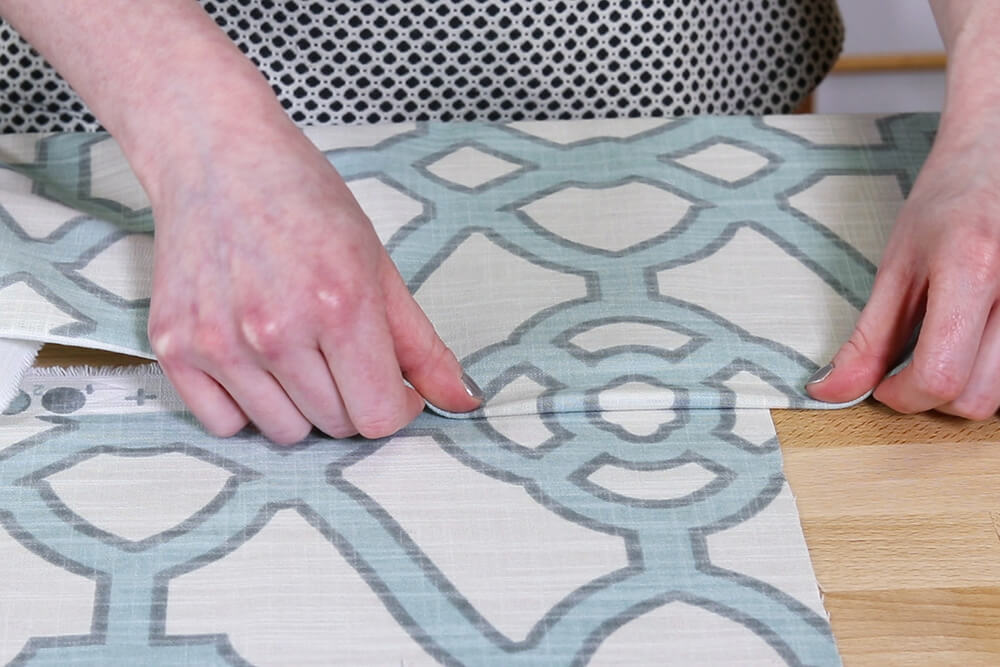
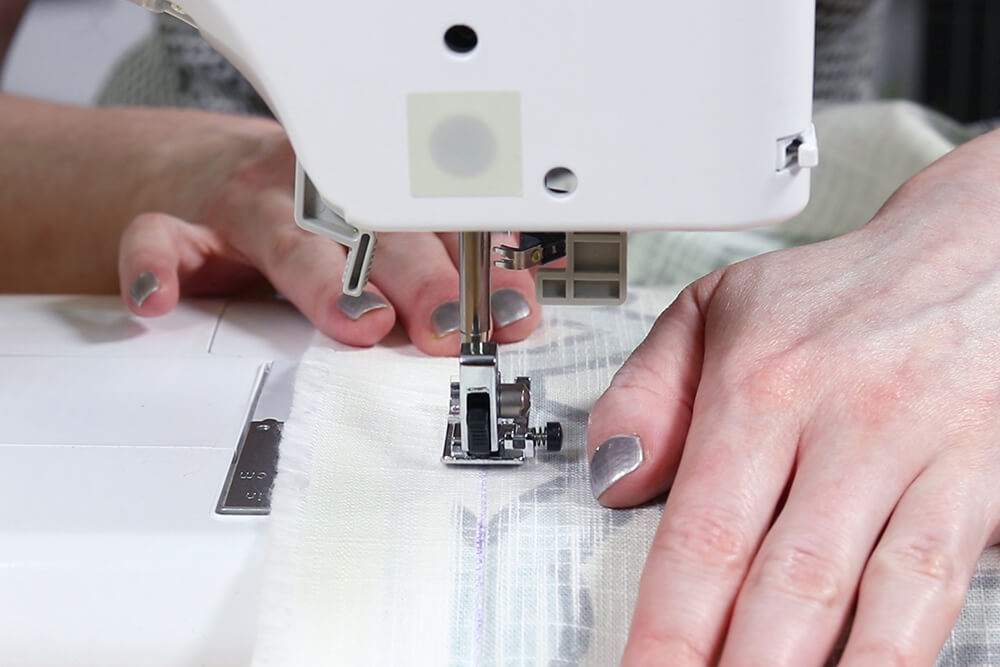
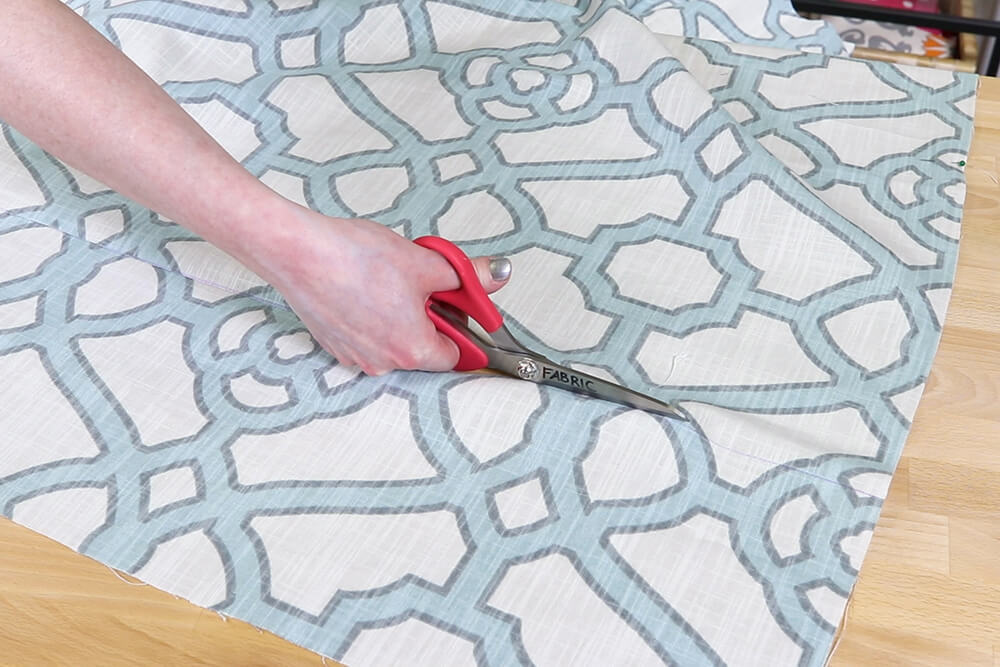
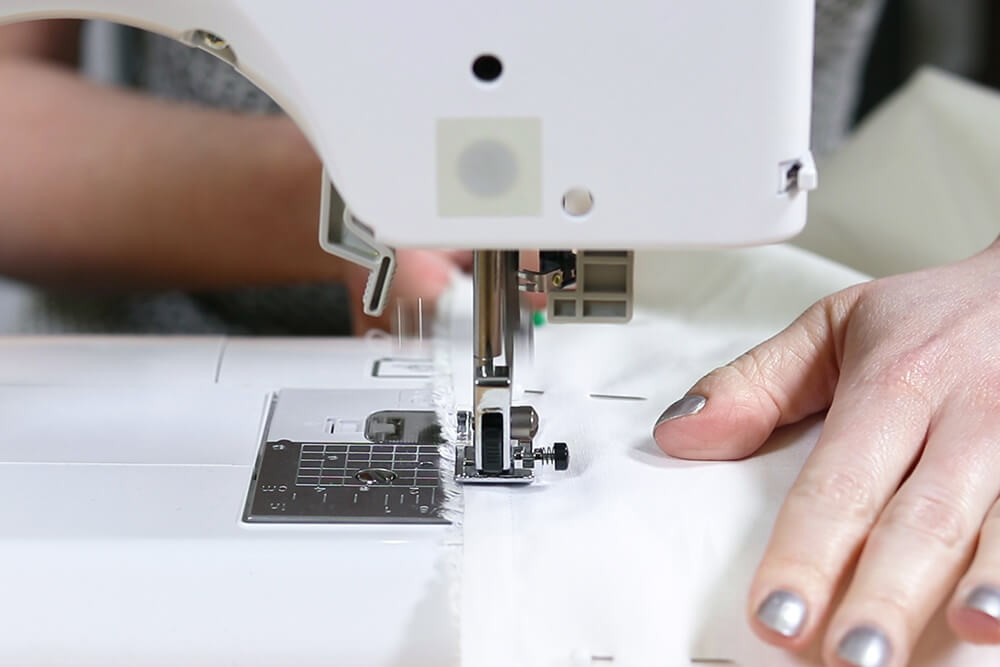
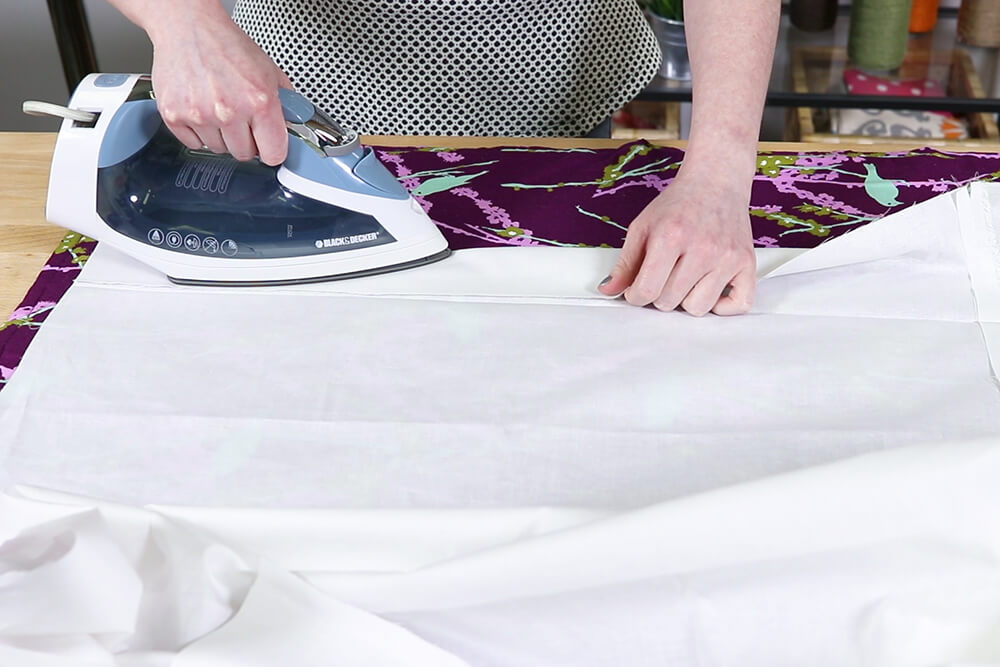
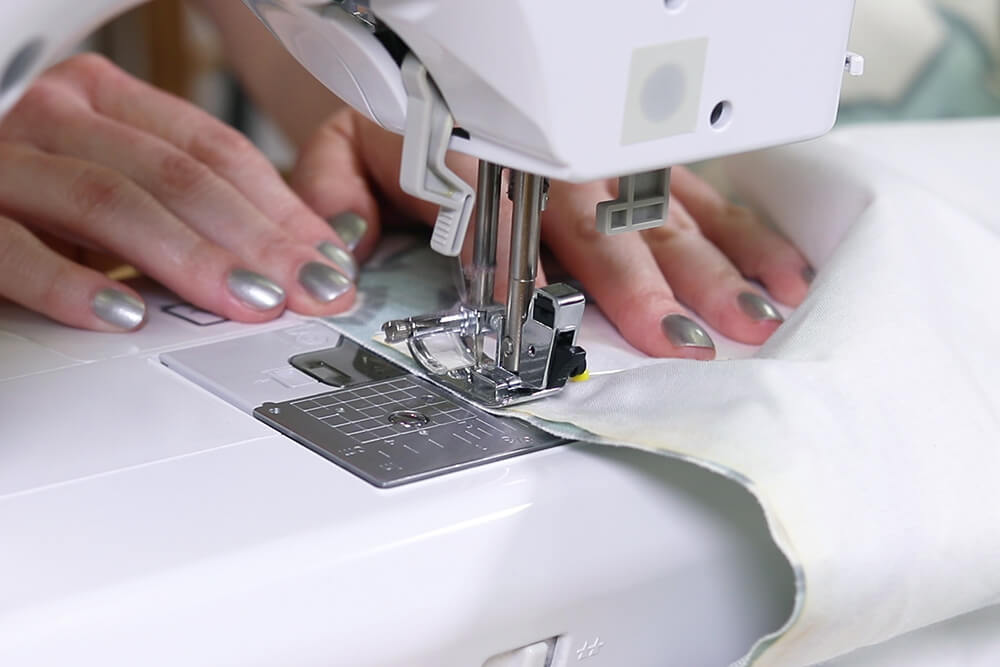
Draw a line right on the crease. Sew on this line down the length of the fabric. It’s important to stay on the crease so the patterns match up correctly.
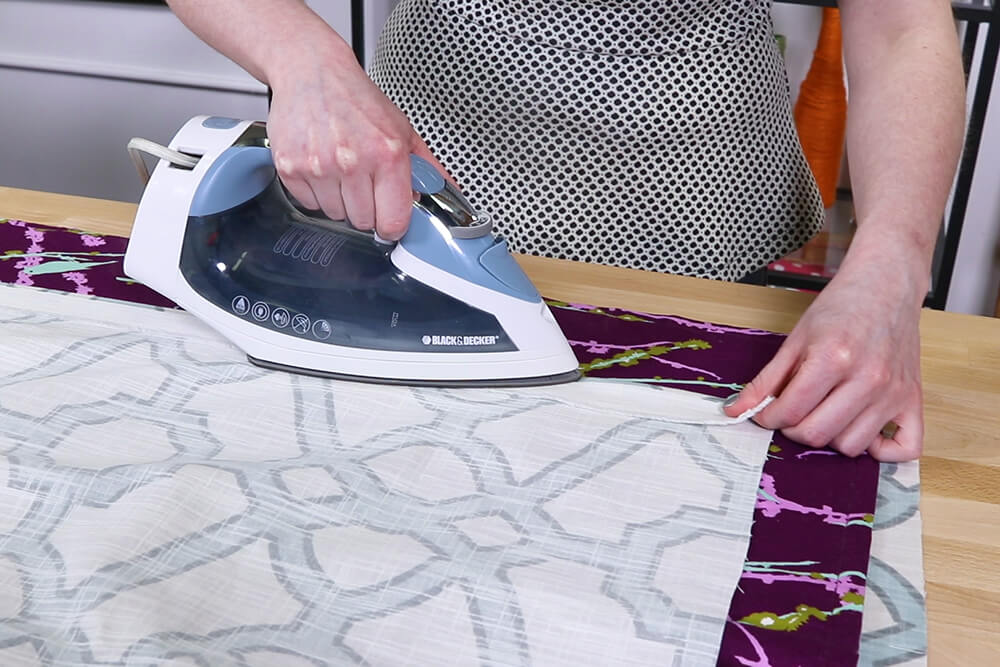
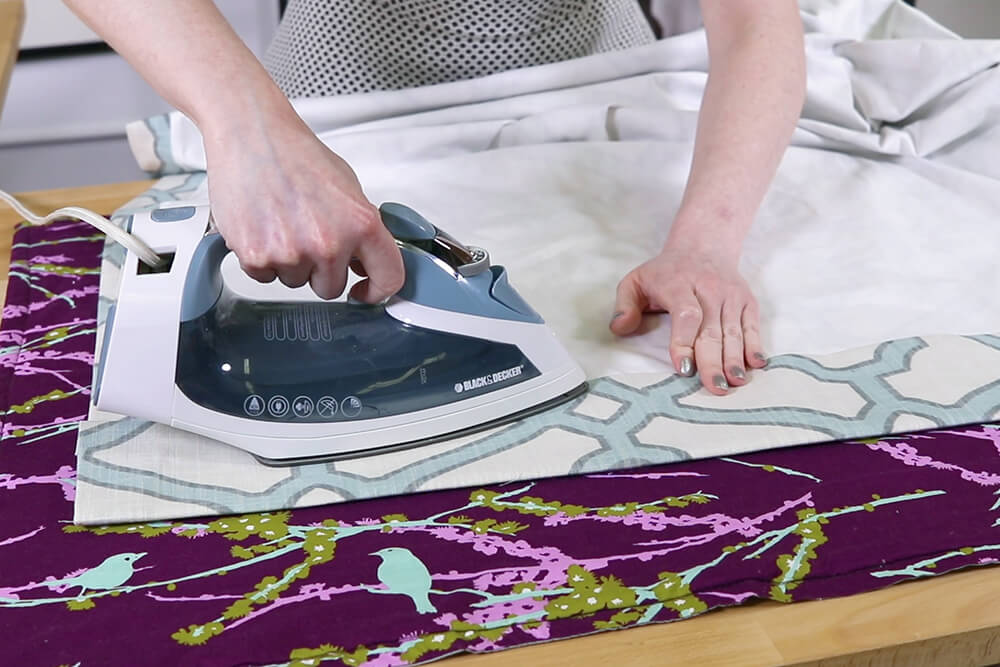
Open the fabric and iron the seam to one side.
Cut the extra fabric off about ½” from the stitches.
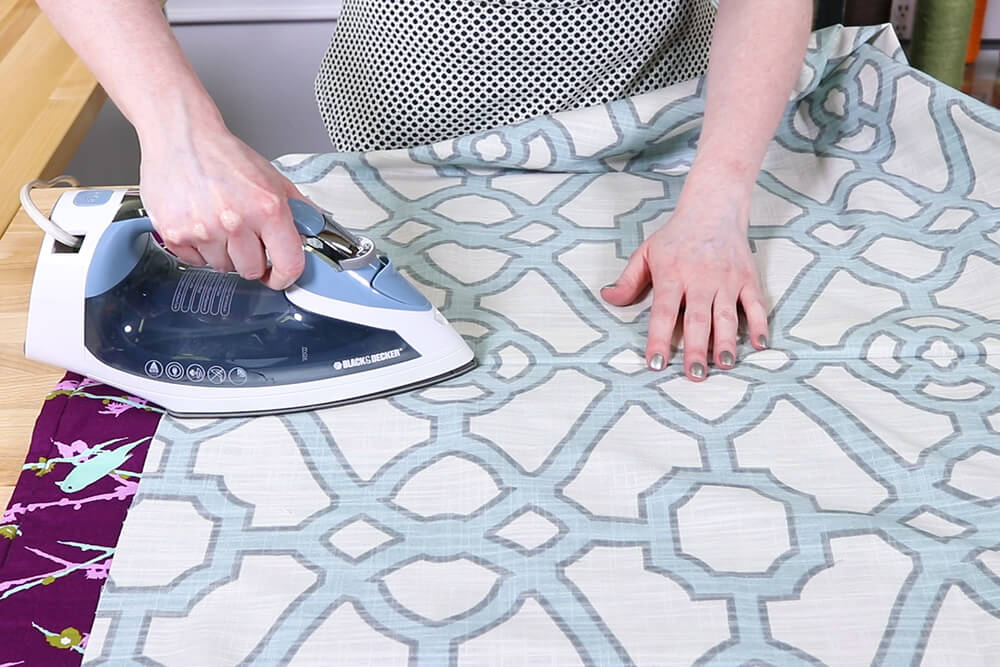
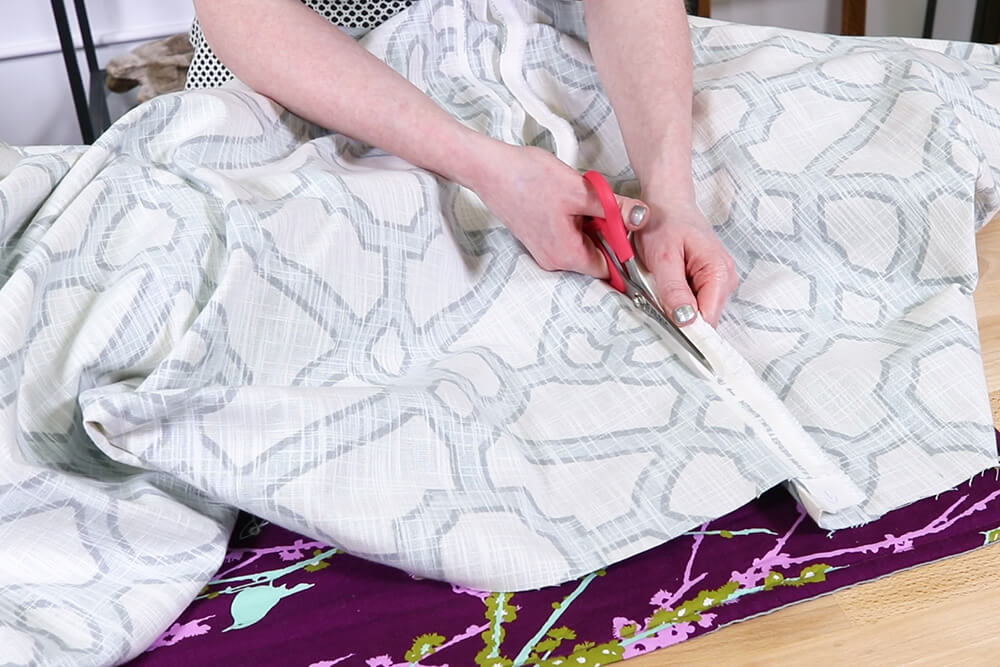
You can now cut the panel to the correct length and width. Make sure everything is square.
Pay close attention to your mock up when cutting the width if it matters where the pattern starts.
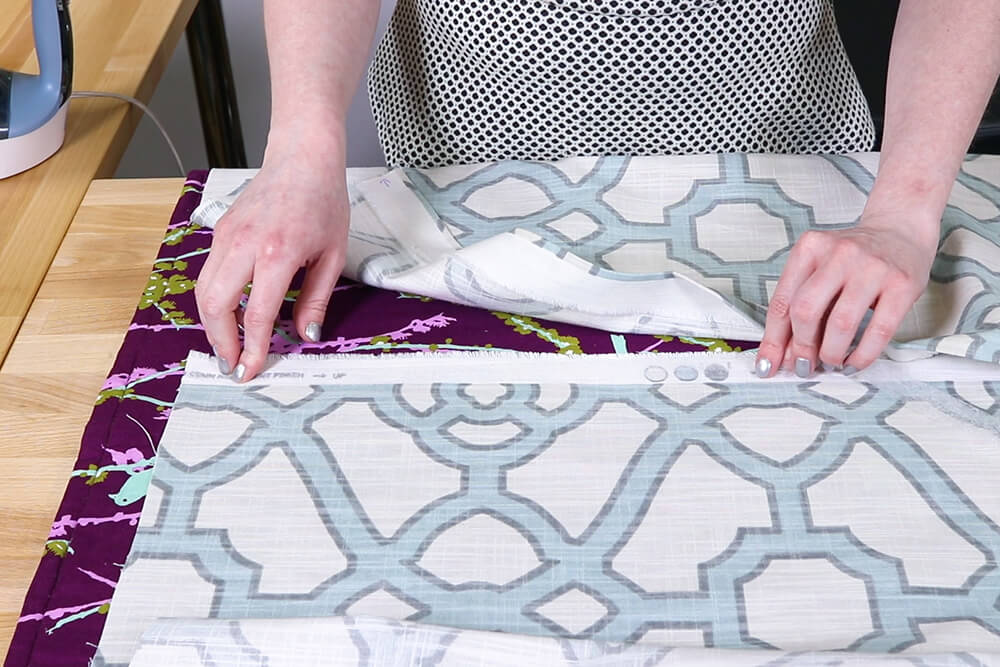
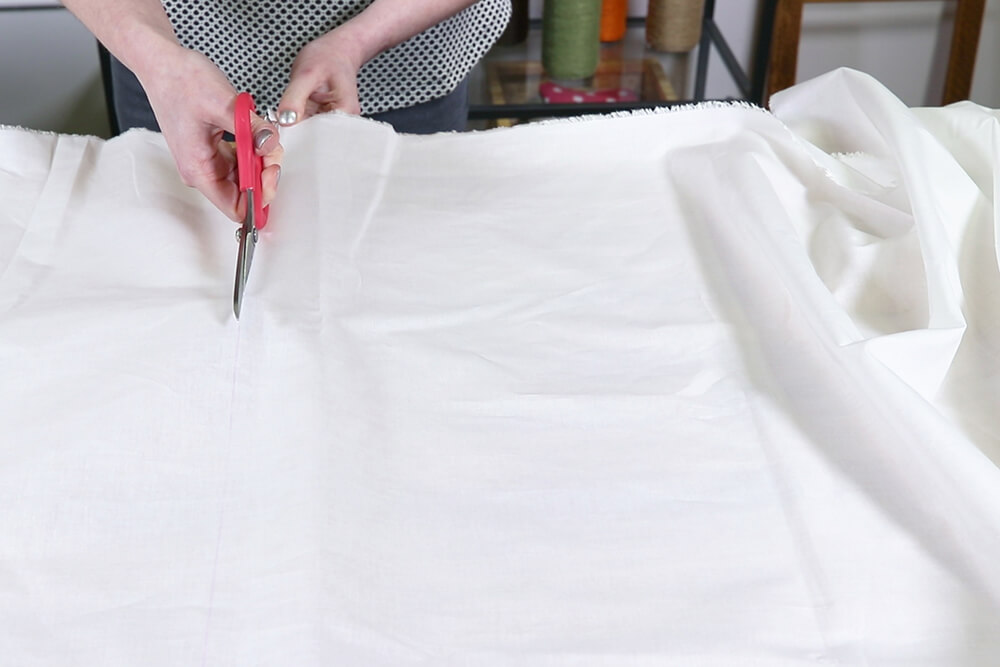
Step 4: Seam and cut the lining
Cut a full width piece of lining fabric to the correct length, which is 5” longer than your finished length.
Cut another piece to the same length and pin the fabric together with right sides facing.
Sew down the length with a ½” seam allowance. Press the seam open.
Cut the lining to the correct width, which is 6” narrower than the face fabric.
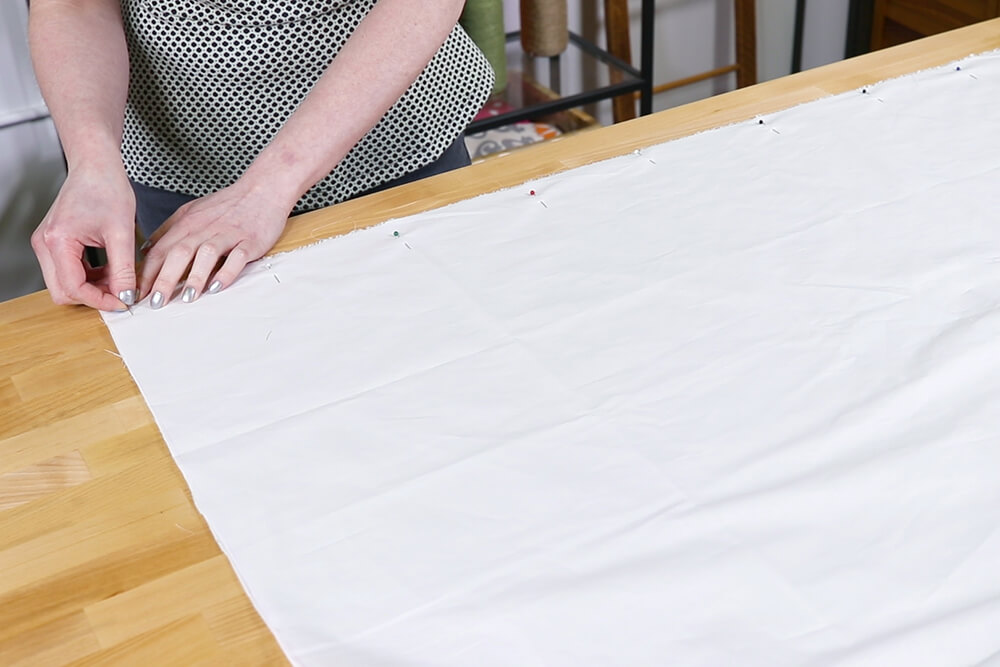

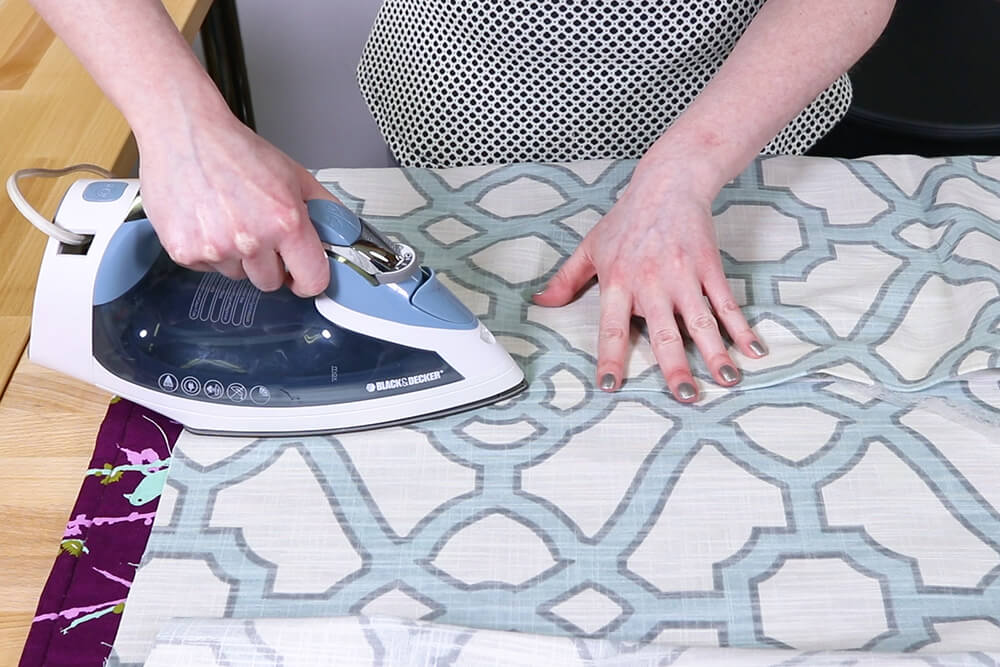
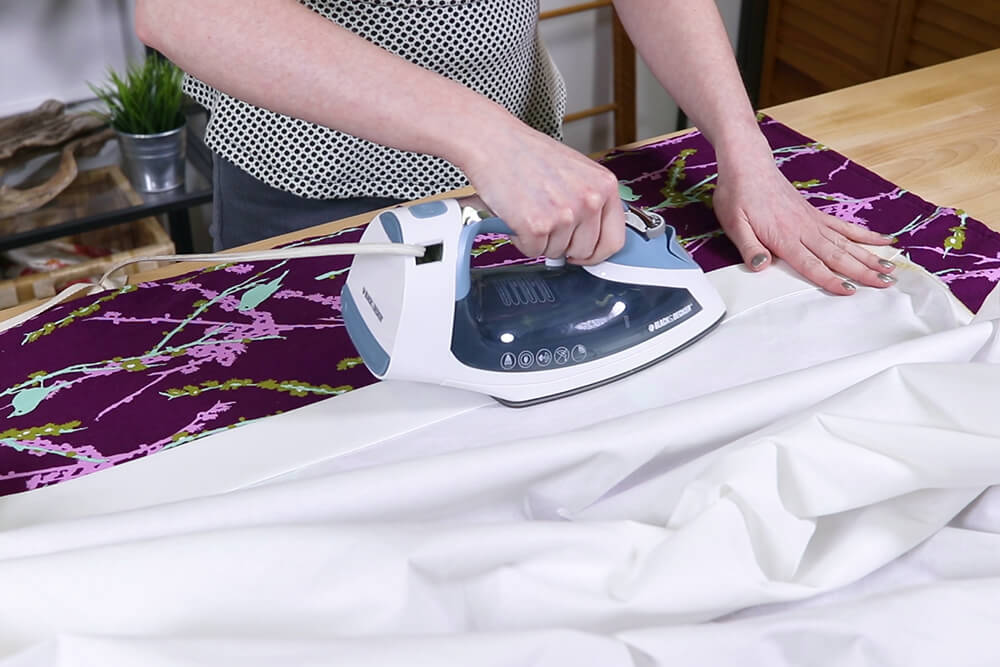
Step 5: Hem the lining
Fold the bottom up 5” and iron. Unfold and bring the edge of the fabric up 2 ½” to the crease and iron again. Fold all the way up and press one more time. Pin the hem if needed. Sew down the hem close to the edge of the fold.
Step 6: Add drapery weights
Create a double folded hem, like the lining, but fold up 8” then 4”.
Unfold the hem part way and tack a weight so it’s lined up with the raw edge or slightly below. Place it about 2 ½” in from the sides. Hand stitch the weight to the fabric. It doesn’t have to look neat.
It’s generally a good idea to use drapery weighs in at least the two bottom corners so the curtains hang straighter. You can also use them in between the corners, especially for wider drapes. I’m using a total of 4 weights.

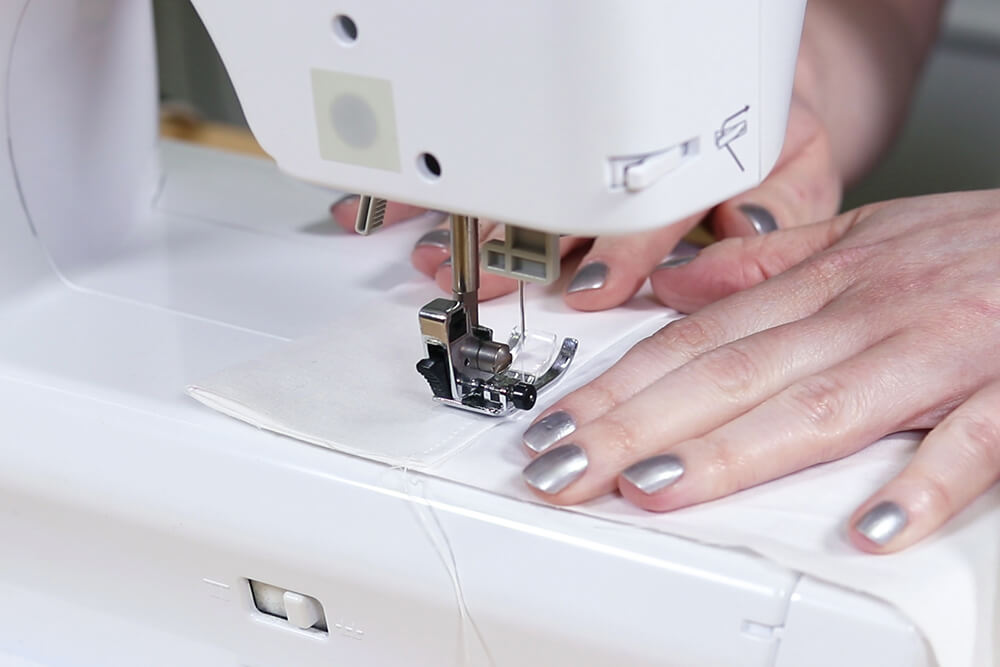
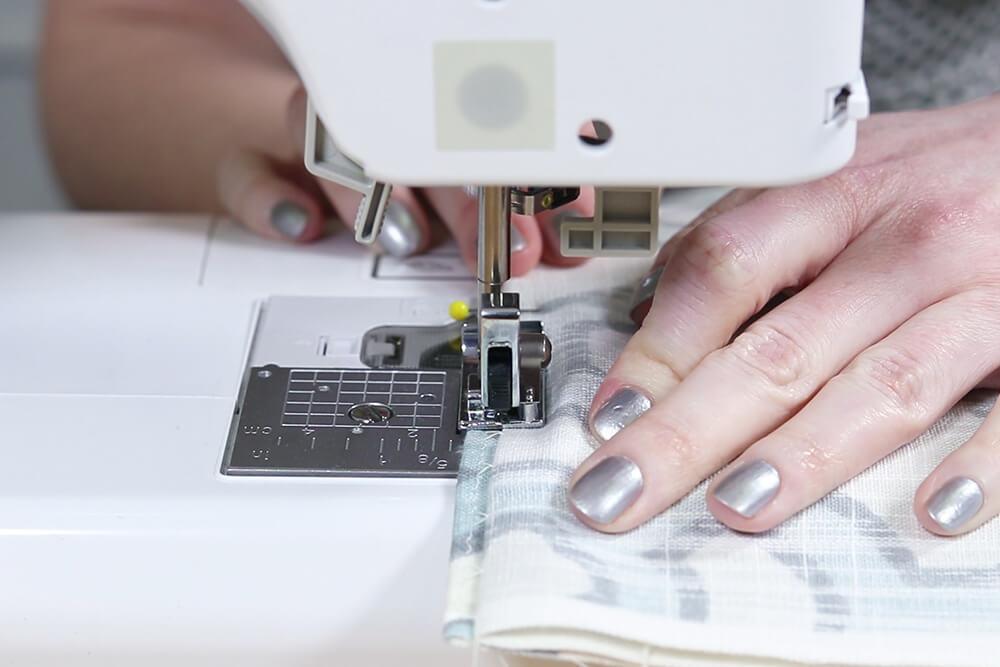
Step 7: Hem the face fabric
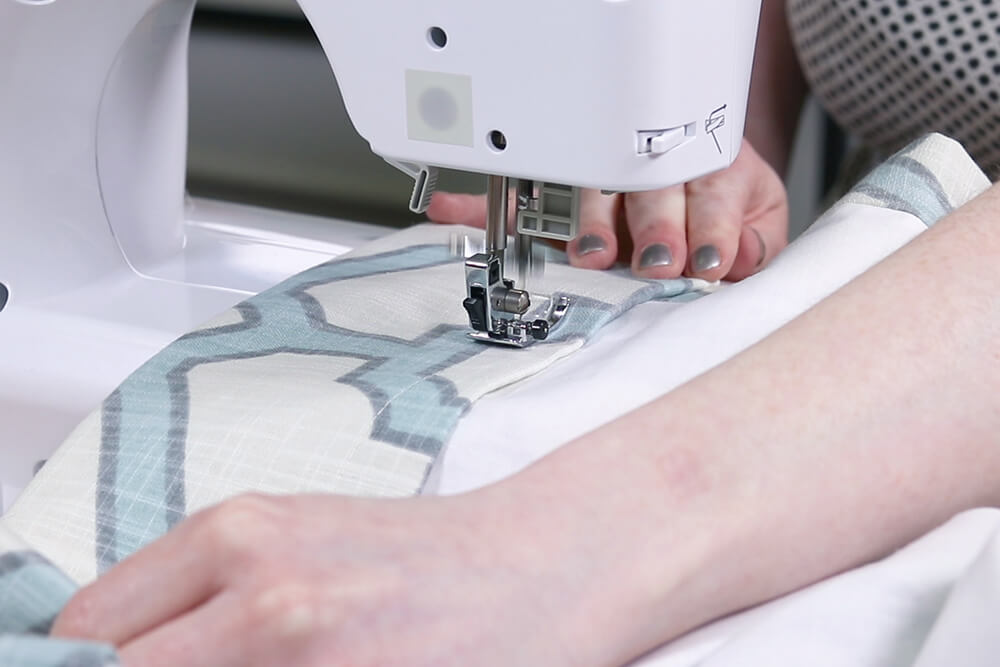
When sewing the hem, the idea is to not have any stitches showing on the front. You can either hand sew the hem with a hemming stitch or you can use a blind hem stitch on a sewing machine, which is what I’m going to do.
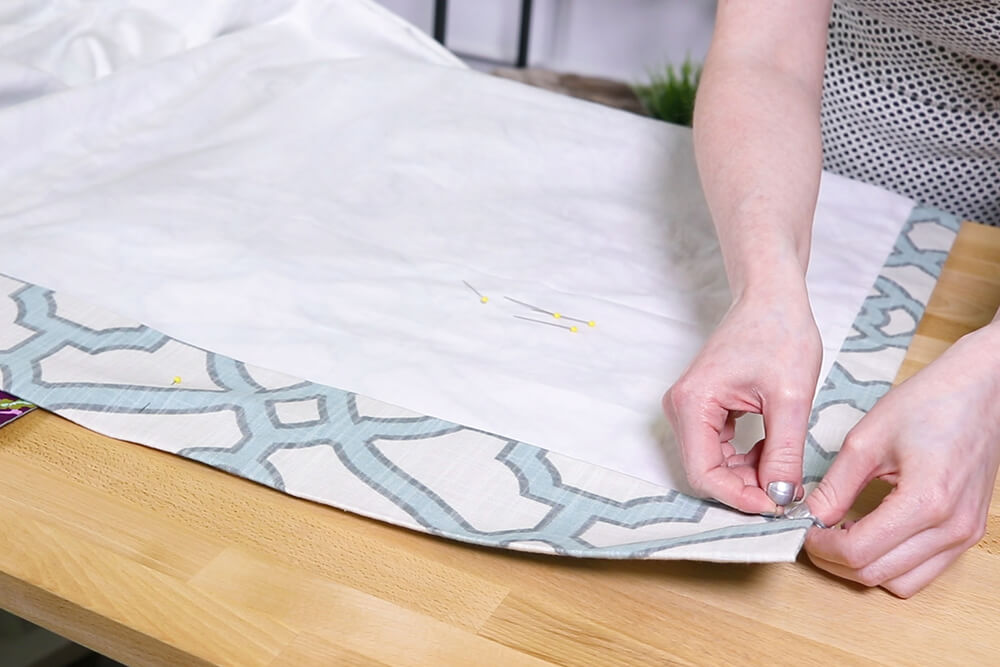
Fold the hem under so just ¼” is showing. Pin the hem so the heads of the pins are overhanging the edge.
The stitches will barely be visible on the front. It’s possible to make them even harder to see if you do it by hand.
Put the blind hem foot on the sewing machine. It has this metal divider in the middle. Select a blind hem stitch.
Position the fabric so the ¼” of the hem that’s showing is on the right side of the foot and the fold is against the divider on the left side.
As you start to sew, it will stitch several stitches on the right, then jump over and nip the edge of the fold for one stitch. Continue sewing the length of the hem.
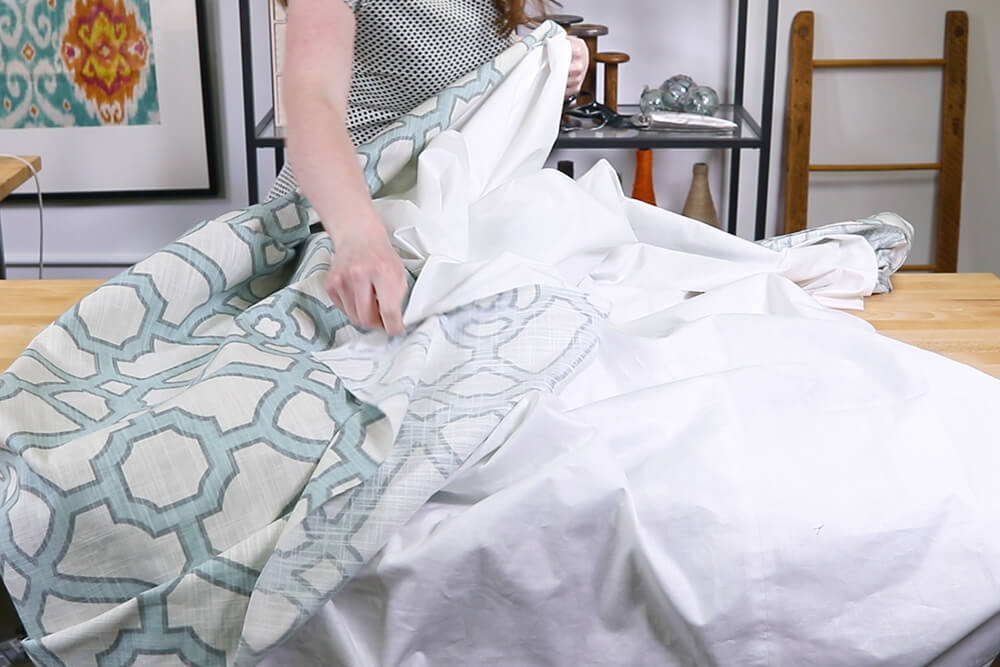
Step 8: Sew the fabrics together
Some people sew the sides a different way. Instead of sewing the wrong sides together, you could sew the lining on top of the back of the face fabric by hand stitching it. I don’t personally think this looks any better and it takes a lot longer to hand sew.
With right sides facing, place the lining so it lines up with one of the sides of the face fabric. The hem should be 1½” from the bottom. Pin the side edges together. Sew down the length with ½” seam allowance.
Pull the lining so it’s now lined up with the other edge of the face fabric. Pin and sew.
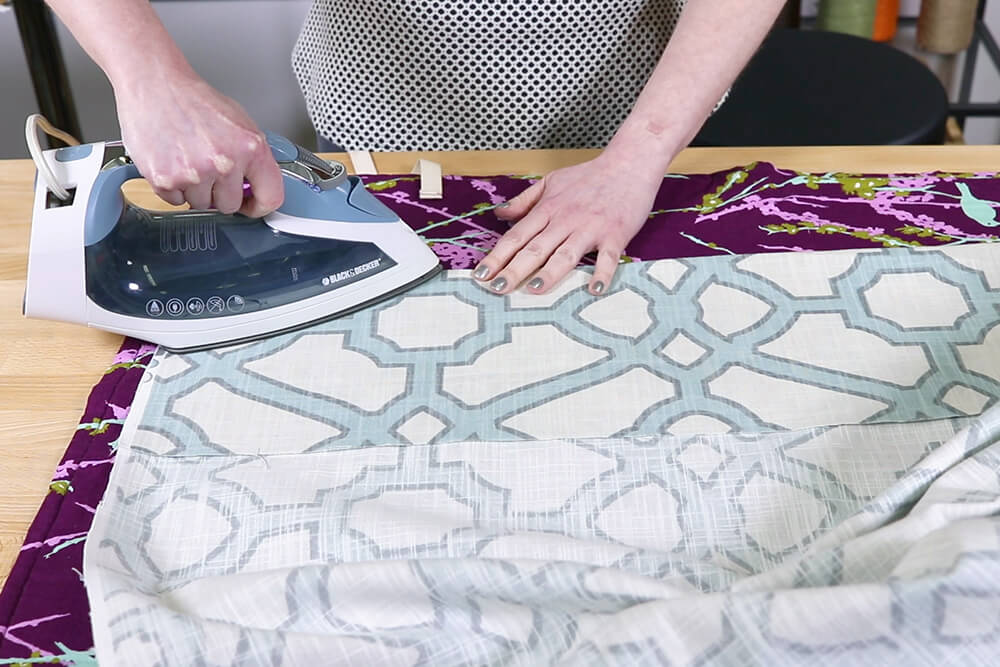
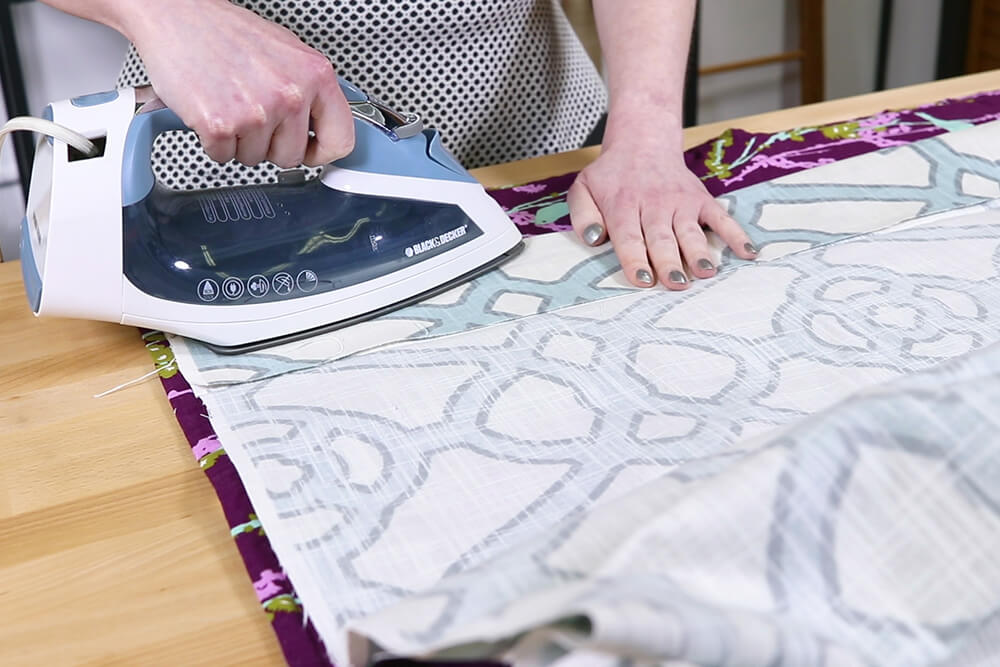
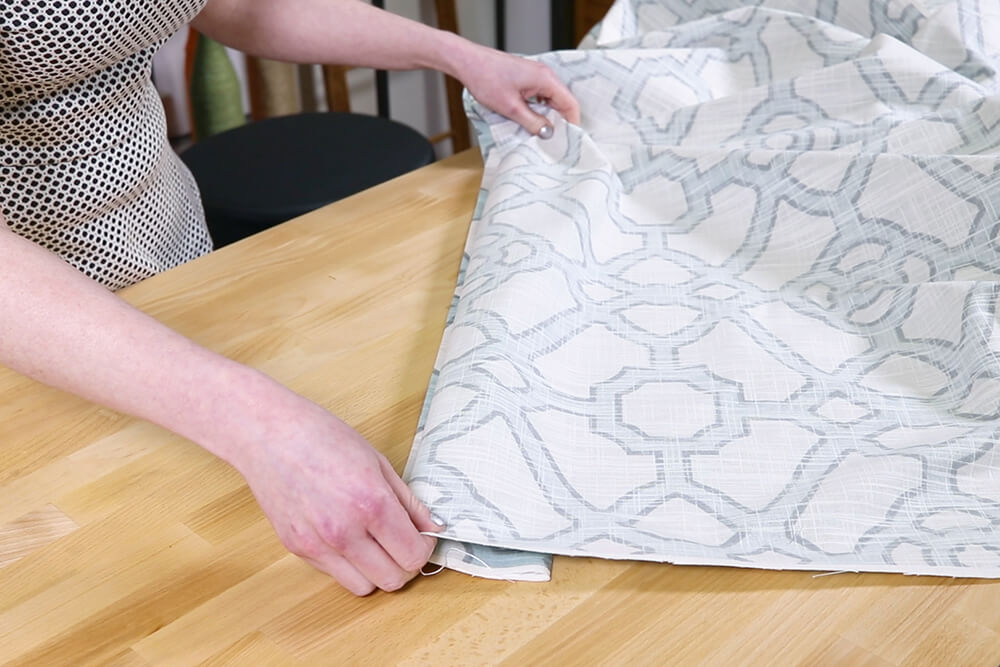
Iron the seams open on both sides. Turn the fabrics right side out.
Position the lining so it’s centered on the face fabric. There should be 1½” on both sides. Iron the edges flat.
Step 9: Tack the fabrics together
If you have wide curtains, it’s a good idea to loosely sew the lining and drapery fabric together in several places. Make sure the fabric is lying flat and pin along the vertical seams where the fabric is joined.
Using a long needle, hide the knot and run the needle between the fabrics for about 2″ or as far as the needle will allow. Make sure you start with enough thread to sew the full length.
Poke the needle through the front and catch a couple of threads and come back out through the lining. Repeat for the length of the fabric.
Do the same in the middle of wider piece. If there’s no seam to guide you, mark a dotted line vertically and place the pins along it before sewing.
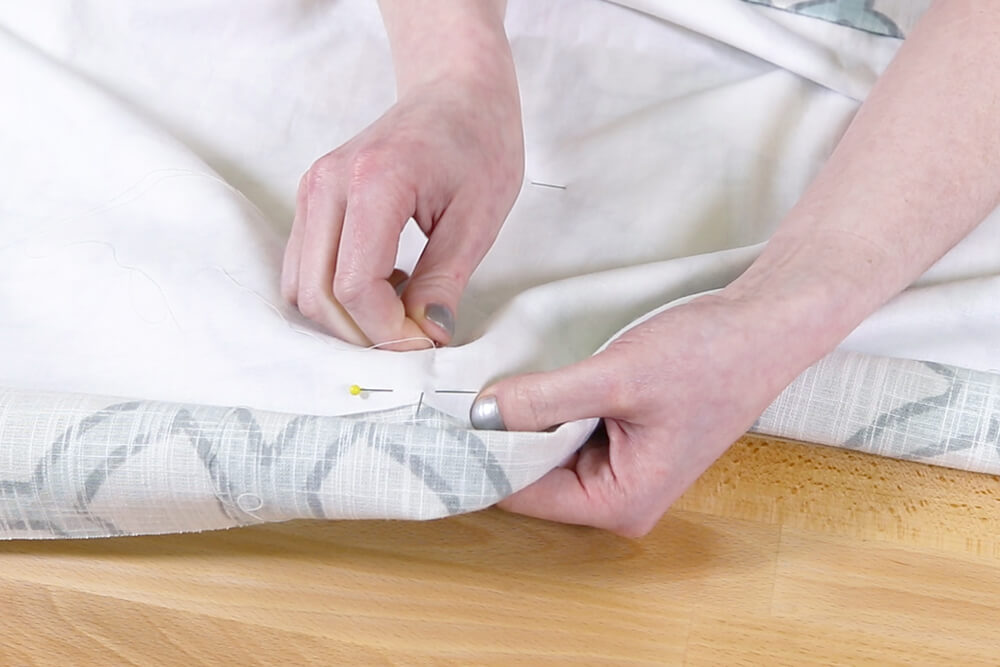
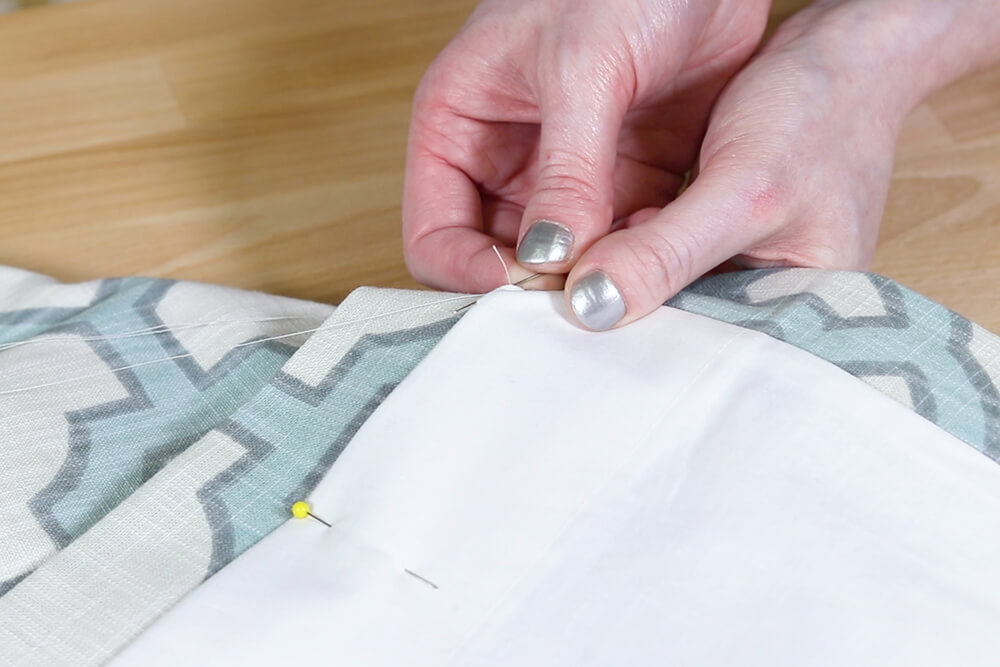
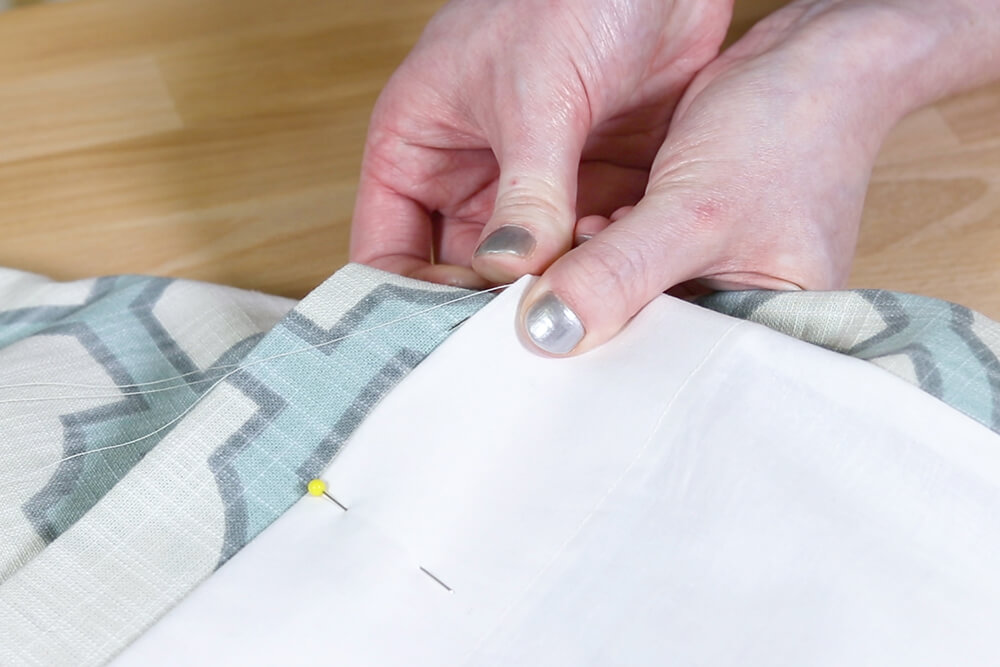
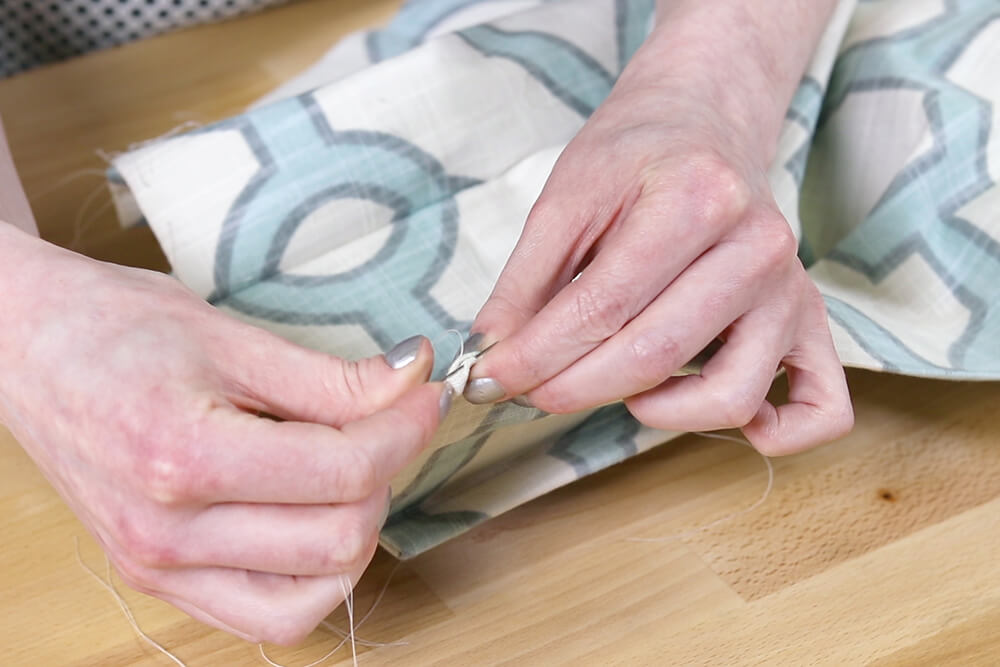
Step 10: Hand sew the corners and bottom
See our invisible stitch tutorial to find out how.
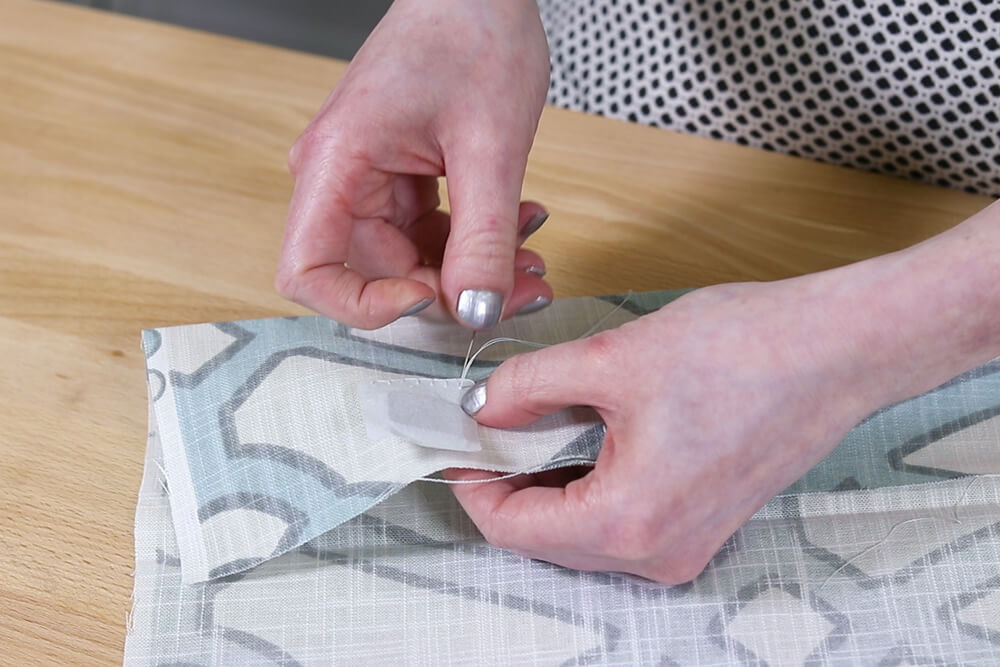
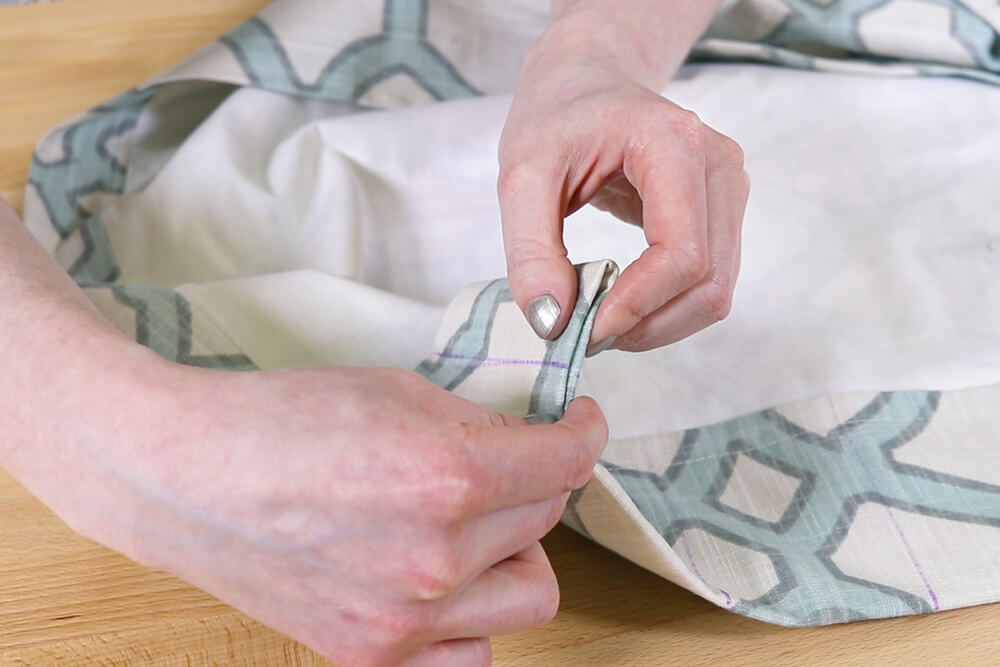
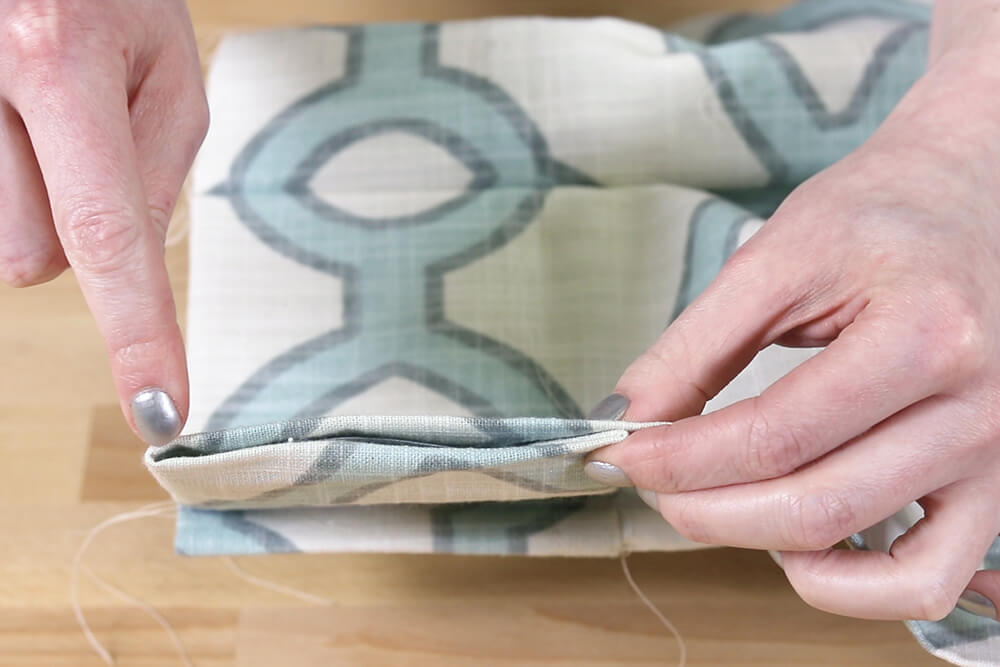
Fold the corners of the face fabric in so it looks like a mitered corner. Hand stitch the diagonal fold with a hidden stitch.
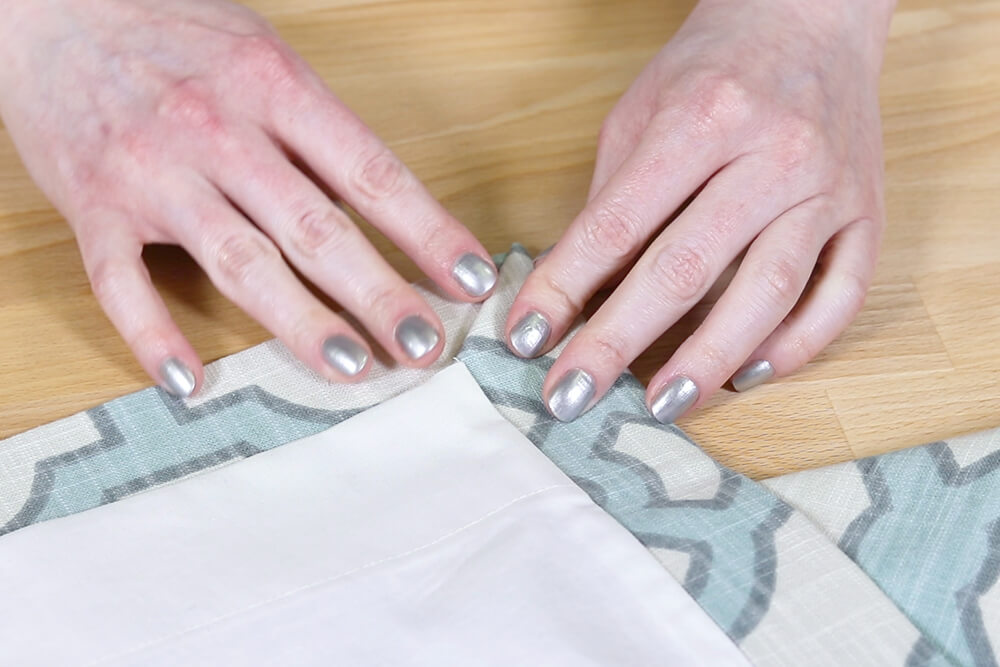
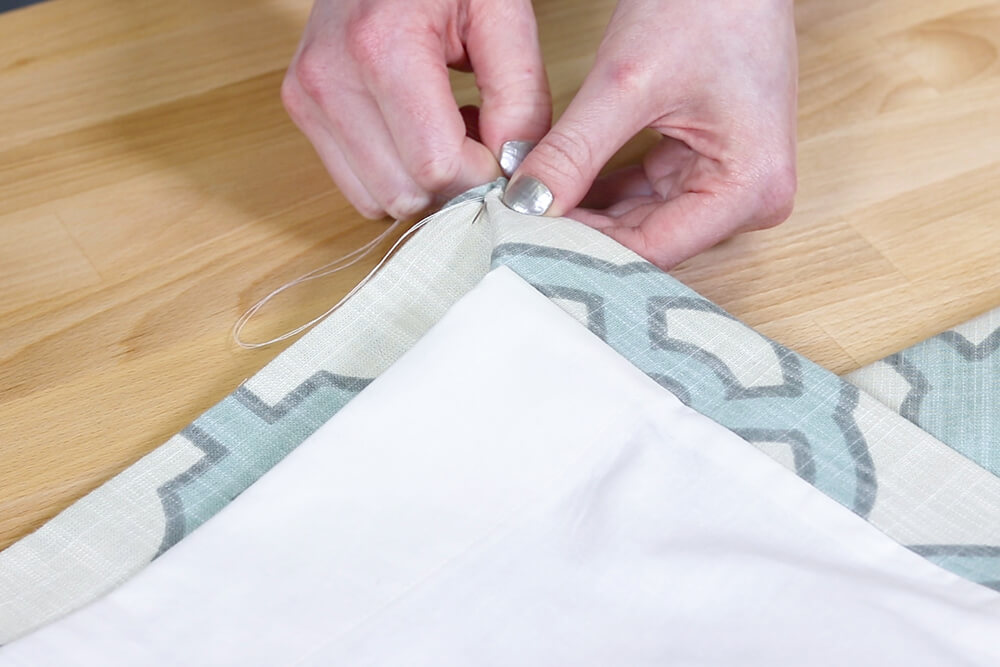
Next I’m going to sew the bottom of the lining hem to the face fabric hem. Pin the fabric together. You can use a slip stitch, but I prefer a long ladder stitch (same as the invisible stitch).
Hide the knot between the fabrics and come out through the crease of the lining. Start the stitches by going straight down to the face fabric and slide the needle between the layers for about ¼ to ½”. Next go straight up to the lining crease and repeat the same size stitch. Keep the stitches loose so it doesn’t pucker.
Step 11: Add the buckram
Now it’s finally time to start the heading!
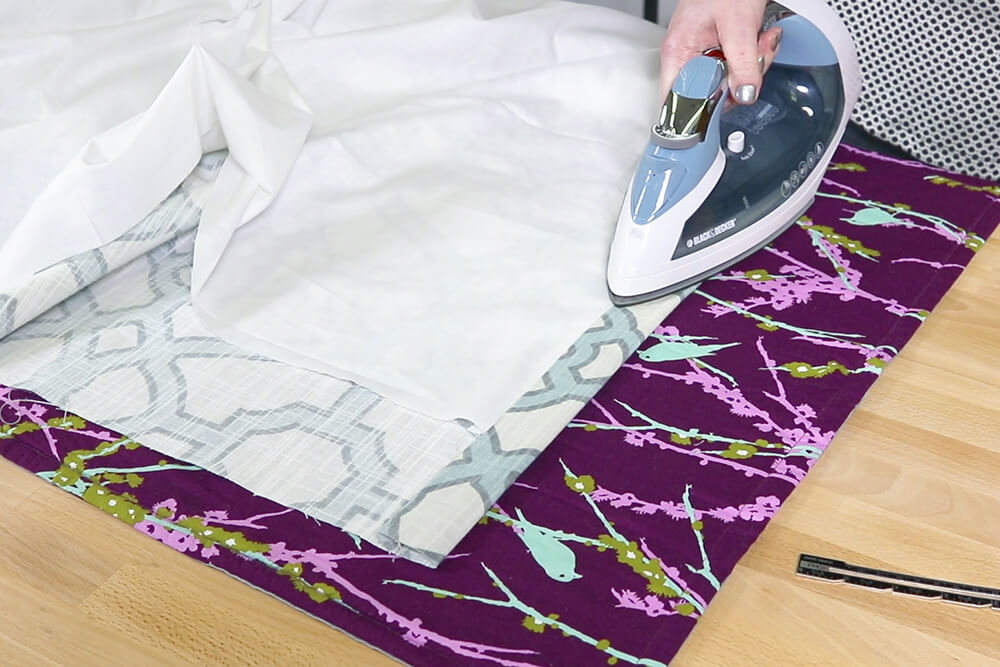
Fold down the top 5” and iron.
Cut the 4” drapery buckram a little narrower than the panel and place it under the fold so it lines up at the top. Fold the extra fabric under the buckram and iron.
Pin and/or use a long basting stitch at the bottom to temporarily hold it in place. Sewing the pleats will hold everything together later.

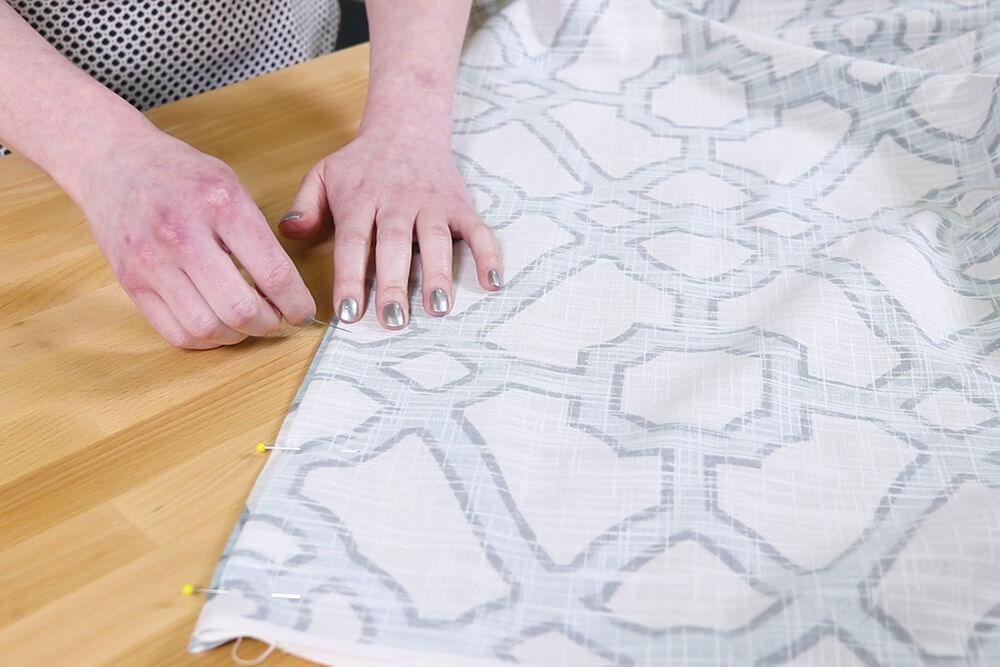
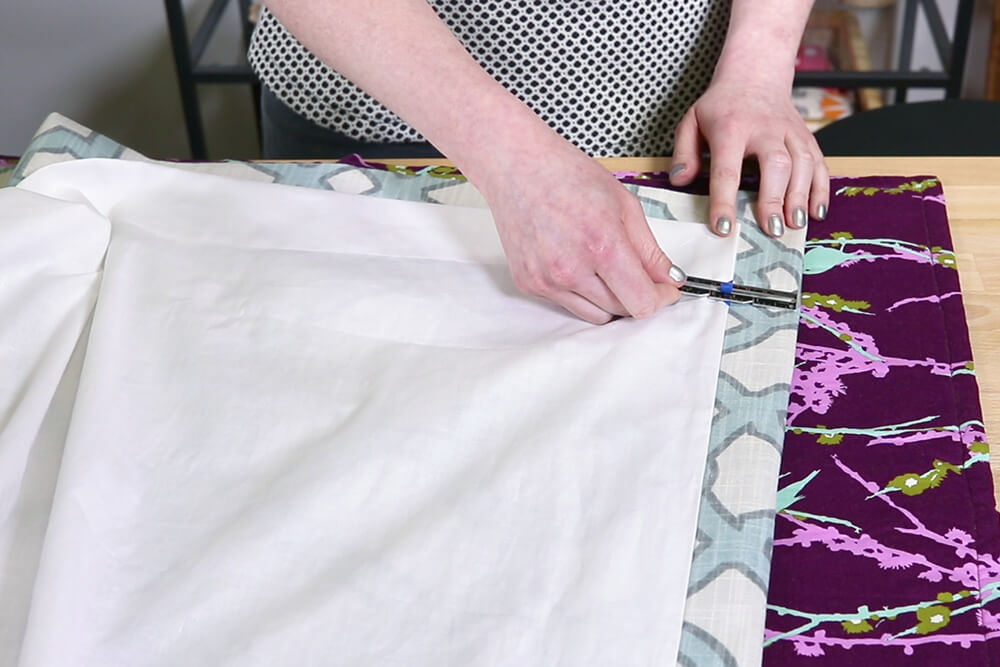
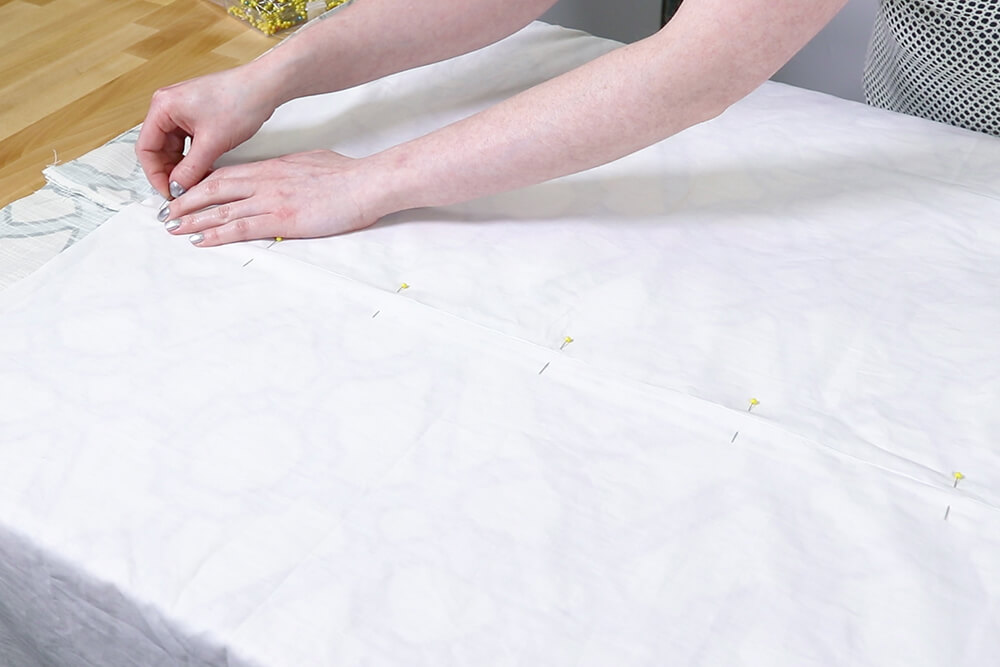
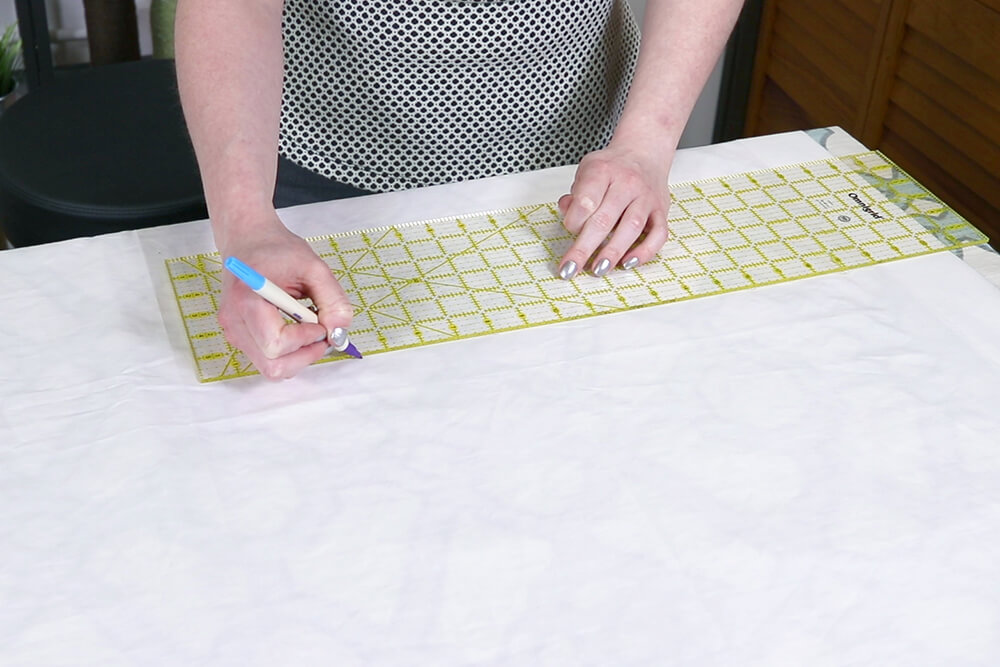
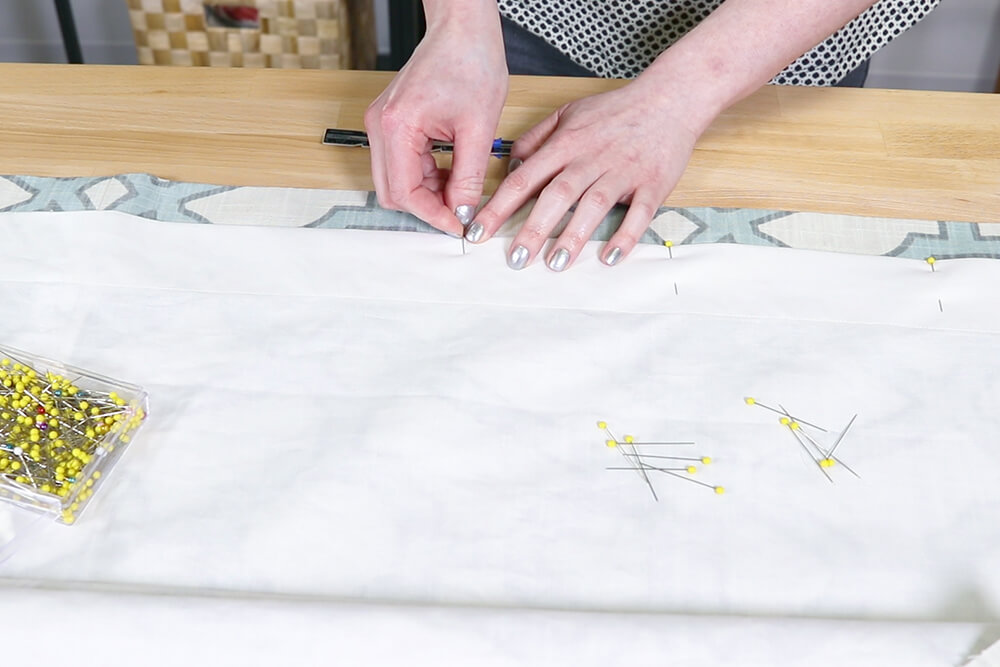
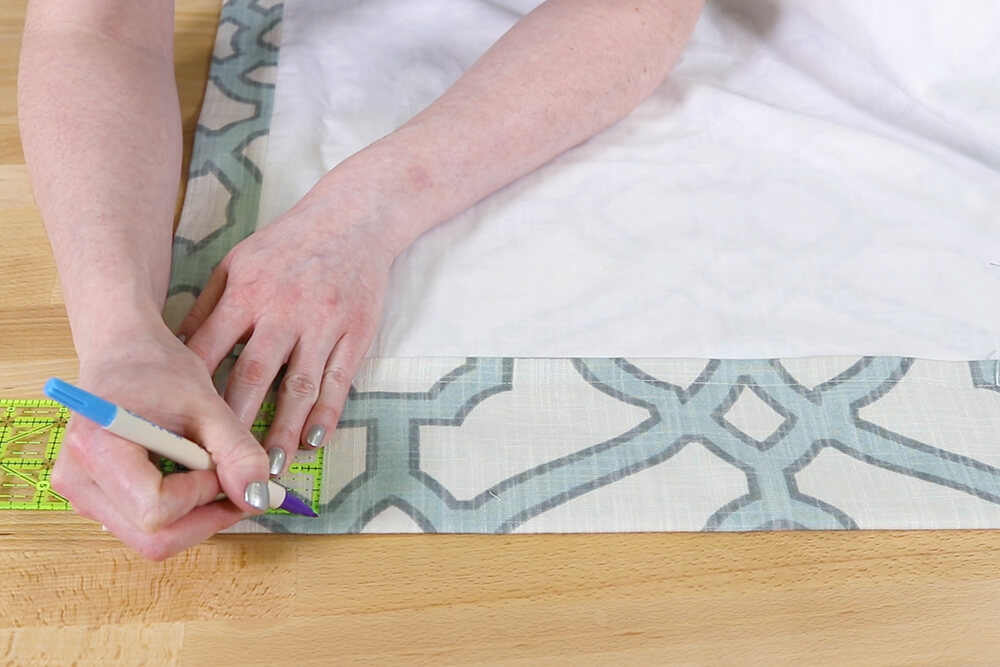
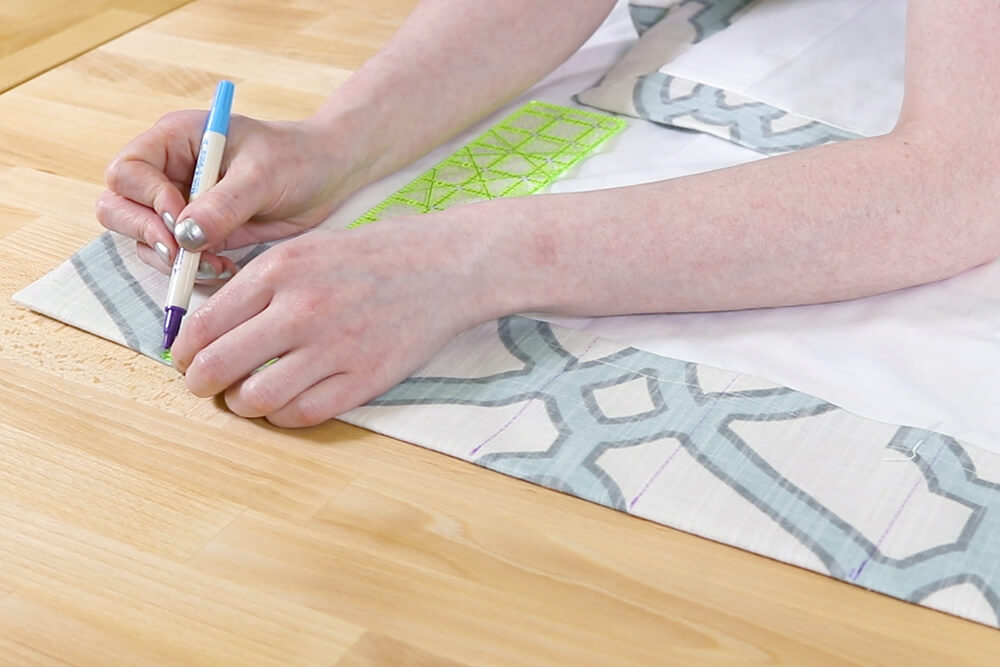
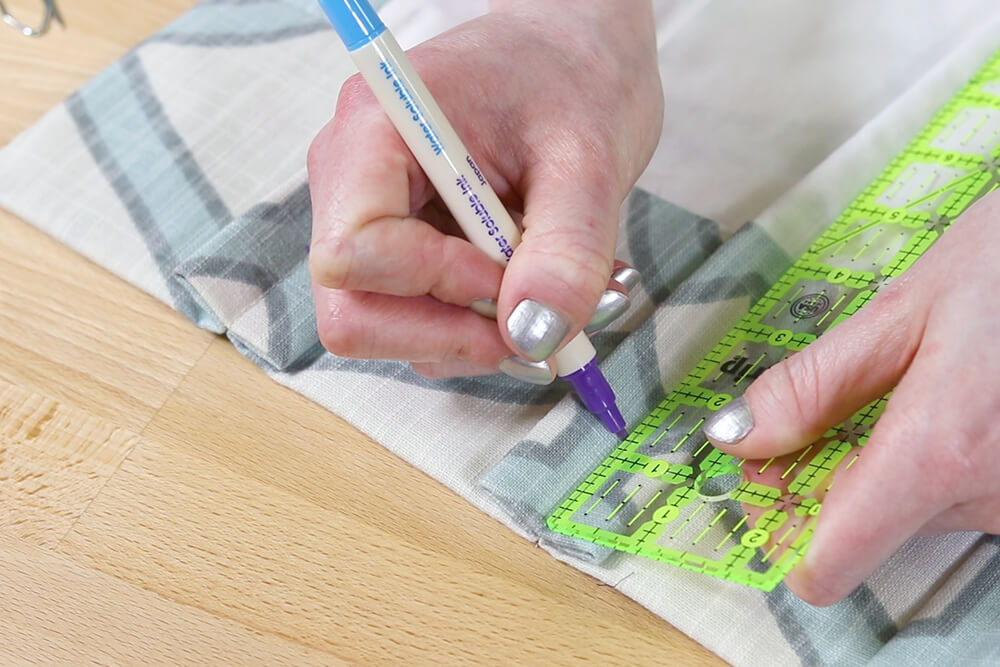
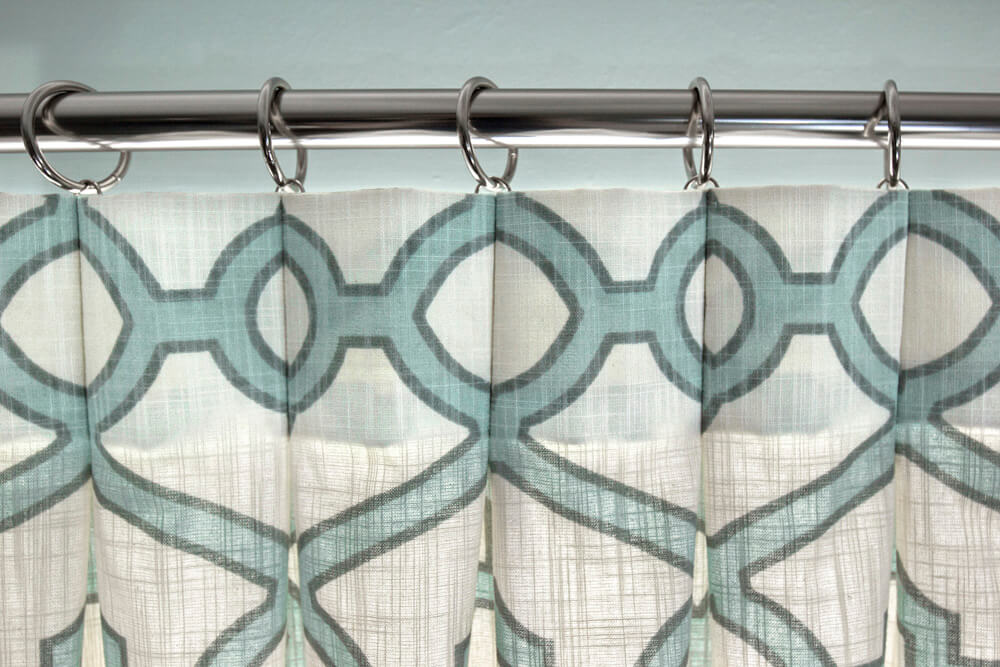
Step 12: Mark the pleats
At the end of the wider piece of fabric, the first pleat should start about 4 inches in to leave room for the leading edge. On the backside of the heading, mark with a pin or disappearing fabric marker.
Measure in the amount of fabric you need for the back pleat. For me that’s 3”. Then mark the size of the front pleat, which is 3 ¾” here. Continue to mark, alternating these measurements.
In this case I’m using the pattern as a guide to mark the 3″ segments, which automatically leaves 3 ¾” between them. This way the measurements won’t get off and the pattern is sure to line up how I want it when pleated.
If you accounted for a return, you should have that much left at the end.
Draw 4” vertical lines at each mark.

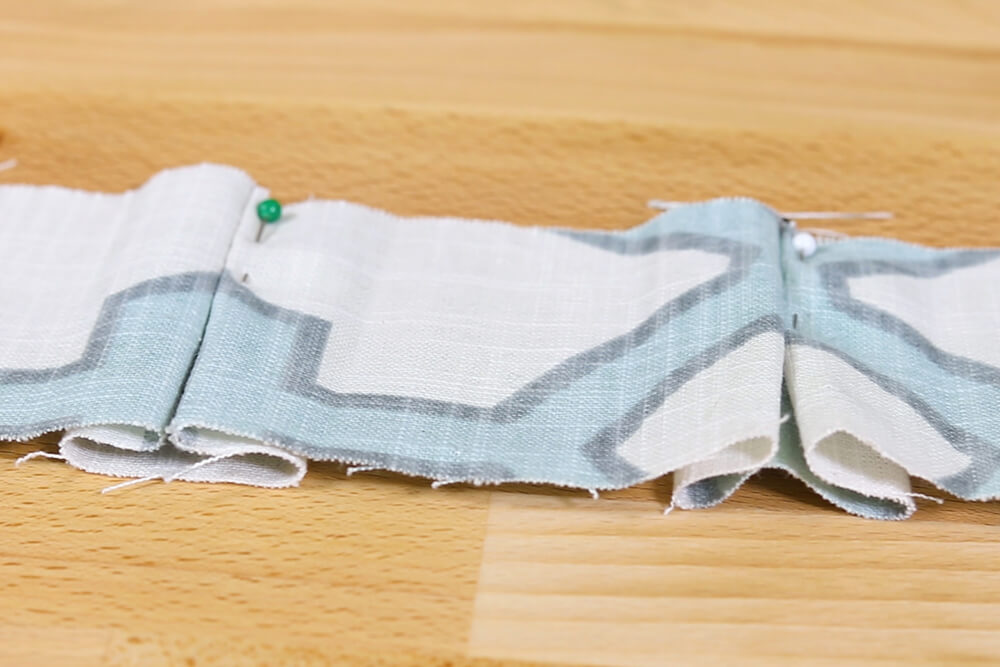
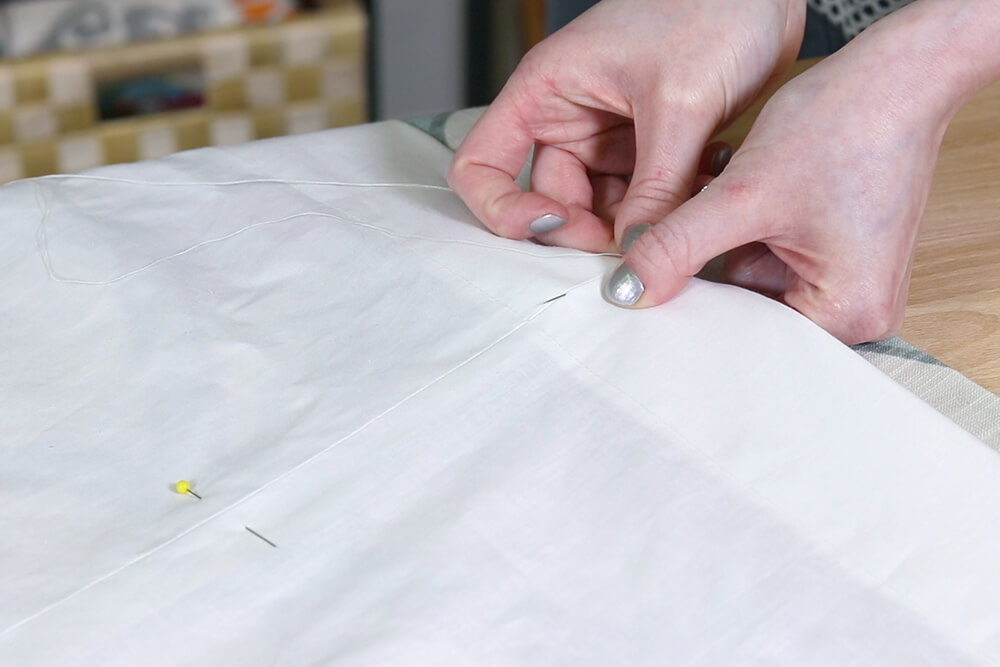
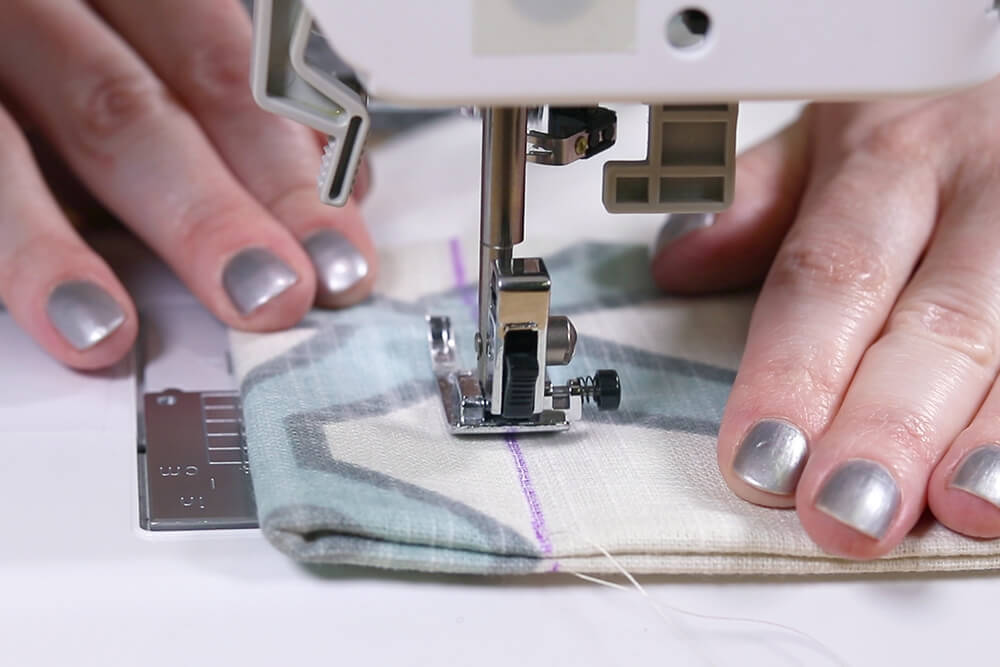
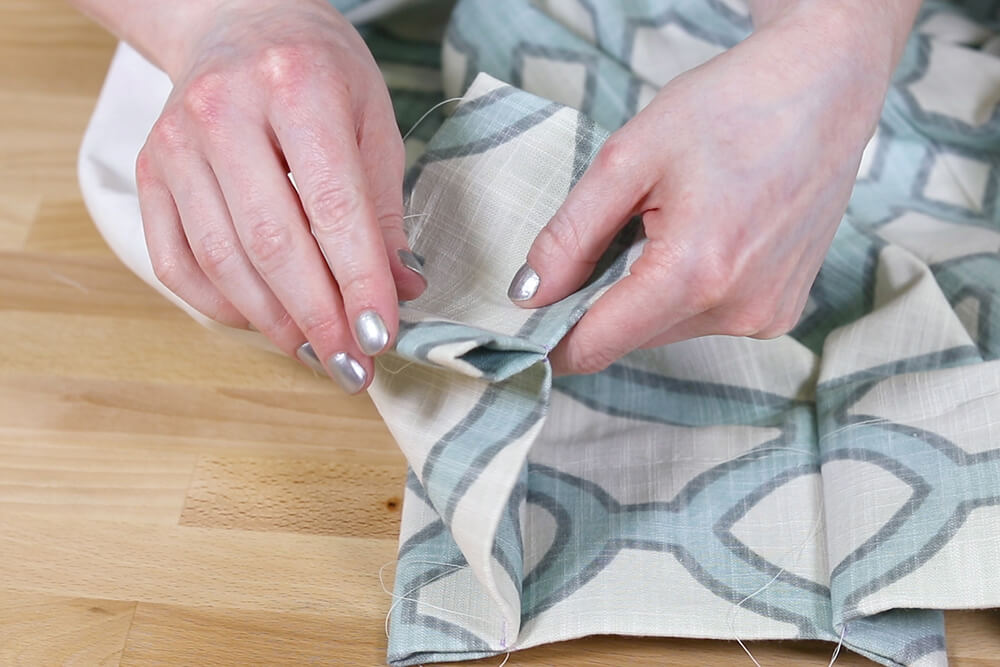
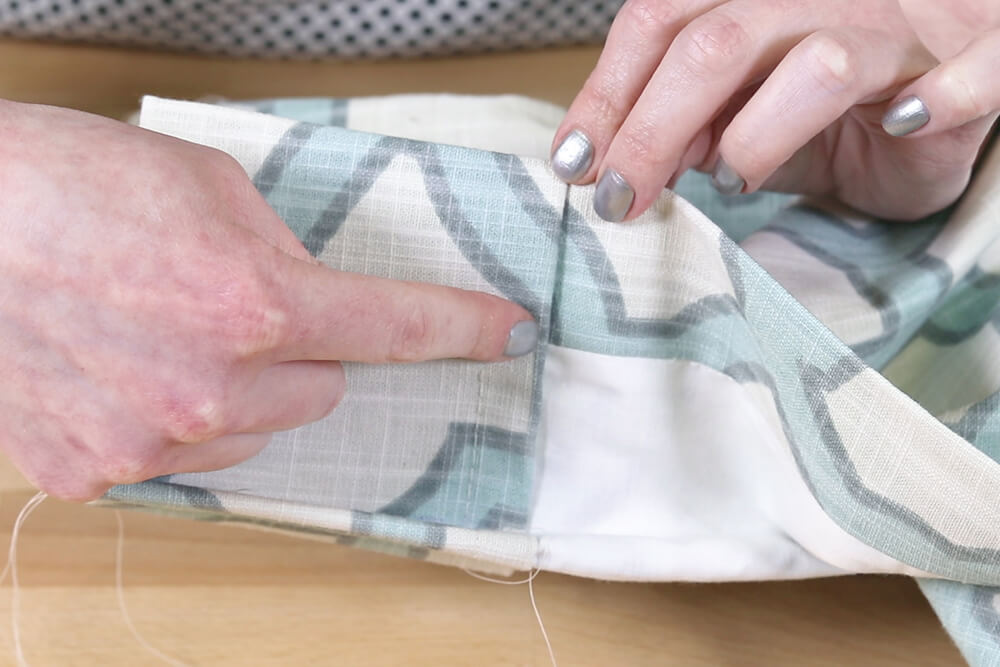
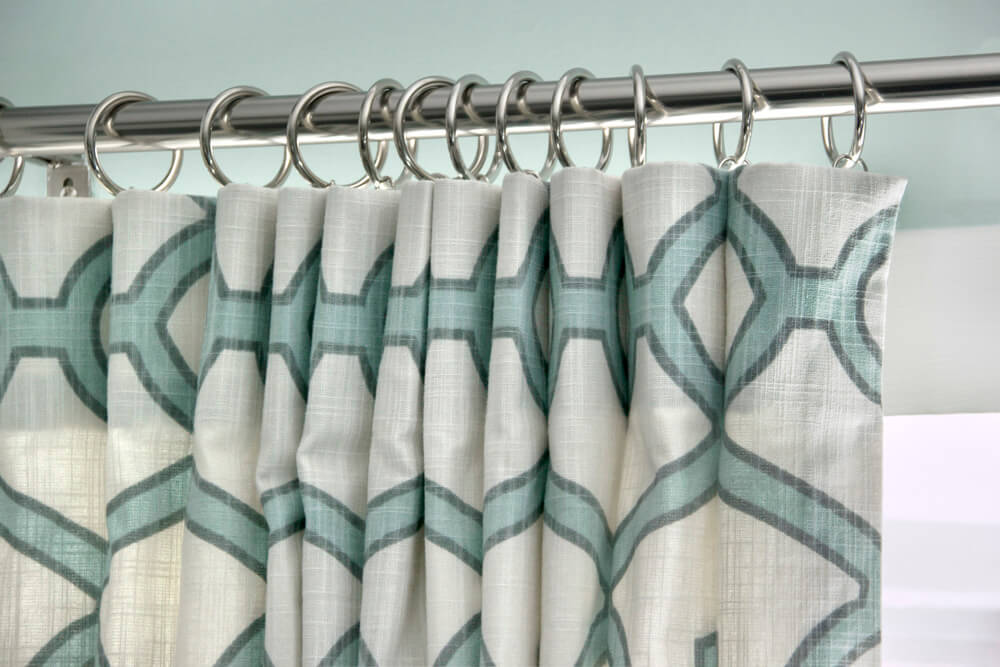
Step 13: Sew the pleats
Fold the fabric together with right sides facing so the first 2 marks line up. Sew on the line, backstitching at the beginning and end. Bring the next 2 marks together and repeat the process for the remainder of the curtain.
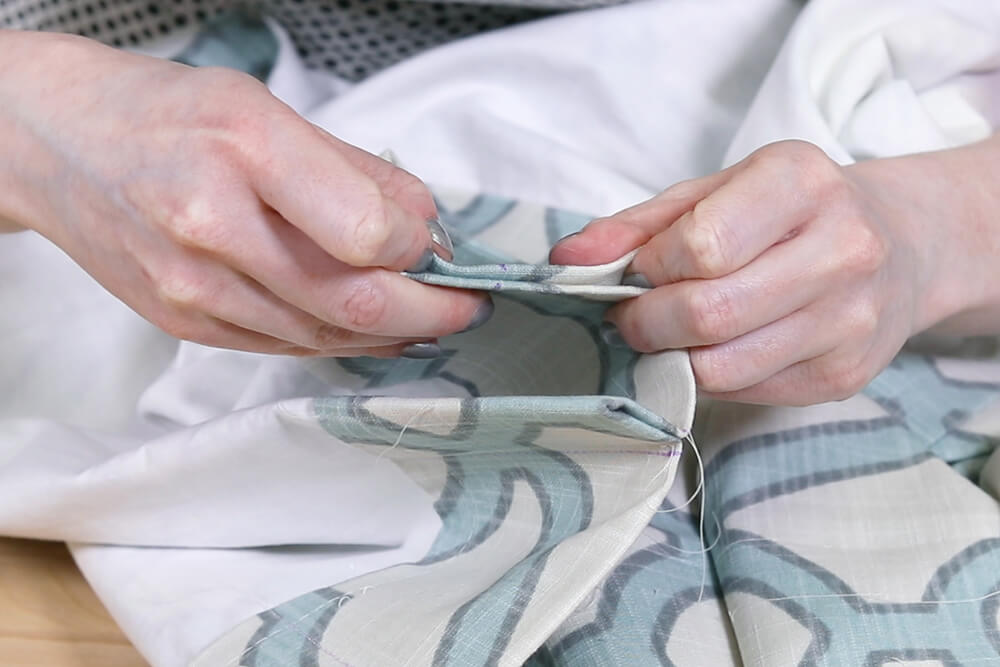
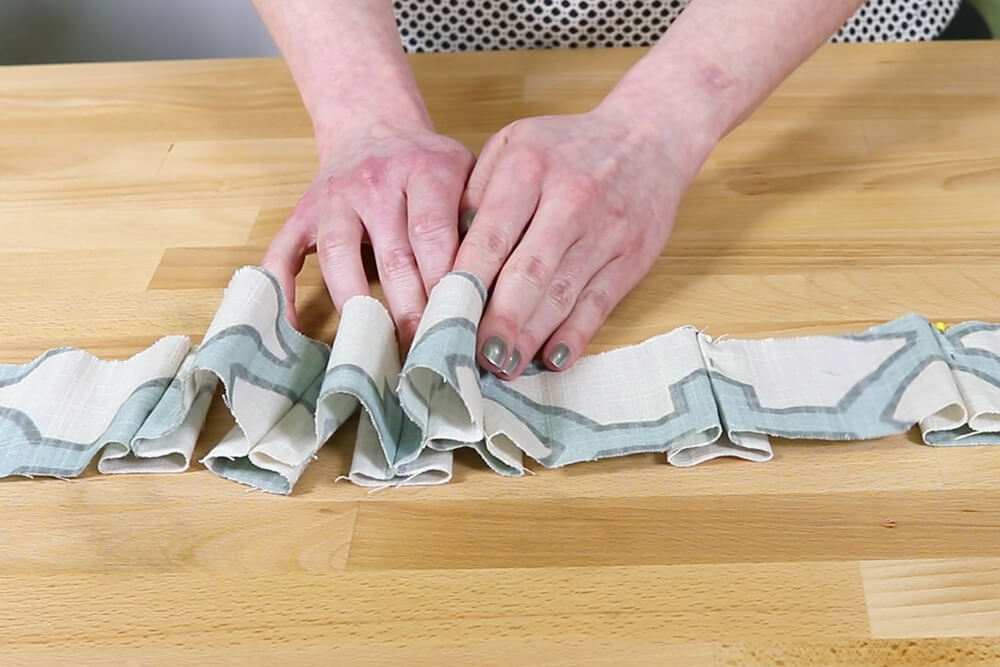
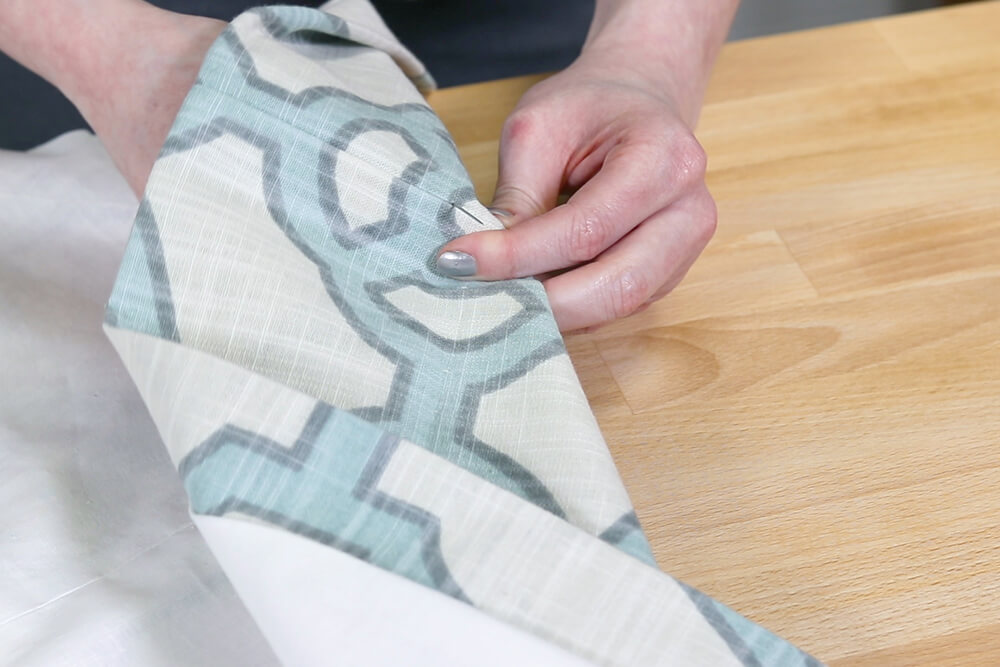
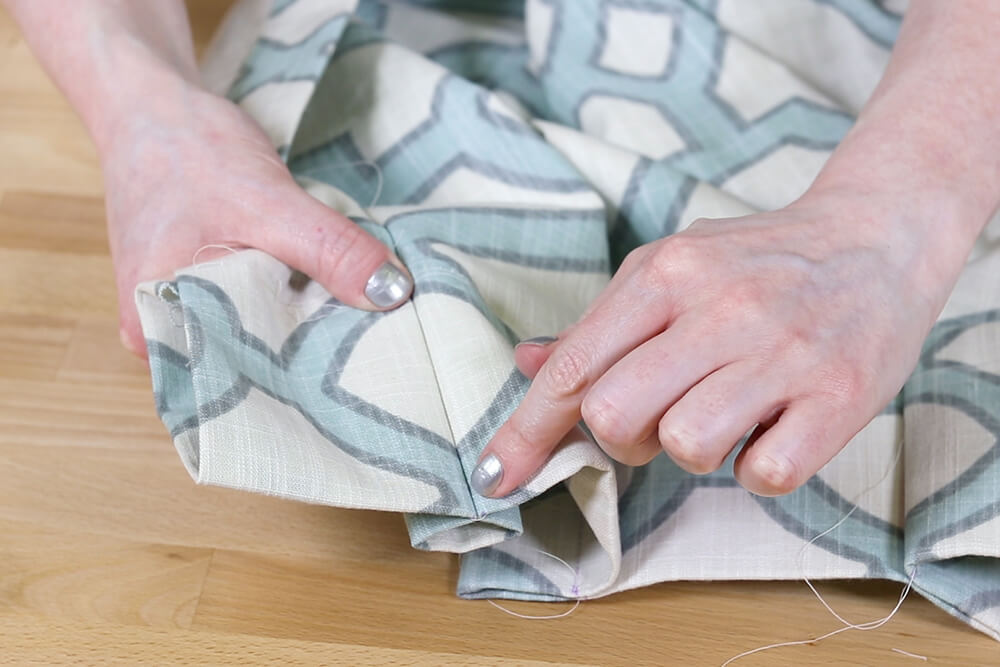
On the back, flatten the pleats do they’re centered on the seams.
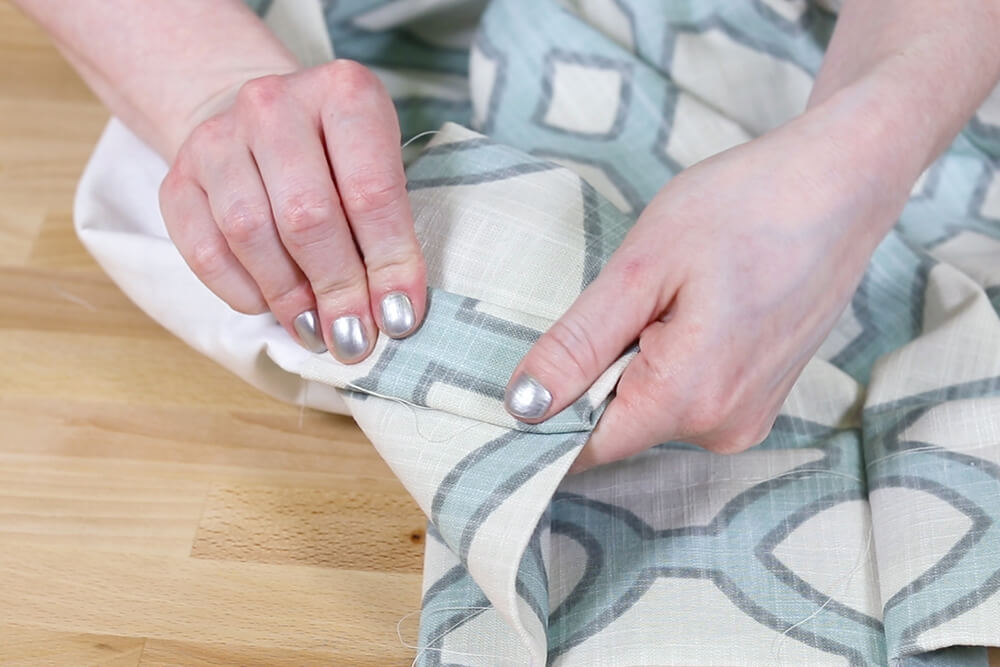
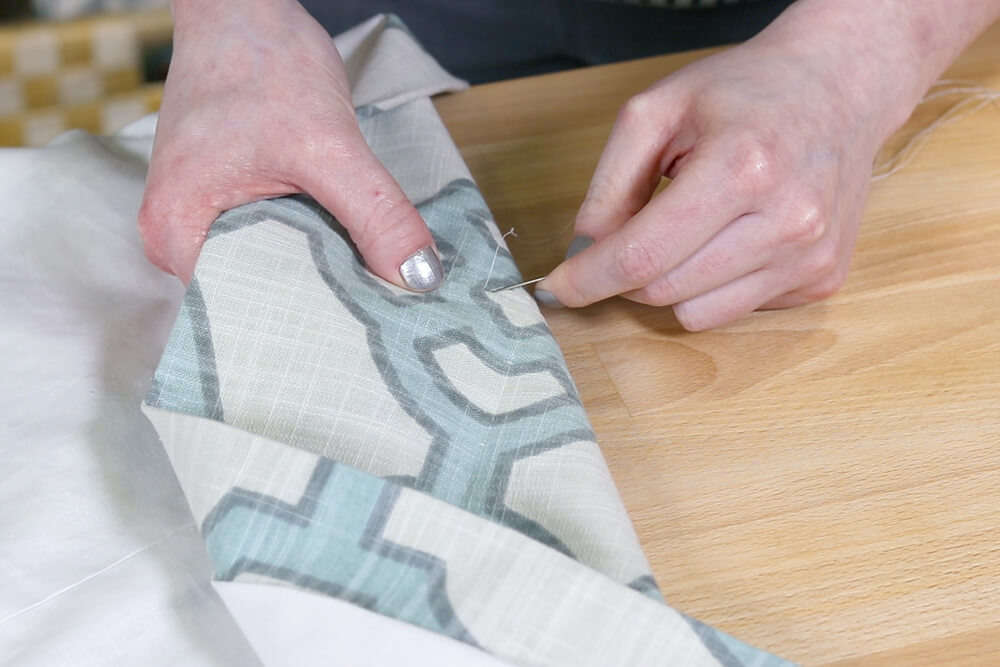
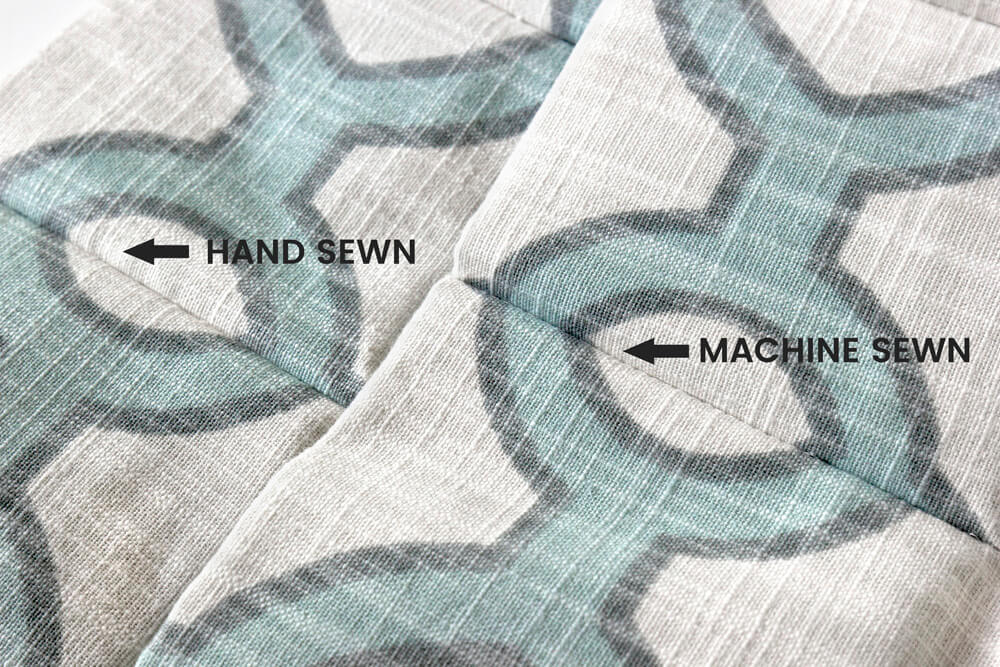
Now you can either machine stitch or hand stitch the back pleats so they stay flattened.
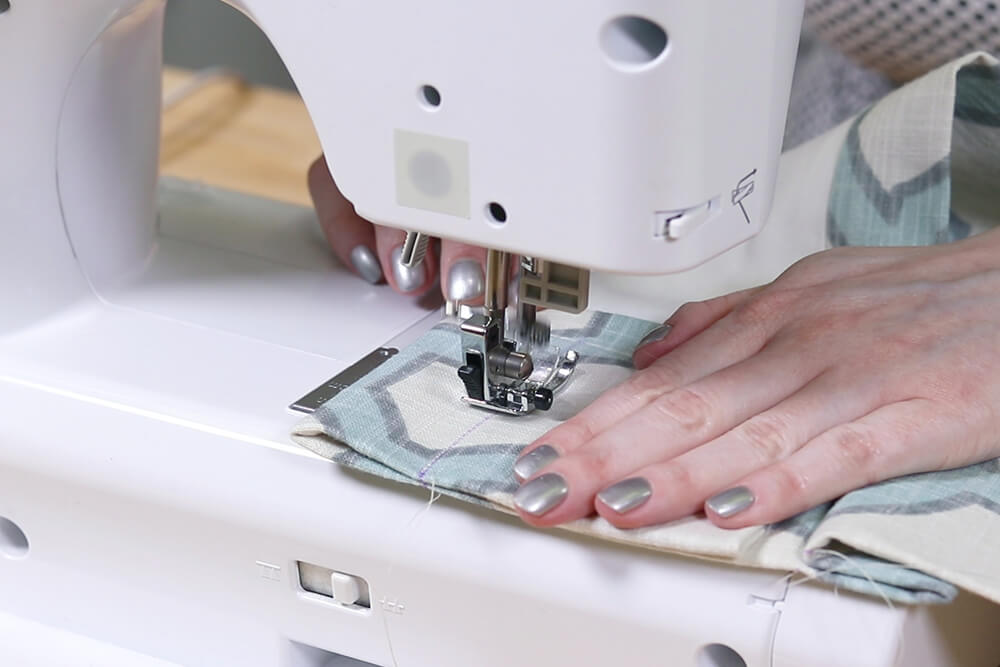
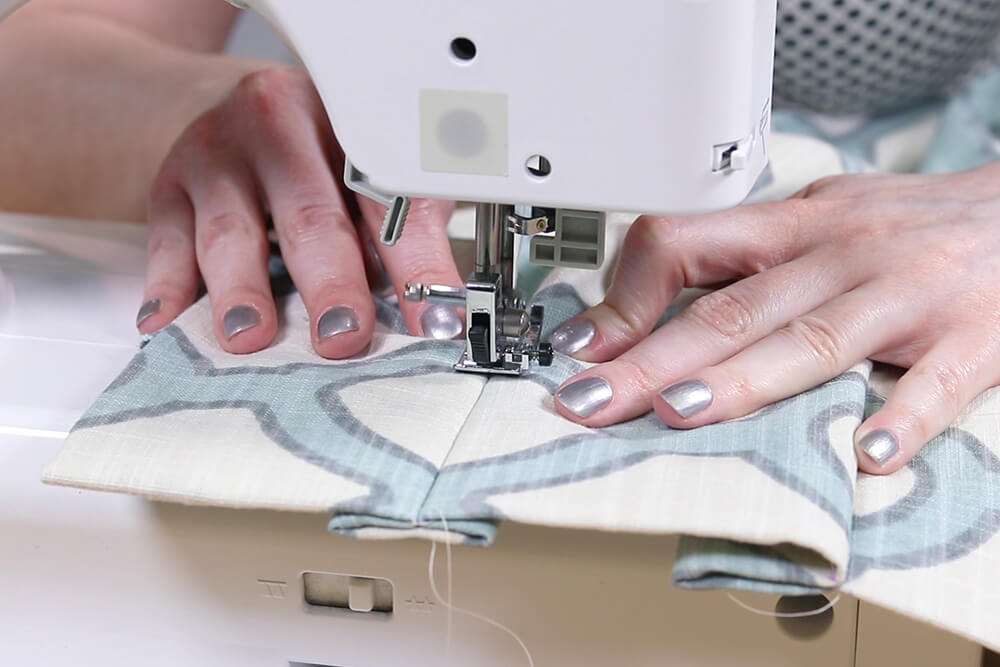
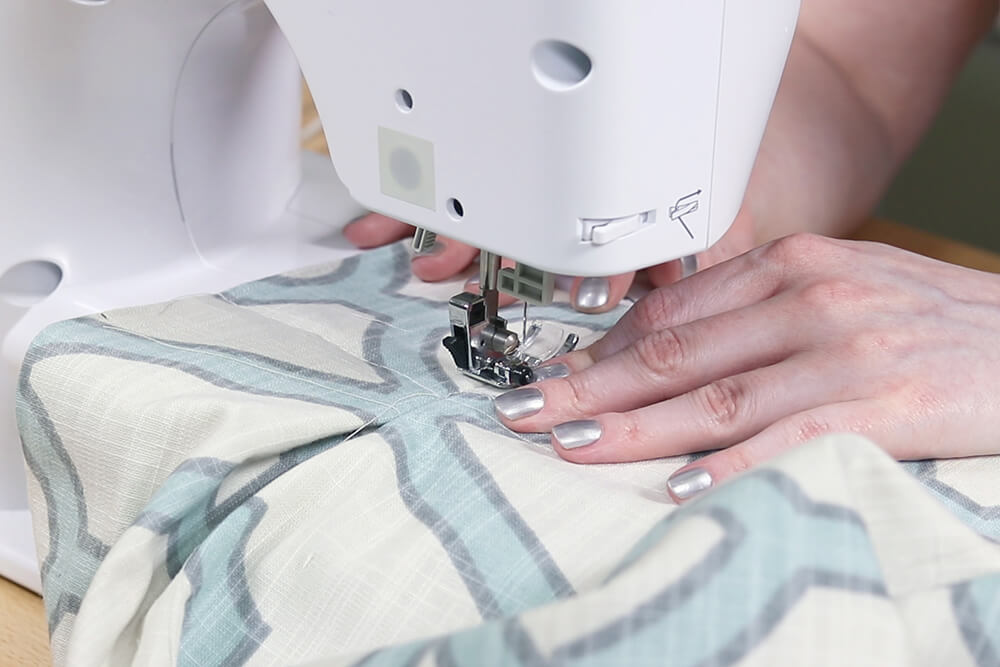
If you want to machine sew, on the front of the curtain, stitch in the ditch, which means sewing in the fold so the stitches won’t be visible. Backstitch at the beginning and end. Repeat for the rest of the pleats.
Hand stitching is the better option if you want to be sure the stitches won’t show on the front. I handstitched the other panel. To me, the amount of time it took wasn’t worth the slightly better looking results.
Hand sew the ends of the panel together ending where the lining starts on the back. Again, I’m using the ladder stitch.
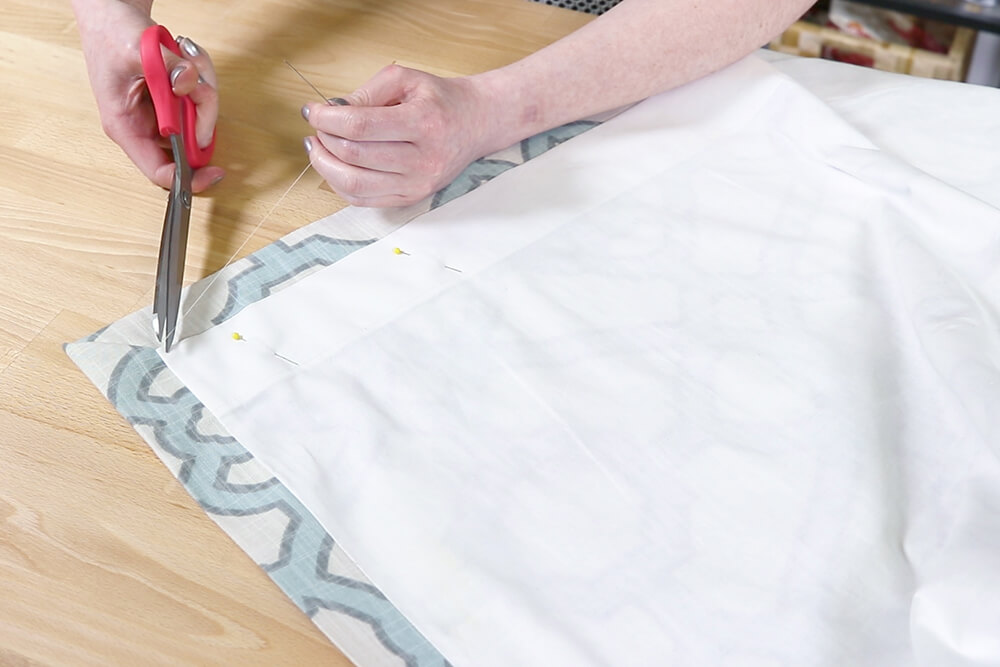
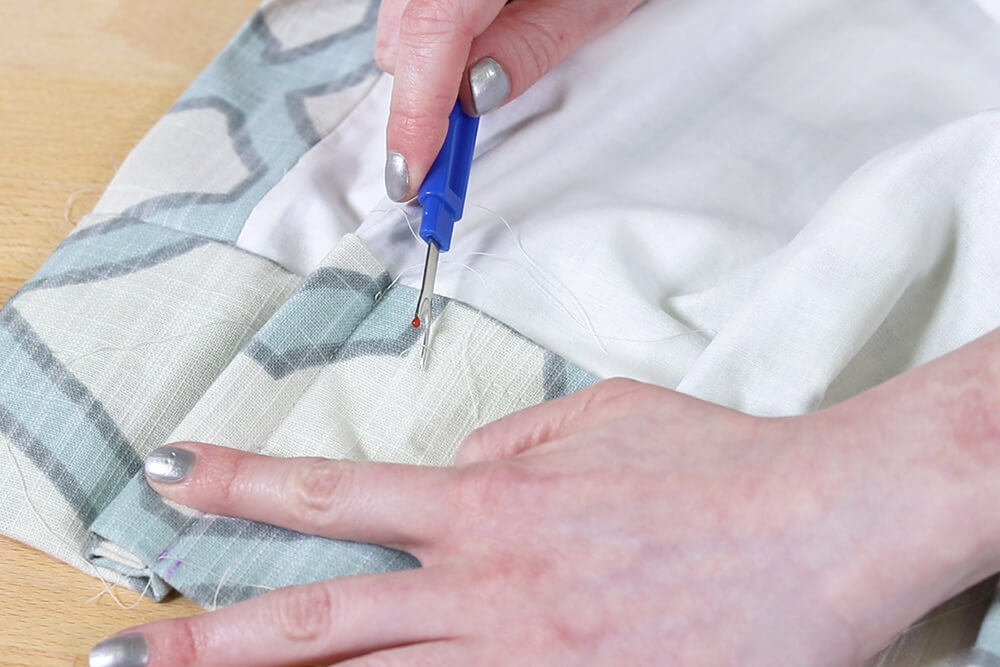
At any time after sewing the pleats, you can rip out the basting stitches and snip away any unwanted threads.
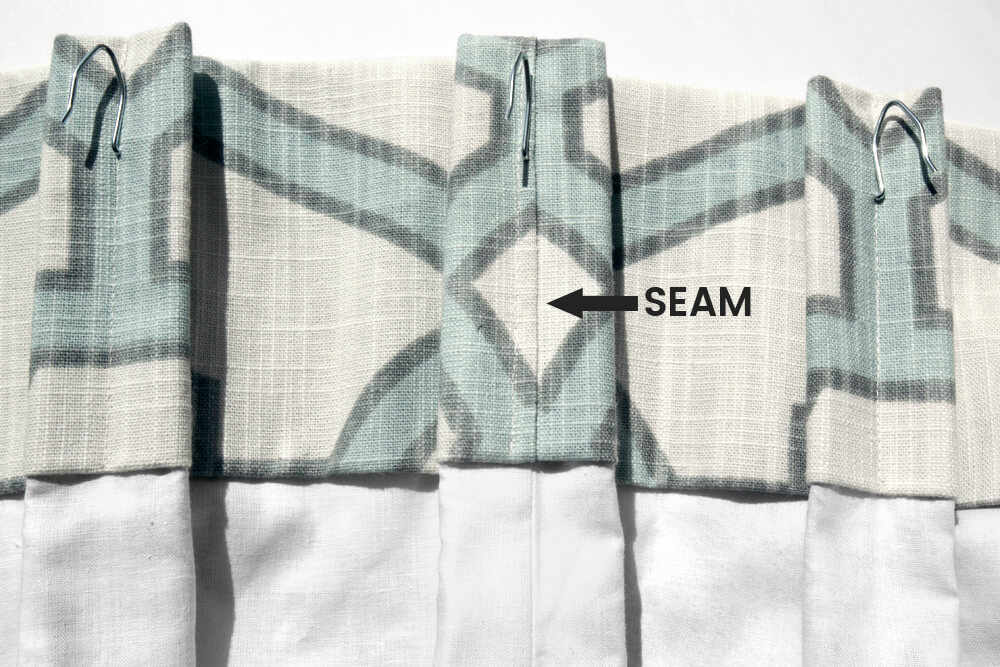
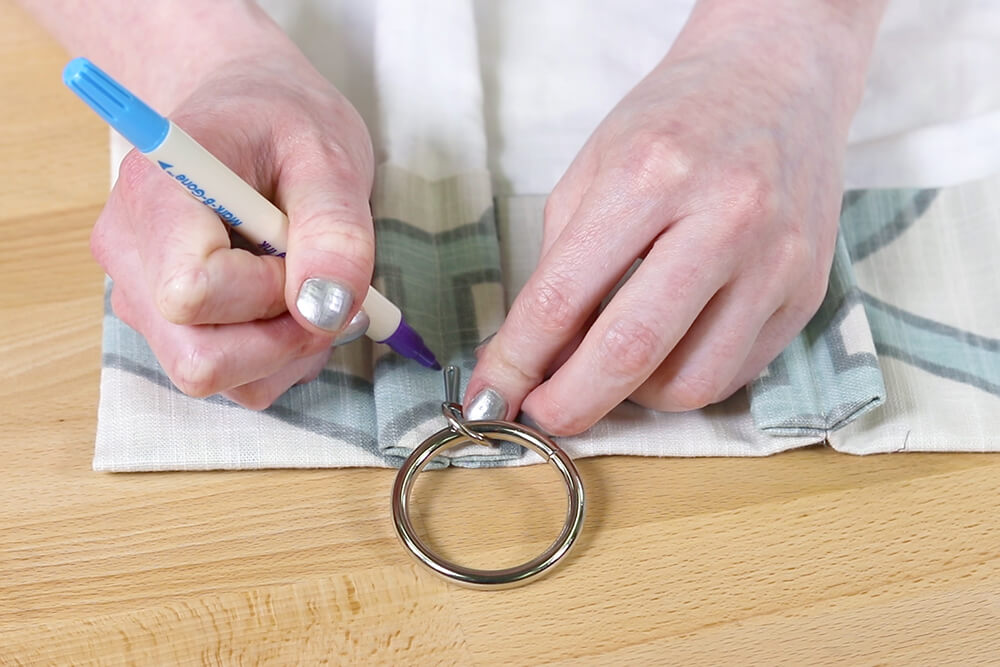
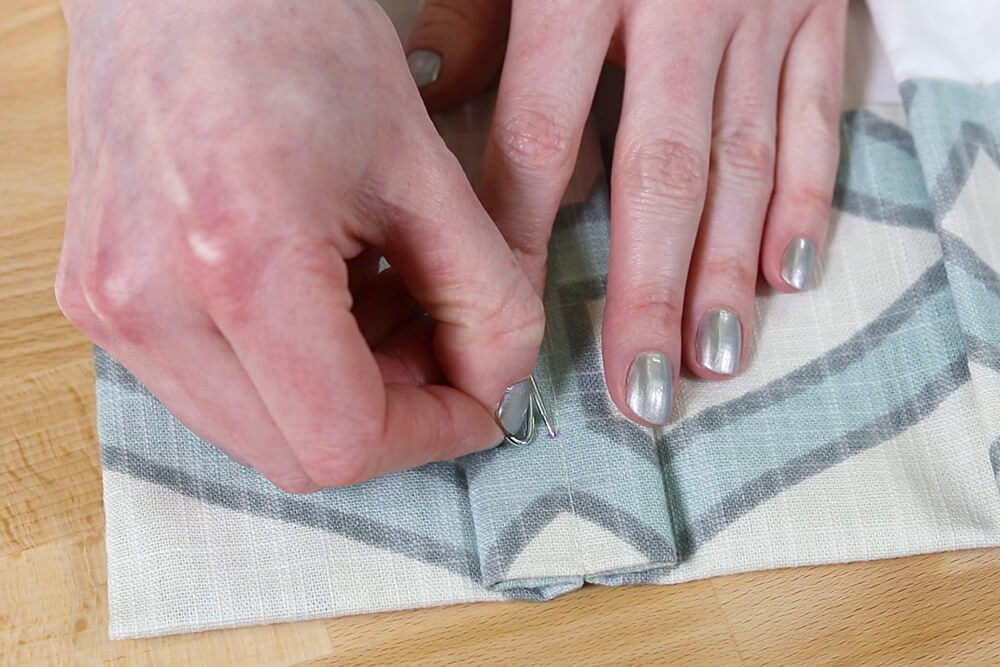
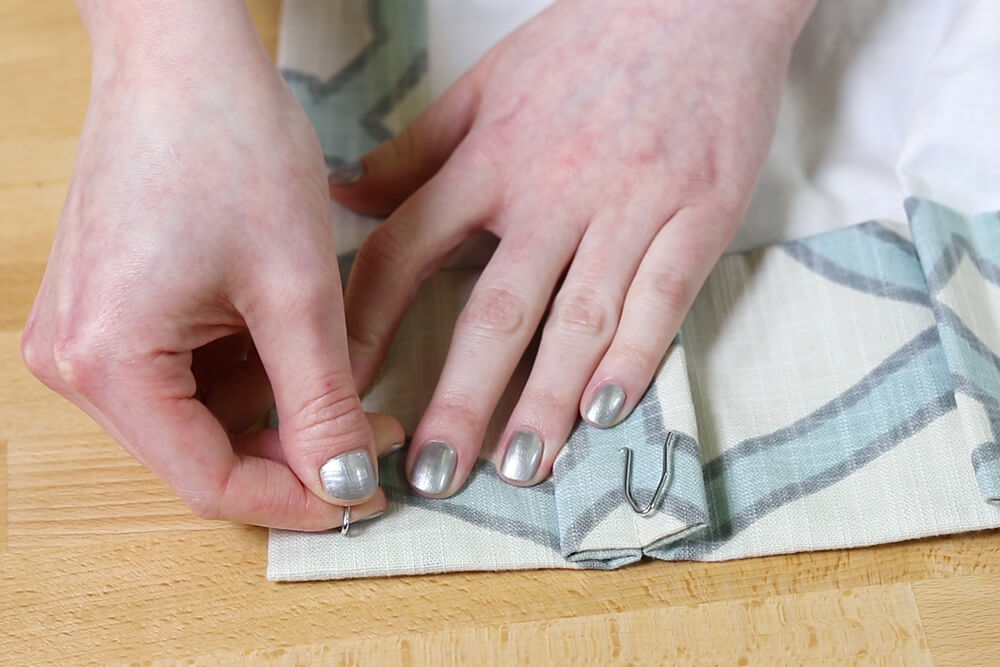
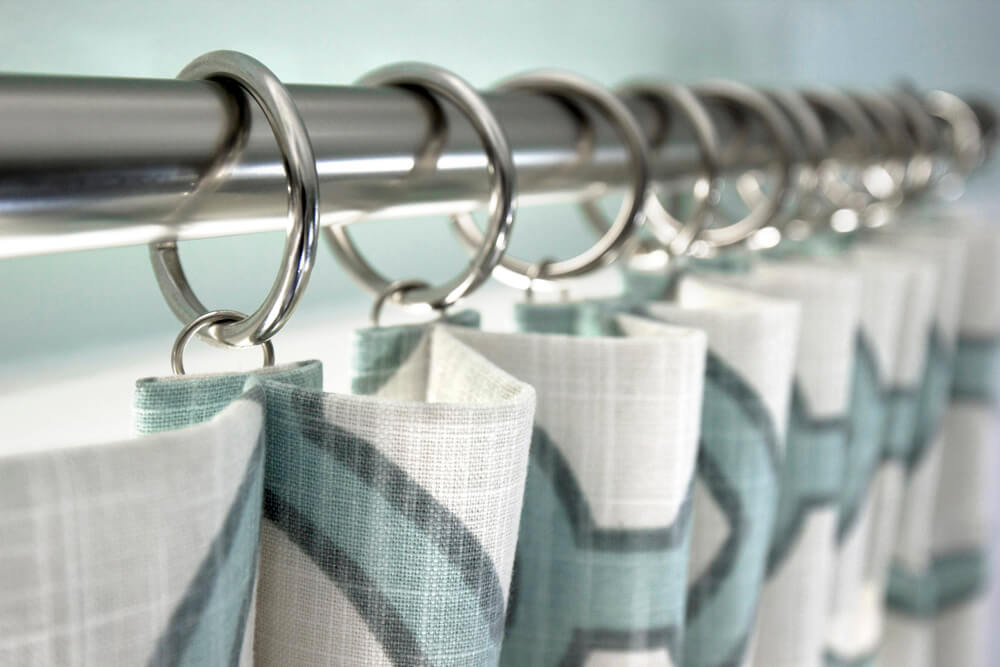
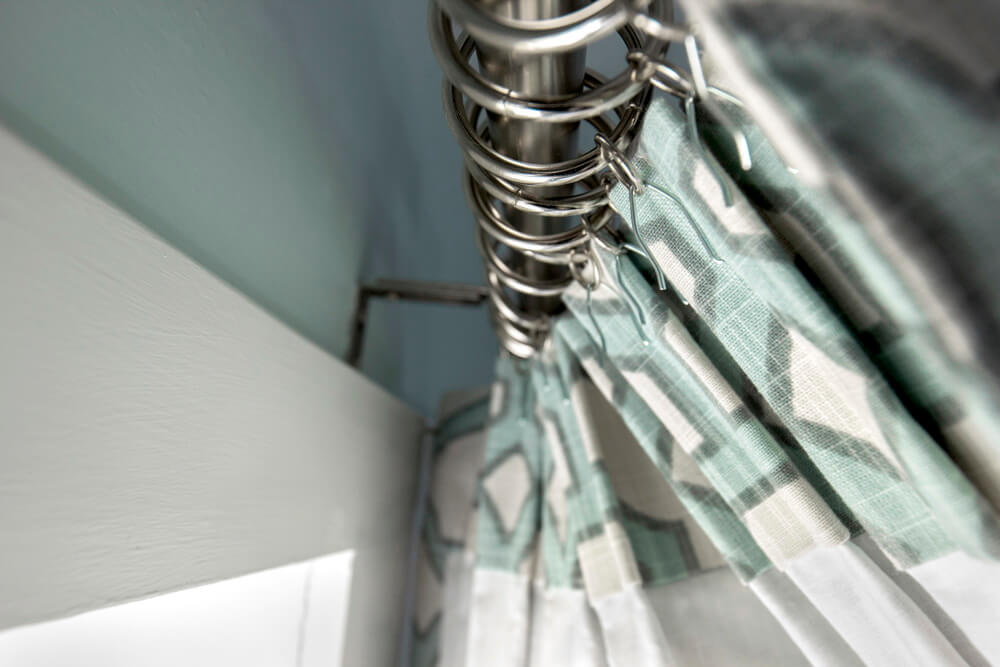
Step 14: Attach the drapery hooks
Hook a drapery hook on your eyelet curtain ring. Line it up on the center of the back pleats so the bottom of the ring is at the top of the curtain. Mark where the drapery hook should be inserted. Measure and mark this distance on the rest of the pleats.
Insert the hooks on the marks. Also add drapery hooks to both ends of the heading.
Now the curtain panel is ready to hang!
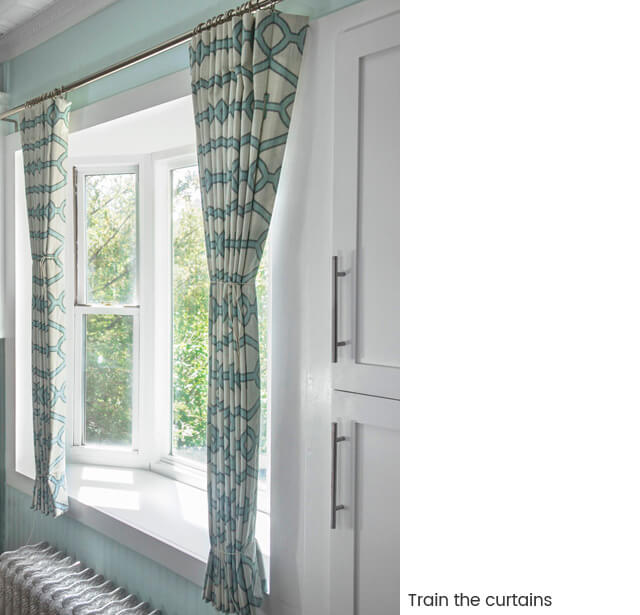
Step 15: Hang the curtain
Attach the hooks to the rings. For the return, attach an eye screw to the wall and hang the last hook on it.
To train the curtain, fold the panel to extend the pleats and tie a scrap of fabric or a piece of twine loosely around it in several places. Leave it like this for about 24 hours. This will make the curtain hang nicely, and it will have a memory of the folds when closed and opened.
Shop our wide selection of drapery fabric here.
-
{{#each productSuggestedQueries.results}}
- {{query}} {{/each}}
-
{{#each categories.results}}
- {{html title}} {{/each}}
{{html attributes.description}}
{{/if}}-
{{#each queries.results}}
- {{query}} {{/each}}