How to Sew a Mitered Corner
- By Clara
- Beginner
- 15 minutes
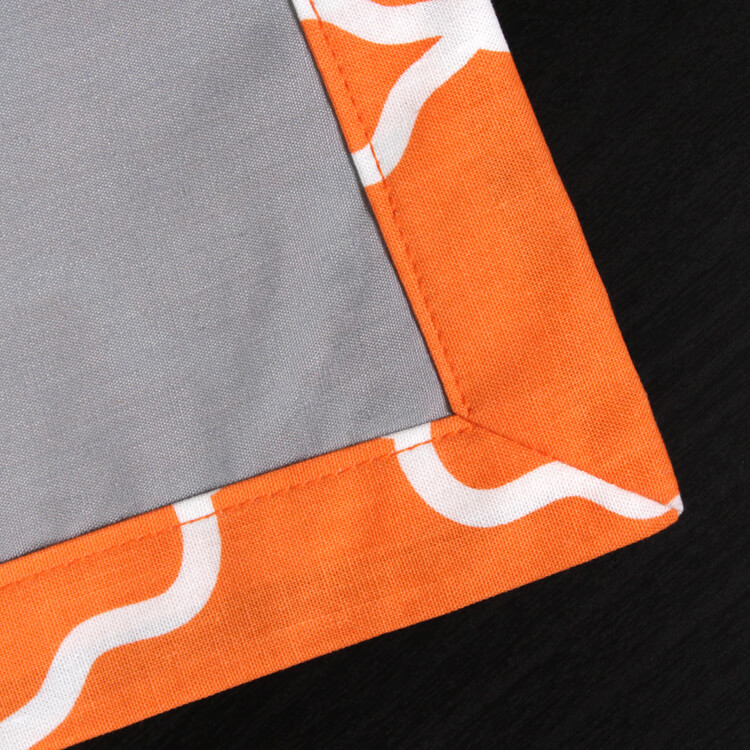
A mitered corner is when two sides come together at a 45 degree angle. You can use this technique to create a polished look on many sewing projects, like napkins, tablecloths, blankets, quilts and curtains.
You can make mitered corners just about any size. This example will have a 1” mitered corner.
Want to get the printable PDF instructions?
Materials
Related Products

Video
Instructions
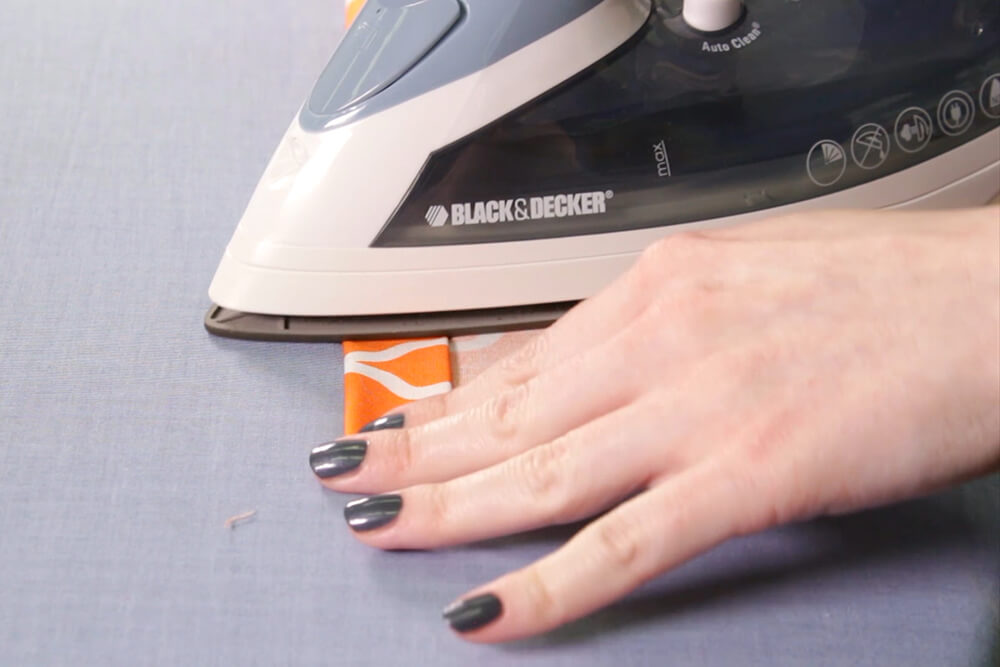
Step 1: Press the fabric
You don’t have to iron creases if your fabric doesn’t iron well, like Minky. Use pins or clips to hold the first fold in place instead.
Fold the fabric over ¼” to ½” and press it. Then fold it over again however wide you want the border to be and iron it. Repeat these steps on the other corners. Open the fabric so just the first crease is folded over.
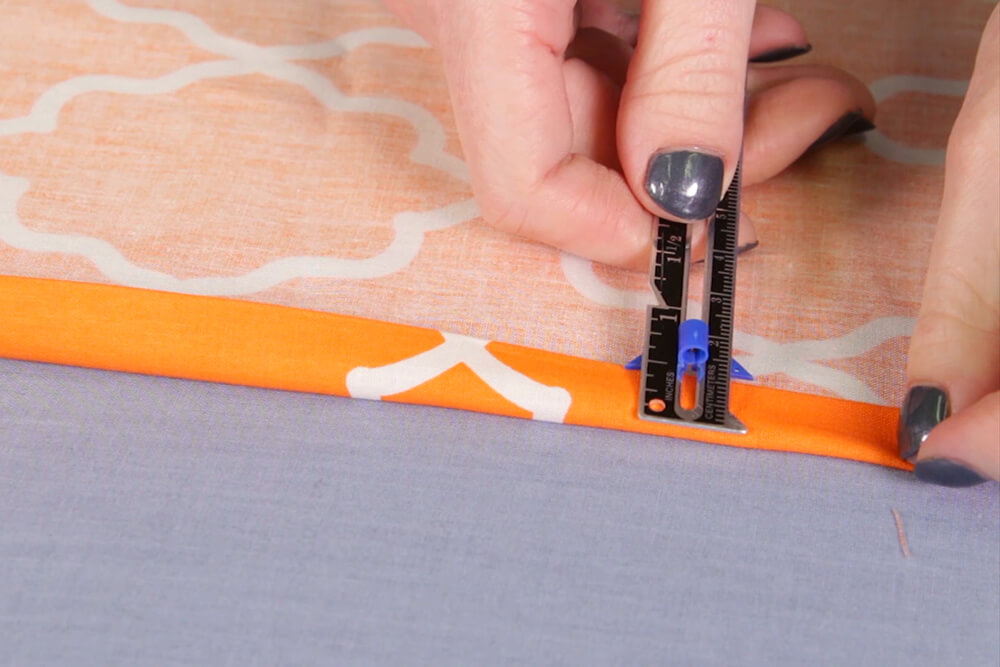
Step 2: Create the miter
Open the fabric so just the first crease is folded over.
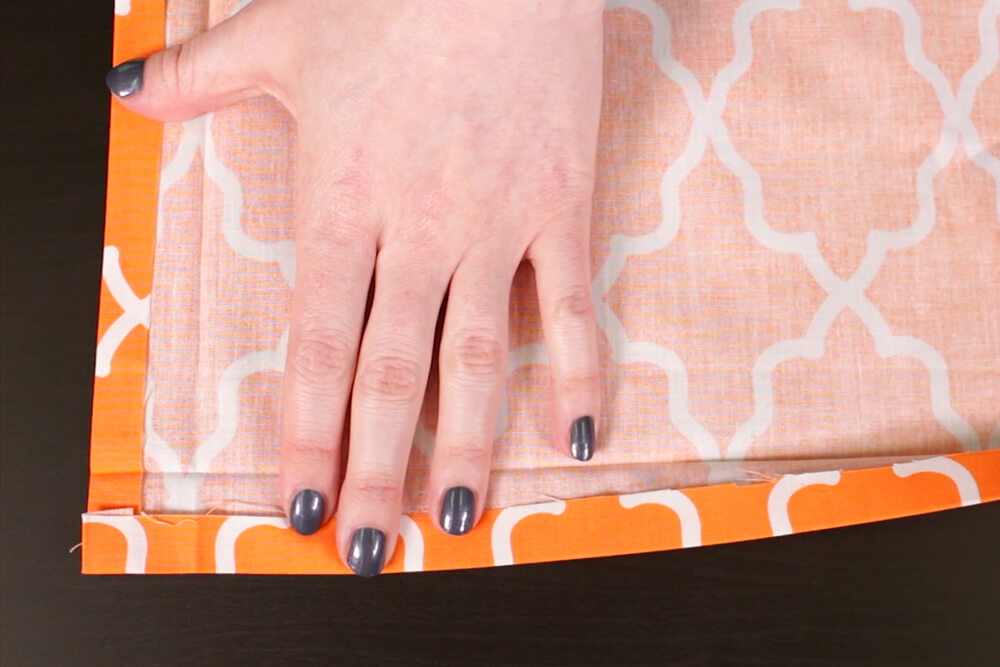
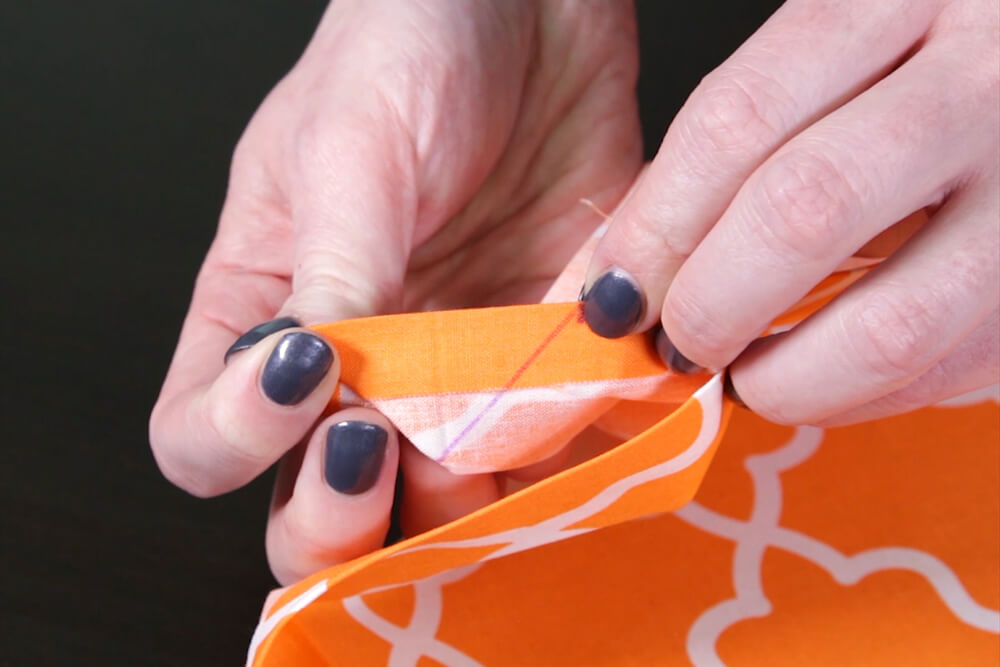
Measure 2 times the width of your border from the corner down each side. Draw a line connecting the two marks.
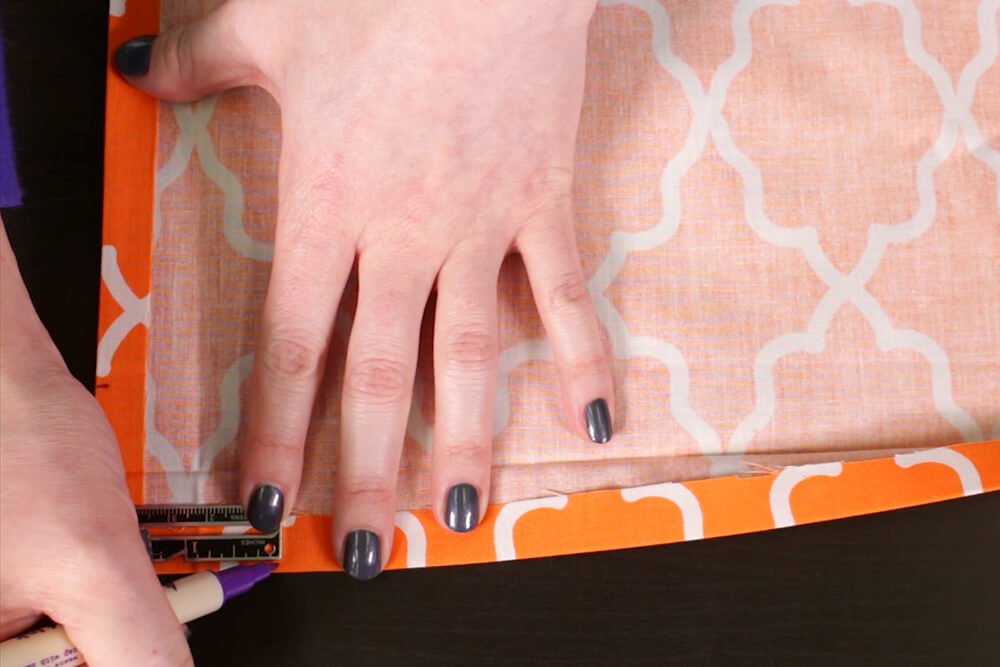
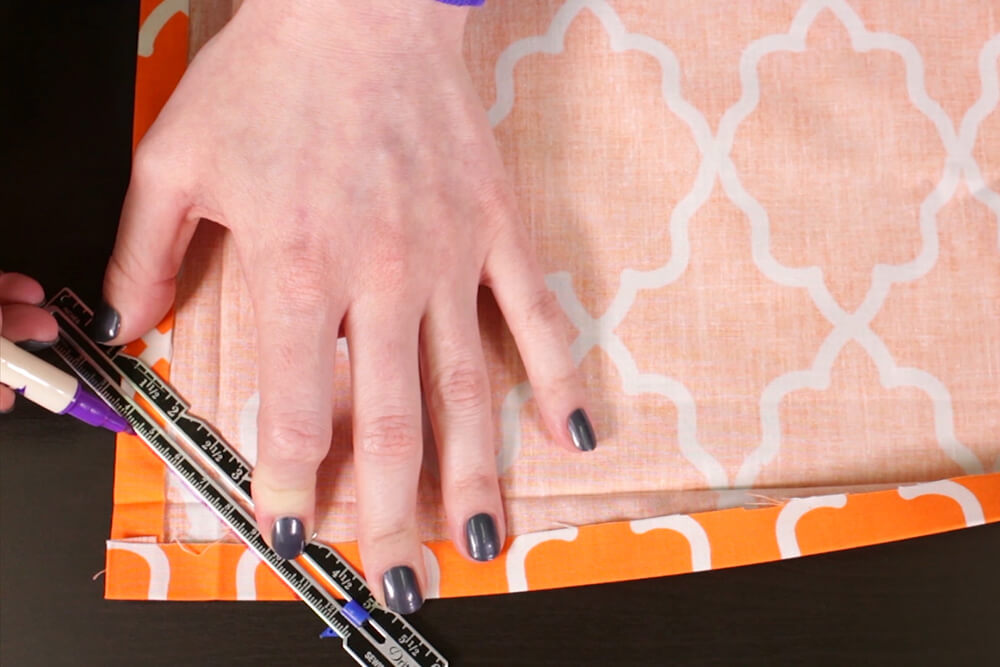
If your fabric doesn’t mark well, you can use a piece of tape instead and sew next to the edge of the tape.
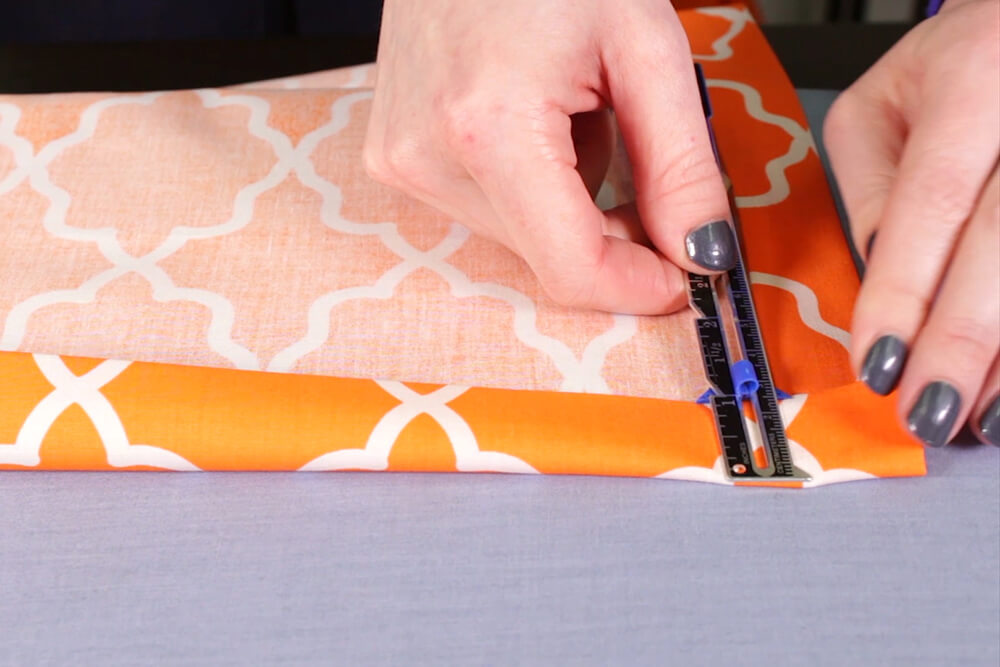
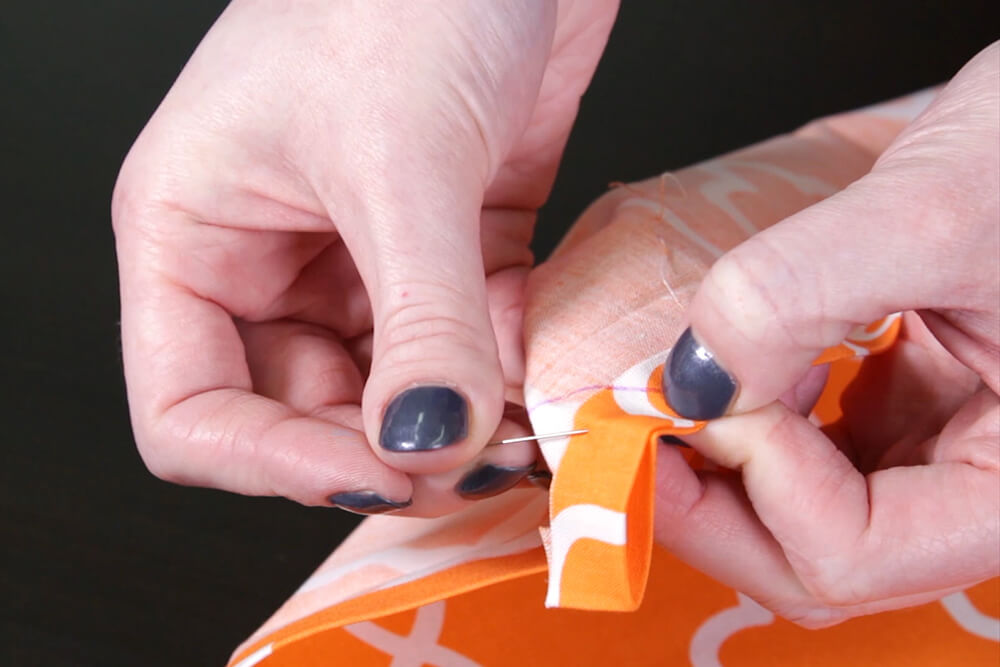
Next fold the corner in half diagonally with the wrong side facing out. Make sure the two marks line up and pin it together.
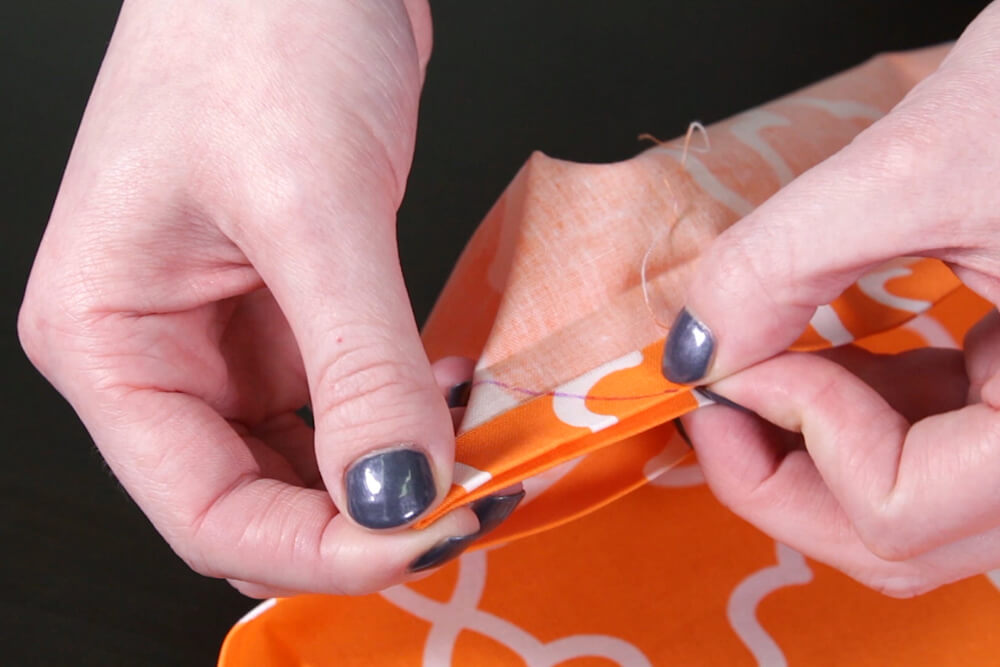
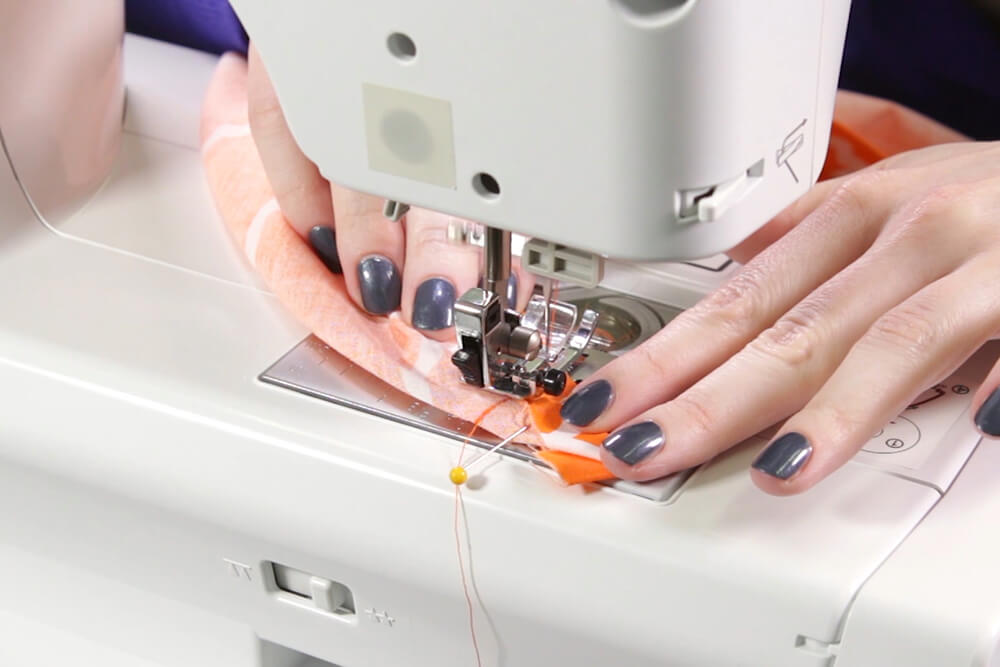
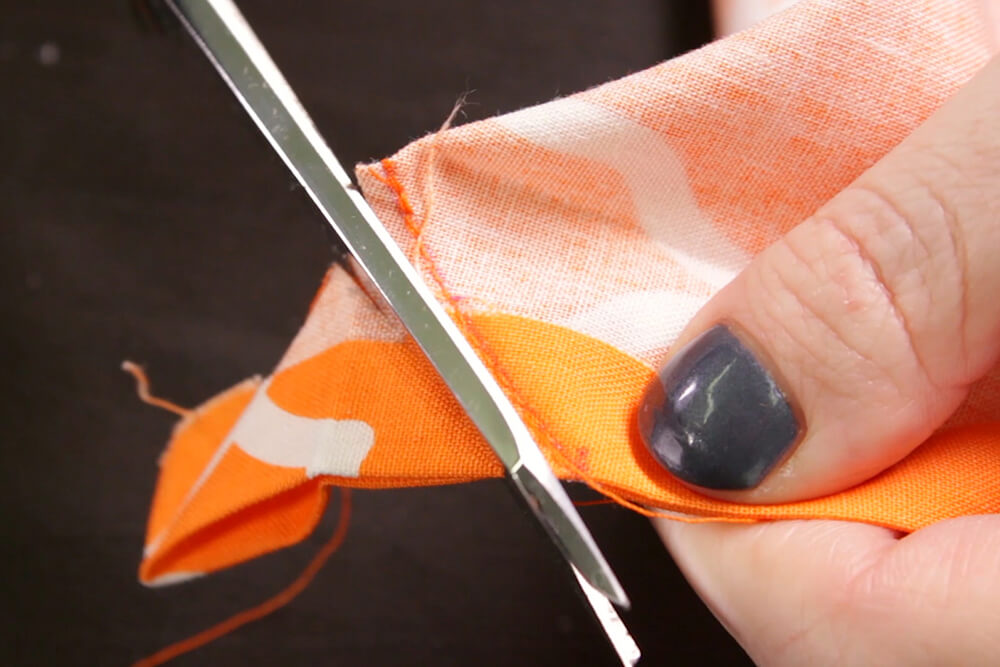
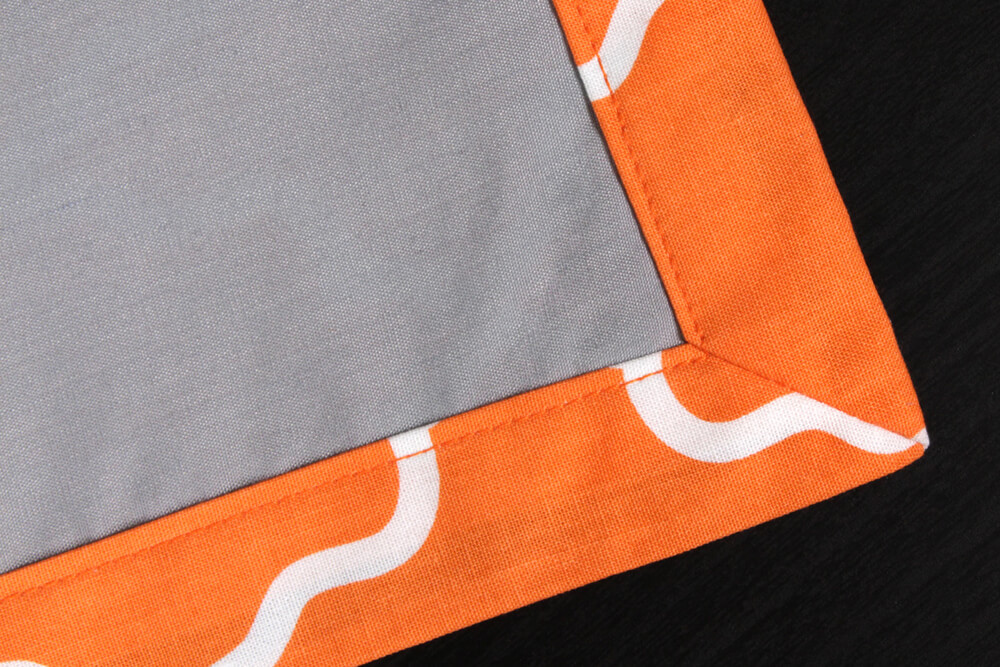
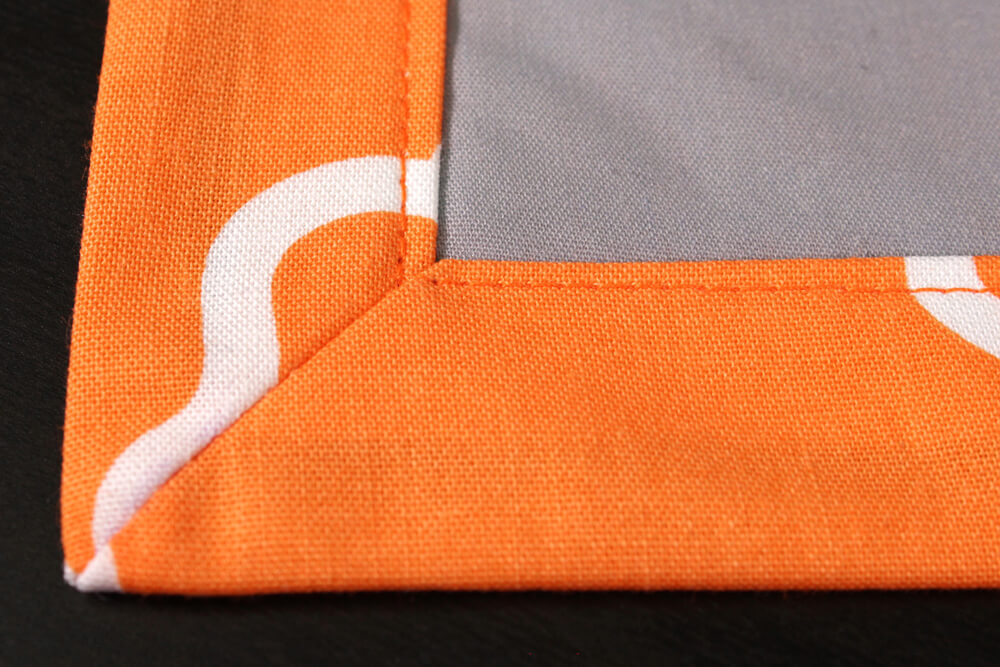
Step 3: Sew and finish the mitered corner
Sew down the marked line. Back stitch at the beginning and end and sew all the way to the edges.
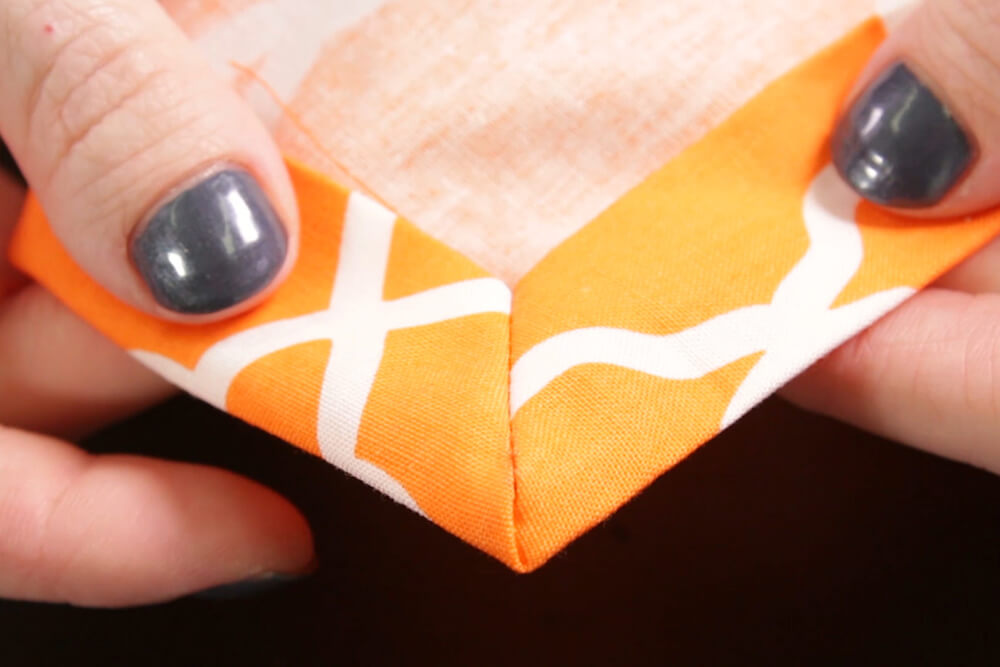
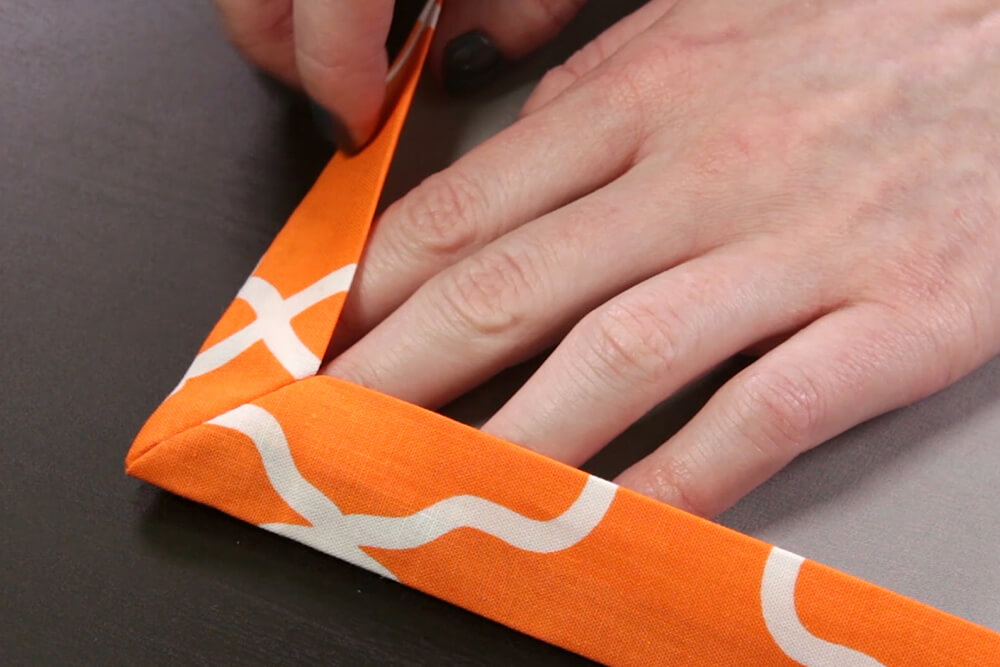
Cut off the excess fabric about ¼” from the seam. Turn it right side out. Then push out the point of the corner.
If you want to add a backing, slide it under the mitered corner.
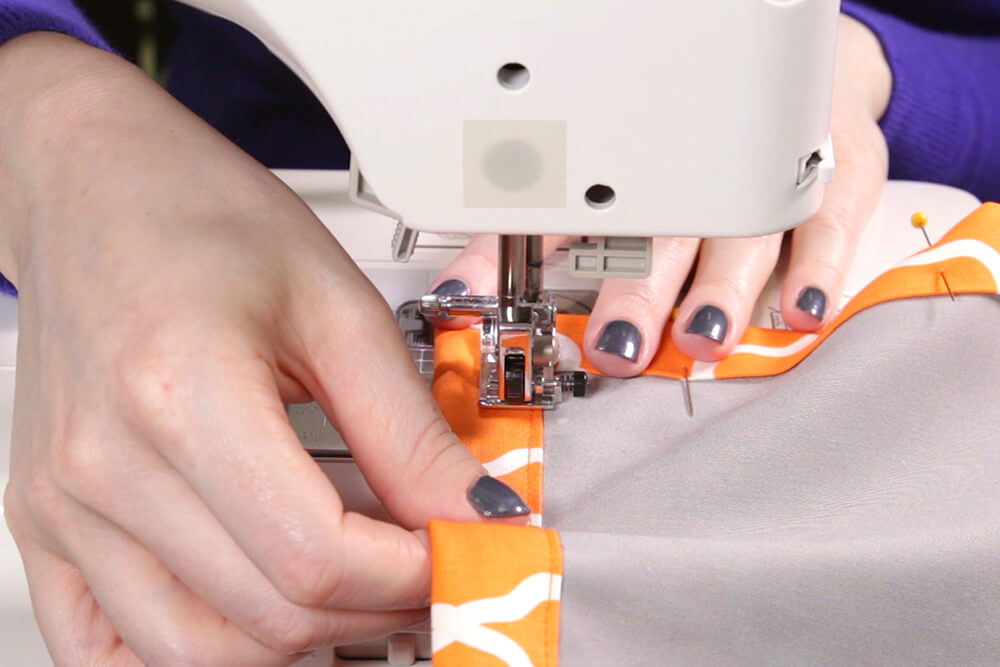
Finally top stitch around the inner edge. And that’s it—an easy mitered corner that you can use on many projects.
Click here to see the full tutorial on how to make cloth napkins.
-
{{#each productSuggestedQueries.results}}
- {{query}} {{/each}}
-
{{#each categories.results}}
- {{html title}} {{/each}}
{{html attributes.description}}
{{/if}}-
{{#each queries.results}}
- {{query}} {{/each}}