How to Hang Wallpaper
- By Alyssa
- 5 hours
If you have been following the trends over the past couple of years, you have probably seen what a huge comeback wallpaper has been making.
And let me tell you, this is not your grandmothers old floral wallpaper. New paper is easier to remove which means it doesn’t have to stay up for 20+ years (no regrets amiright?)
If you have never ordered, or installed wallpaper we have some very helpful wallpaper guides that I recommend checking out before starting your project. They help to explain the terminology used when you are buying wallpaper, how to match your panels, and along with this tutorial, you will have all of the information you need to do your project with confidence.
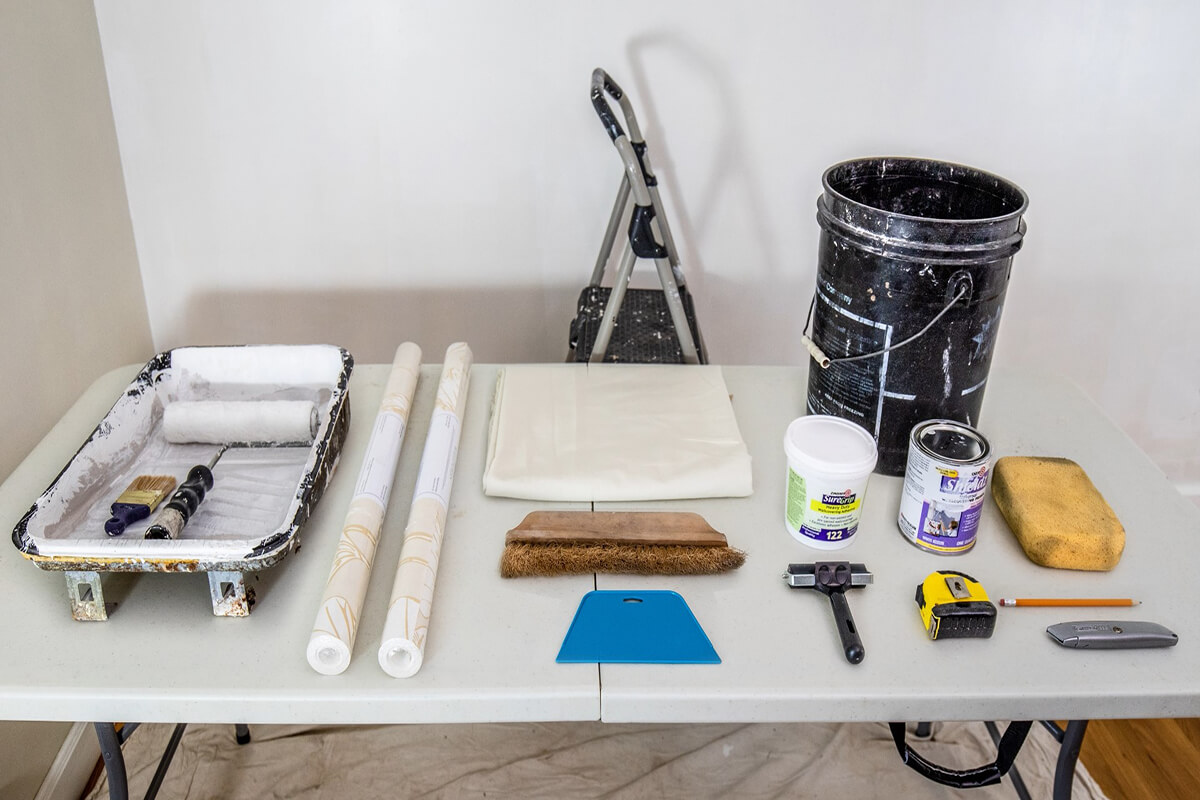
Materials
- Wallpaper
- Drop cloth
- Measuring tape
- Wallpaper paste
- Pencil
- Paint roller
- Wallpaper seam roller
- Flat edge
- Bucket with water
- Sponge
- Sharp edge
- Wallpaper primer
Related Products
Video
Instructions
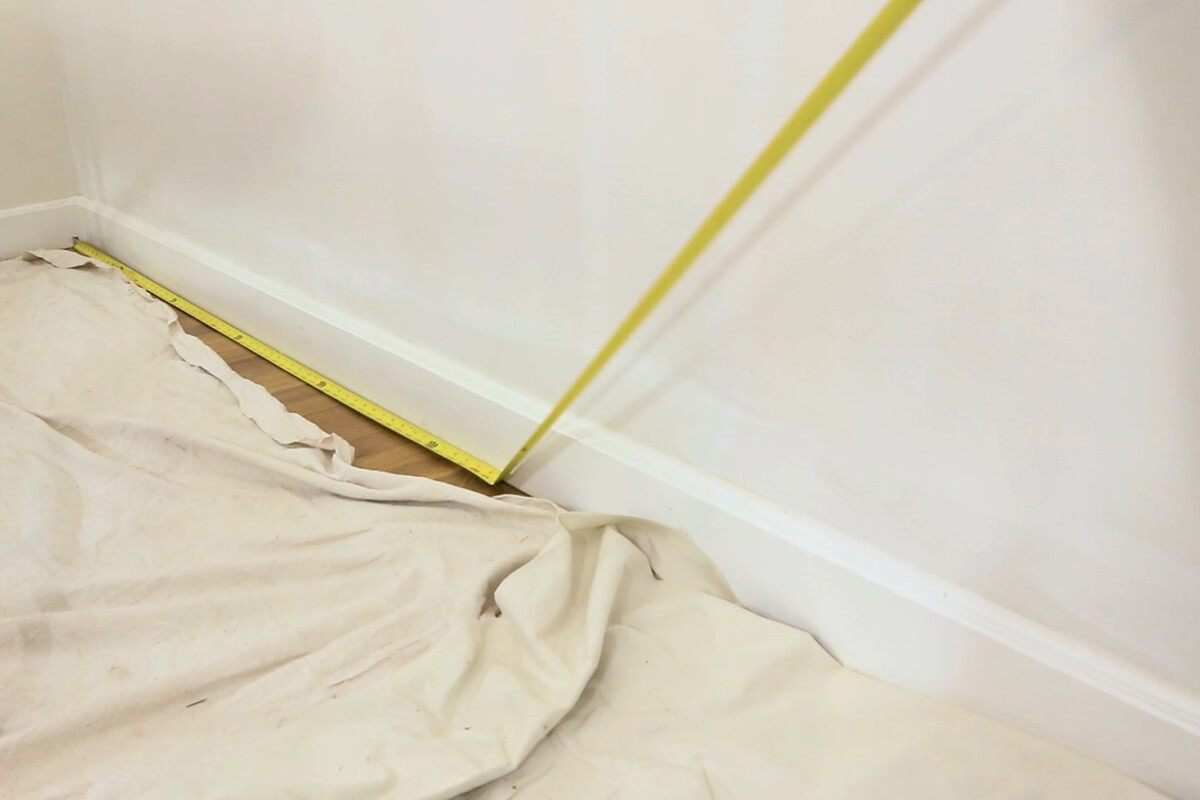
Step 1: Measuring out your walls
Start by measuring your walls, when you have all of the measurements, you will want to put them into our wallpaper calculator. Make sure that you choose the option to include an extra 10% of material for pattern matching and potential waste.
Step 2: Prep your space
Start by clearing out your space. Then lay down your drop cloth and clean your walls, the prep is very important to your process. You really want to make sure to remove dirt, dog hair, or anything that will create lumps under the paper.
Now is also the time to fill any holes or indentations left in the wall with spackle and take off any outlet or light switch covers as well.
You may also want to put a wallpaper primer on your walls. This will make it easier for the wallpaper to be removed in the future.
Step 3: Measure and plan
If you are putting paper up around the whole room, you will want to start in the corner behind the entrance to hide where the paper begins and ends.
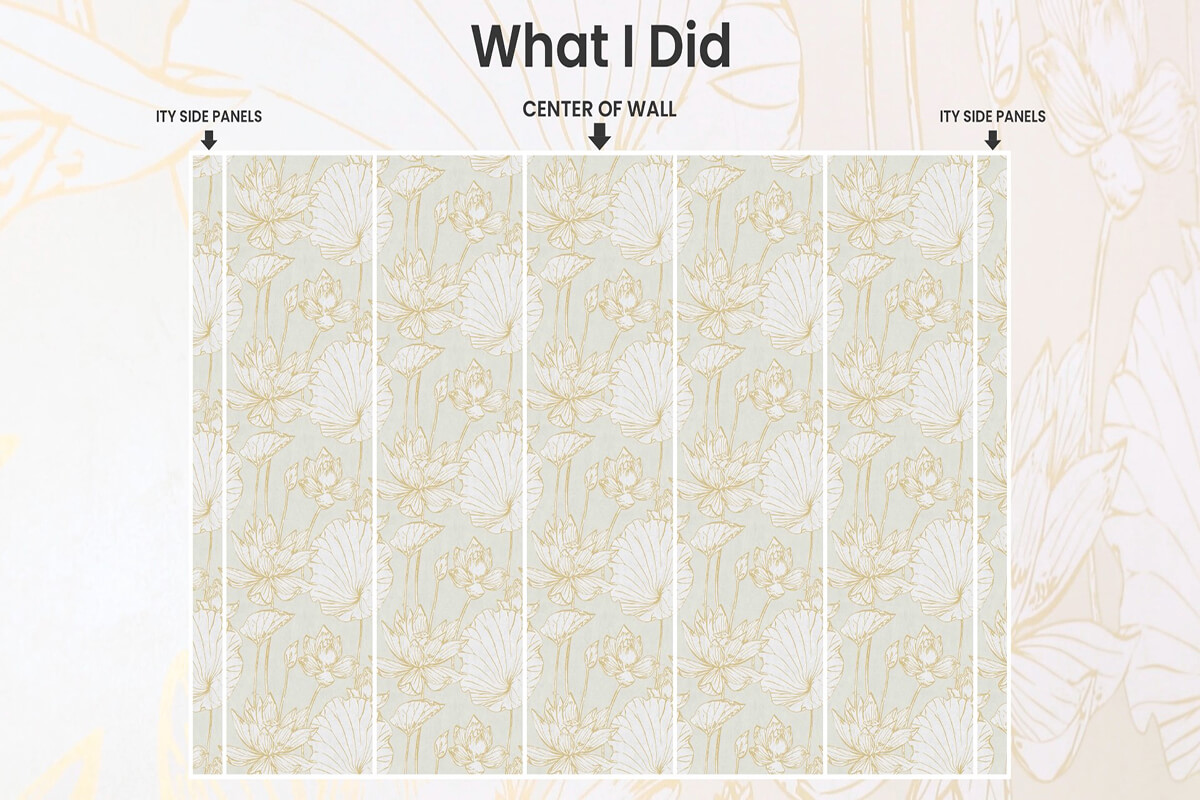
In my case, I am only putting up the wallpaper on an accent wall, and in other tutorials, they recommend starting from the center of your wall so that’s what I did but I once I got into it, I realized this was NOT the best choice for what I had going on. And Here’s why. My wall ended up needing 5 full panels across and then about 8 inches of a 6th BUT since I started from the direct center, I ended up with 5 full panels and 2 4” panels on either side which were a total pain to put up. So, learn from my mistake and plan out your full wall before hand and put that center panel off center if your pattern allows for it. You’ll save yourself quite a bit of time.
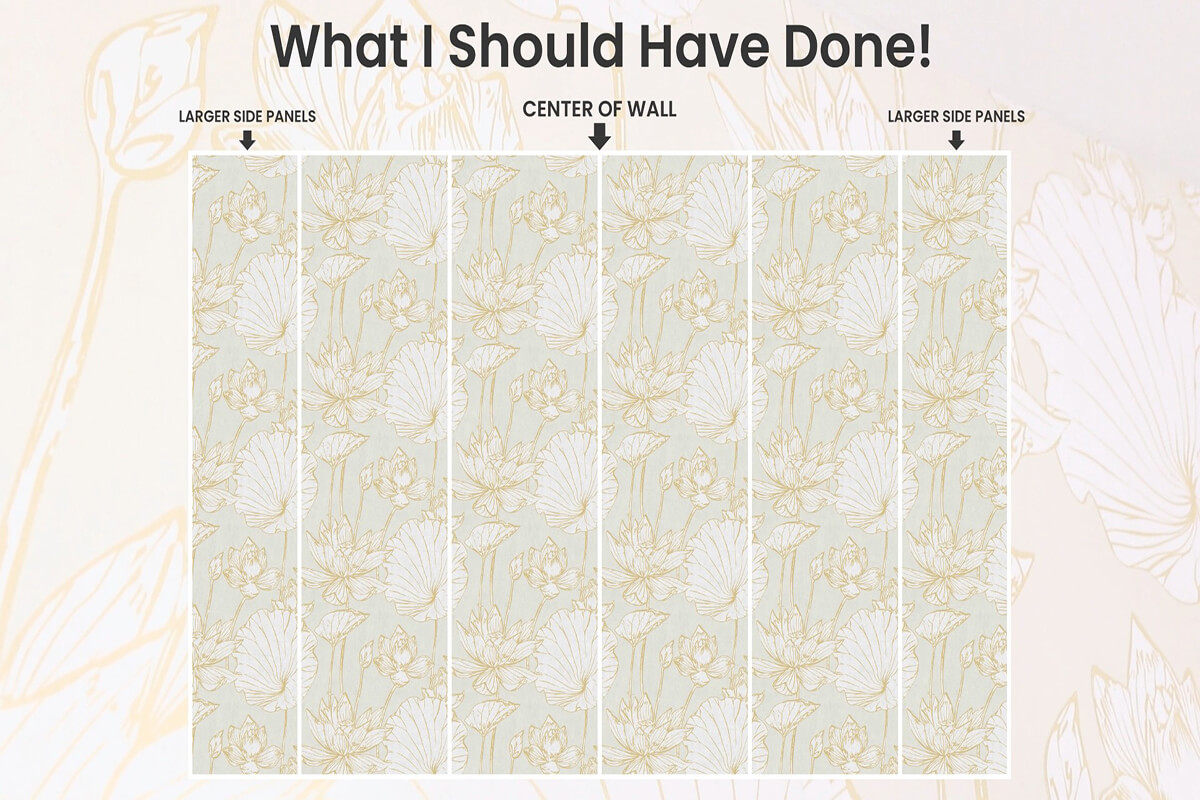
So with that in mind. Find where you want to place your first panel. Find where the center of that panel will be.
Then I will measure out half the width of my wallpaper from both sides of that mark. My paper is 27” wide, so I will need to measure out 13.5” from both sides of the center mark.
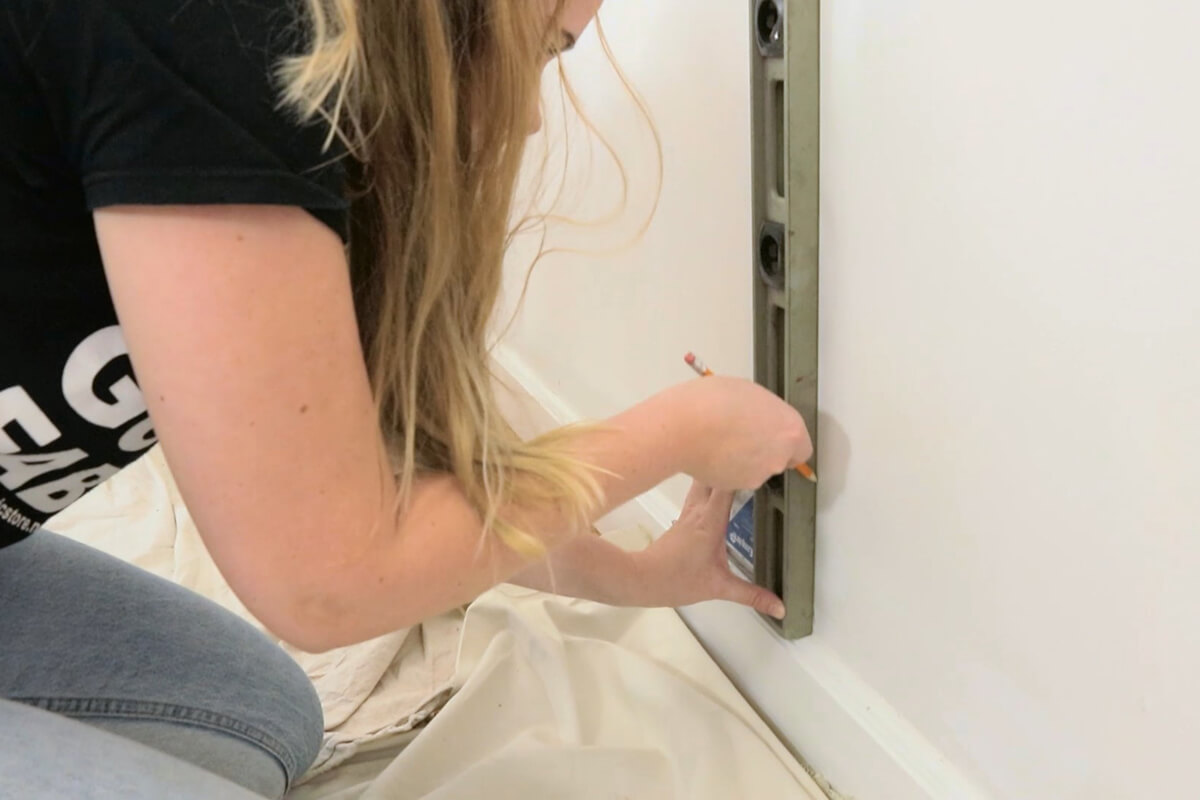
Now I am going to create light guide lines for myself to ensure that the paper is being put up perfectly straight, or at a 90-degree angle to the ground. You can use a level like I am here, or you can use a plumb line. I don’t know how to make a plumb line, and they seem pretty easy, but I didn’t want to make any holes anywhere and I didn’t have a fancy plumb line marker so this is what I have to work with.
Now unwrap your paper and dry fit it to your wall. Make sure that you like the pattern placement, and move it up or down if you would like certain parts of the design to be at a specific height.
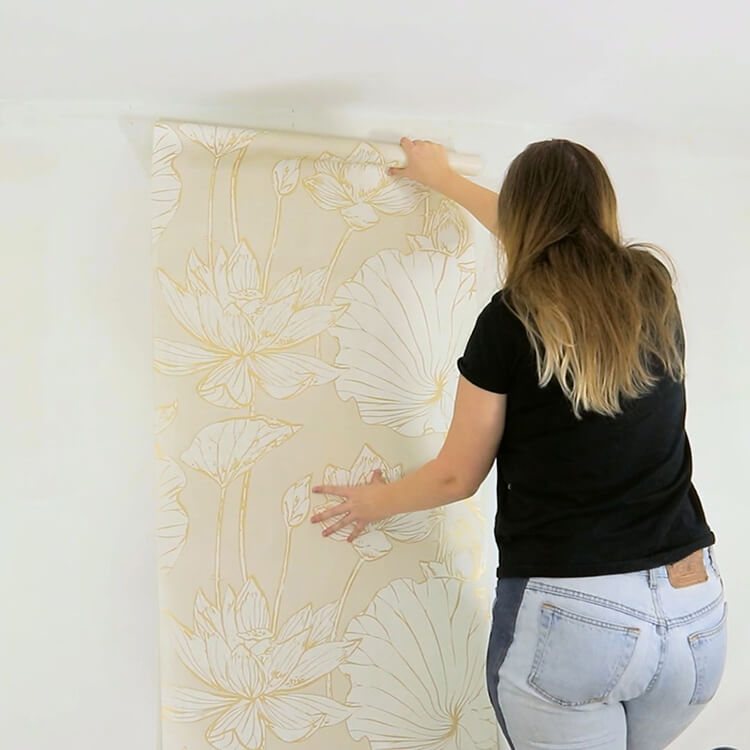
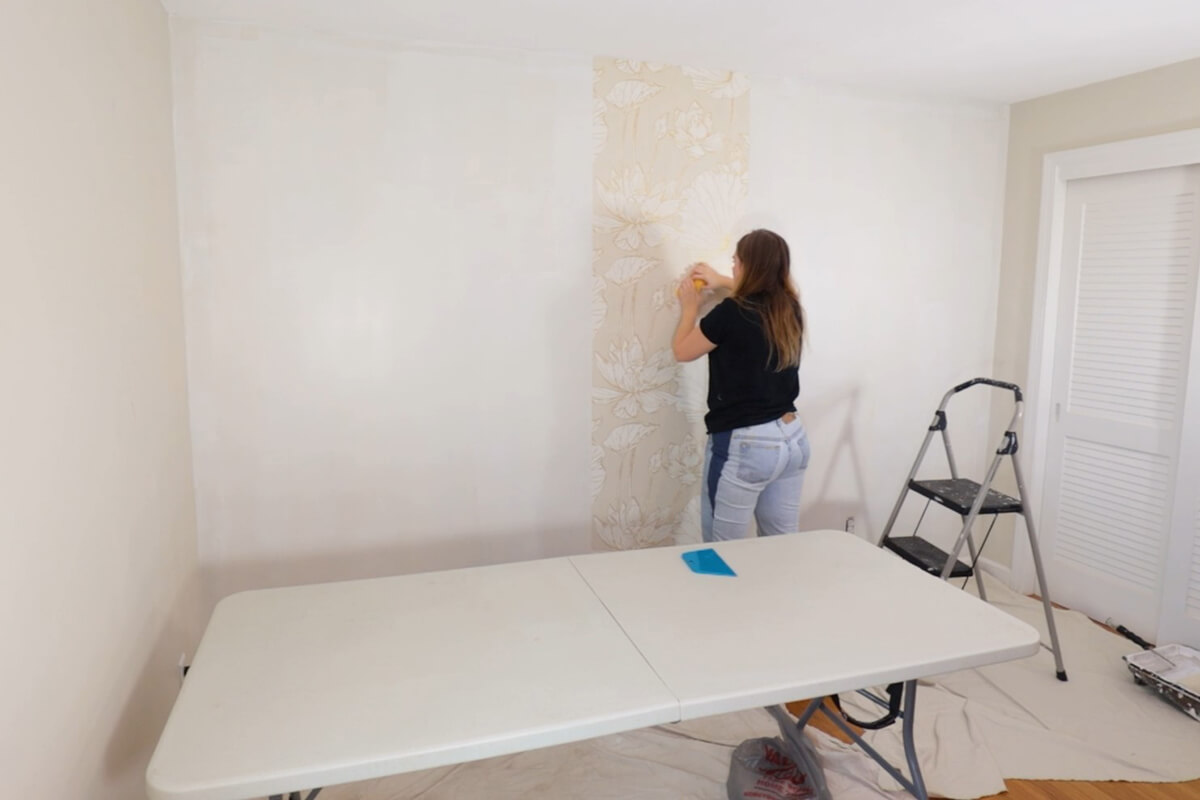
Step 4: Hang your paper
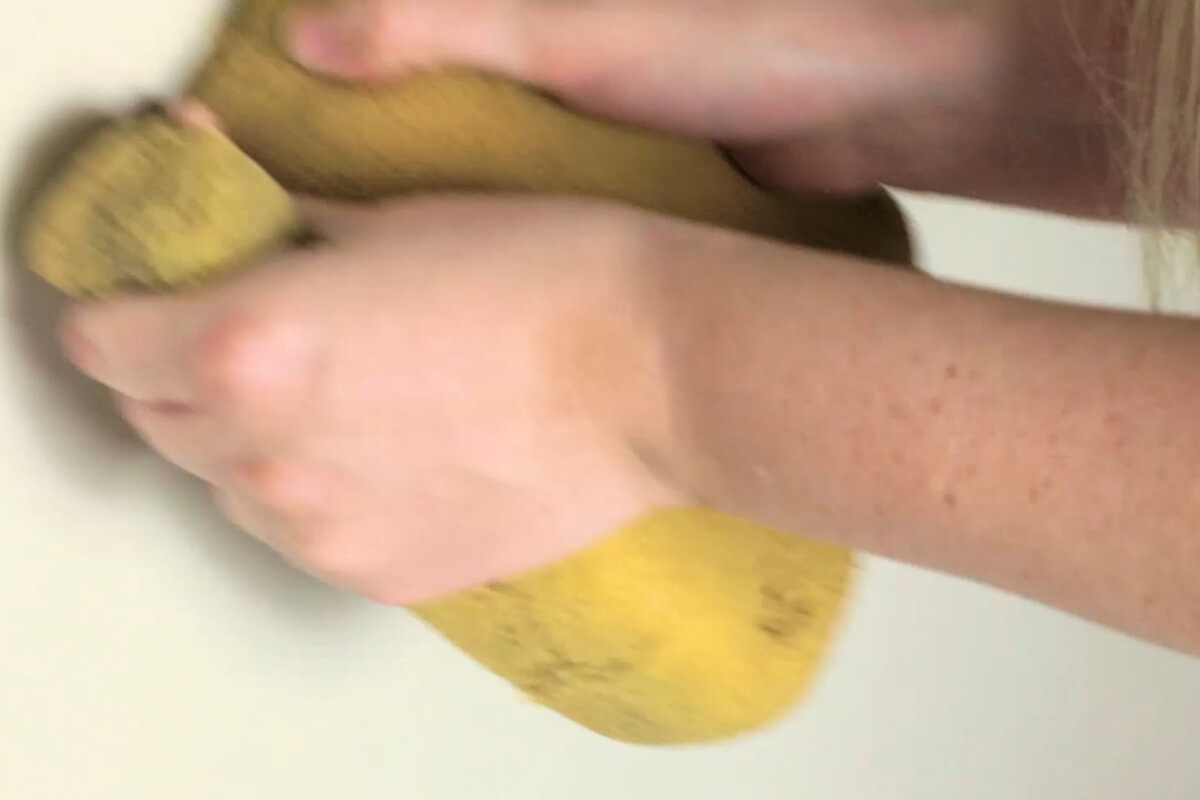
My wallpaper says that you should apply paste directly to the paper and not the wall, so I bought the appropriate paste, set up a table, and got to work.
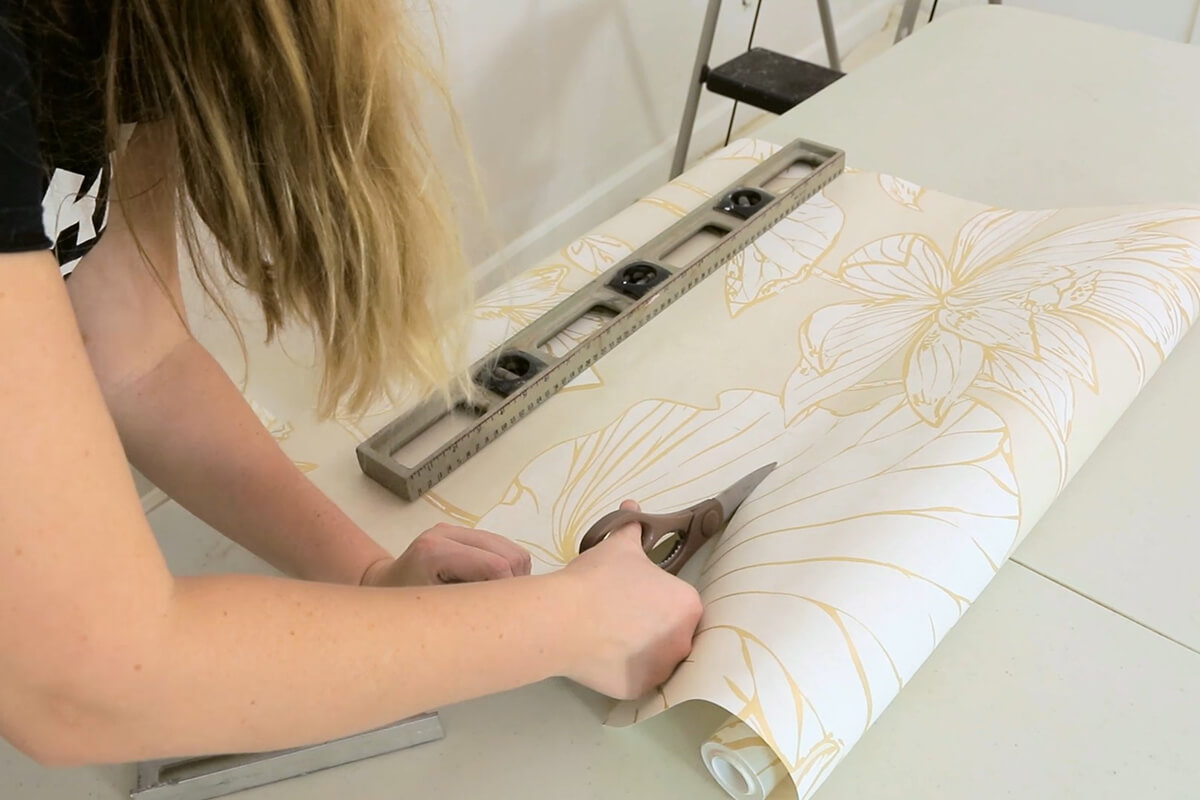
Cut the wallpaper so there is about 1-3 inches of extra paper on both the top and bottom of your panel.
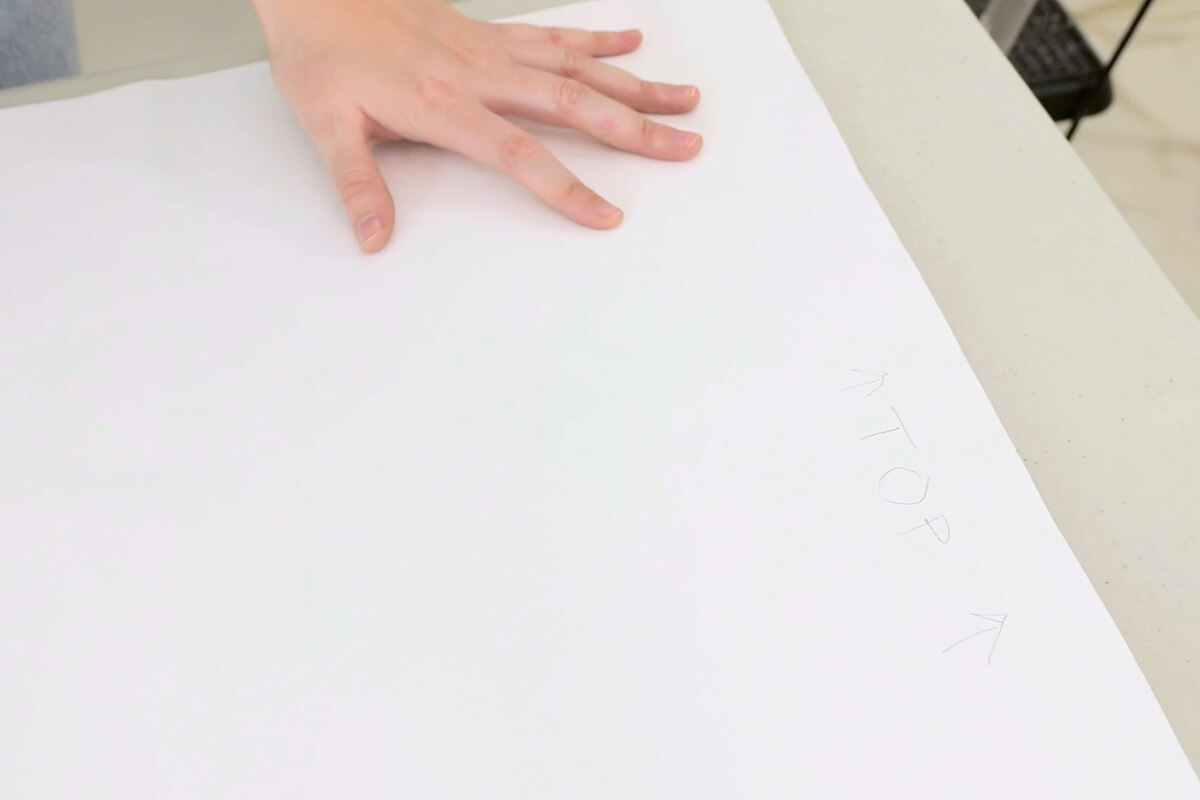
l like to mark the top with an arrow to remind me so I don’t have to figure out what end I am holding after the paper is all folded up.
Don’t forget to shake your paste!
Then, lay out the paper on your table and start to apply the paste. Start from the center of the paper and work your way out to the edge. Fold the paper over on itself to let the paste set up. Your paste will tell you how long you need to wait before putting the paper up on the wall.

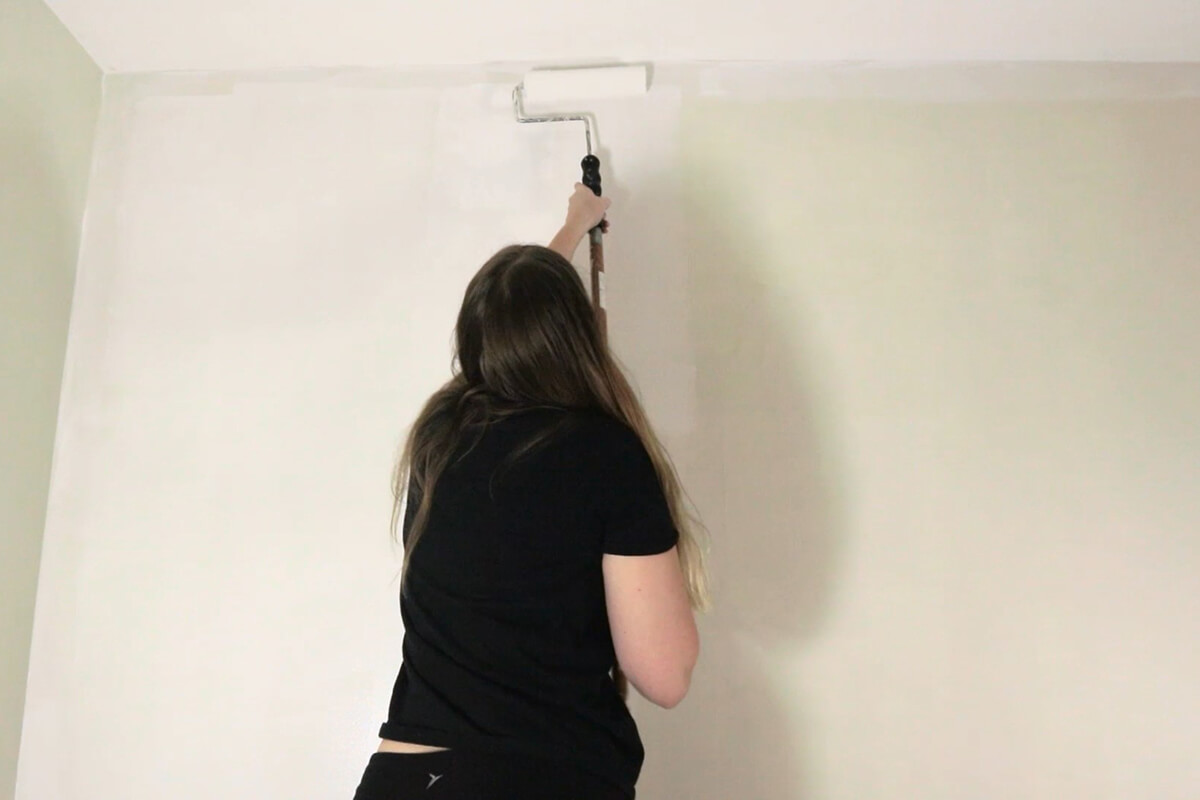
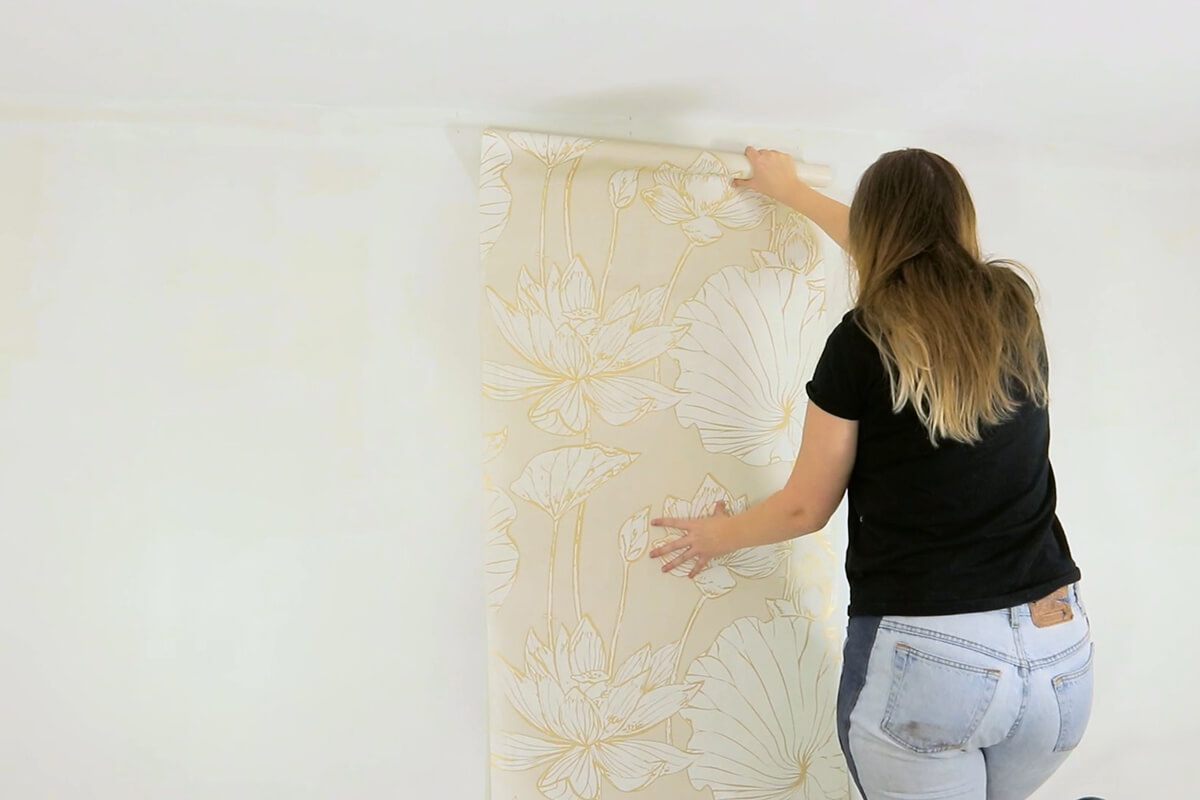
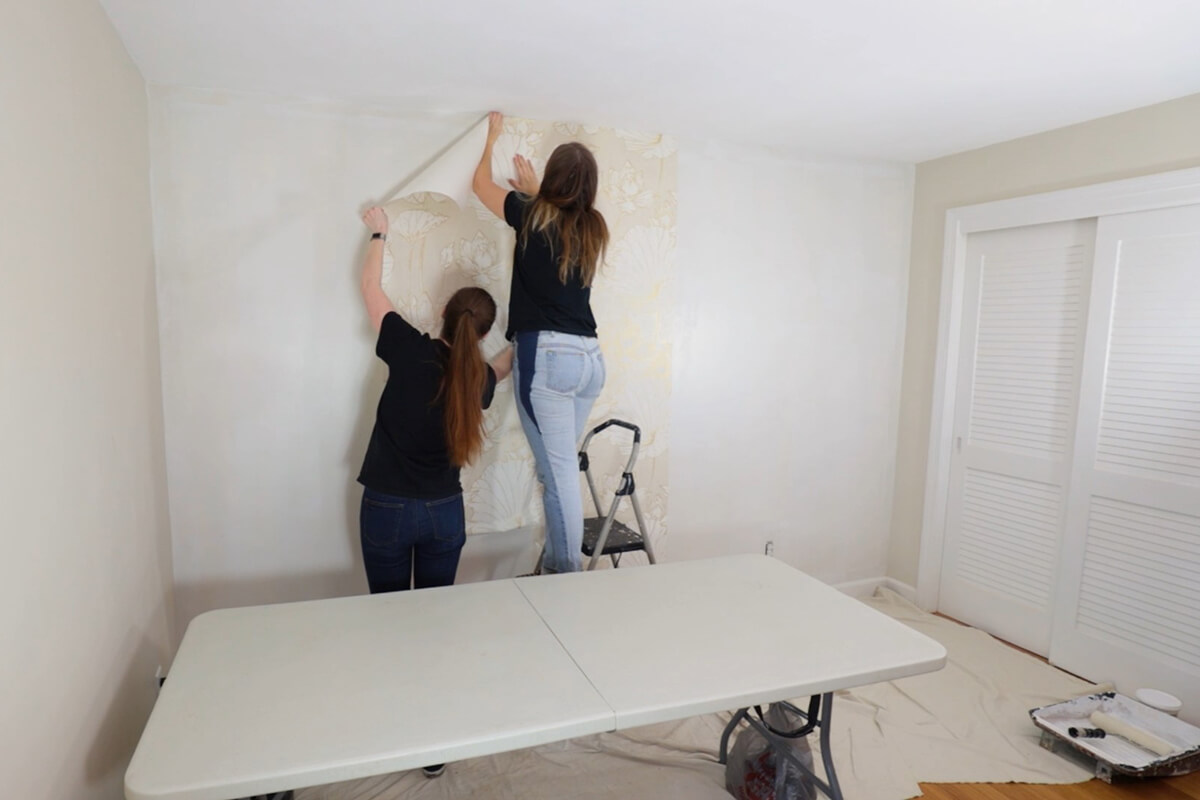
Once that time has passed use your guidelines to hang the panel up perfectly straight.
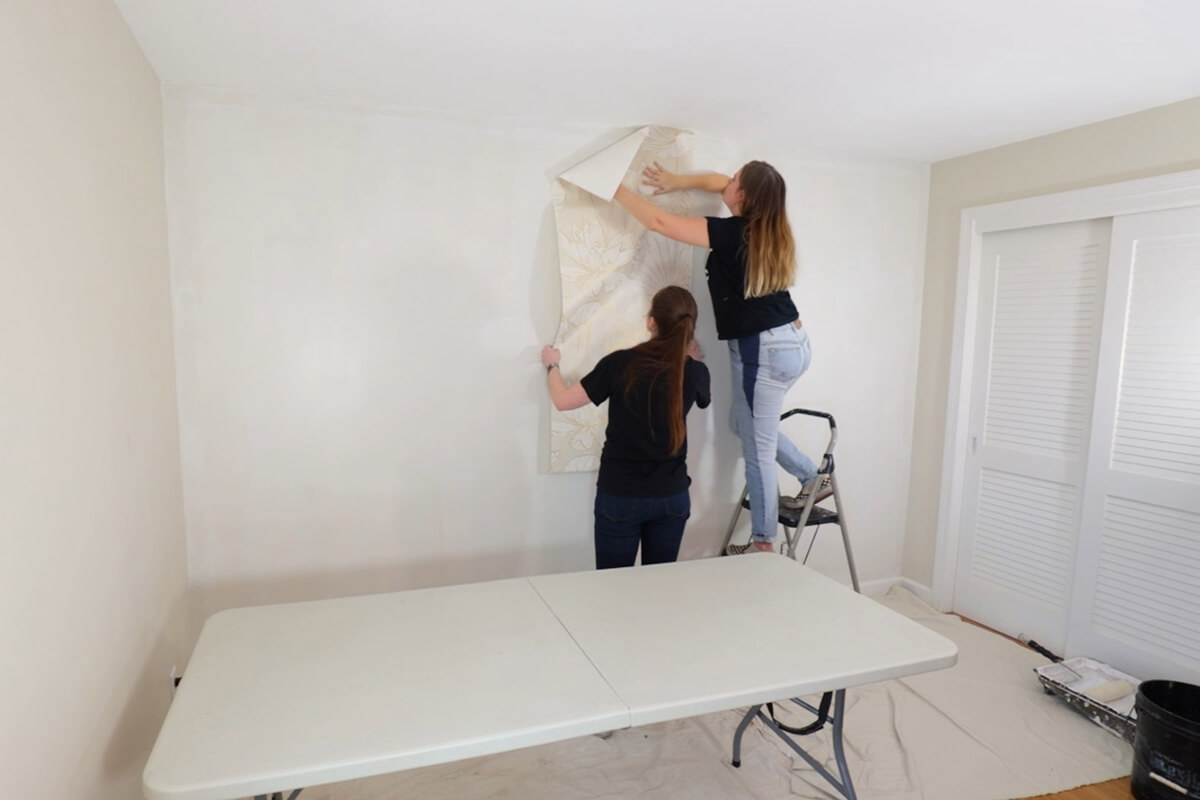
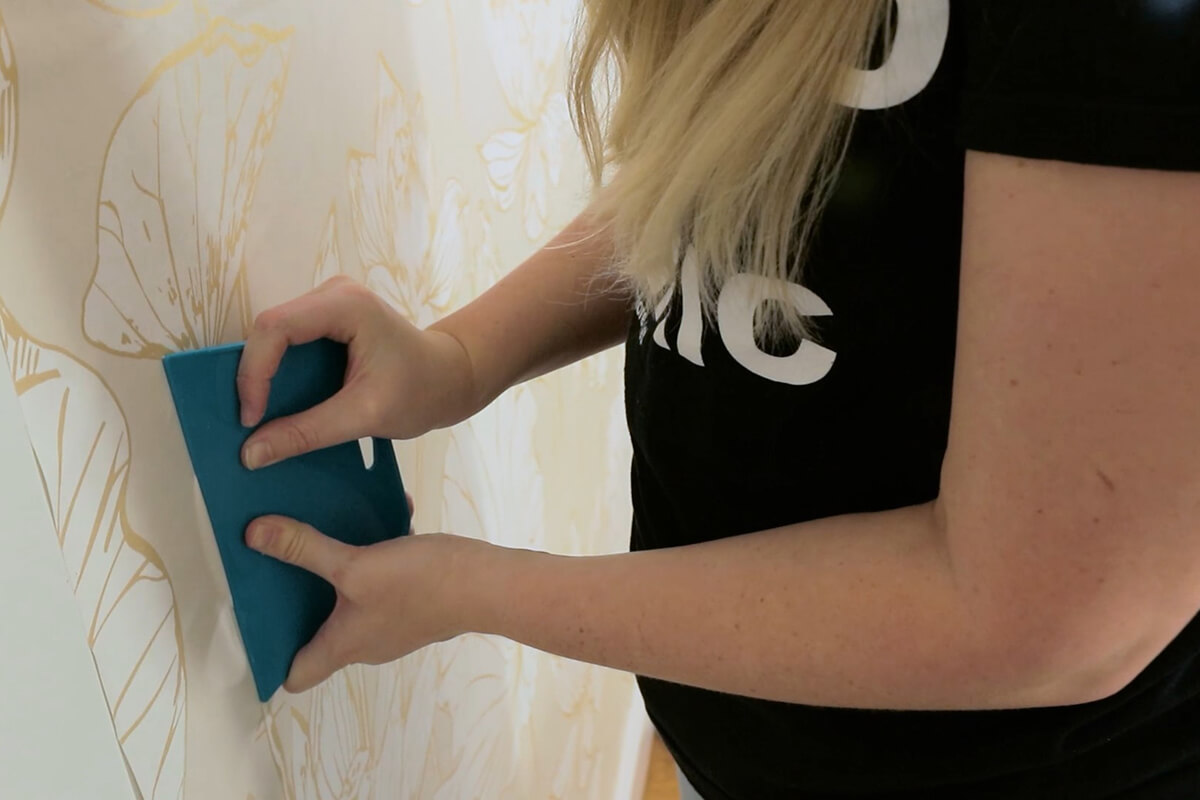
Use your flat edge or wallpaper brush to push any air bubbles out of the sides. This takes a while so be patient. When you run your hands over the panel you’ll feel and hear where there are air bubbles. It’s so important to get them out or else you can end up with peeling paper.
Also, I found when you have an edge that is light on paste, you can put a little paste on your finger and mush it under the edge. Then take your scraper tool and push inwards towards the center of your panel and then back out to the edge and that should usually fix your problem.
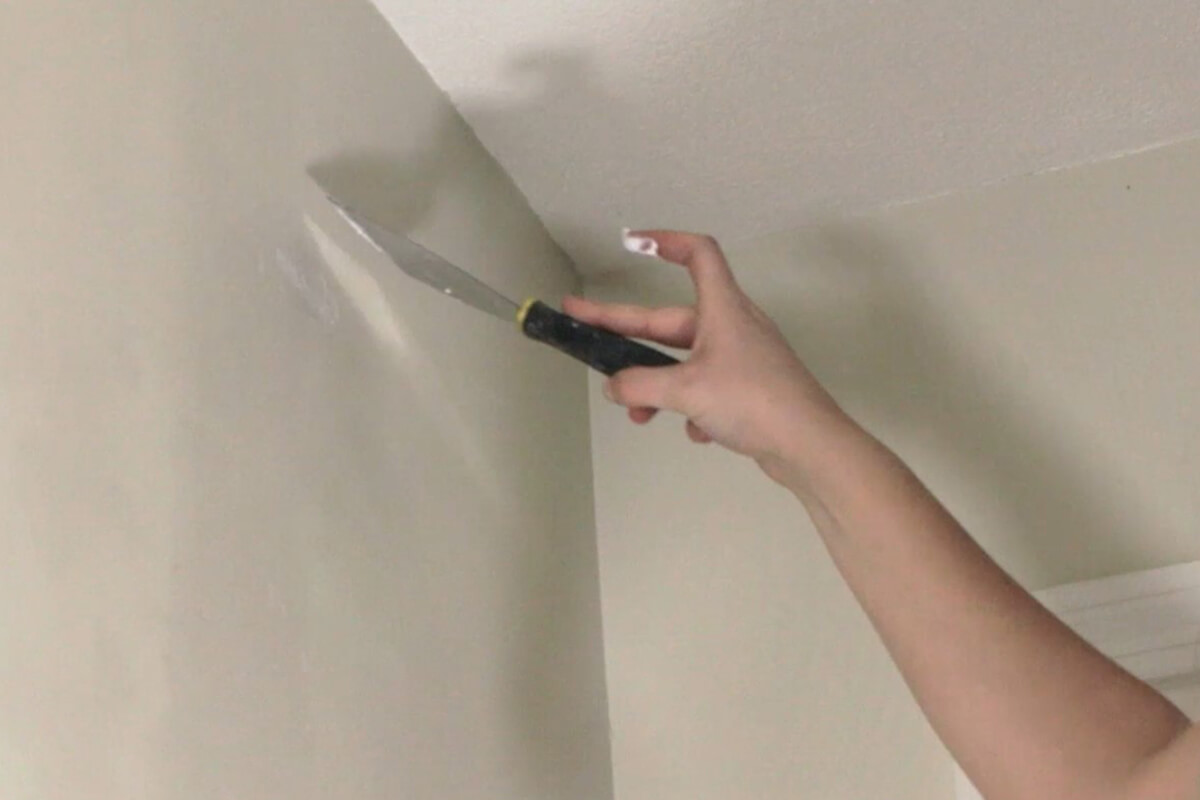
Then take your flat edge and your knife and cut away the extra material at the top and bottom. Try to keep your knife pushed into the wallpaper and only move your straight edge to get a nice clean cut straight across.
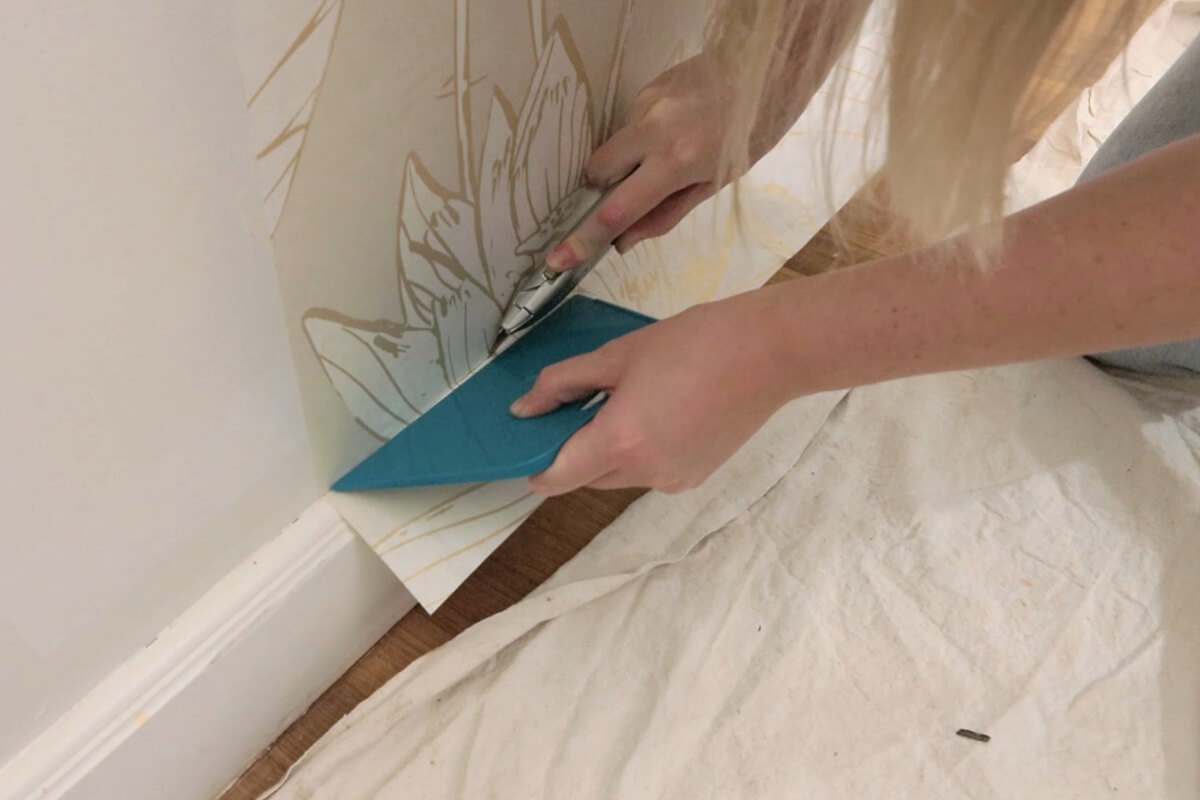
Wipe any excess paste off the wall with your slightly dampened sponge and make sure your table surface is clean before putting down another piece of paper.
Now move onto your next piece. Start again by dry fitting the piece and lining up the pattern to the piece that is already hung. One trick that I saw when doing my research was to check your other rolls when doing this dry fitting, because sometimes the pattern happens to match better and then you end up with less waste.
Find where the paper matches and cut that panel to be a few inches longer than you will need so you can get that nice fitted look.
The next piece should be hung on the opposite side of your first. Working out, keep going back and forth.
Paste the paper, making sure to always work from the center out and fold it over on itself.
Hang your paper up on the wall, brush out any air bubbles really well, cut away the excess material, and then wipe any leftover paste away.
Its not totally necessary, but I ended up using a seam roller on the edges to really make sure that those seems were not visible.
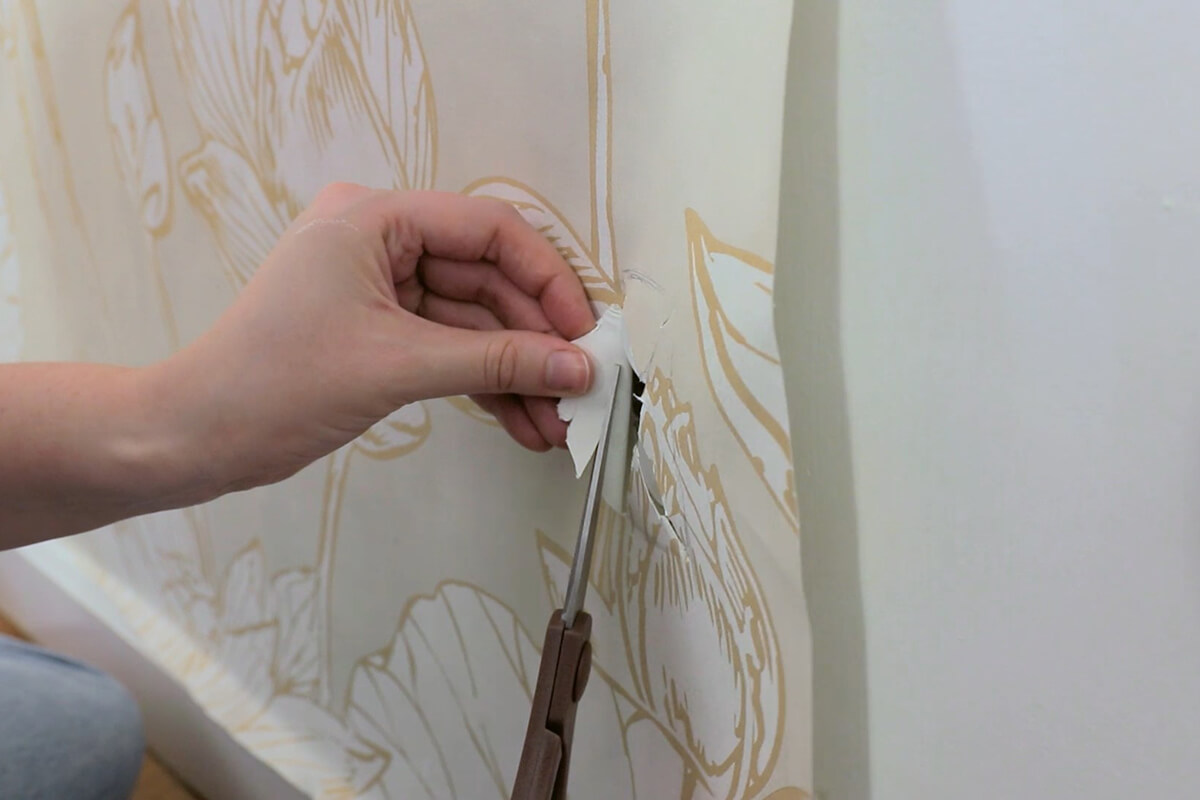
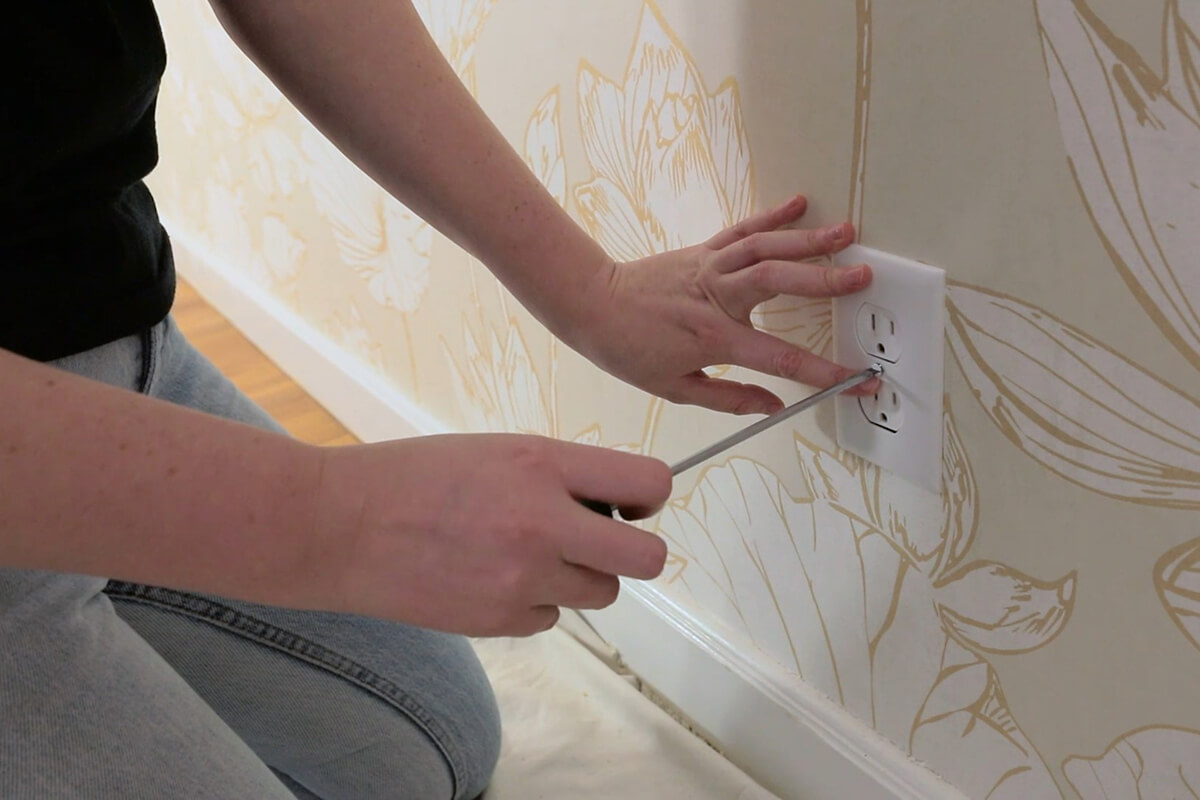
So, you may come across an outlet when working on your putting up your wallpaper. When this happens, make note of the location, and smooth down the rest of the panel. When you are done, you are going to want to mark out exactly where the outlet is at with a pencil.
Once you have the area marked out and are going to want to take your box cutters and try to cut out an X shape over your outlet. Obviously be super careful when you’re doing this because outlets can be dangerous when you are sticking metal objects near them. I ended up using scissors to really make my lines sharp, and I wanted to cut away a little more paper. Don’t cut it all down though, because they do recommend making the paper wrap into the outlet socket when possible. So very carefully wrap around your outlet and you should be able to put your outlet back on in about a half hour or when the glue has a little time to dry.
This process is really repetitive and it is going to take you awhile. It took me between an hour to an hour and a half per panel.
When you finally get to the corners, you are going to want to hang your wallpaper just as before. As I said in the beginning, I had those two tiny panels to tackle so I cut my panel to length to start and then I measured the size of the area I needed to cover. Each side was about 4” wide so I cut the width of each of my panels to a little over 5” because its always easy to cut away paper, but its harder to add it back in. Then I pasted the paper onto the wall like normal, and I cut the excess paper, this time being really careful with that straight edge to get the cleanest straightest cut possible.
Step 5: Clean
It’s finally time to give your walls a final wipe down, put your outlet covers back on and enjoy your new walls.
Find the Perfect Wallpaper for You!
-
{{#each productSuggestedQueries.results}}
- {{query}} {{/each}}
-
{{#each categories.results}}
- {{html title}} {{/each}}
{{html attributes.description}}
{{/if}}-
{{#each queries.results}}
- {{query}} {{/each}}