How to Make a Circle Skirt with Lace Trim
- By Mikayla
Circle skirts are so versatile and can be made from a range of different fabrics. The best fabric to choose for a circle skirt depends on your desired look and feel. If you’re looking for something light and airy, a lightweight cotton or rayon blend would work well. For a more structured look, something like a twill or denim would be a great choice; or go luxurious with silk or satin. Whichever fabric you choose, make sure to pre-wash if possible to avoid any shrinkage after the skirt is sewn.
Let’s get started and good luck!
Want to get the printable PDF instructions?
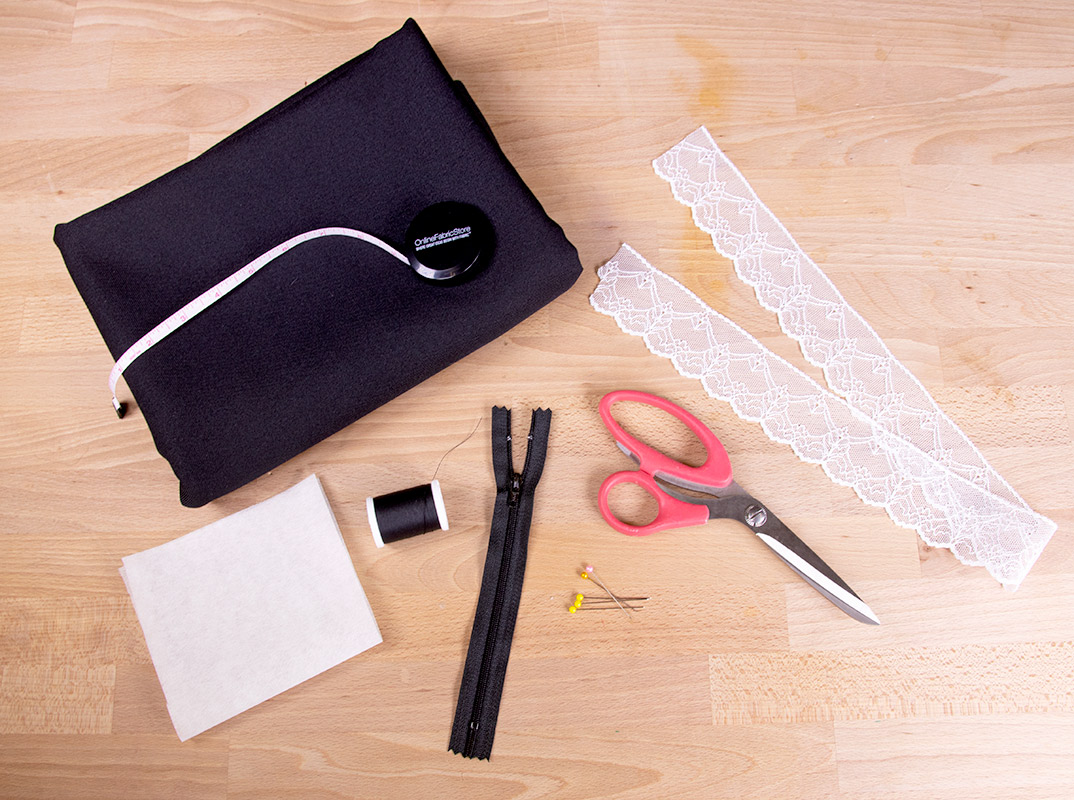
Materials
Related Products


Video
<iframe title="How to Make a Circle Skirt with Lace Trim" width="500" height="281" src="https://www.youtube.com/embed/6Oy_Ivap1EE?feature=oembed" frameborder="0" allow="accelerometer; autoplay; clipboard-write; encrypted-media; gyroscope; picture-in-picture; web-share" allowfullscreen></iframe>Instructions
Step 1: Measurements
Let’s start with measurements. In order to find the yardage you need for your skirt you’ll need to measure your waist and determine your desired skirt length and fullness. In today’s tutorial, we will be making a full 360° circle skirt.
WAIST & RADIUS
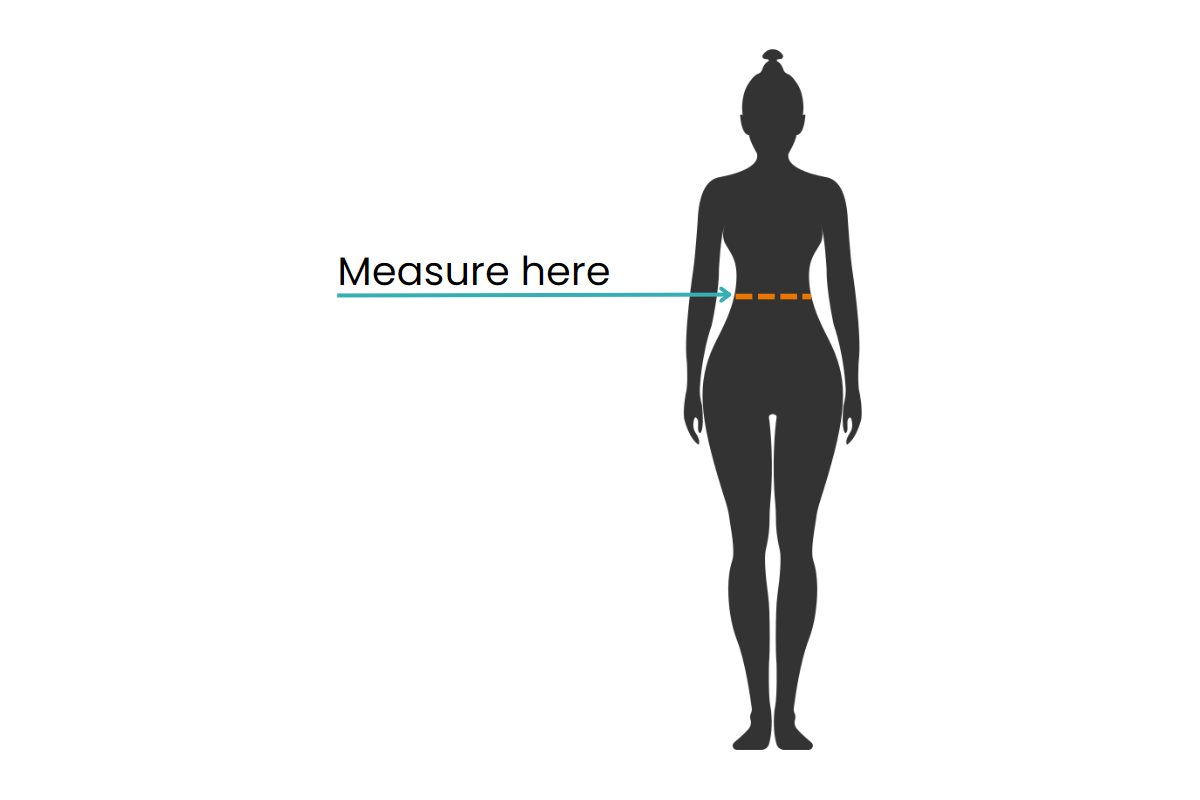
To get your waist measurement, wrap a tape measure around your natural waistline above your hip.
To calculate the waist radius for your skirt pattern, divide your waist measurement by 2 x pi
note: 2 x pi = 6.28
Our model has a 25″ waist so we are dividing 25 by 6.28 which comes out to 3.98. We’ll round up to an even 4 for our waist radius measurement.
Our formula looks like this:
25 / (2 x pi) = 3.98
LENGTH
To determine the length of your skirt, measure from your waistline down to where you’d like your skirt to fall.
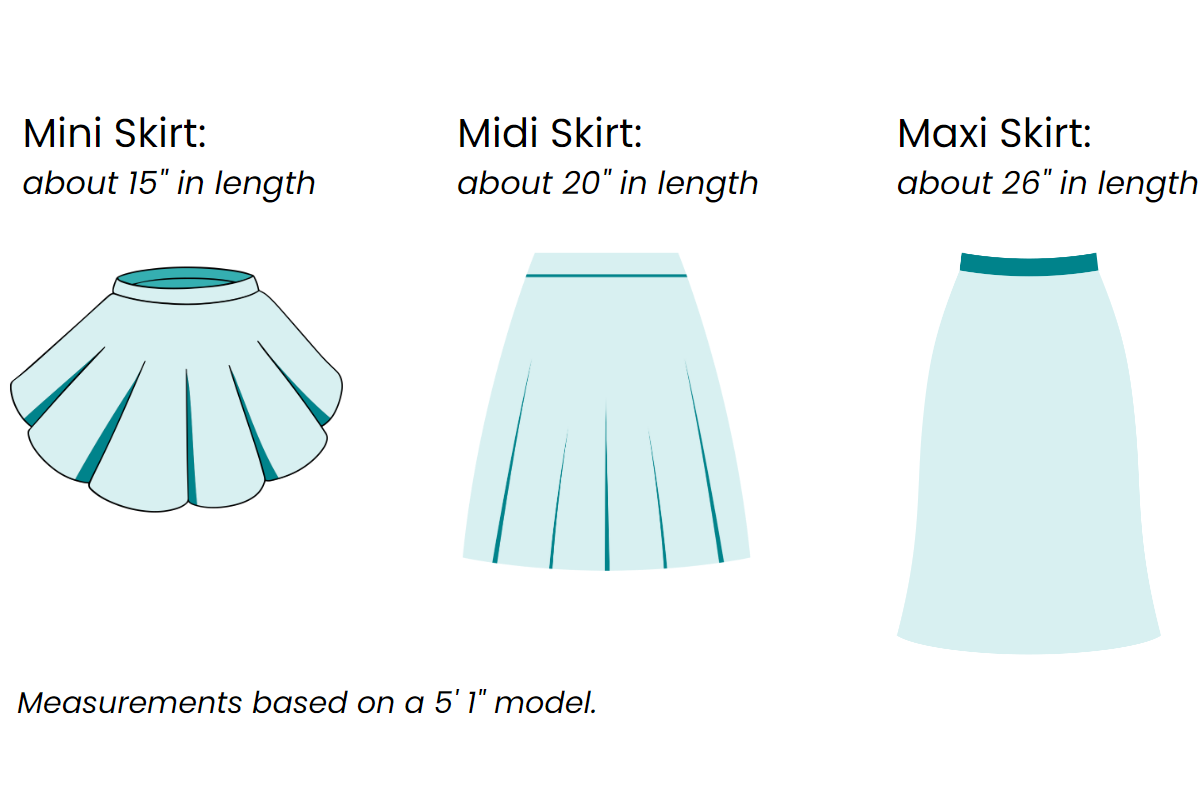
Mini skirts fall above the knee while midi skirts fall below the knee. Maxi skirts are ankle length or longer.
For any skirt longer then midi make sure to get a fabric that has a width greater than 60″. Ours will be a midi skirt at a 20″ length.
Step 2: Create Pattern
Once your measurements are determined, create a pattern to guide you as you cut your fabric to size using a sheet of dotted pattern paper.
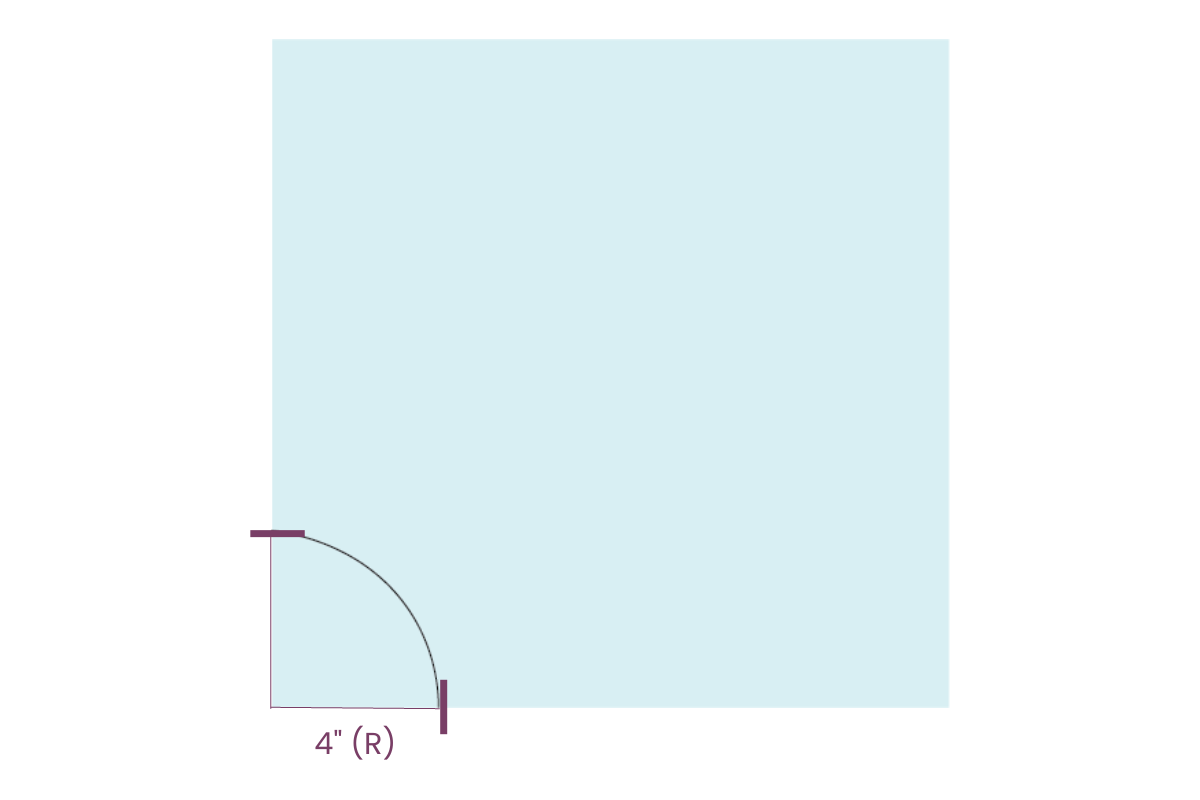
Starting at the bottom right corner, use your ruler to mark your waist radius measurements on both sides. We marked ours at 4″. Connect the two markings to form the shape of a quarter circle.
Starting from your waist radius markings, measure and mark your desired skirt length down the sides of the pattern paper. Include your seam allowance in this measurement as well. Accounting for a 5/8″ hem, we marked our length lines 20 5/8″ from our waist marks.
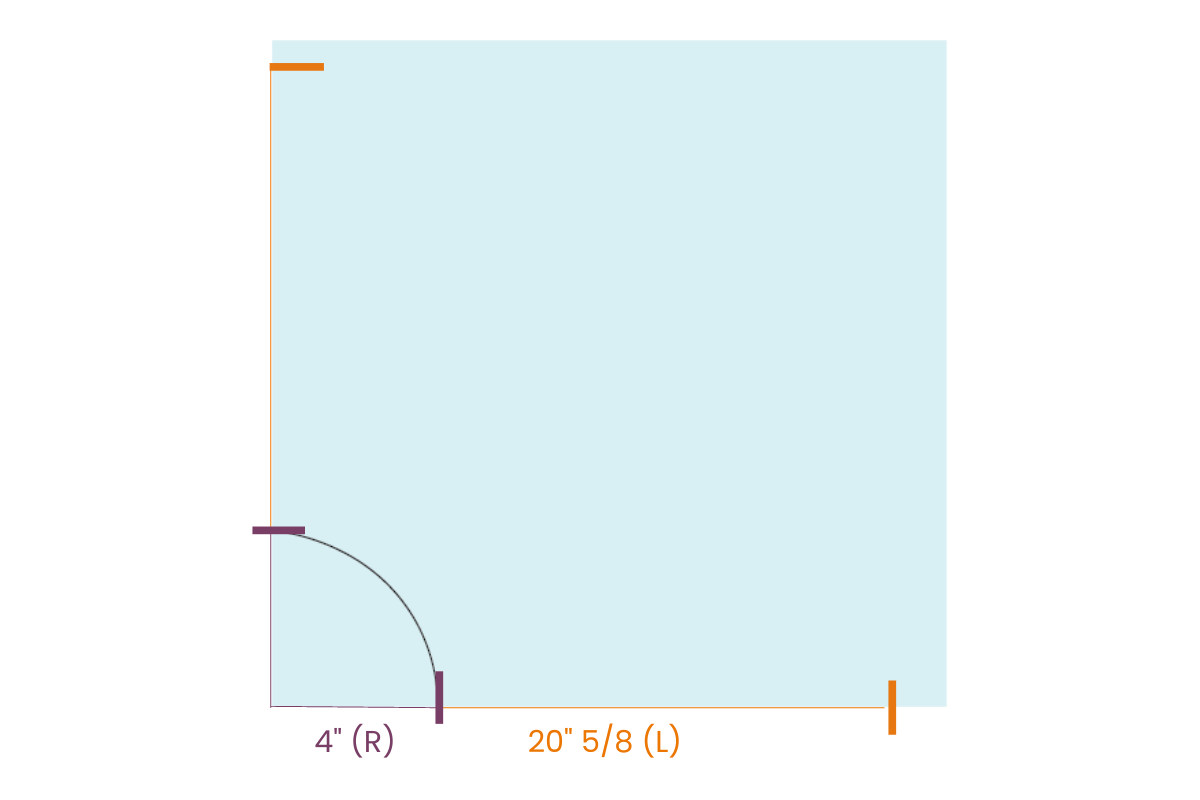
Outline your length lines to create a larger quarter circle as you did for your waist radius.
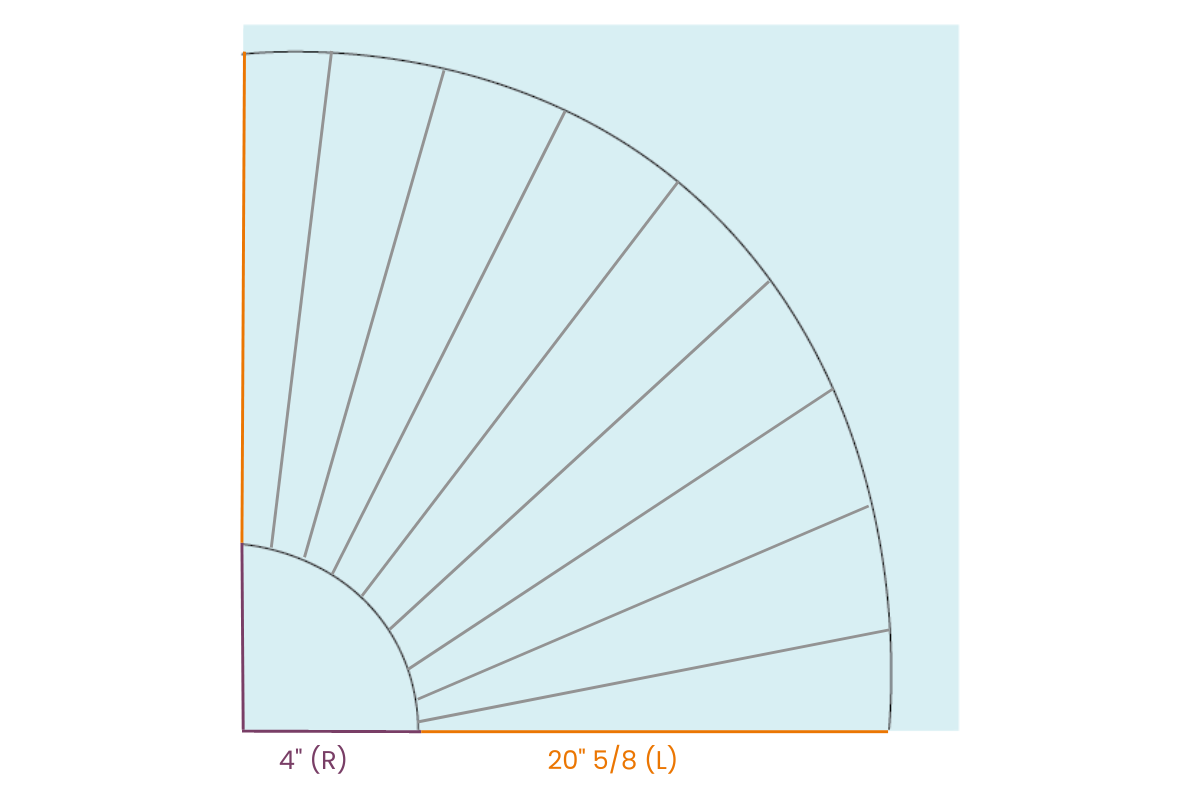
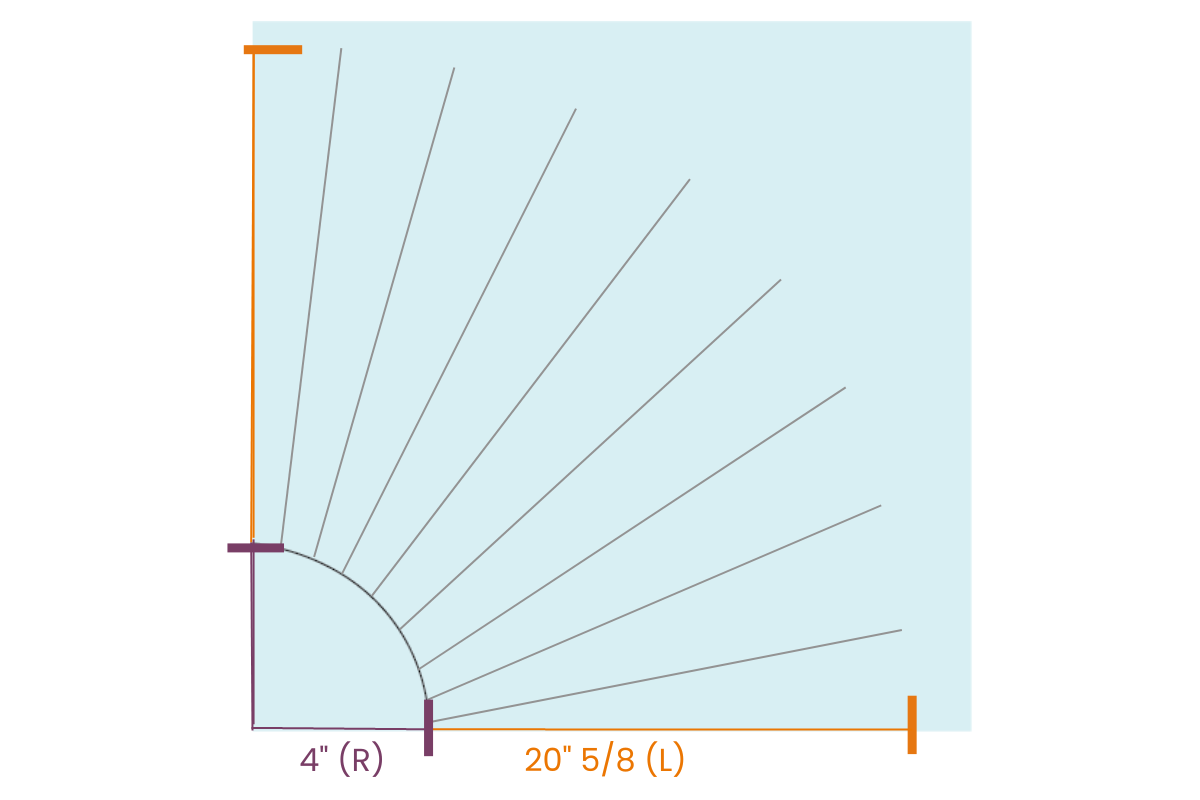
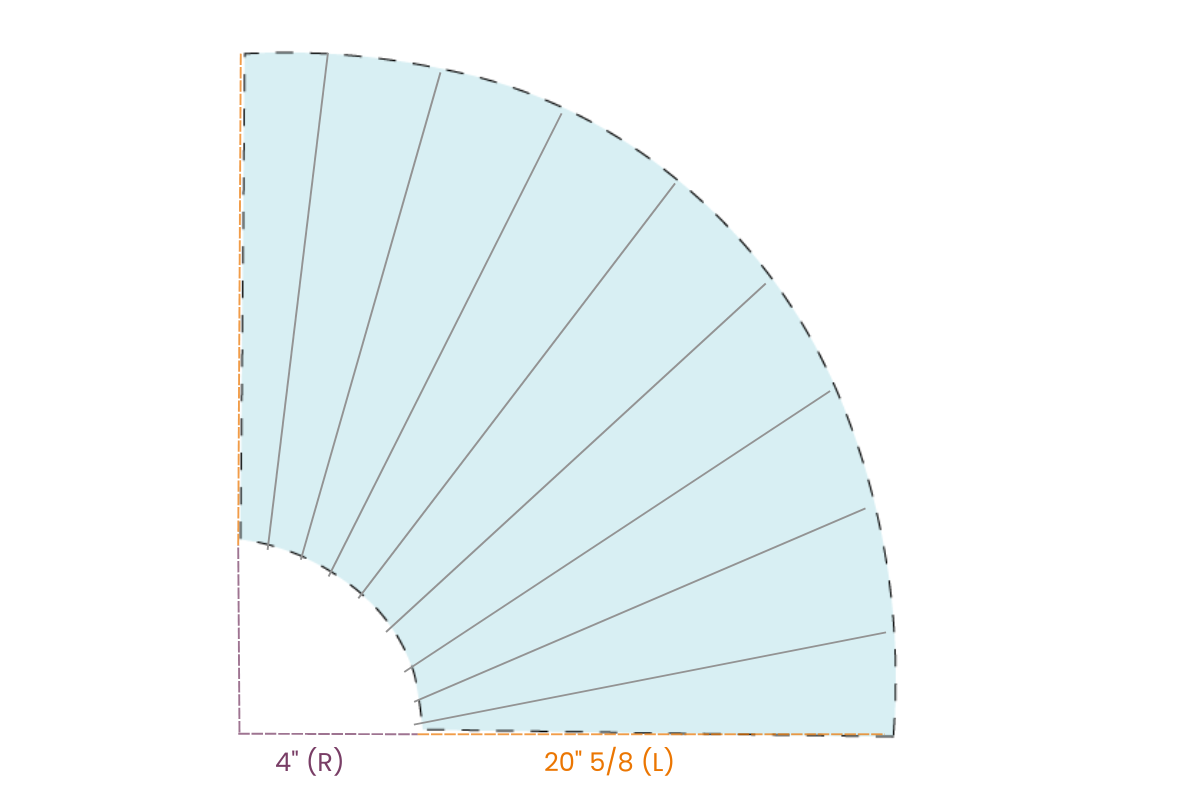
Now it’s time to cut the pattern out. Starting with your waist radius circle, cut around the quarter circle shape your markings made. Do the same around your length lines.
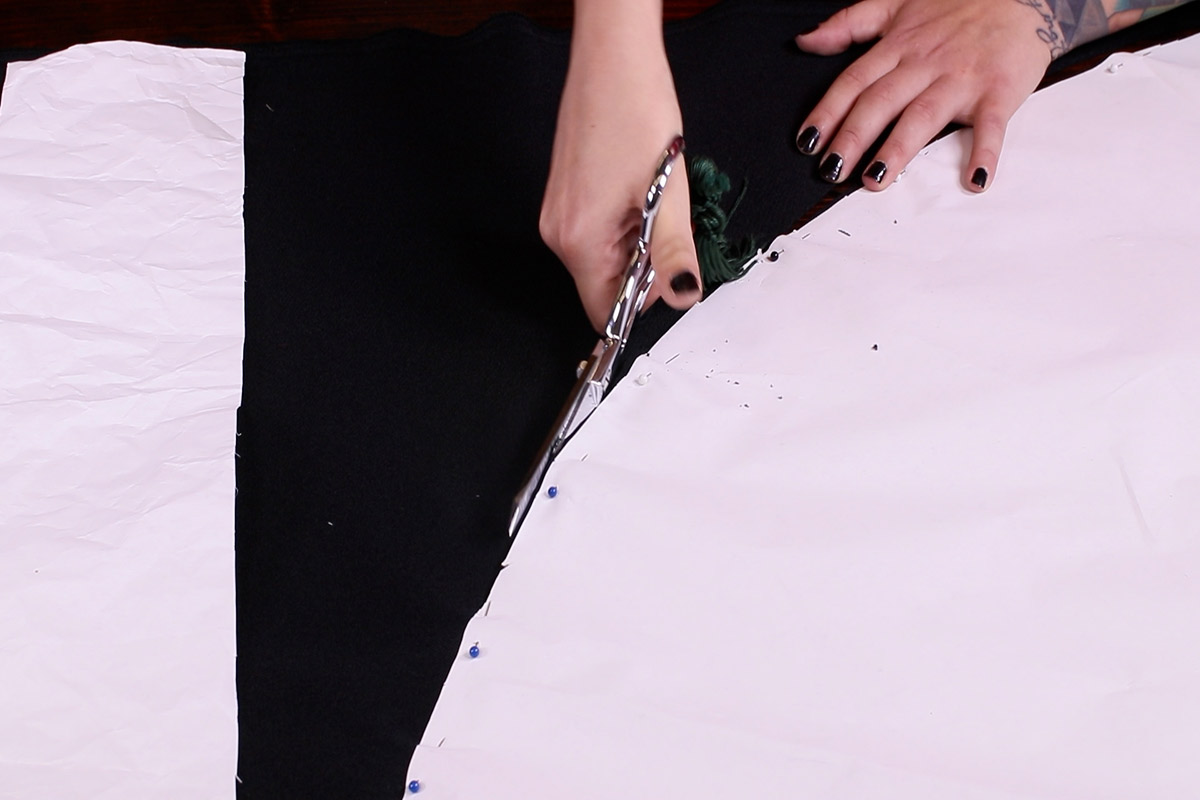
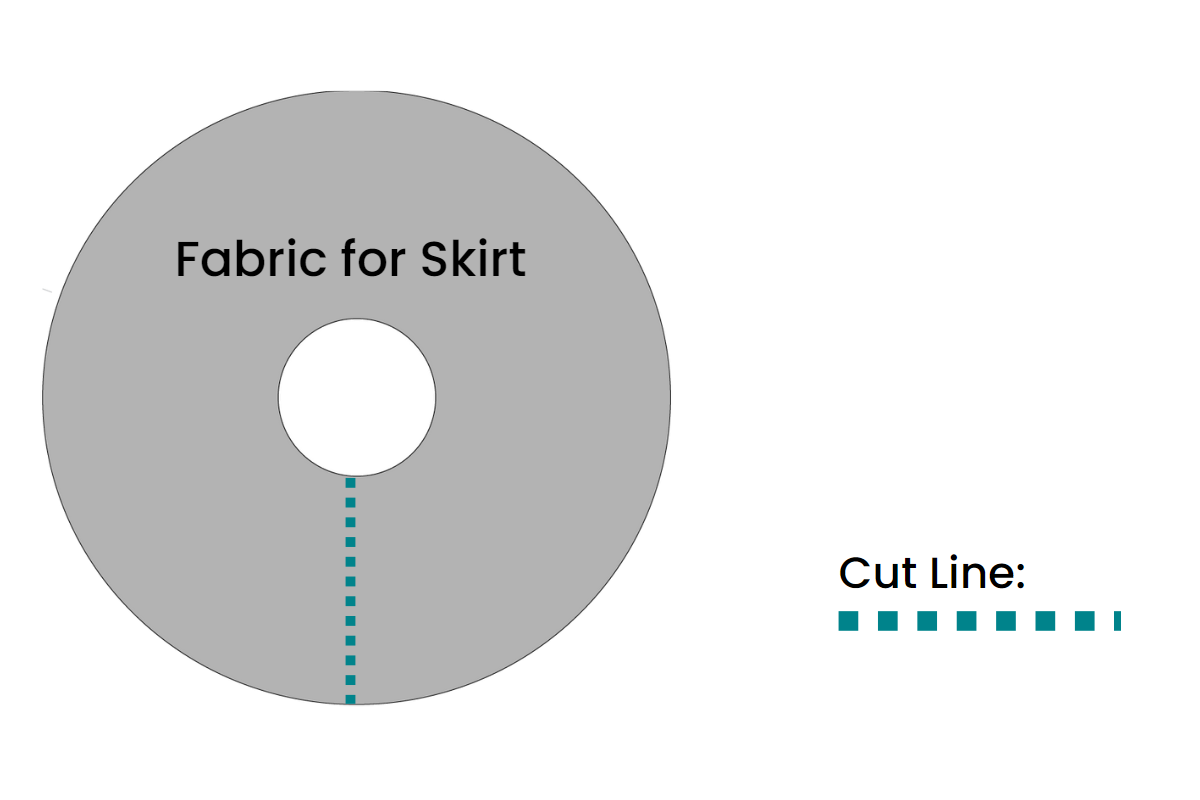
Step 3: Cut the Fabric
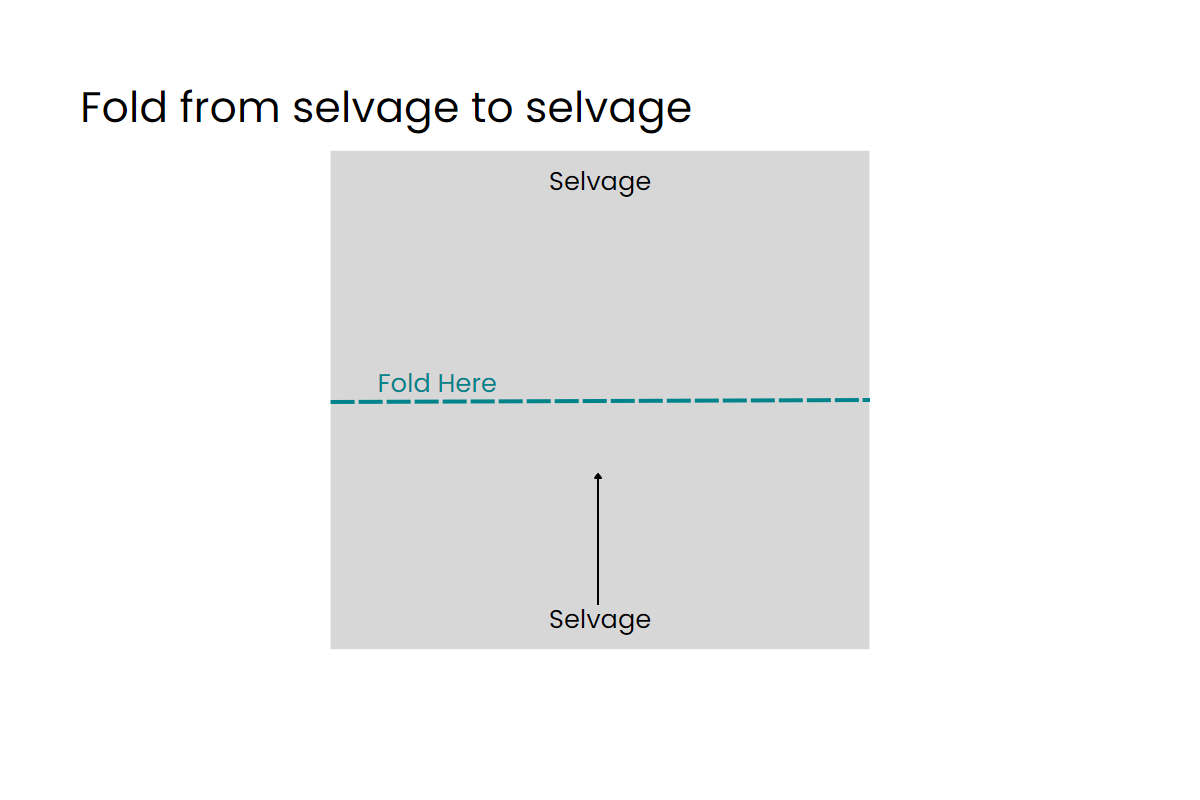
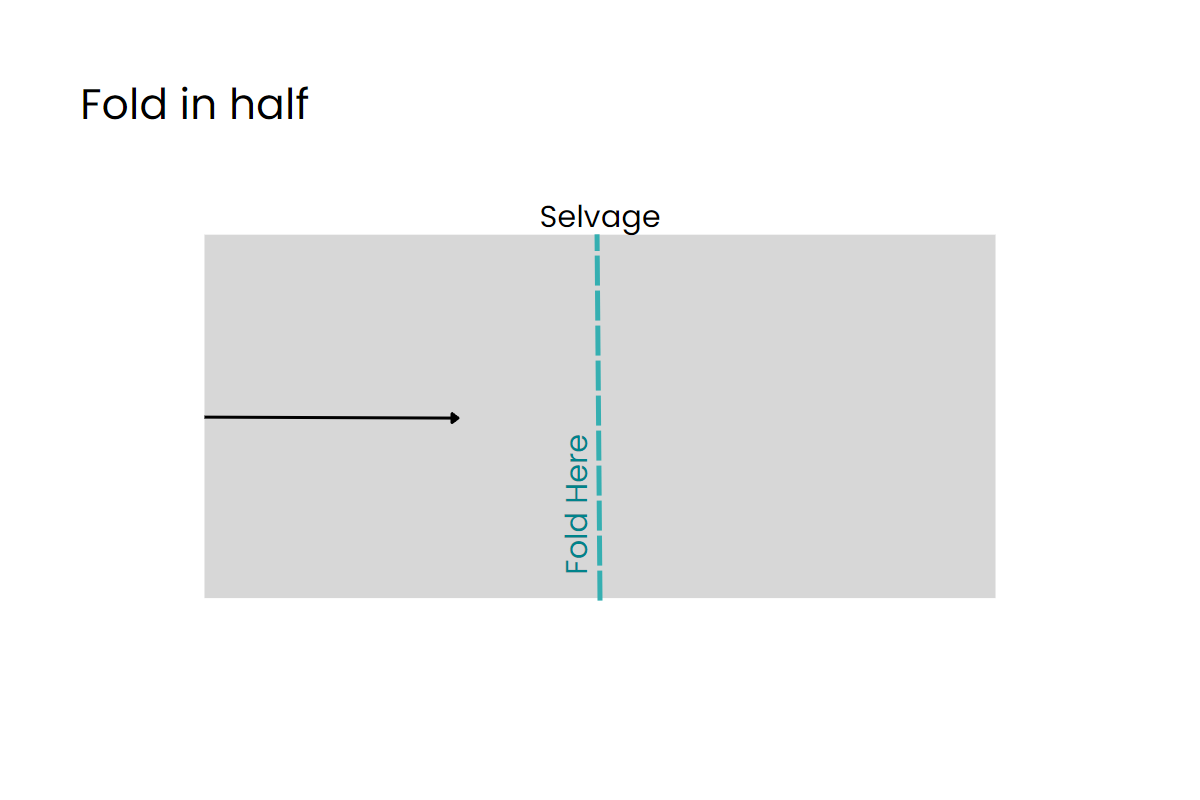
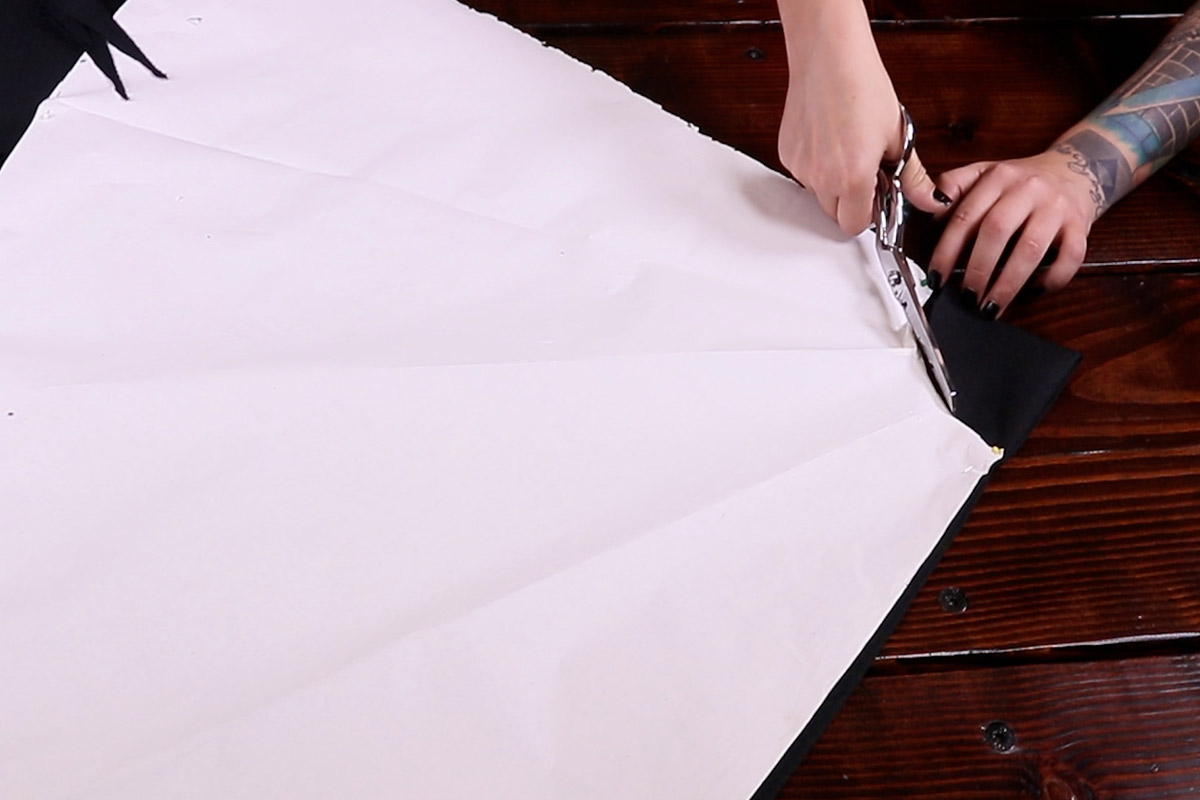
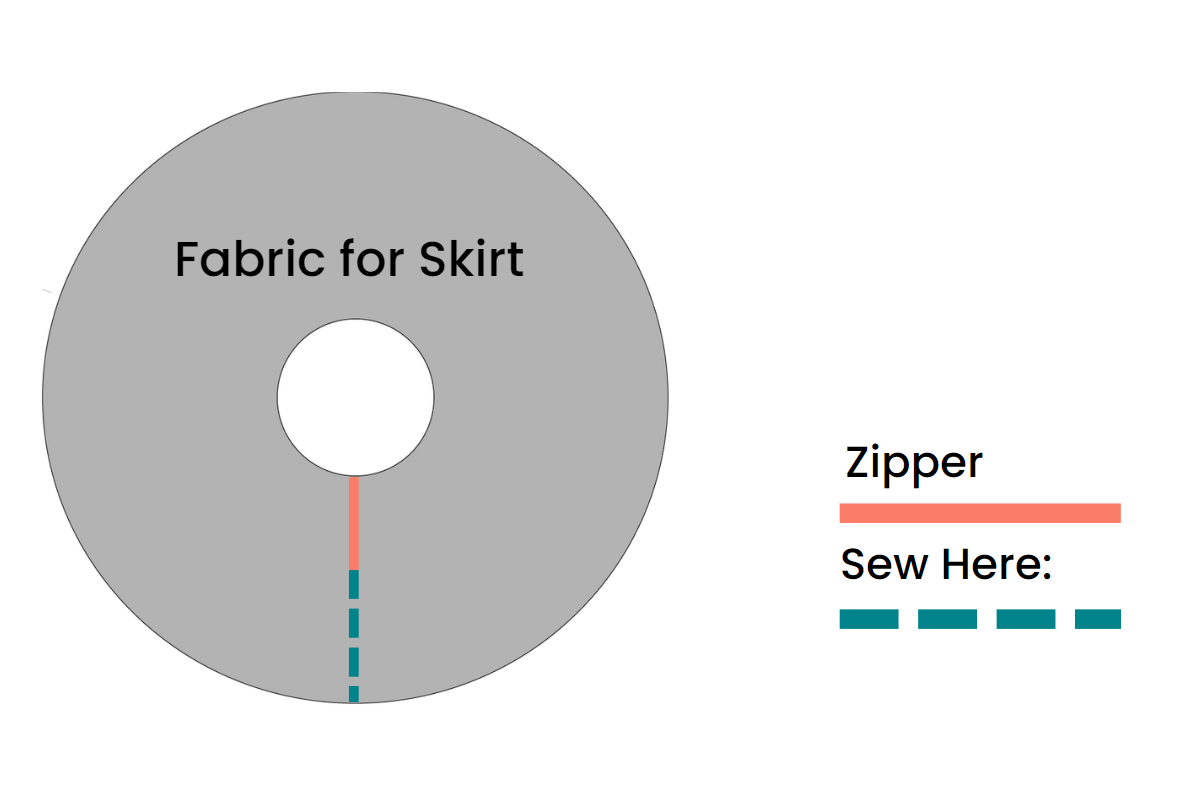
Now that your pattern has been cut, let’s cut the fabric. Begin by folding your fabric into four sections (see diagram below for reference). Then pin the pattern to your fabric with the waist radius in the bottom left corner.
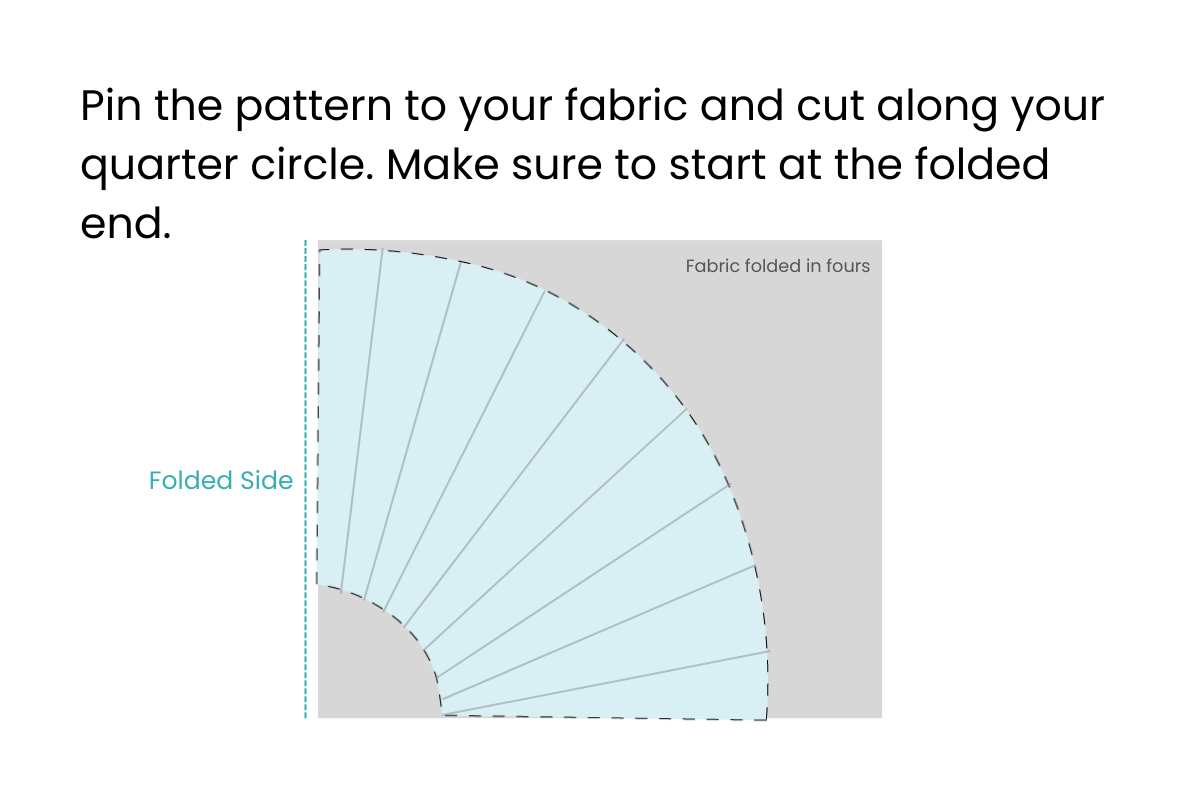
Use your pattern as a guide while cutting your fabric pieces. Begin by cutting out your waist radius. This will be the waist of your skirt. Do the same around your length lines as well.
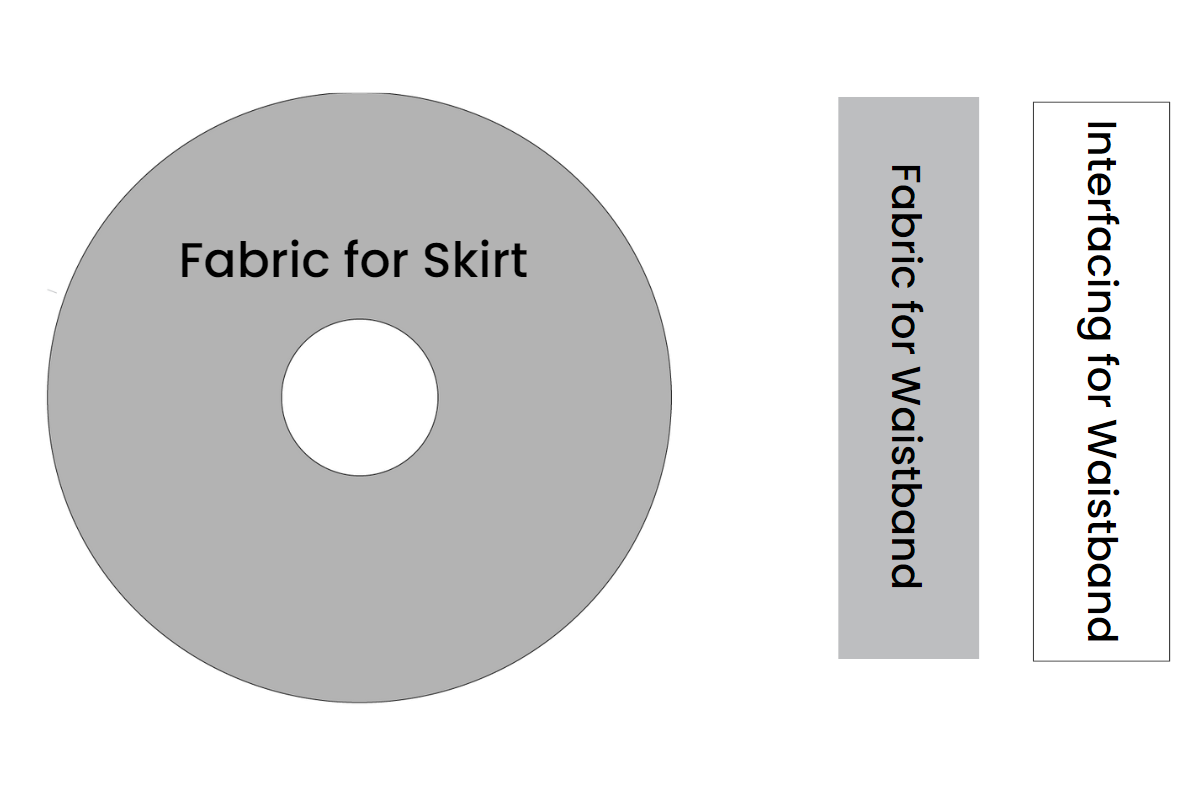
Once your fabric is cut, unfold the remaining pieces of your fabric to cut out your waistband.
Waistband length = waist measurement plus your seam allowance Waistband width = desired size but wide enough to at least fold in half
With the same measurements as your waistband, cut out your interfacing.
Note: We’ll be adding a zipper to our skirt in step 6. To add a zipper, prep for this now by cutting a straight line from your waist circle to the bottom edge of the skirt.
Step 4: Create and Attach Waistband
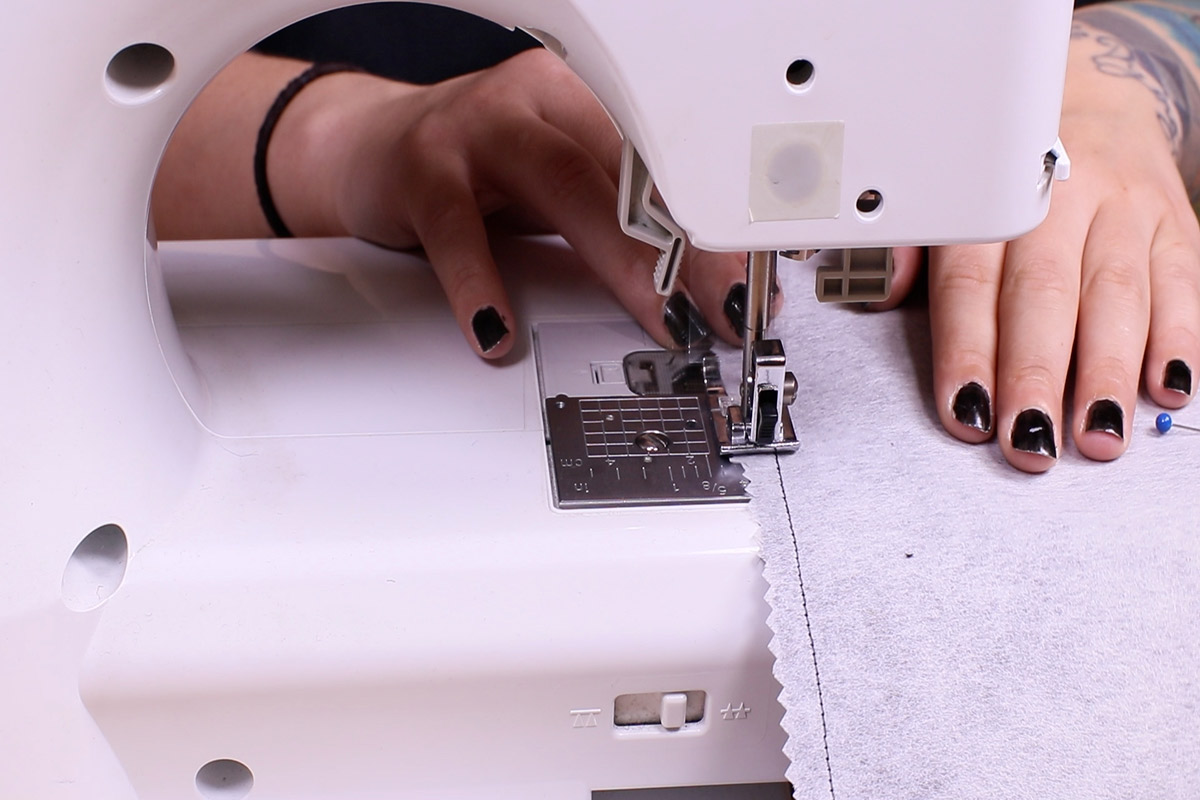
Take your waistband fabric strap and the fusible interfacing and place one on top of the other and pin them together. Sew them along the longer edges keeping your seam allowance in mind.
Use an iron to fuse the interfacing onto the fabric. For best results, hold the iron down for 10 seconds or more in small areas. When moving on the next area, move the iron by picking it up and putting it down instead of gliding.
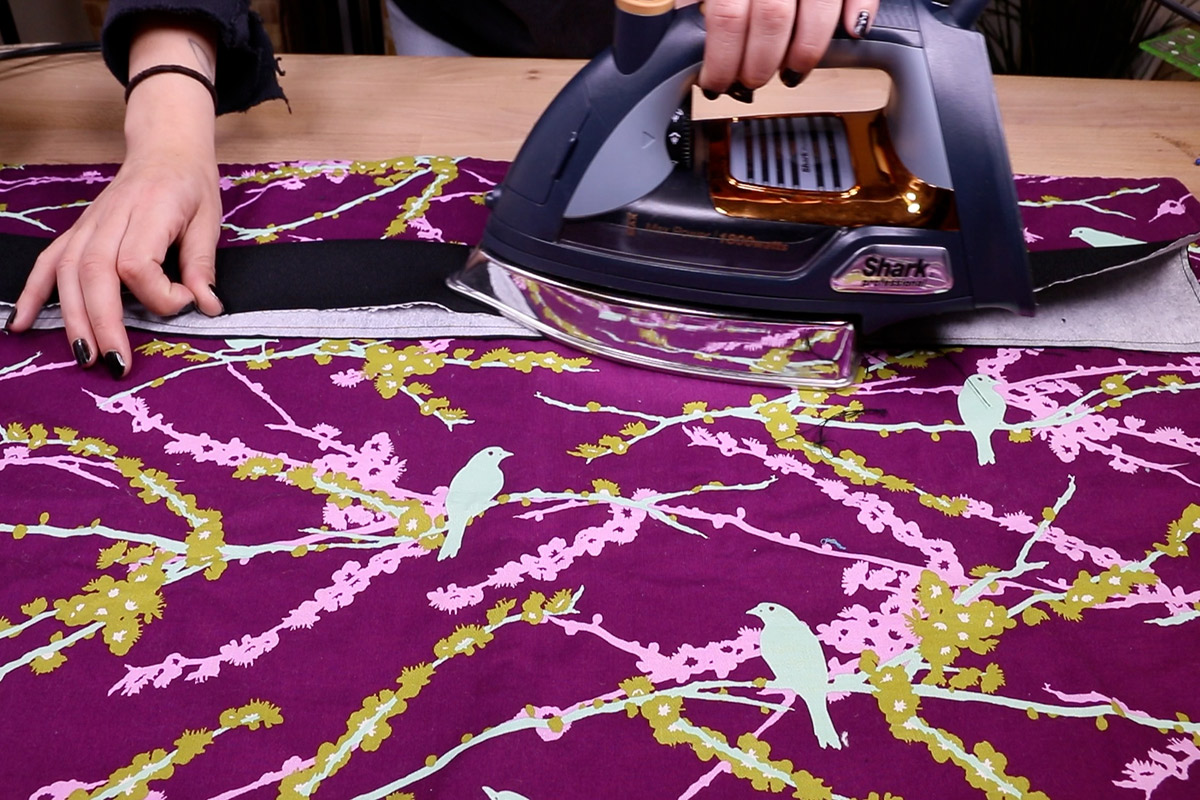
Once the waistband and interfacing are fused together, it’s time to add it to your skirt base. With the fabric side facing out, pin the waistband to the outside edge of your skirt waistline, while aligning the crease with the top edge of the skirt.

Step 5: Let Hang
Now that your waistband is sewn onto your base, it’s time to let it hang. A fashion mannequin would be perfect for this. If you don’t have access to a mannequin, use a clothes hanger that has clips attached, or add some laundry pins onto a regular hangar. Let hang for at least 24 hours to allow your fabric to drop.
Step 6: Fold, Pin, & Sew
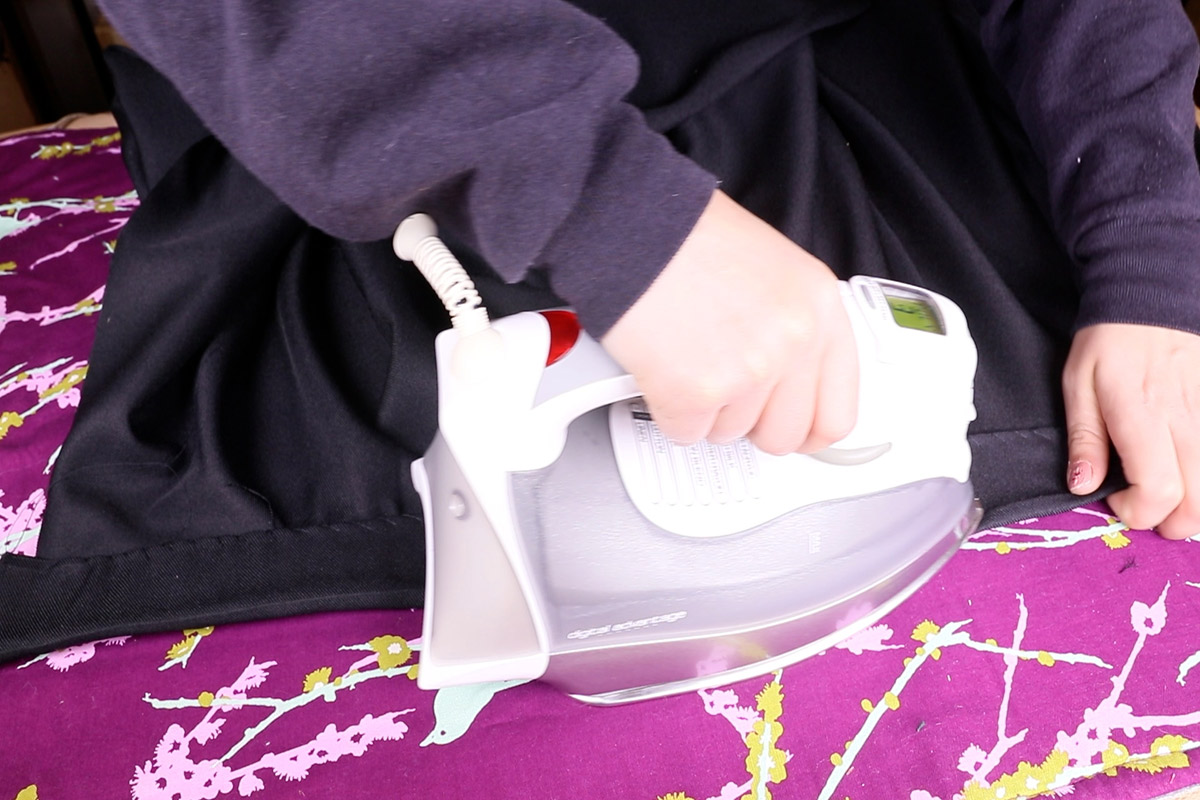
After your skirt has hung for about 24 hours, take it off your mannequin or hangar and let’s get sewing! Start by folding the waistband fabric lengthwise and inward towards your skirt base. Go over it with the iron again to ensure your interfacing is set in nicely.
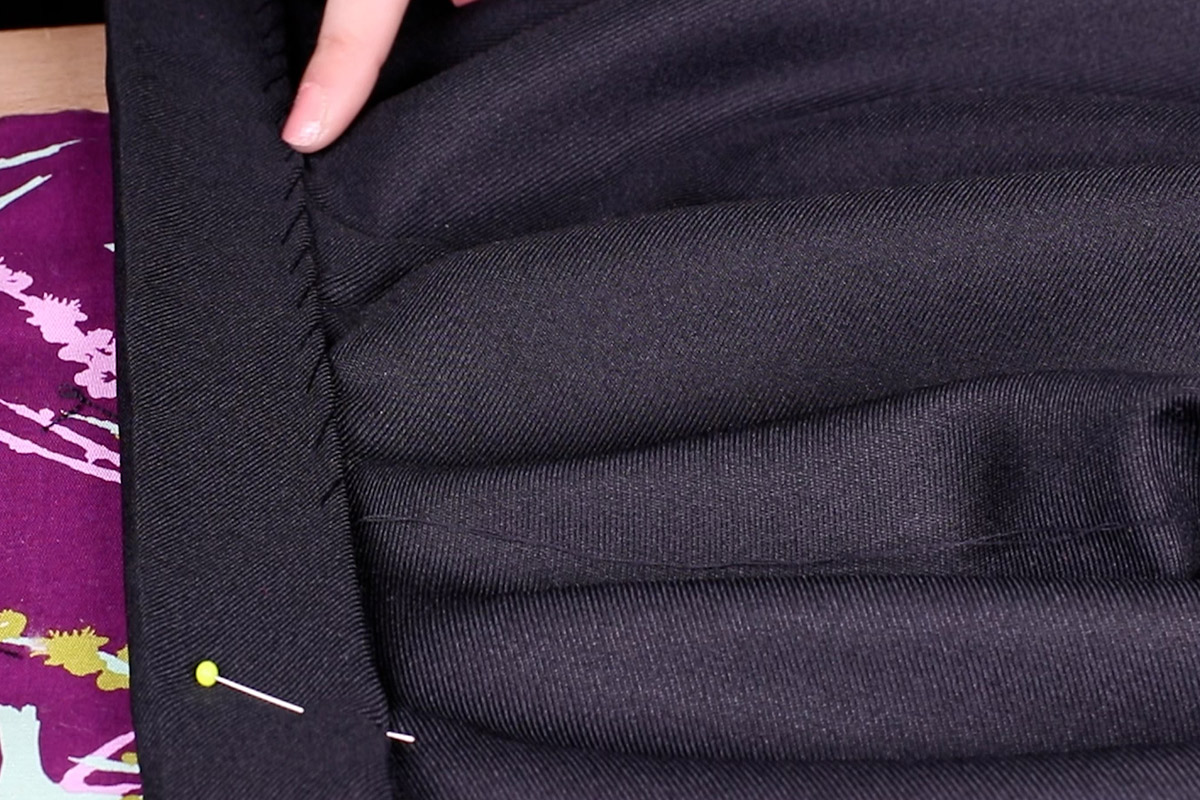
Keeping your waistband folded, Pin it to the skirt fabric along the opened end to hand sew it closed.
Next, add your zipper. Pin the zipper between the two open sides with the top meeting your hem. Sew the sides closed once the zipper is in place. Get as close to the teeth as you can.
We added our trim on last, however we do recommend adding it in BEFORE the zipper. (Step 7)
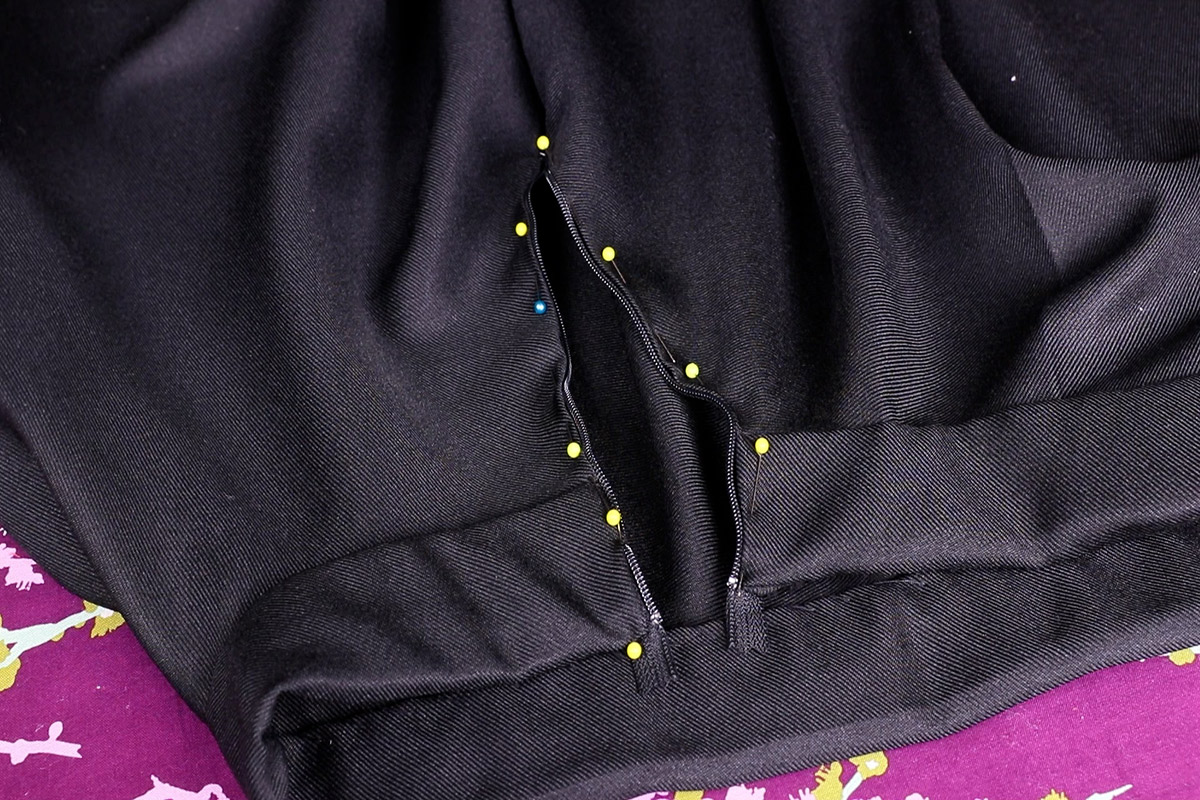
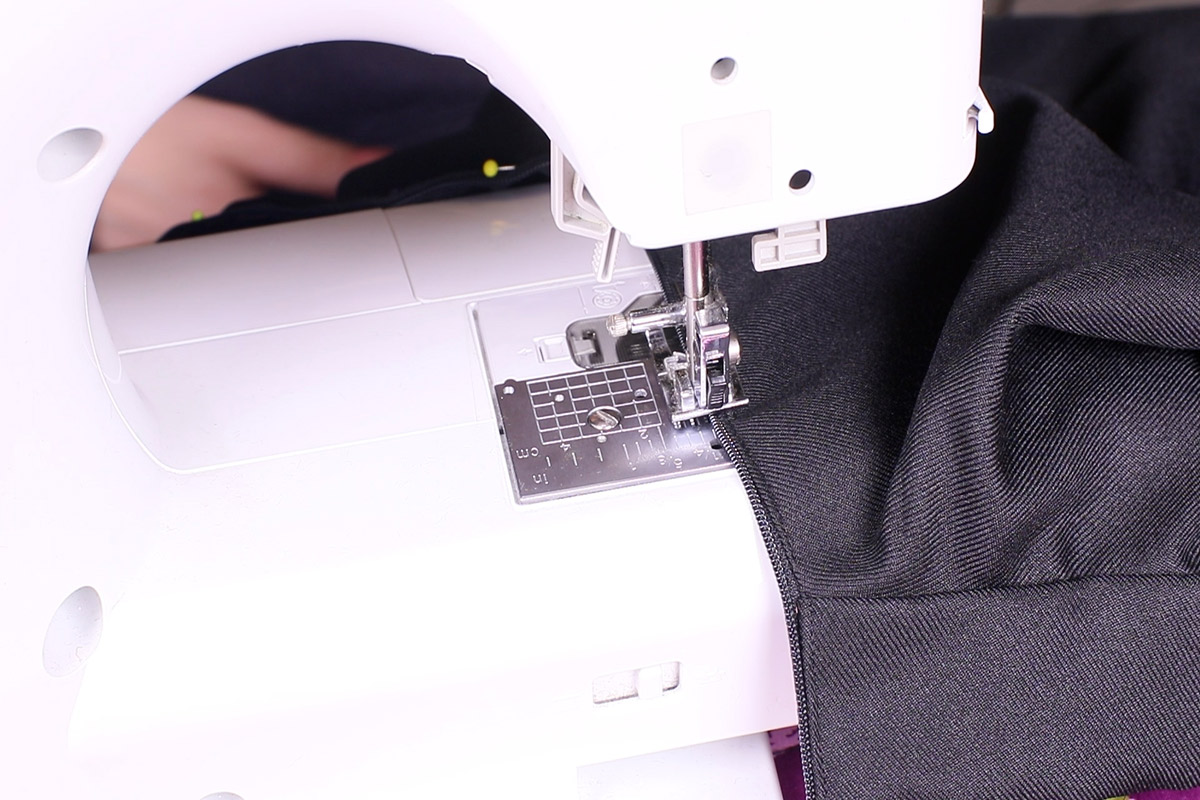
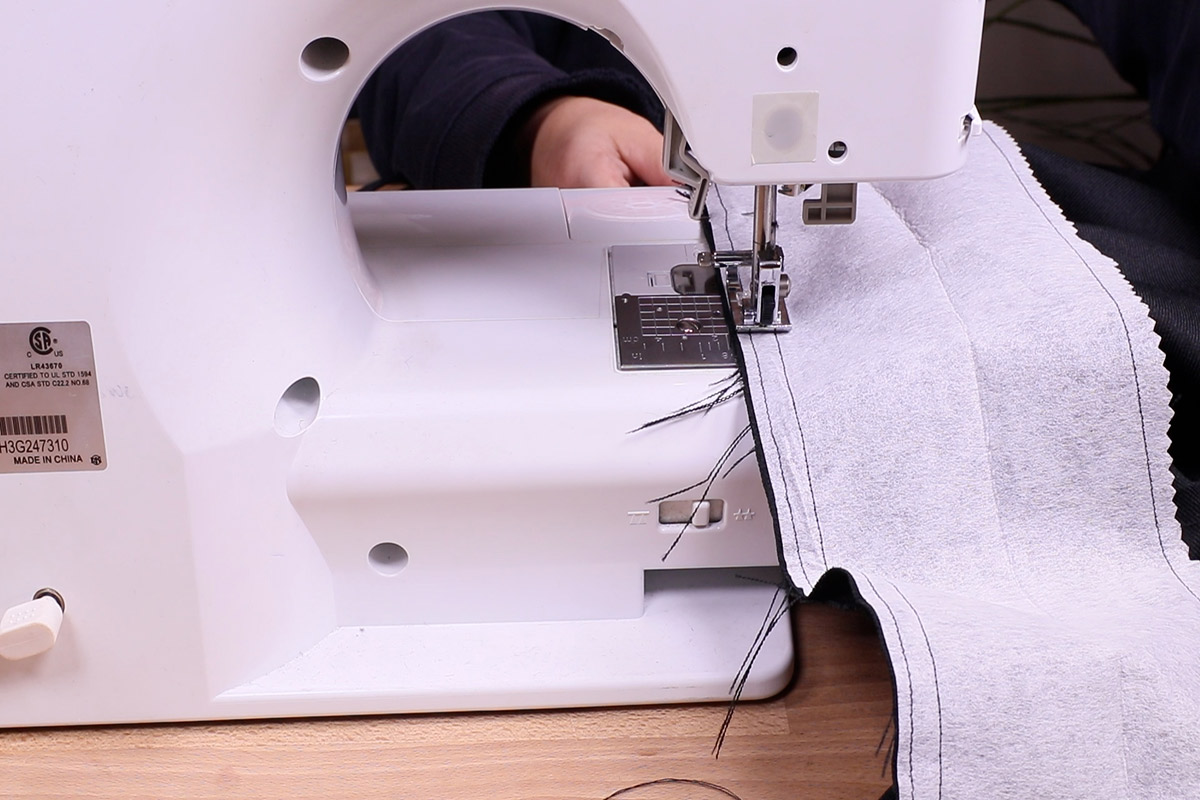
Once your zipper is sewn on, sew the open sides shut.
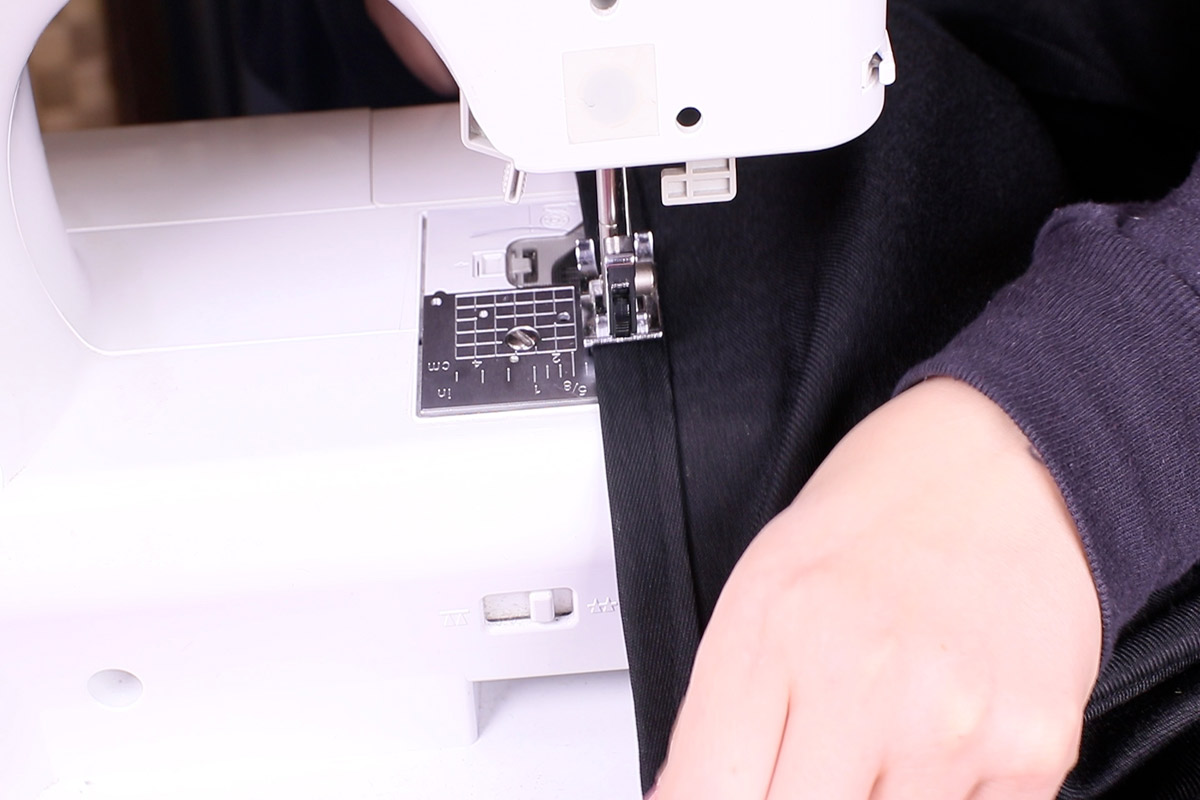
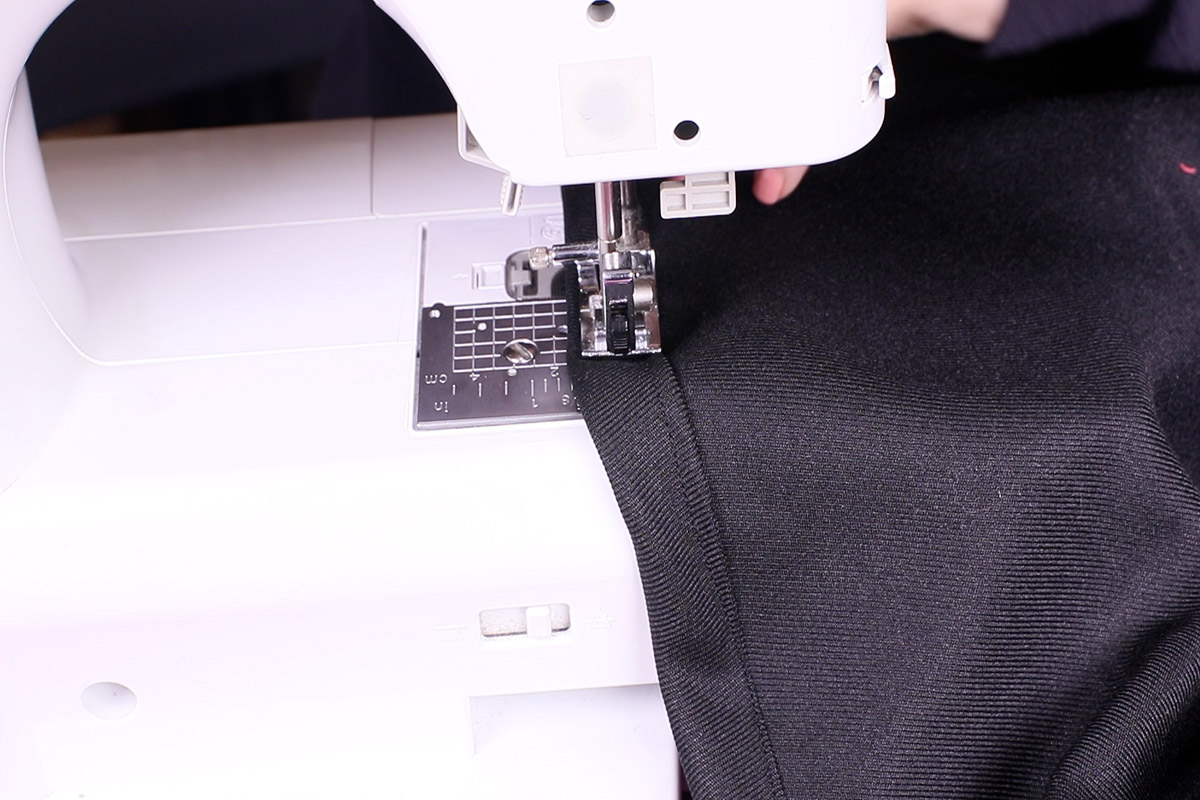
Now it’s time to hem the bottom edges of your skirt. Measure the hem to your seam allowance and and line it with pins. Sew around the edges.
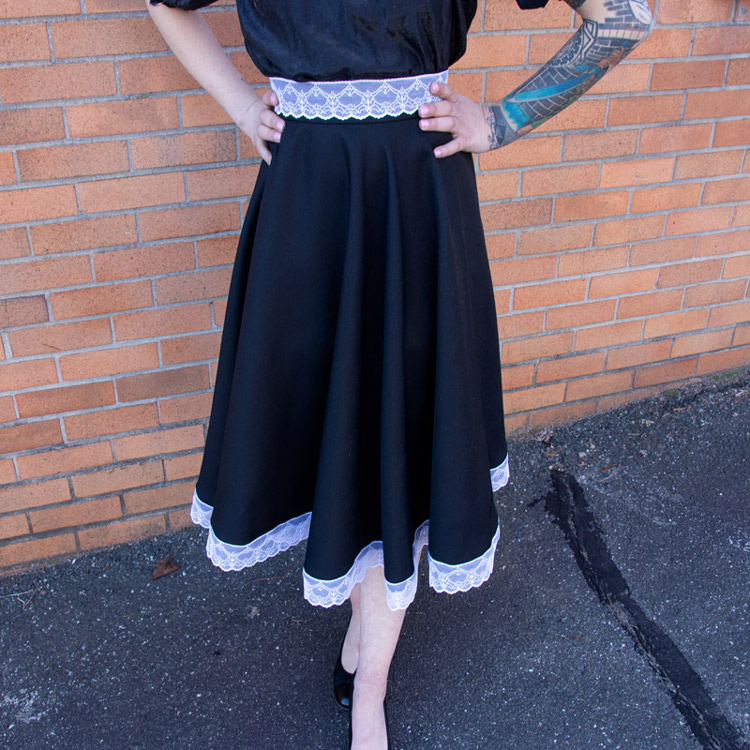
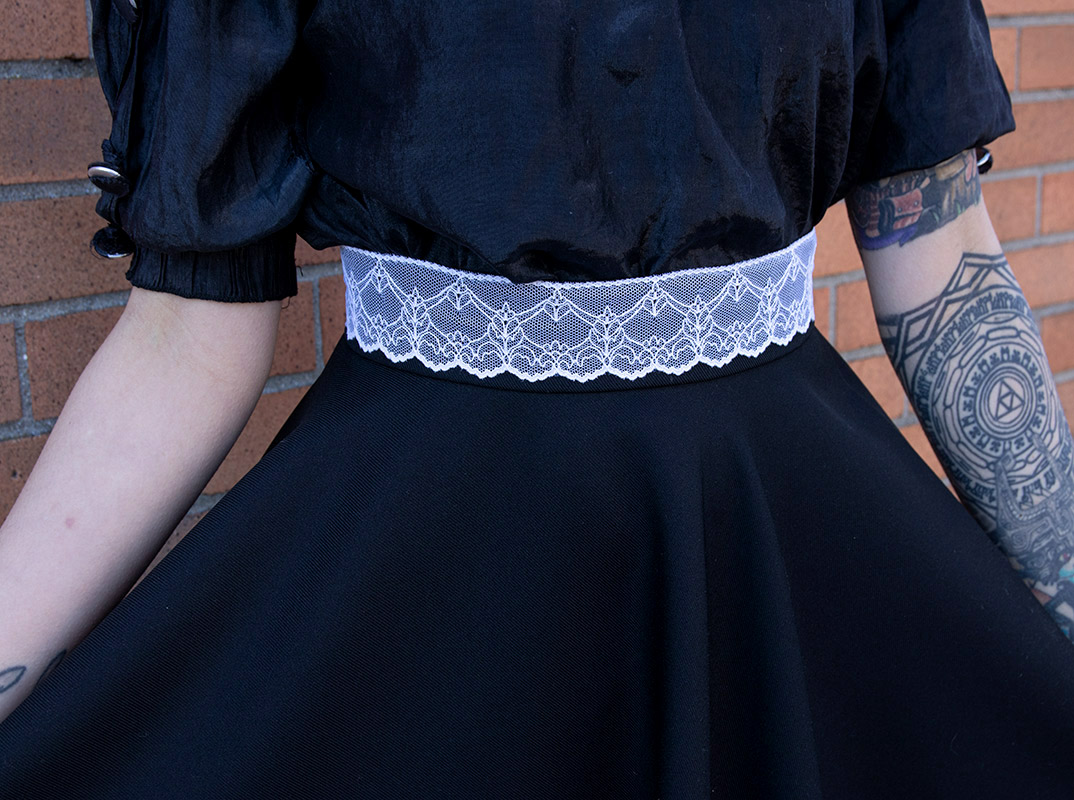
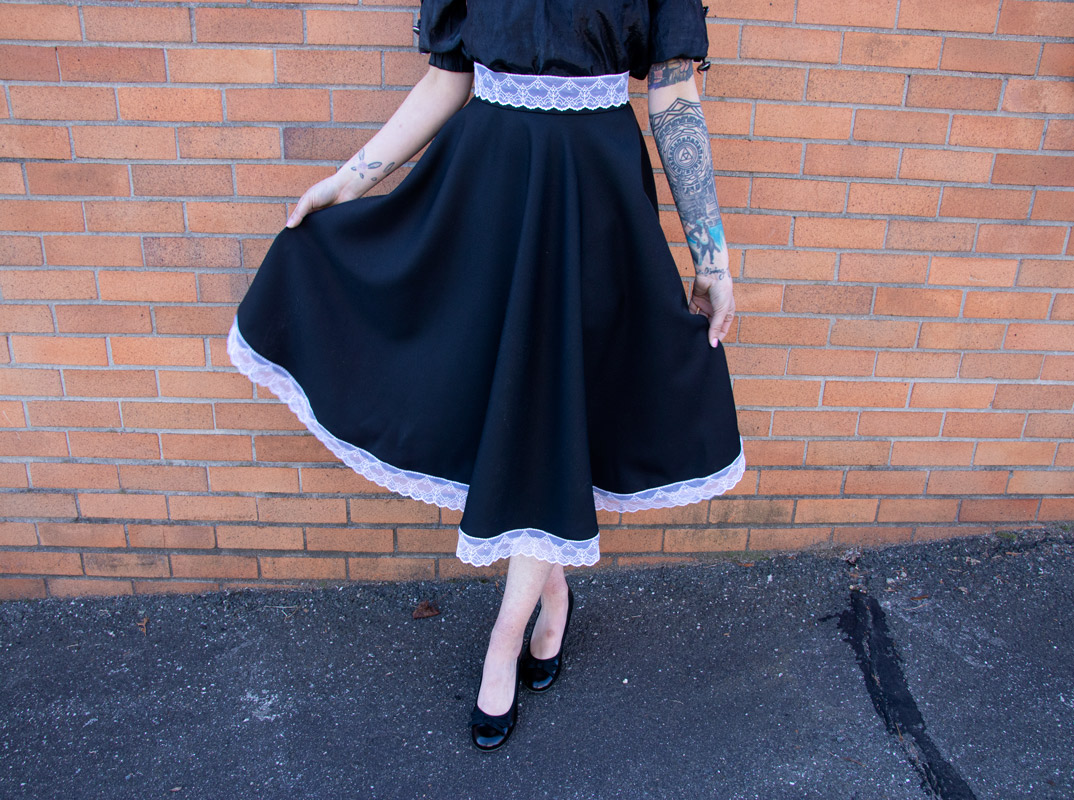
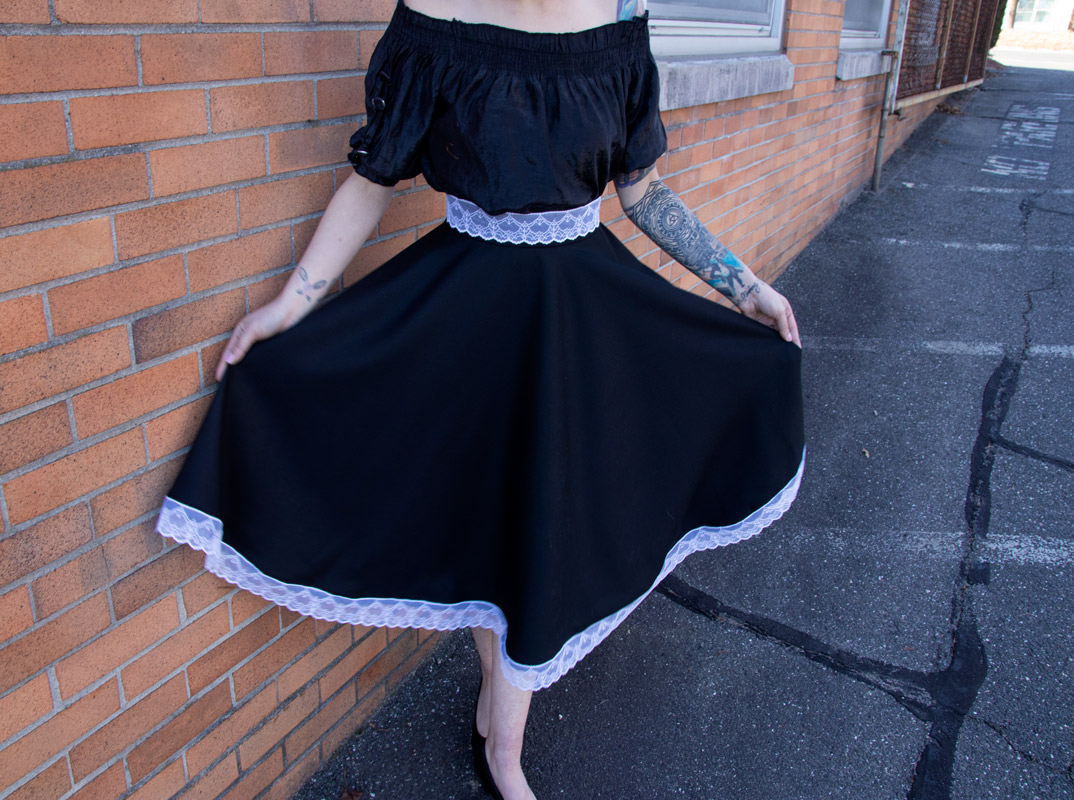
Step 7: Add Lace Trim
Grab your choice of lace trim to add some pizzazz to your skirt! Pin the lace to your waistband and your bottom hems, lining it up with the top of your waistband and the top of your bottom hem. Make sure to leave an extra 5/8″ of the trim on the end next to the zipper.
Note: We recommend waiting to cut the trim to size until after pinning is done to ensure it doesn’t get cut too short.
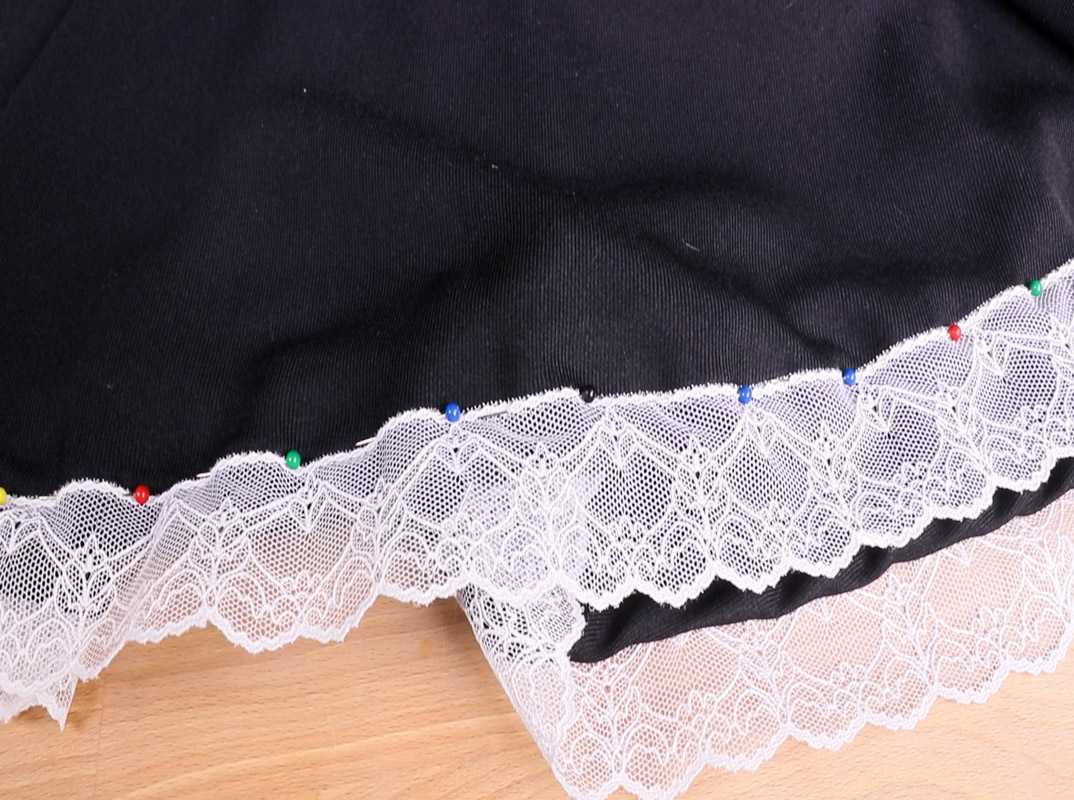
Once pinned, cut the lace where the two ends meet. Again, making sure to leave that extra 5/8″ next to the zipper.
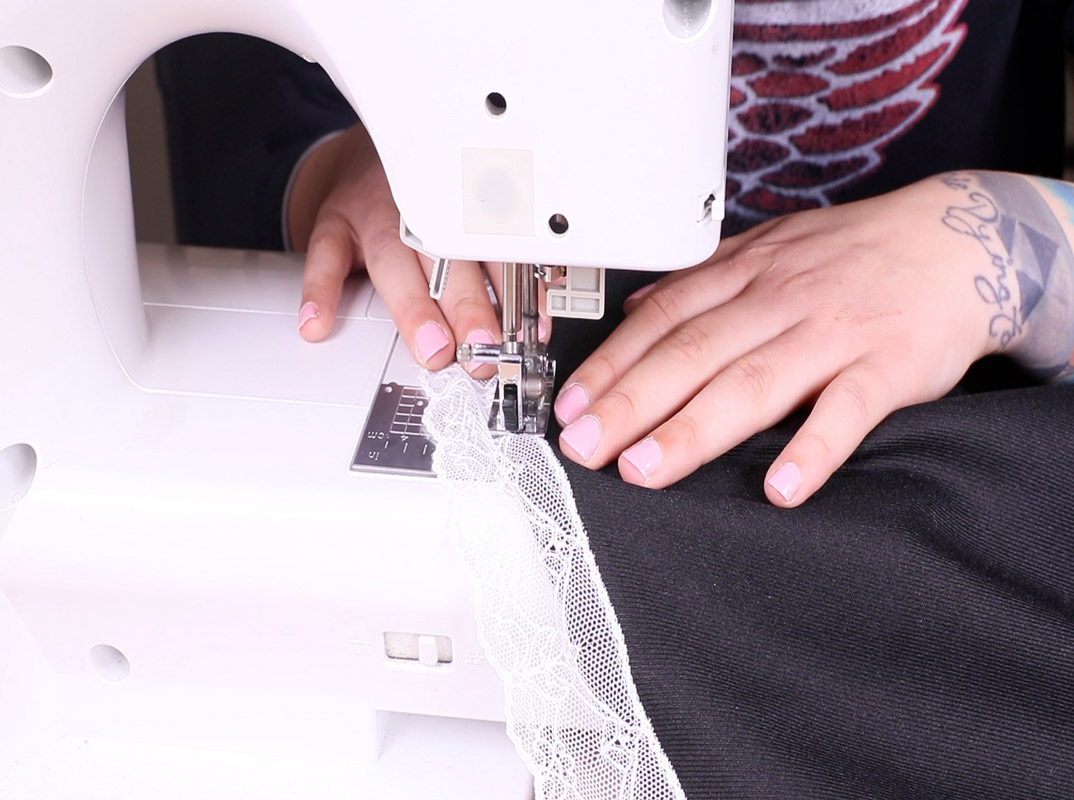
Now sew that lace onto your skirt! When you get to the ends by the zipper, fold those them inward and sew neatly beside the zipper.
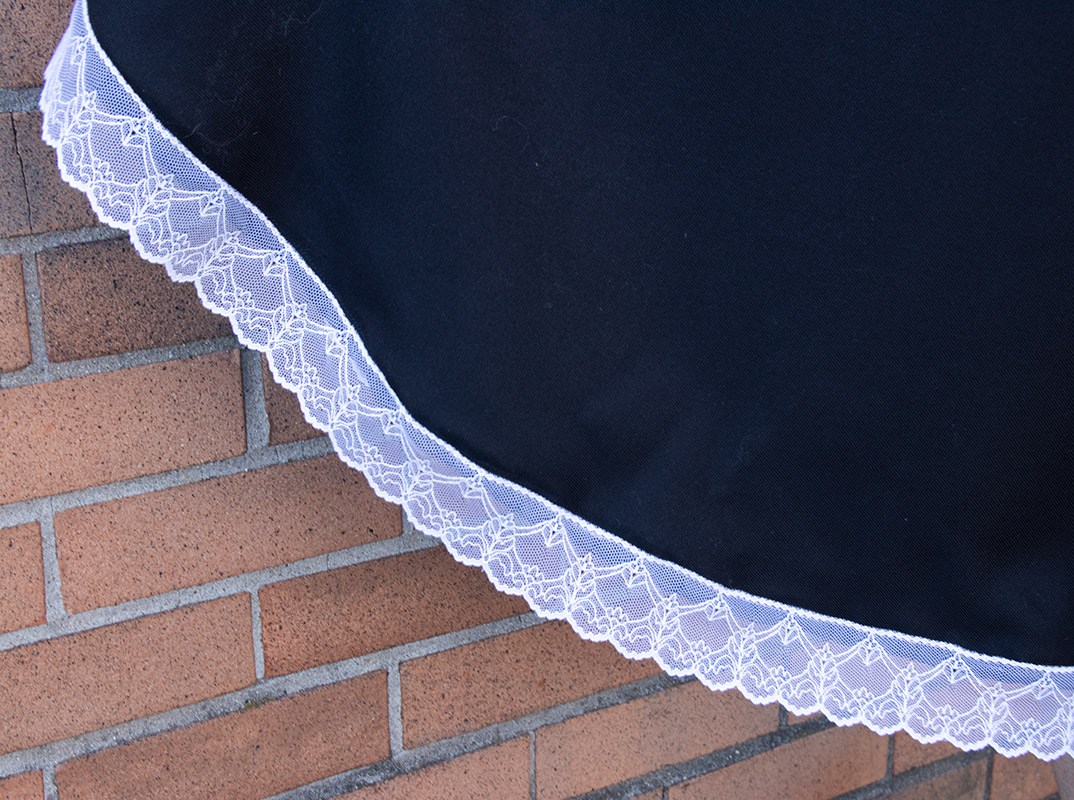
Once your trim is added and your zipper is closed, unplug your sewing machine because the runway is calling! Now you’re not only a DIY boss, you’re also a self-made model with a trendy skirt to prove it. And what’s better than saving money & choosing ALL the details?!

-
{{#each productSuggestedQueries.results}}
- {{query}} {{/each}}
-
{{#each categories.results}}
- {{html title}} {{/each}}
{{html attributes.description}}
{{/if}}-
{{#each queries.results}}
- {{query}} {{/each}}