How to Make a Waterproof Dog Coat
- By Clara
- 1 hour 15 minutes
As some of you may know, we live in the illustrious Commonwealth of Massachusetts. New England is well known for their sports teams, quirky people, and of course the weather.
If you have never had the chance to visit us in the Northeast, let me fill you in on a little secret known to all locals. The weather here is absolutely insane. If you are really lucky, you can sometimes experience all four seasons in just a week in New England.
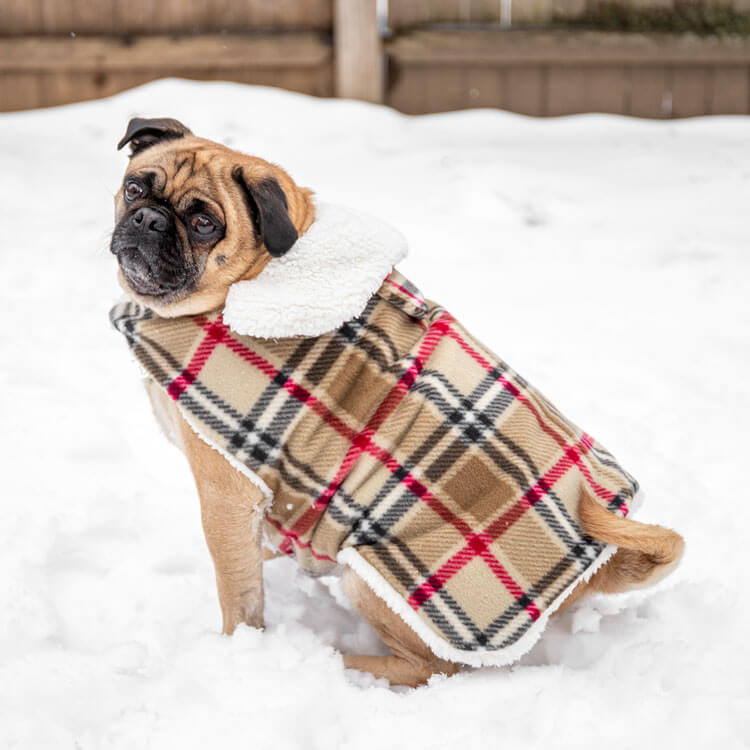
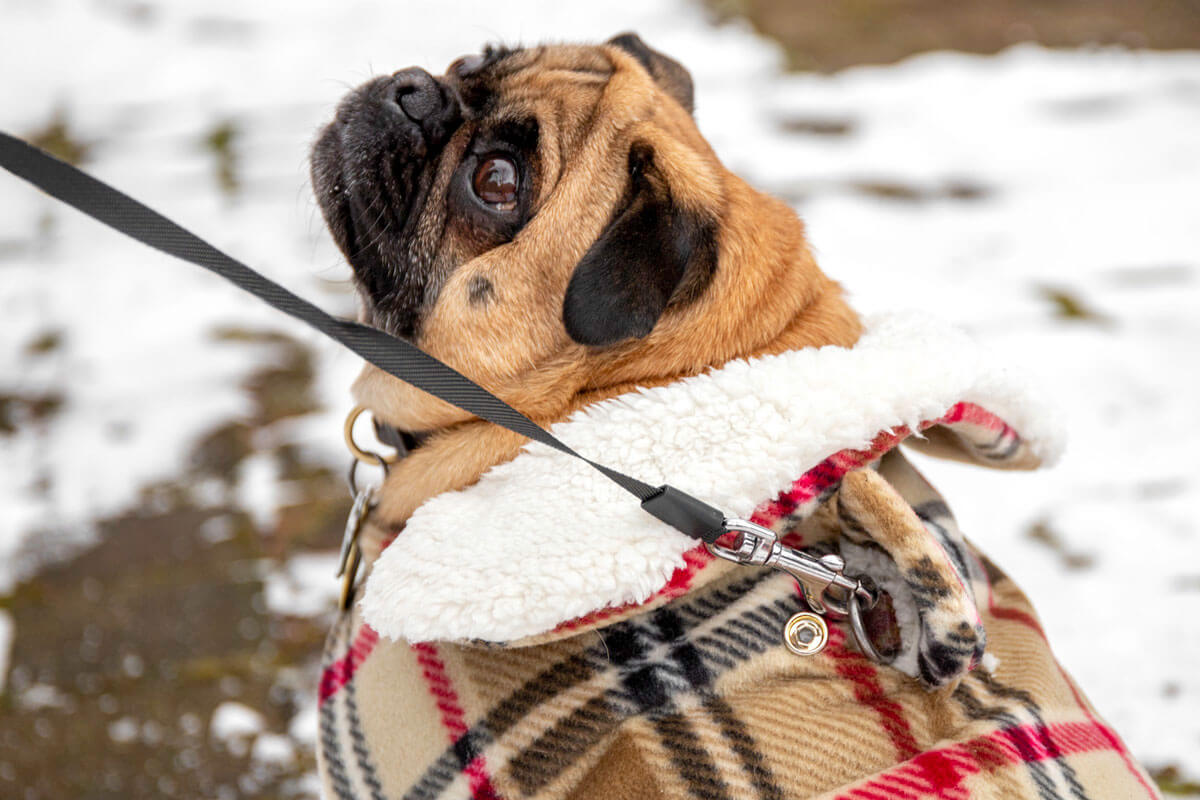
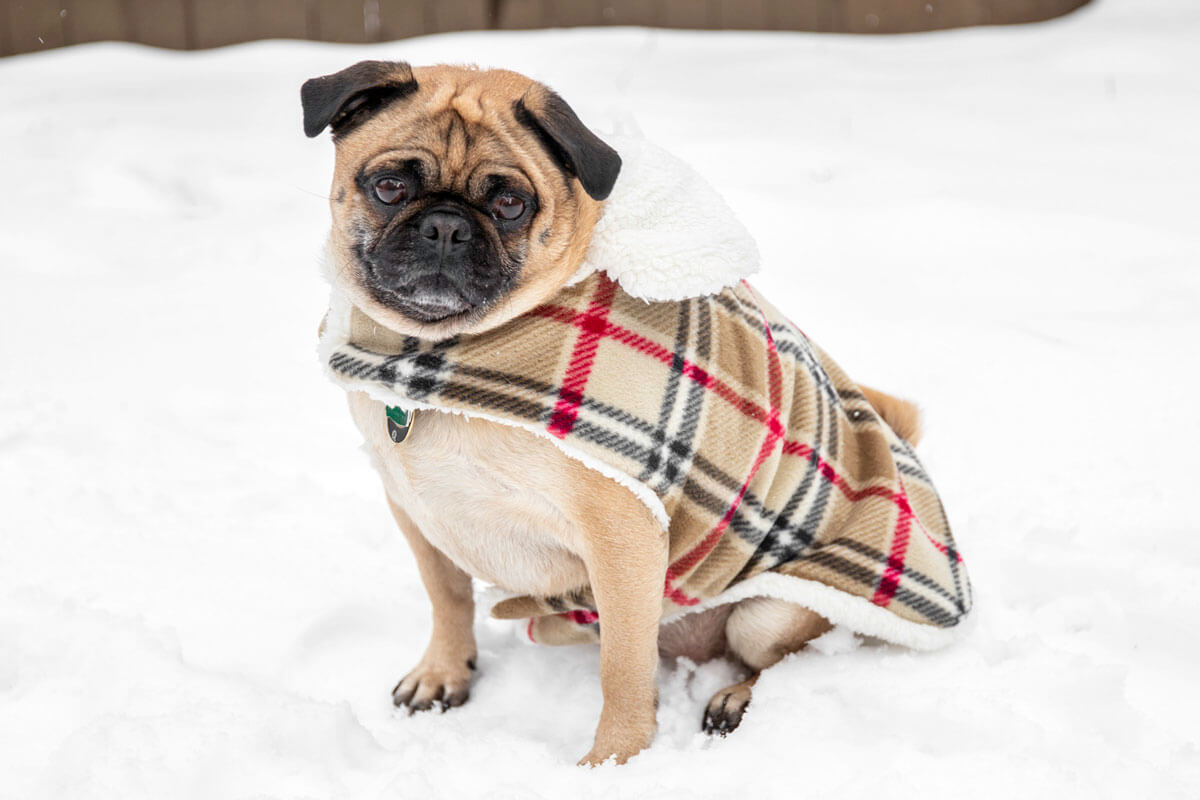
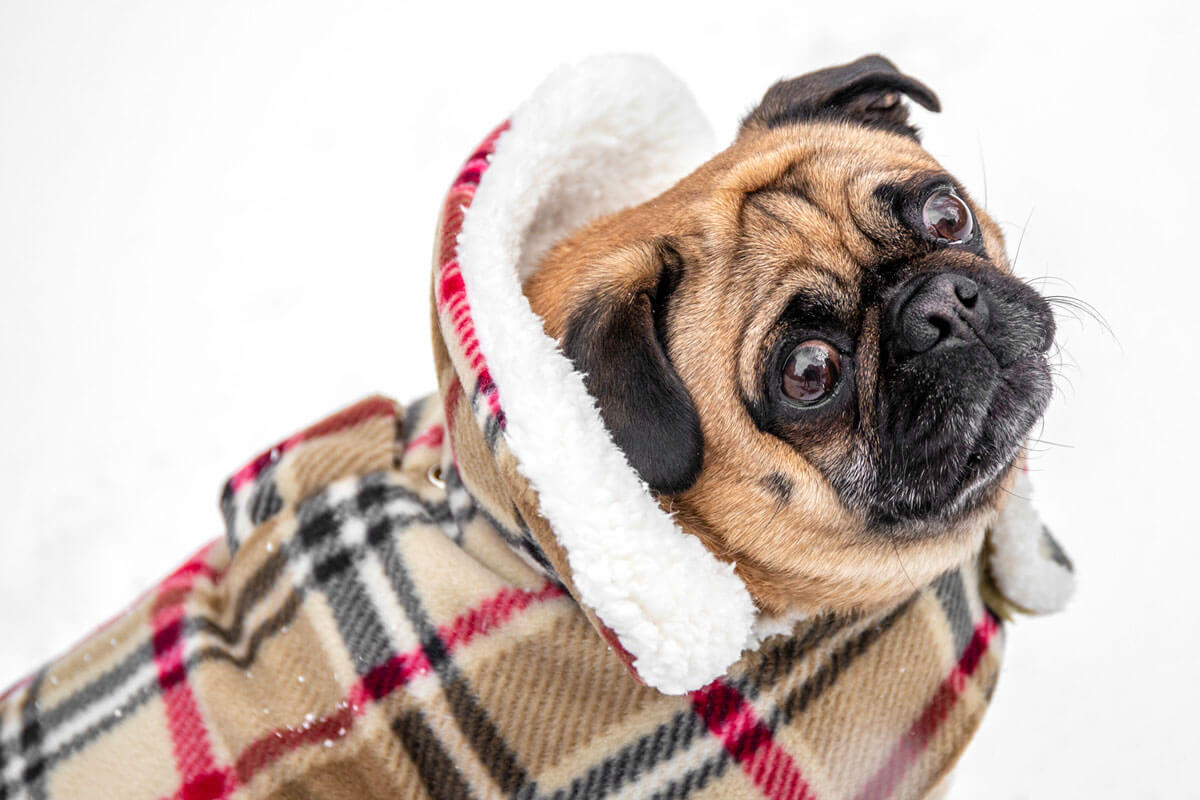
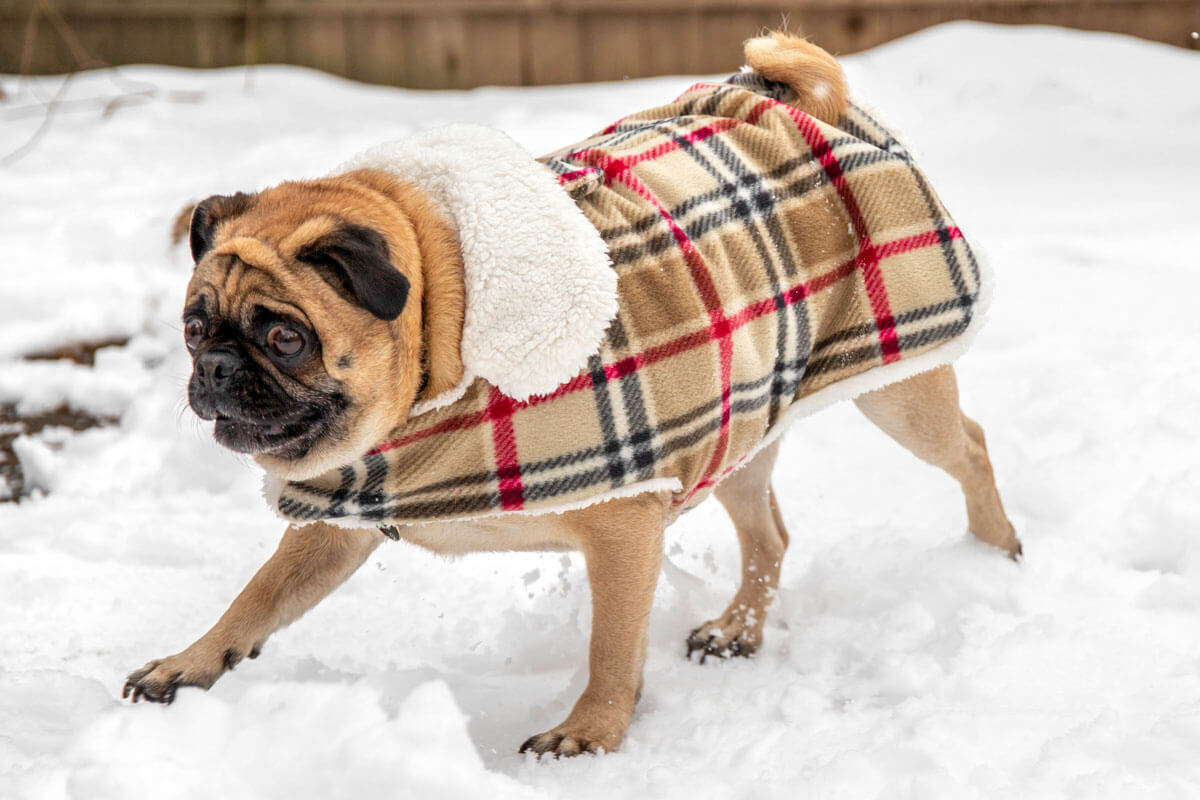
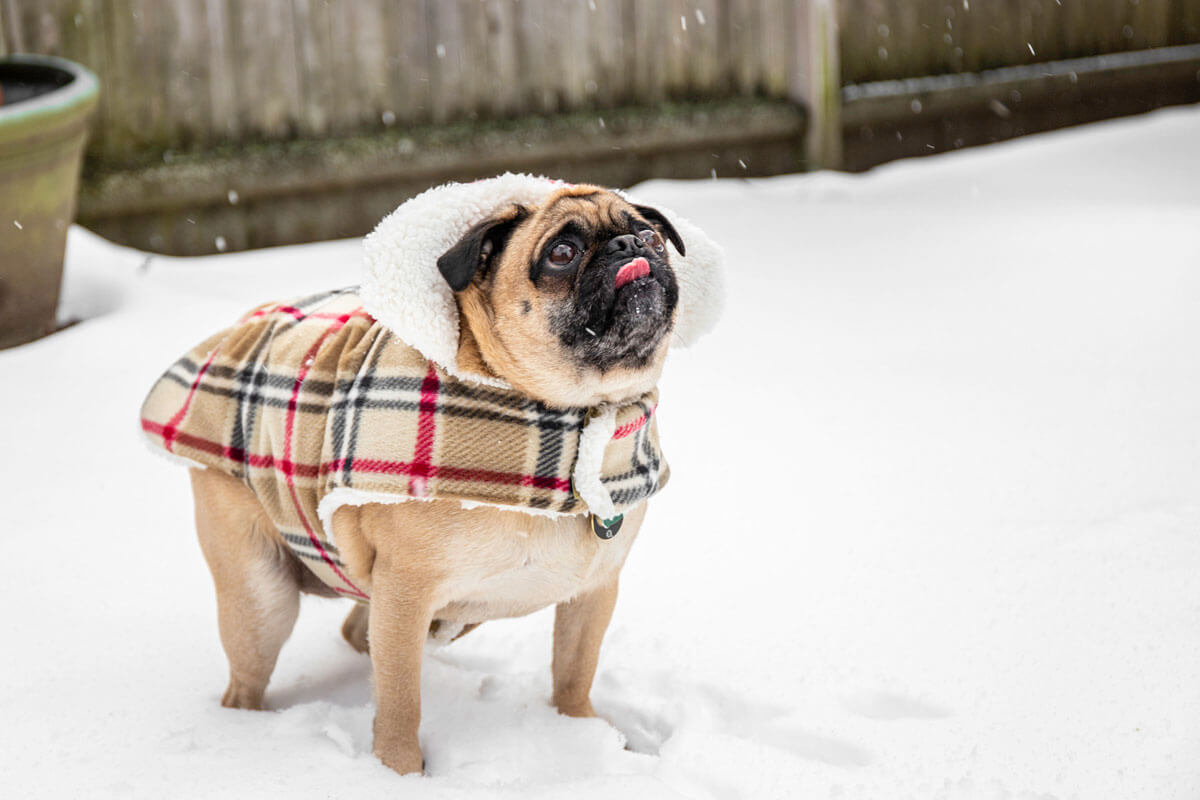
For short haired dogs, like Arya here, a warm doggie jacket is a must, but it’s hard to find one that fits just right.
I’ll show you how to make a custom coat made out of fleece with a layer of ripstop nylon to make it waterproof and a Sherpa lining to make it warm and cozy. All the fabrics I’m using are washable so you’ll be able to easily throw the coat in the wash when needed.
The collar flips up for extra protection and this one has an opening for a harness.
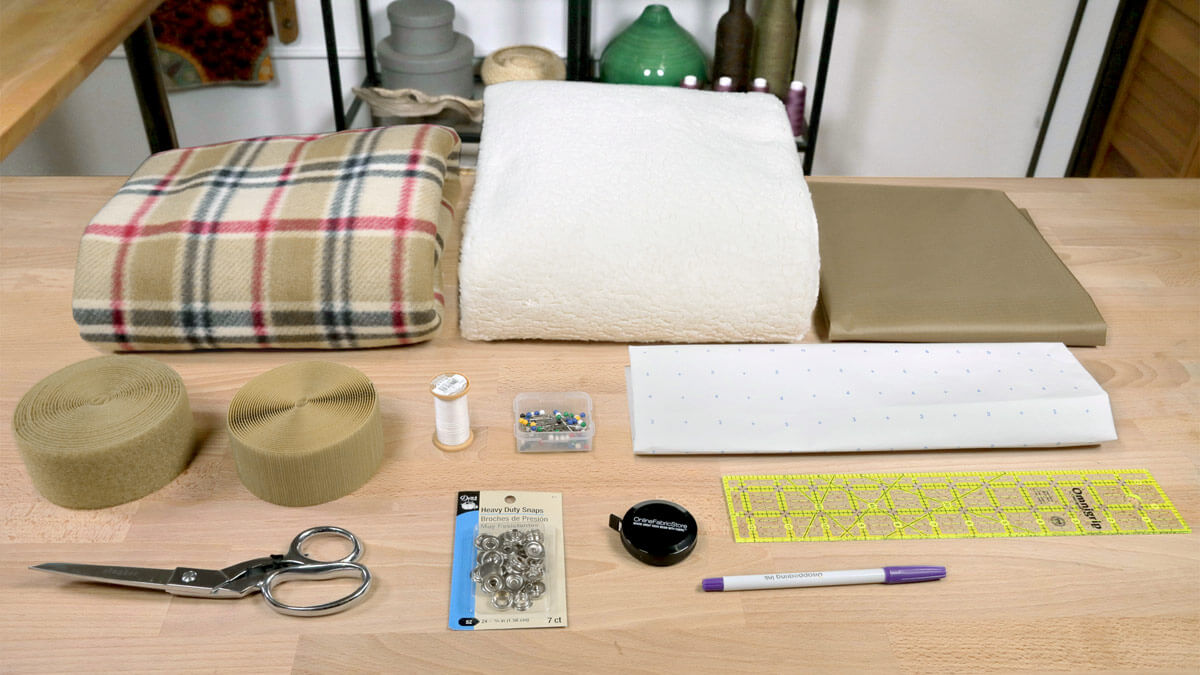
Materials
Related Products
-
 Knife Edge Dressmaker's Shears - 8"
-
 Tan 70 Denier Nylon Ripstop
-
 Dual Duty XP Thread - Ecru, 250 Yards
-
 Hook Fastener 2" Sew-On Beige - 5 Yard Roll
-
 Loop Fastener 2" Sew-On Beige - 5 Yard Roll
-
 7 Heavy Duty Snaps - Size 24
-
 Disappearing Ink Marking Pen - Purple
-
 London Plaid Camel WinterFleece
-
 Ivory Sherpa Minky Cuddle
-
 Quilter's Ruler - 6" x 24"
Video
Instructions
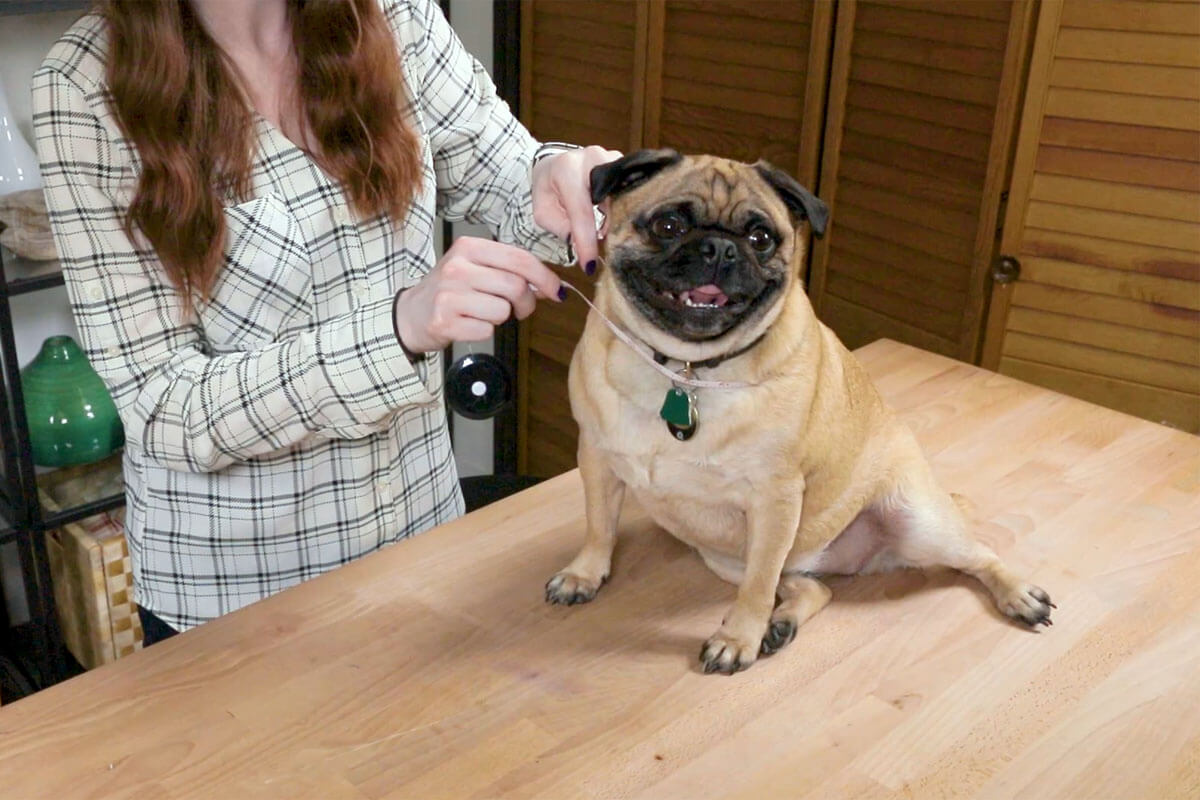
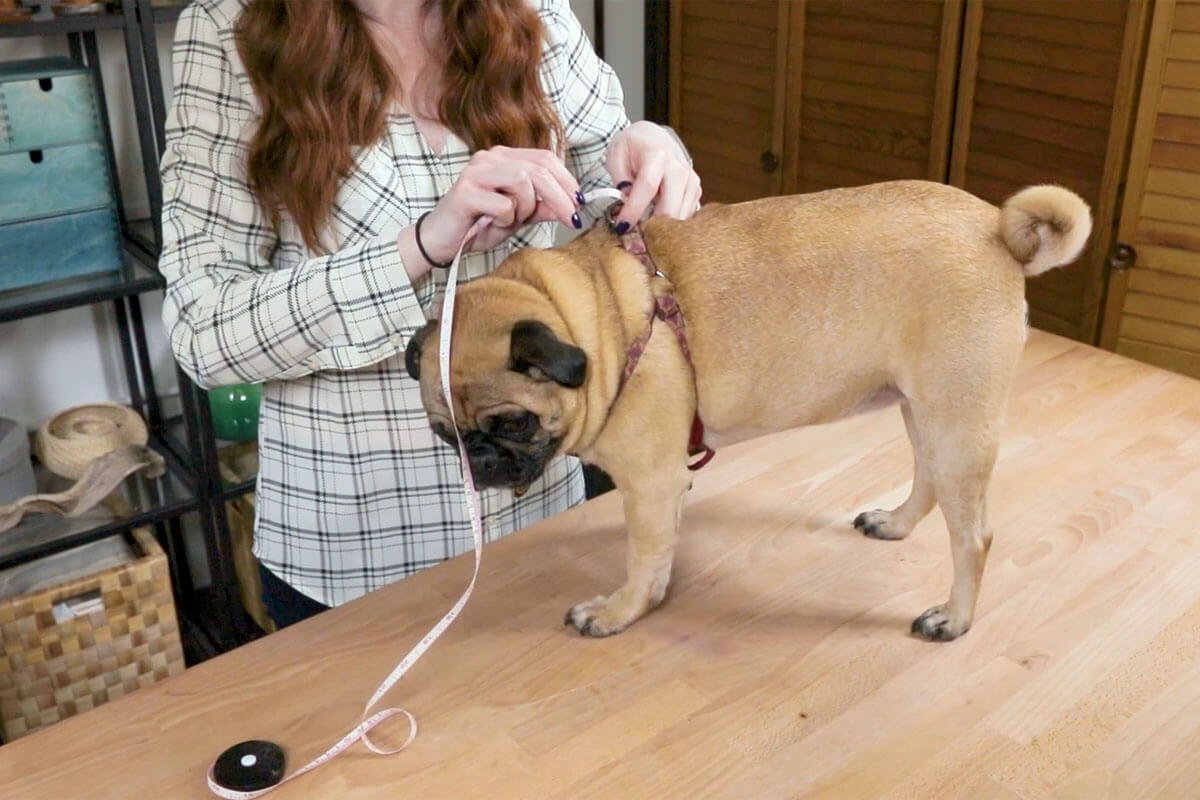
Step 1: Measure Your Dog
Dogs come in all shapes and sizes so to make a well-fitting dog coat, you need to create your own template. First, you need some measurements of your dog.
We created a PDF that you can print out to help you keep track of your measurements and create a sketch of your template. You can sign up to our mailing list below to get the download.
Dog Measurements
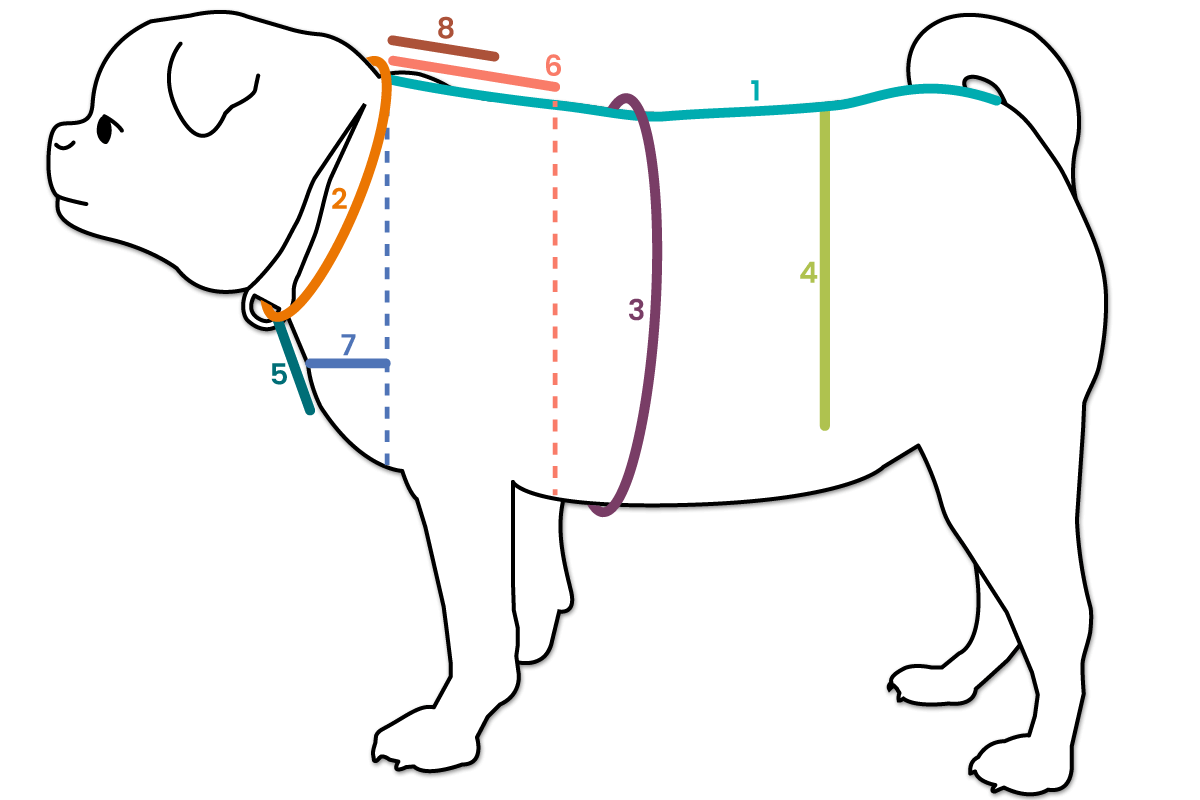
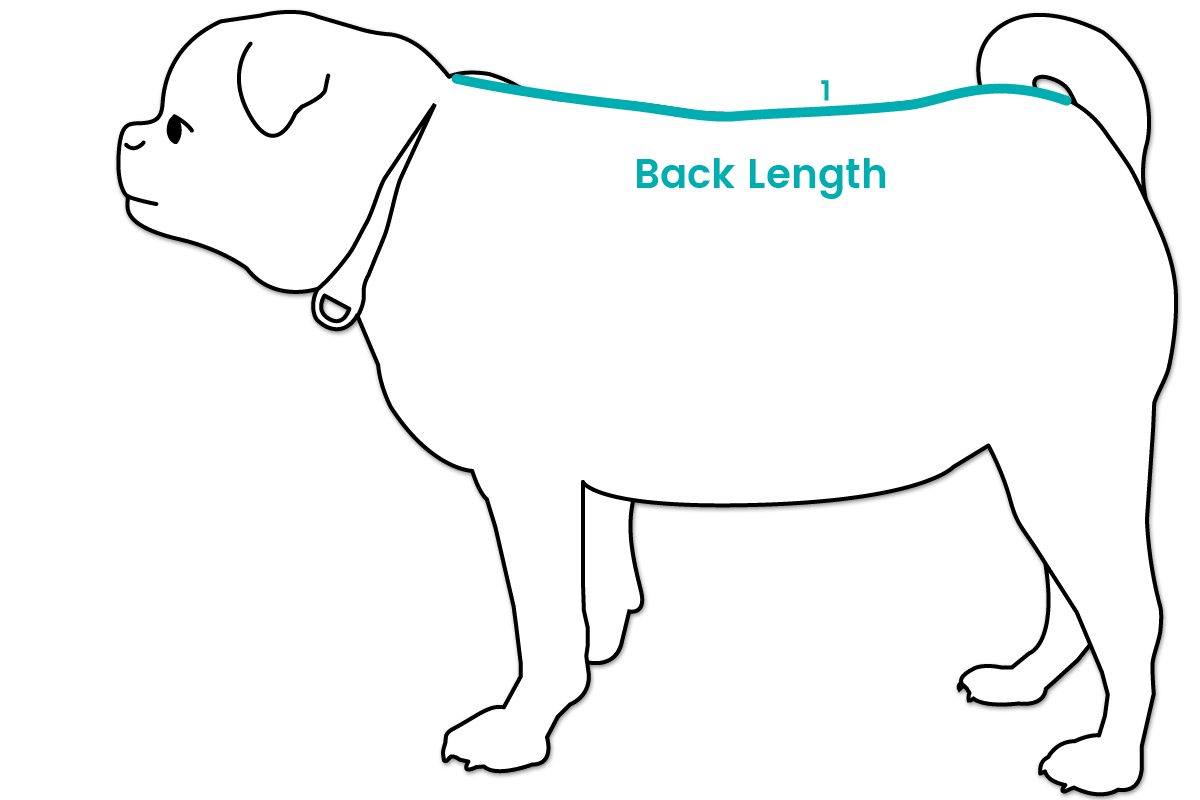
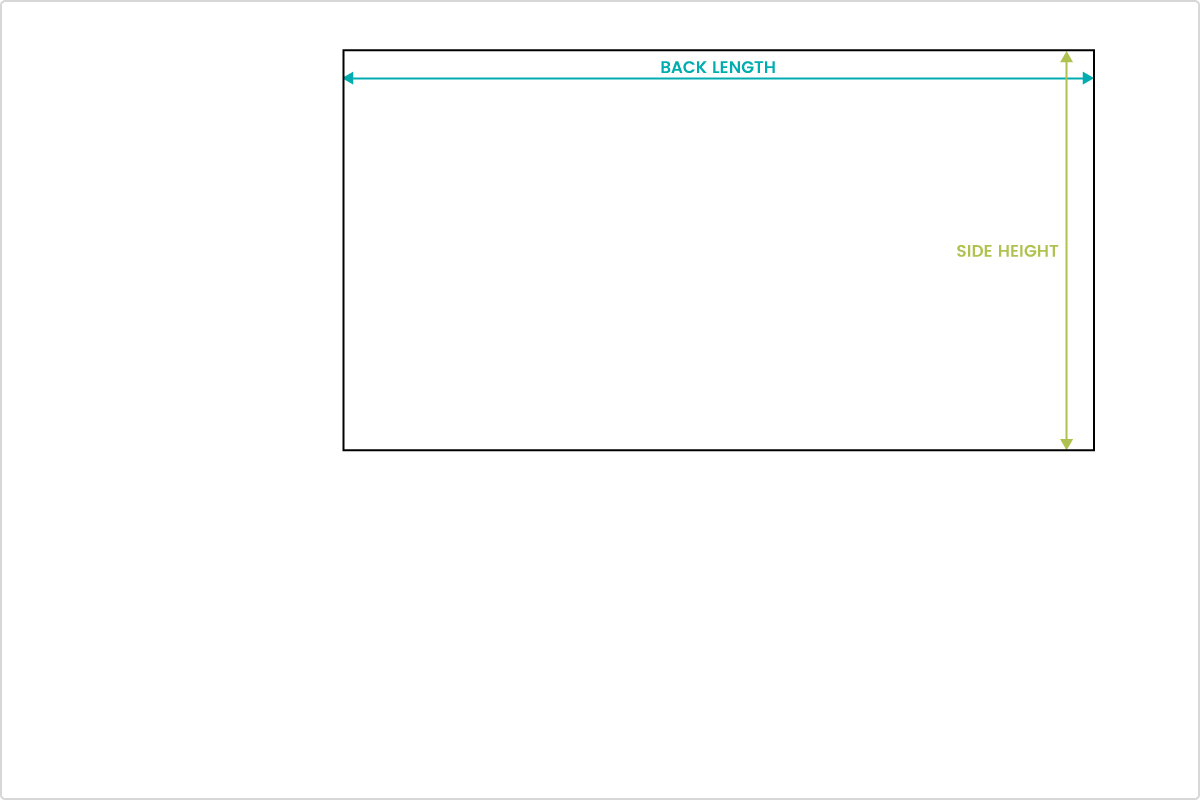
1. Back length:
Measure from the collar to the tail.
Arya: 15″
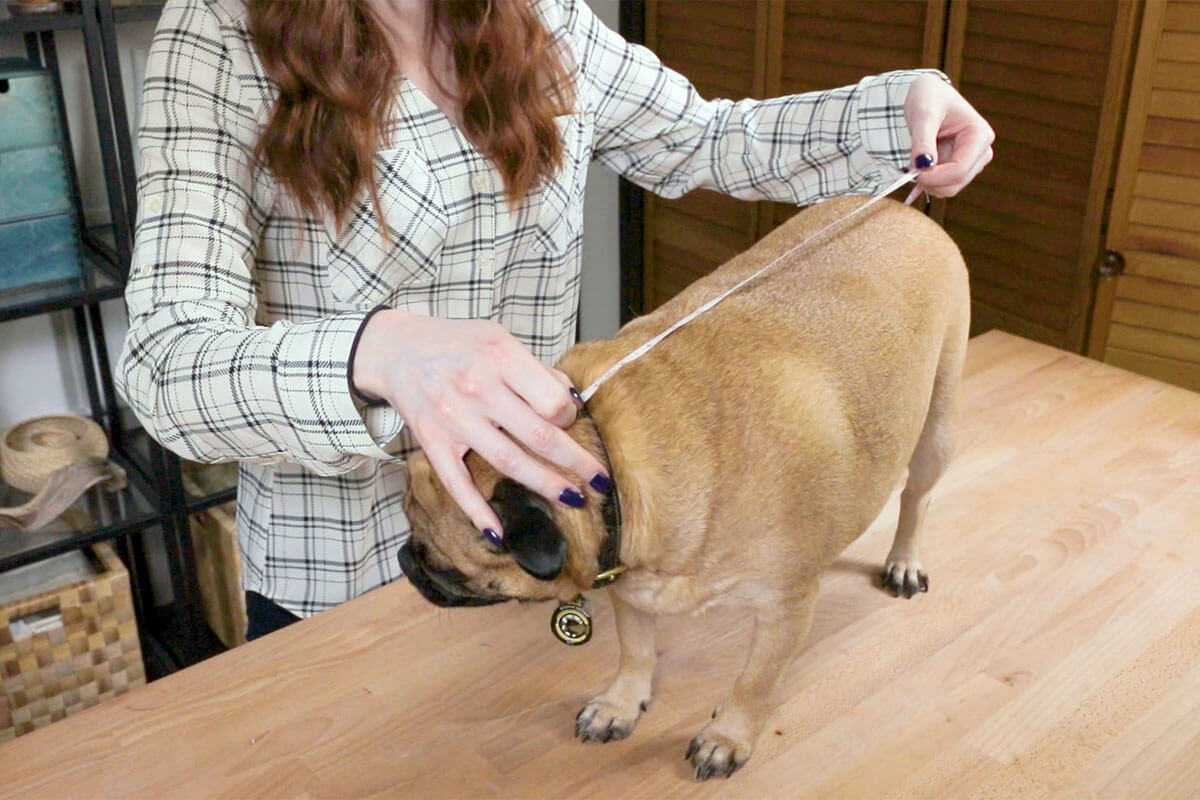
2. Neck circumference:
Measure around the collar.
Arya: 16″

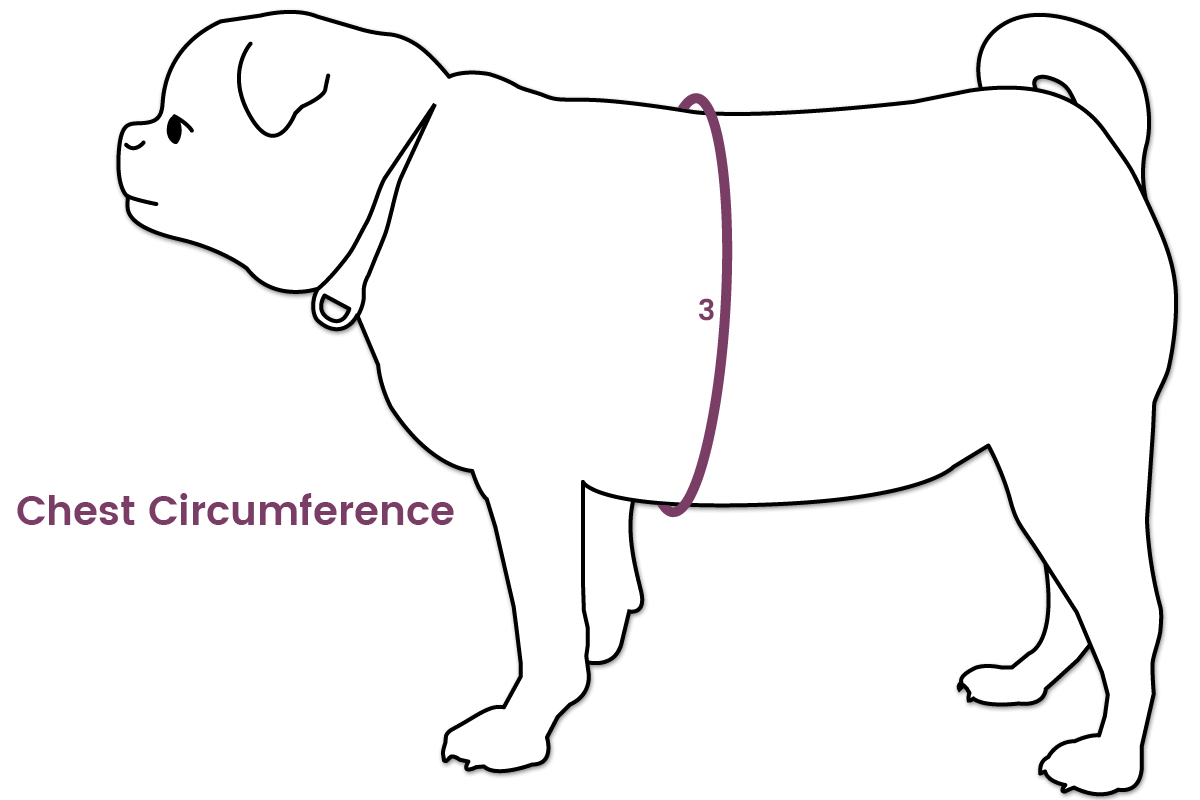
3. Chest circumference:
Measure around the largest part of your dog’s chest.
Arya: 26″
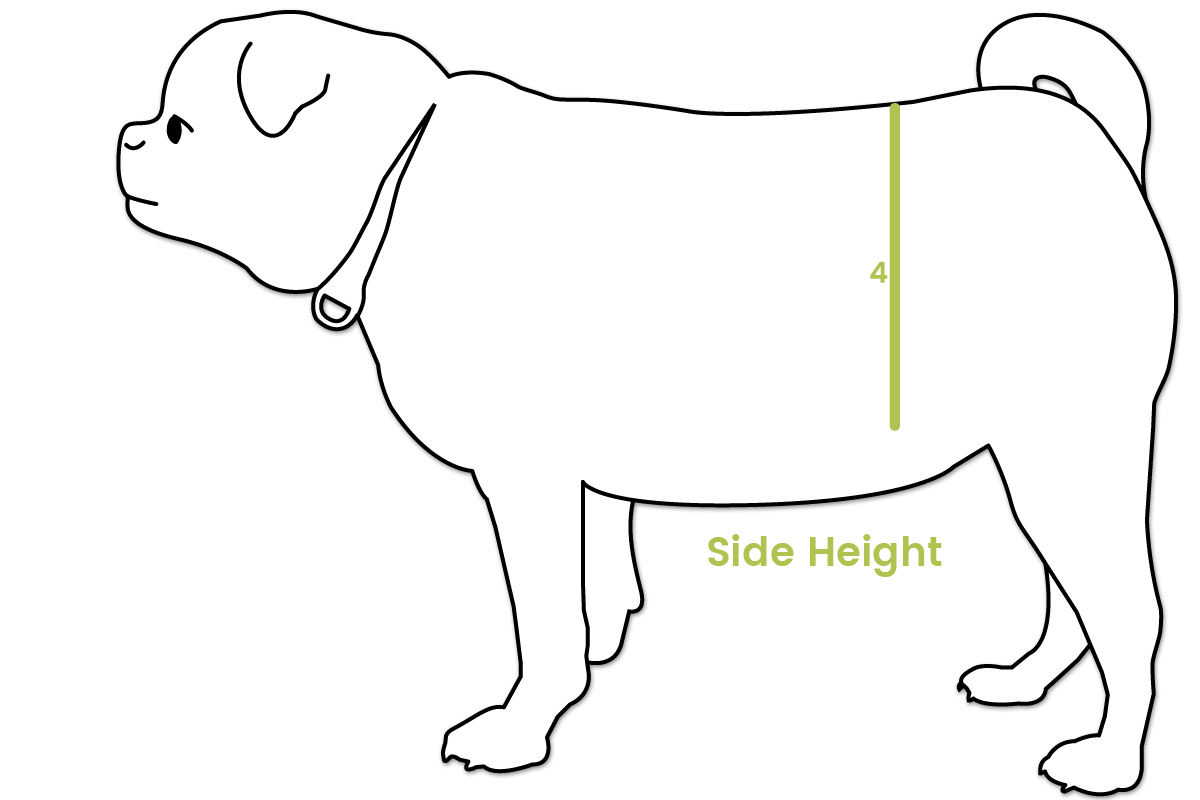
4. Side height:
Decide how far down you want the coat to hang on the side starting from the center of the back.
Arya: 8″
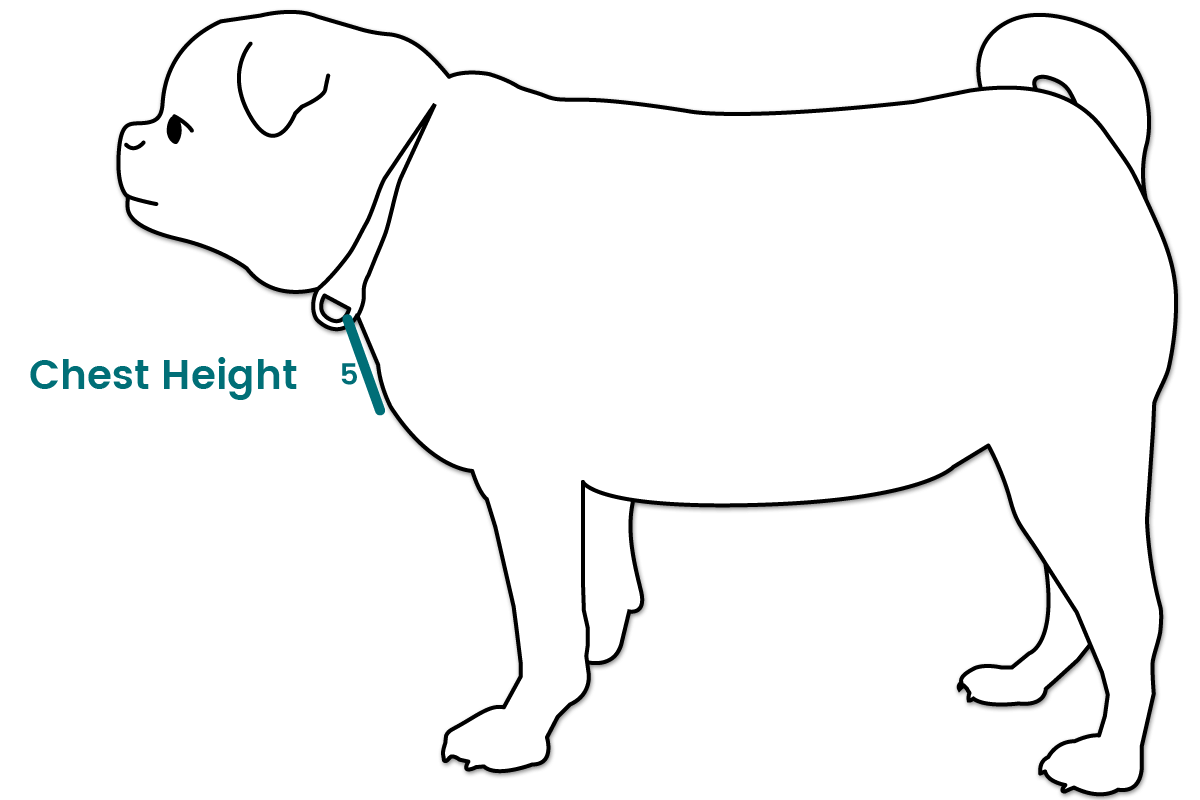
5. Chest height:
Decide the width of front straps by measuring from the bottom of the collar to where the strap should end at the chest.
Arya: 3.5″
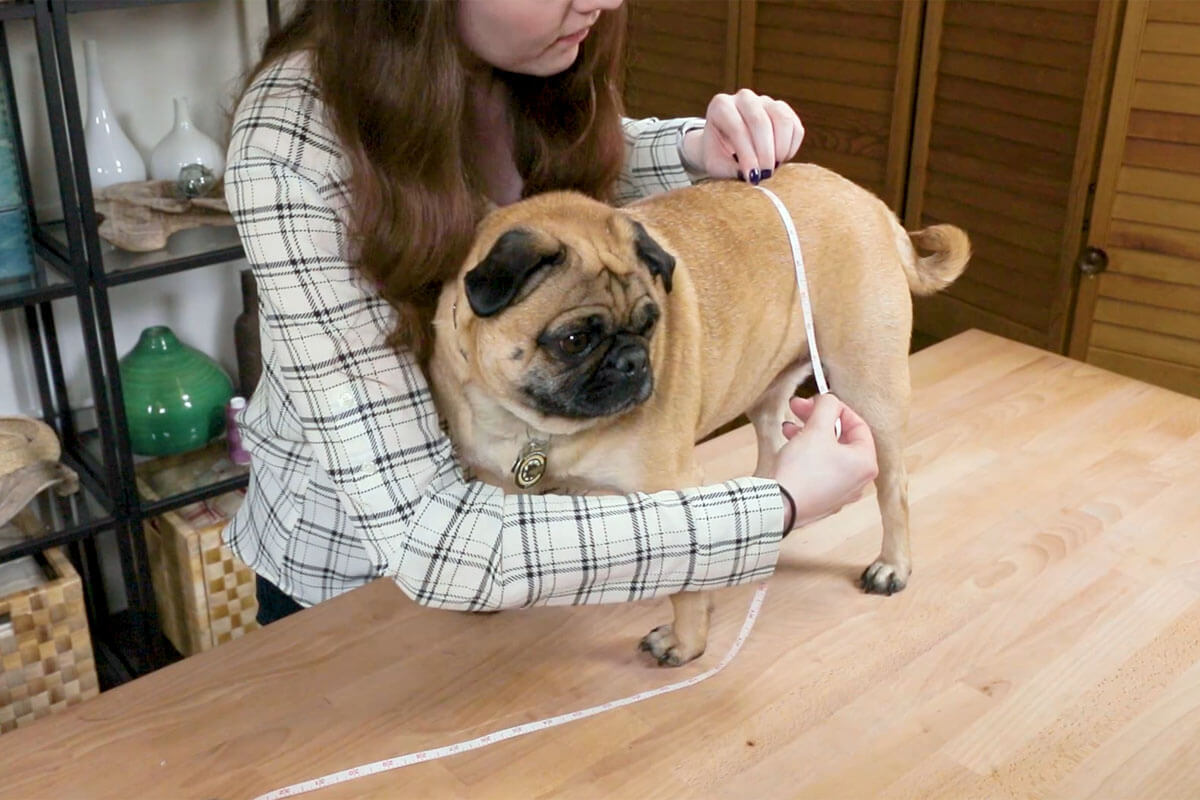
6. Neck to bottom strap:
To determine where to start the bottom straps, take a measuring tape, a piece of rope or something similar, and drape it over the back so it’s a comfortable distance from the backs of the front legs. Make sure it’s hanging straight, then measure from the collar to this spot on the back.
Arya: 5″

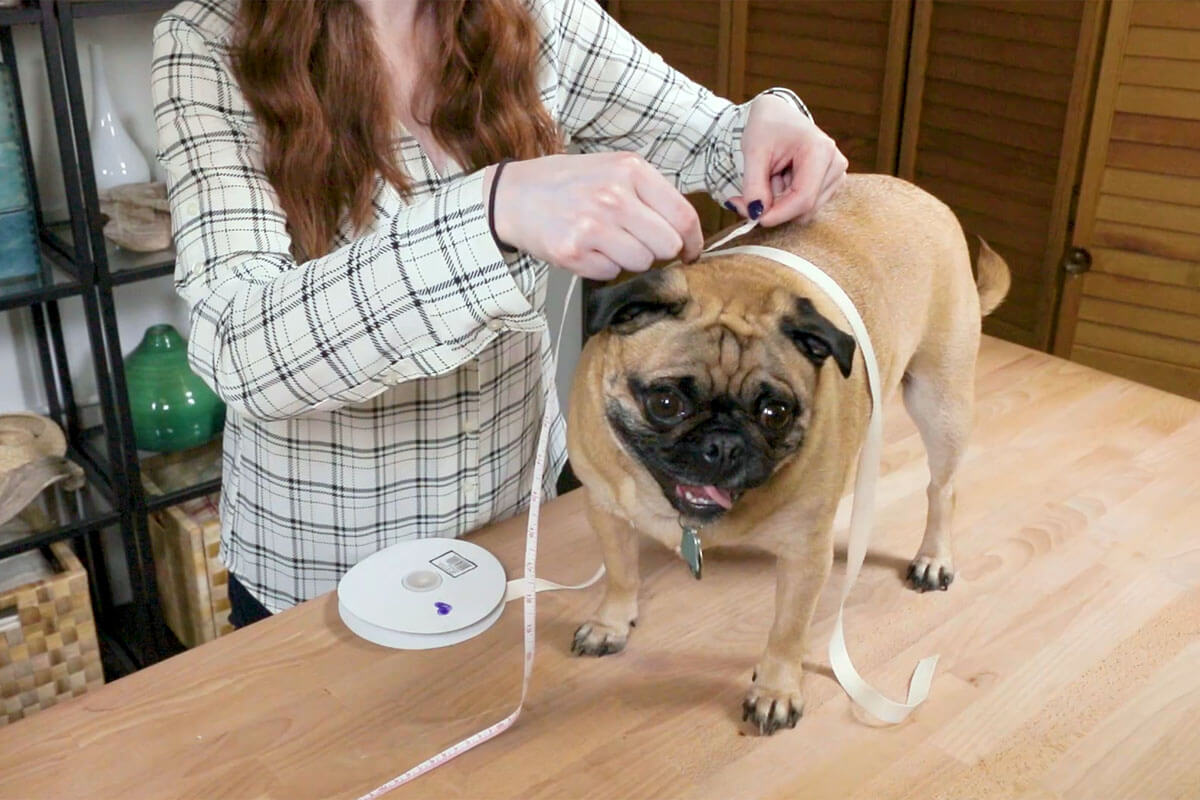
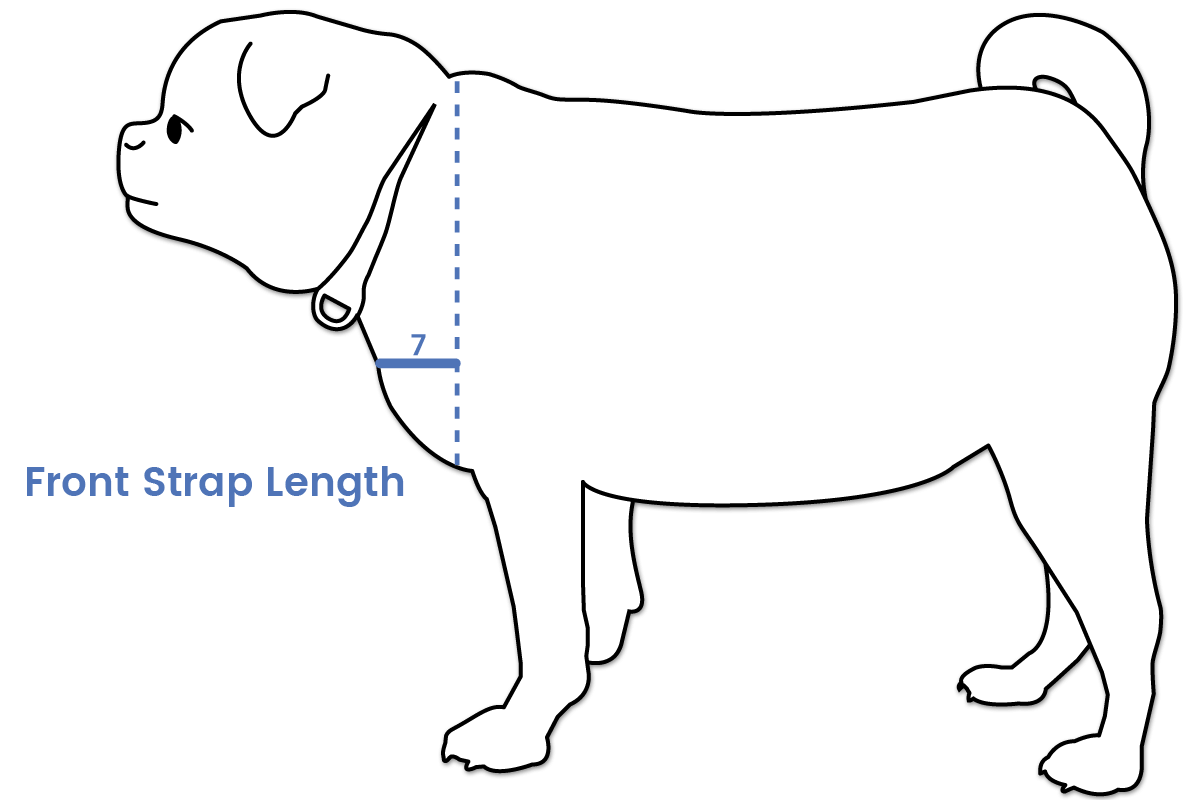
7. Front strap length:
Now move the tape to the collar and measure from this spot straight across to the center of the chest.
Arya: 4″
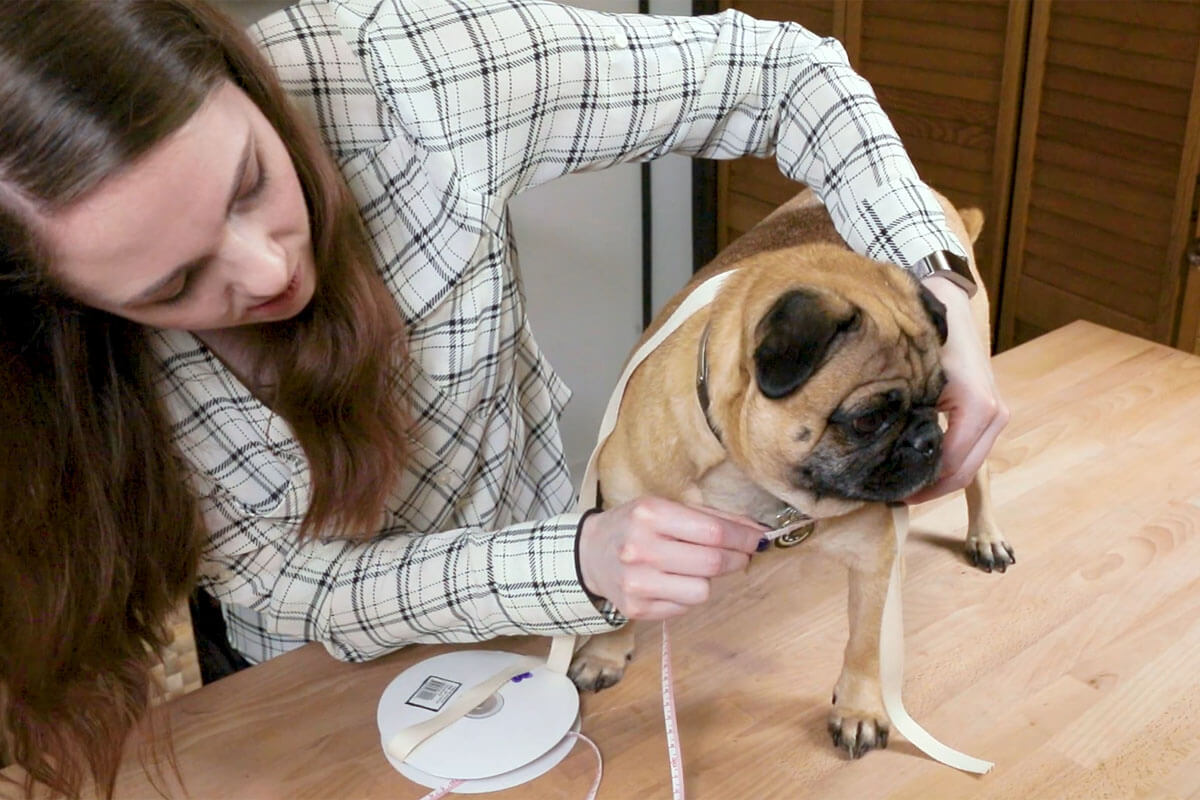
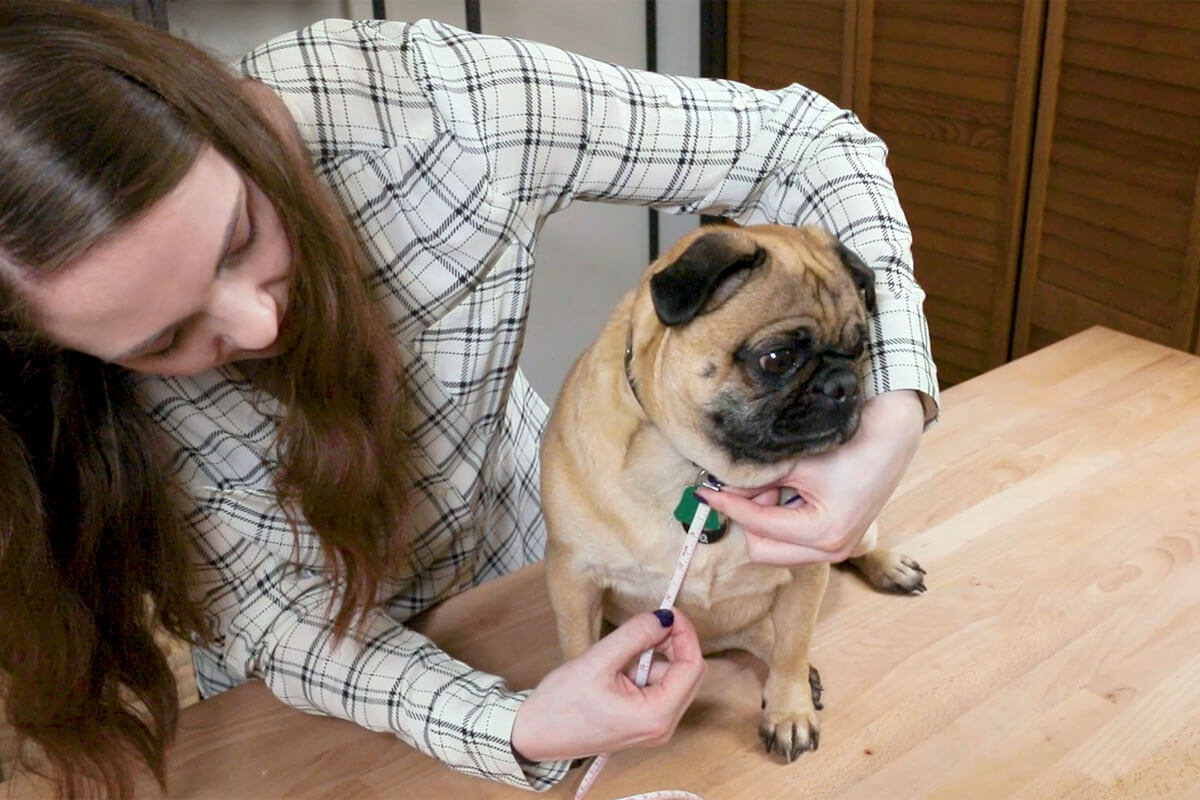
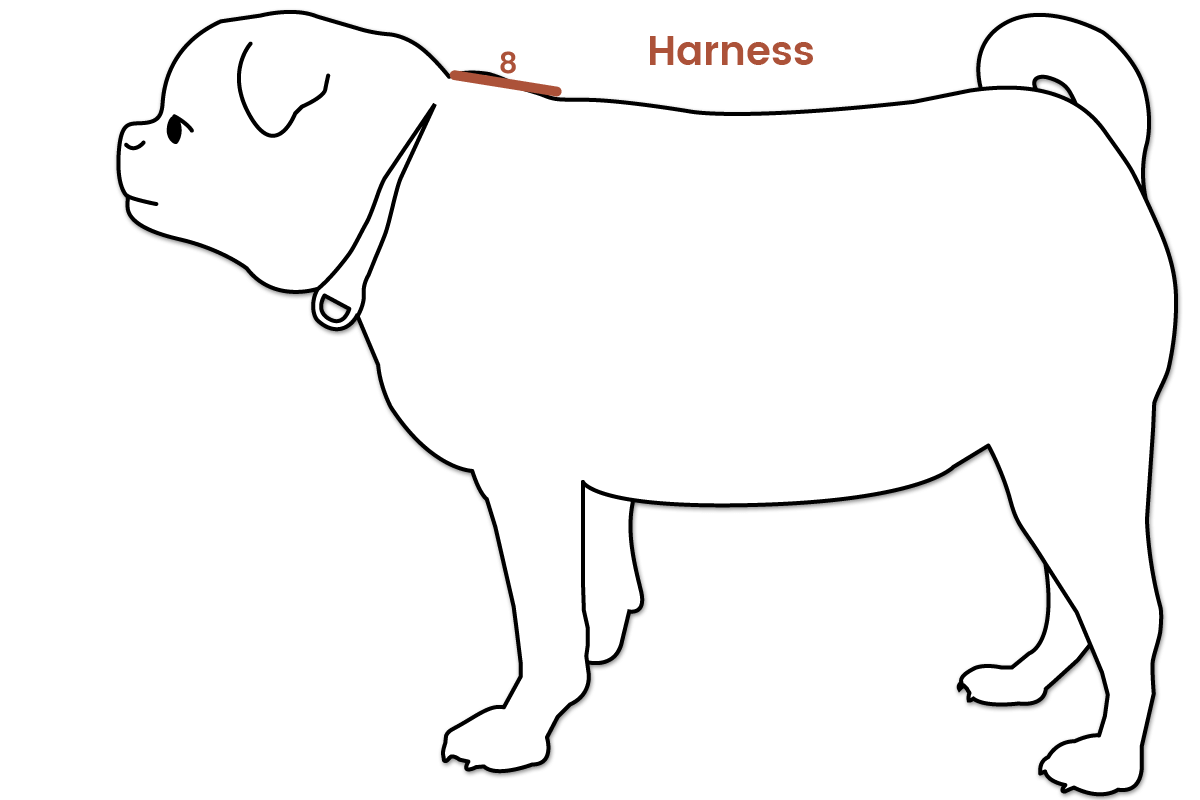
Harness:
If you want to be able to use a harness while your dog’s wearing the coat, measure from the collar to the center of the harness buckle.
Arya: 3.5″
Please note: If your dog has a long neck and the collar sits high, you may want to tie something lower around the neck and take all your measurements from there instead of the collar.
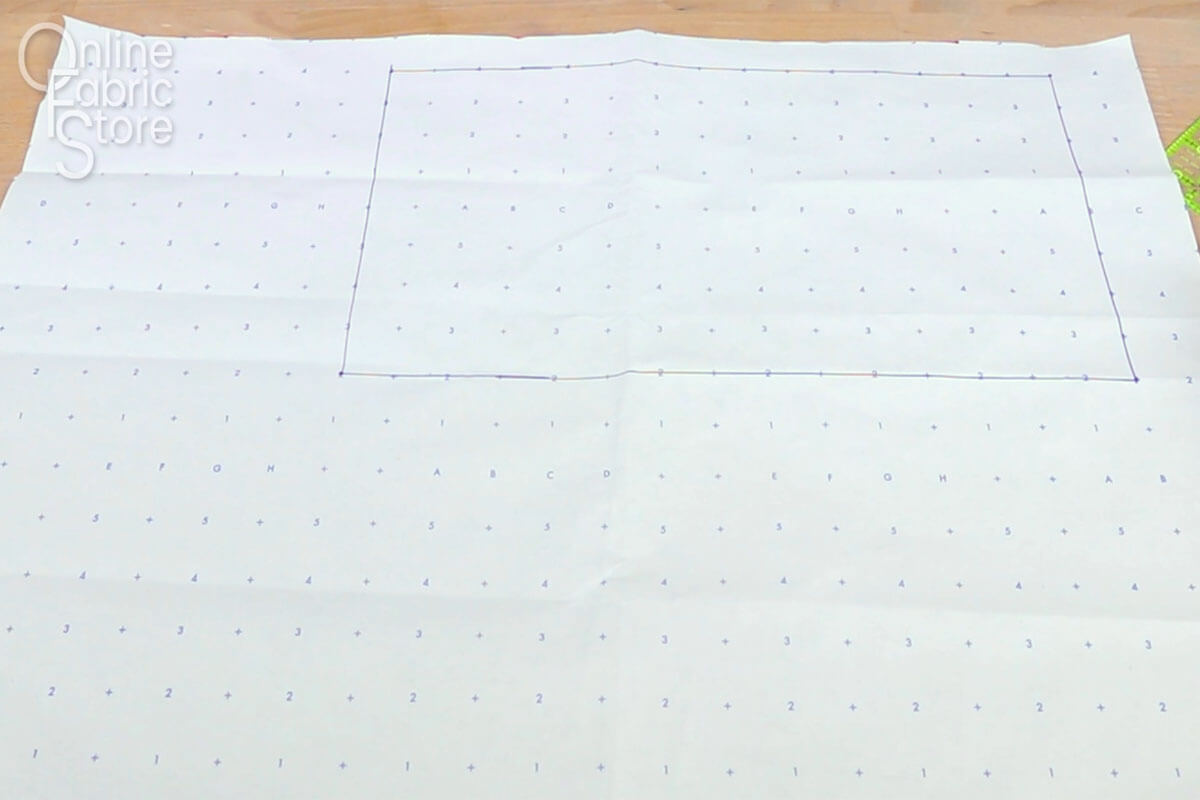
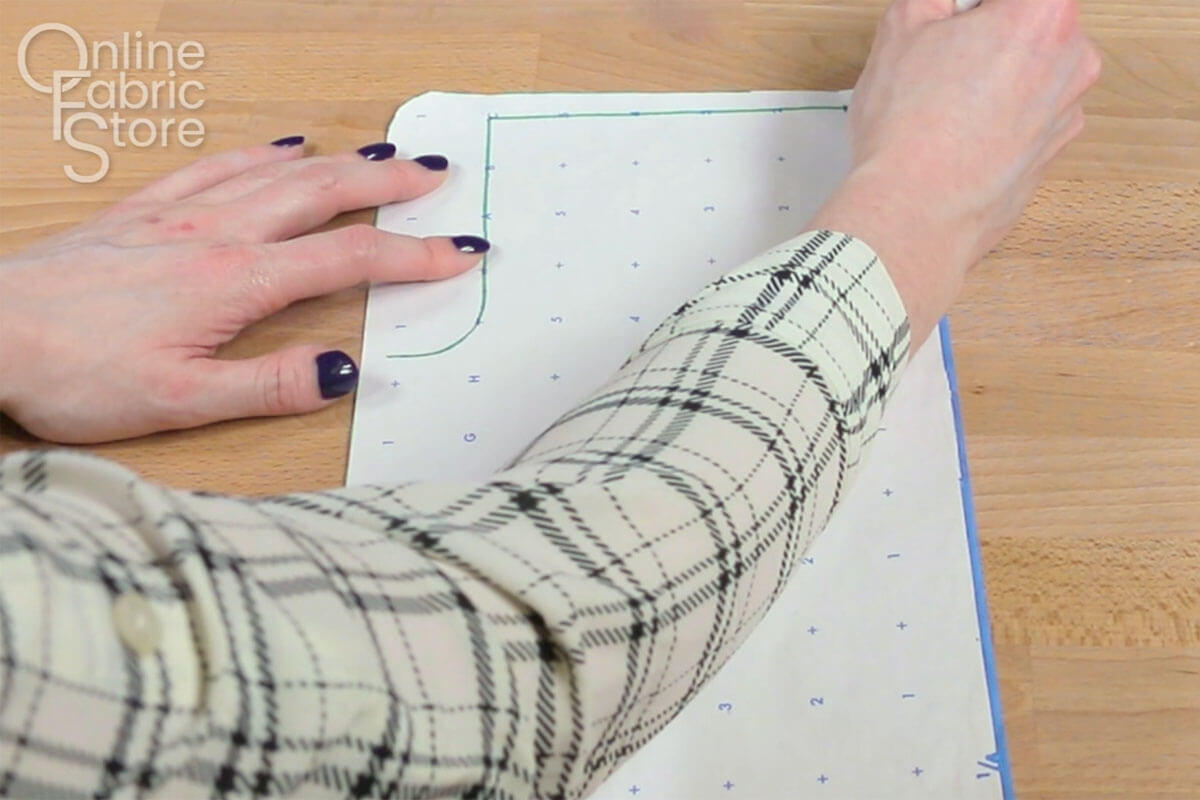
Step 2: Create the Template
Body Template
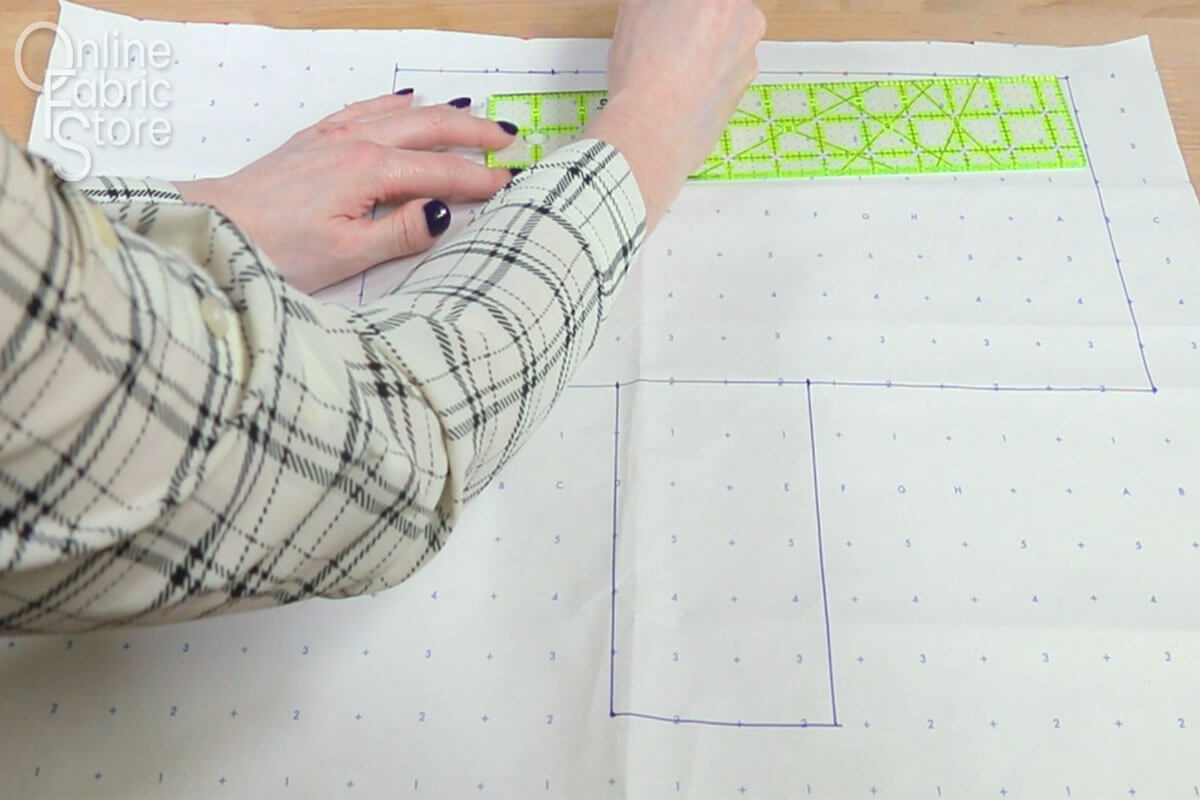
On a piece of pattern paper, start by making a rectangle that’s the back length by the side height.
If you don’t have pattern paper, you can use craft paper, tape pieces of paper together, or even use a large scrap of fabric.
For Arya that’s 15” by 8”
Take the neck to bottom strap measurement and mark this distance in from the bottom left corner of the rectangle.
Generally, the front strap width, which is the chest height measurement is also good for the bottom strap width so make another mark at this distance.
Arya
Neck to bottom strap: 5”
Chest height measurement: 3.5″
Next take the chest circumference, add 2 inches so the straps can overlap, and divide it in half.
Make a mark at this distance starting from the top of the rectangle. Draw a rectangle for the bottom strap from the marks.
For Arya, that’s 26 + 2 = 28 / 2 = 14”
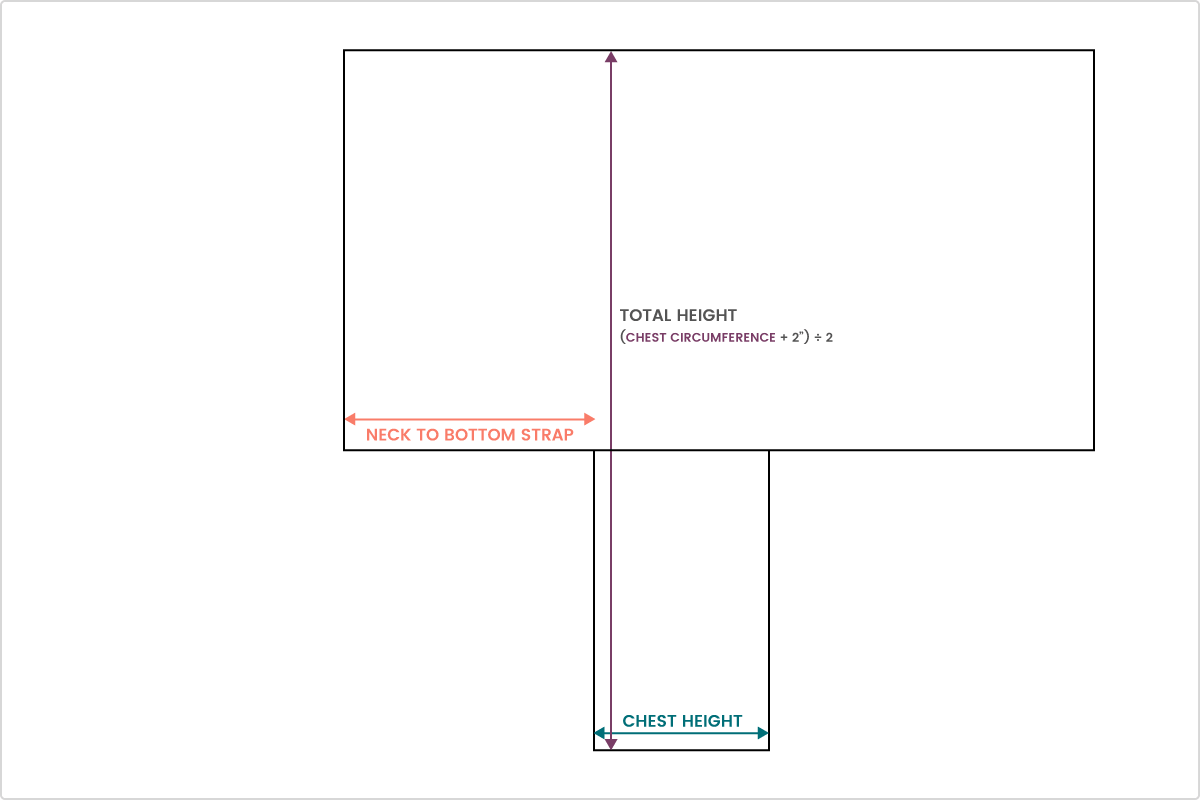
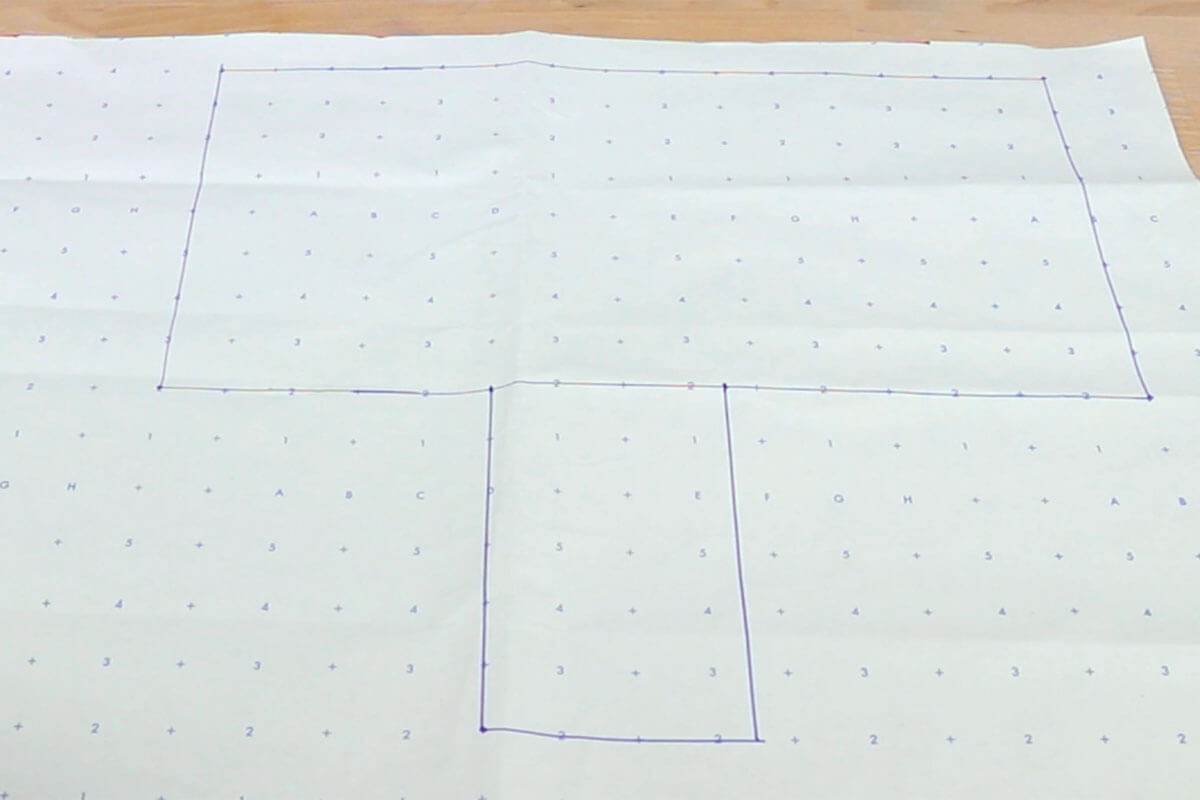
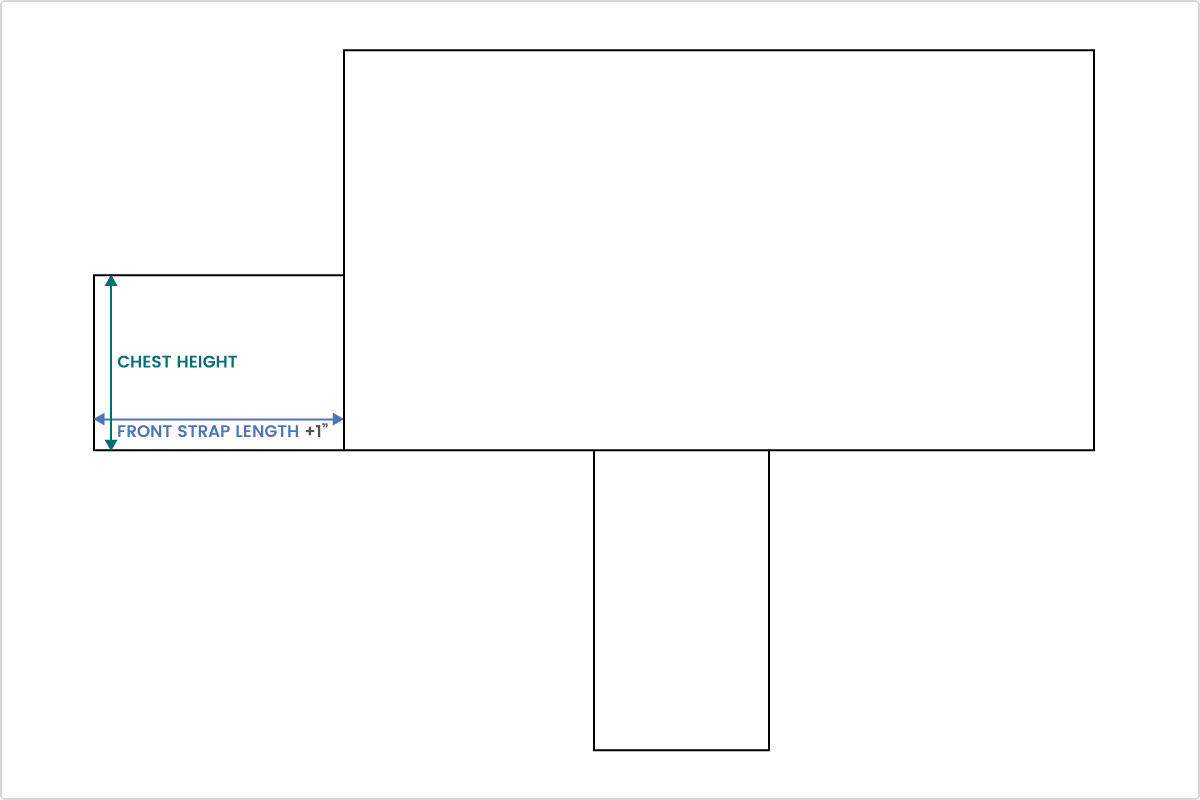
Draw another rectangle at the bottom left corner of the large rectangle. The width is the front strap length measurement plus 1” for overlap.
Use the chest height measurement for the height of this rectangle.
For Arya, that’s 4 + 1 = 5”
Next, add 2” to the neck circumference measurement for overlap and divide that in half.
For Arya, that’s 16 + 2 = 18 / 2 = 9”
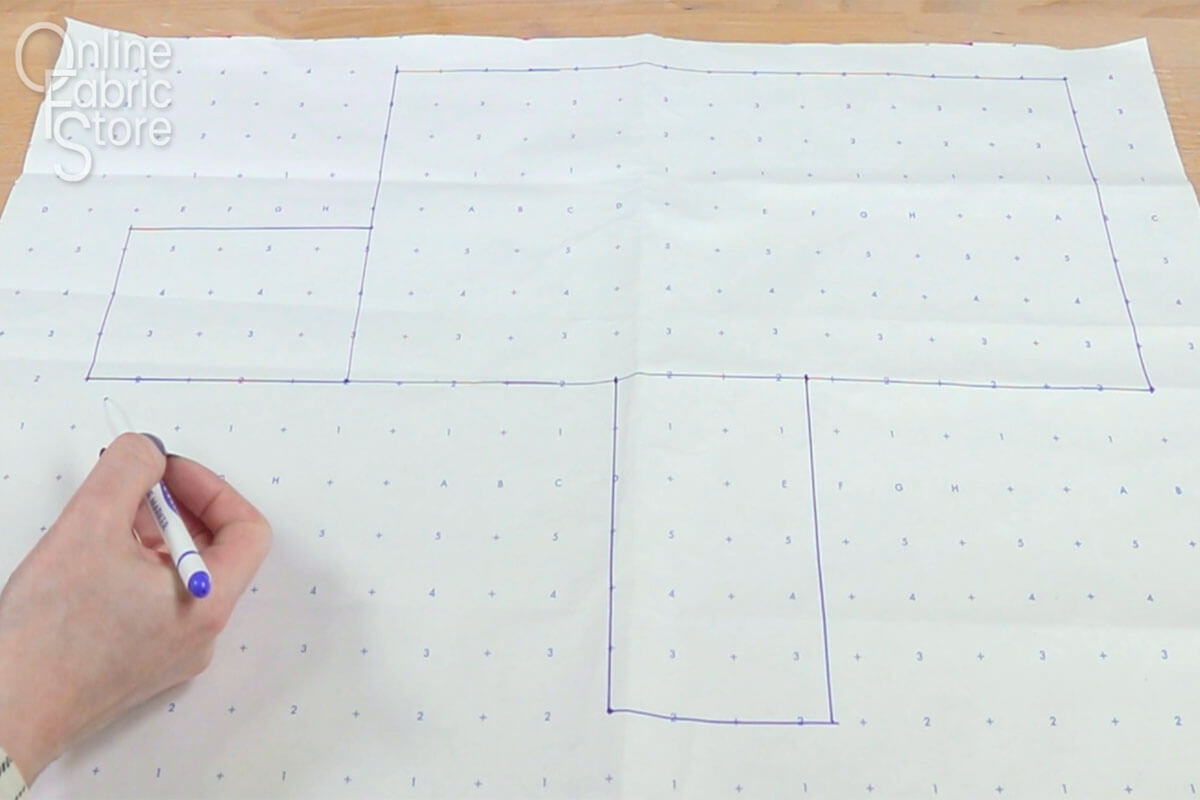
Take a flexible measuring tape and curve it so that the distance from the top left corners is that amount.
It may end up just being a small curve in the corner like this.
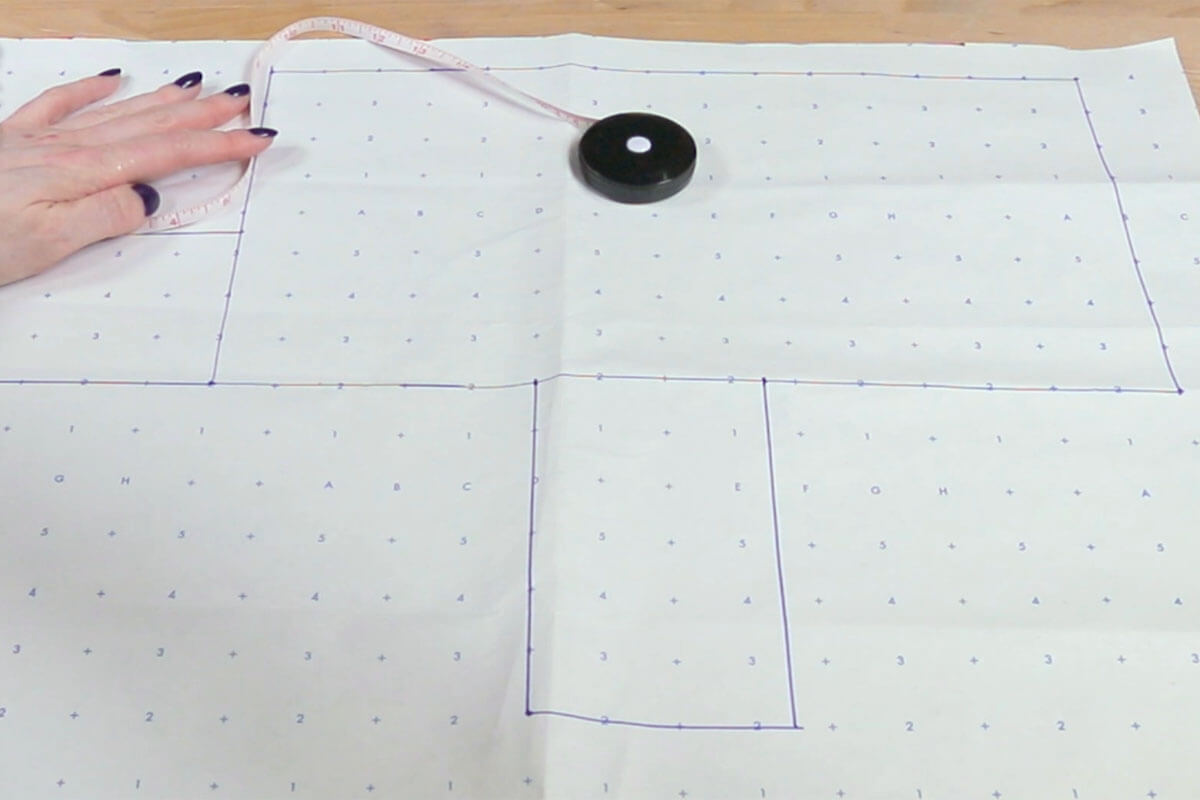
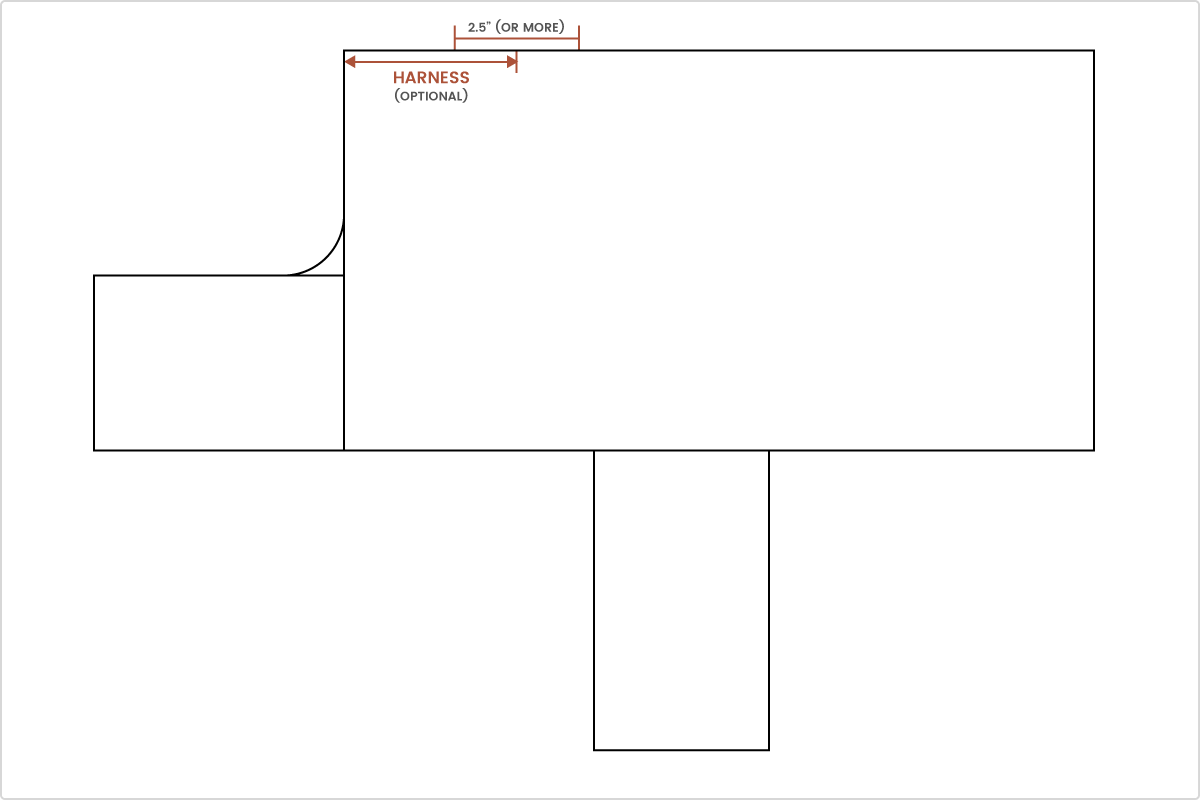
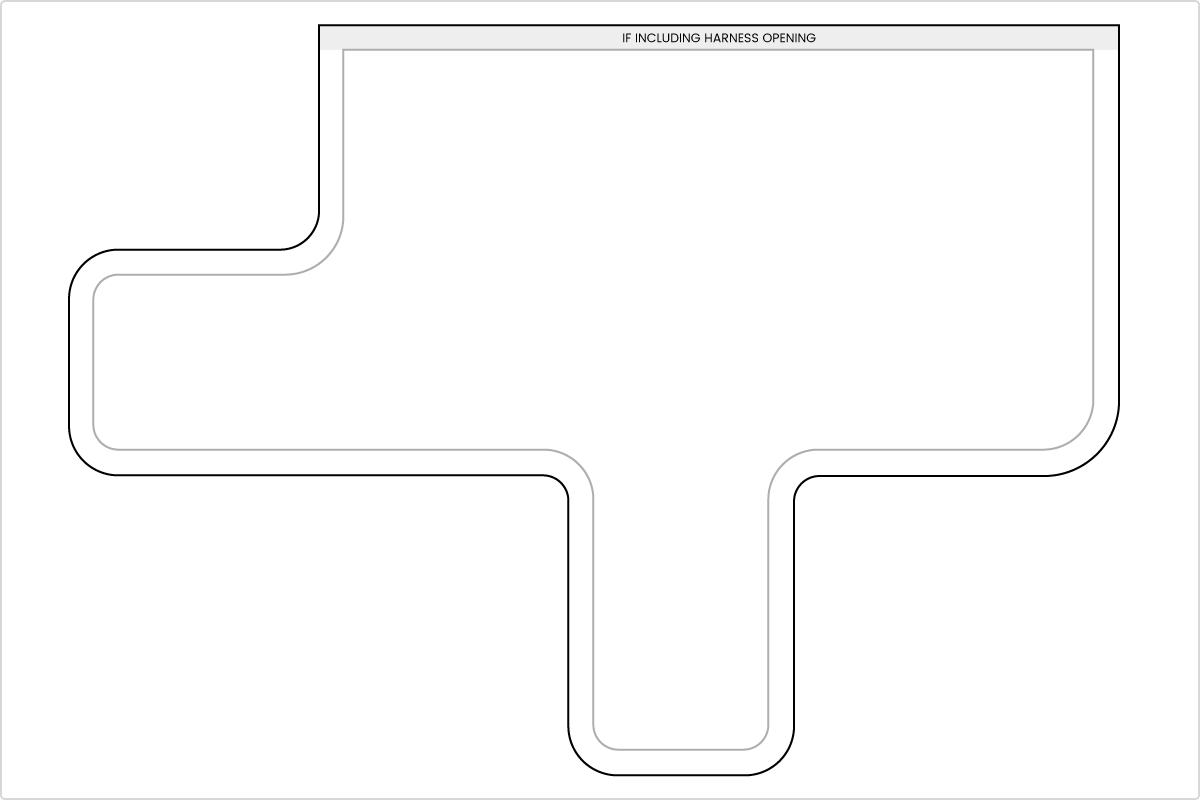
If you want to have an opening for a harness, measure in the distance from the collar to harness and make marks on either side that are 2 ½” apart. You can make this opening larger if you prefer, especially for bigger dogs.
Round the corners of the 2 straps a bit, as well as where the bottom strap connects and the bottom corner.
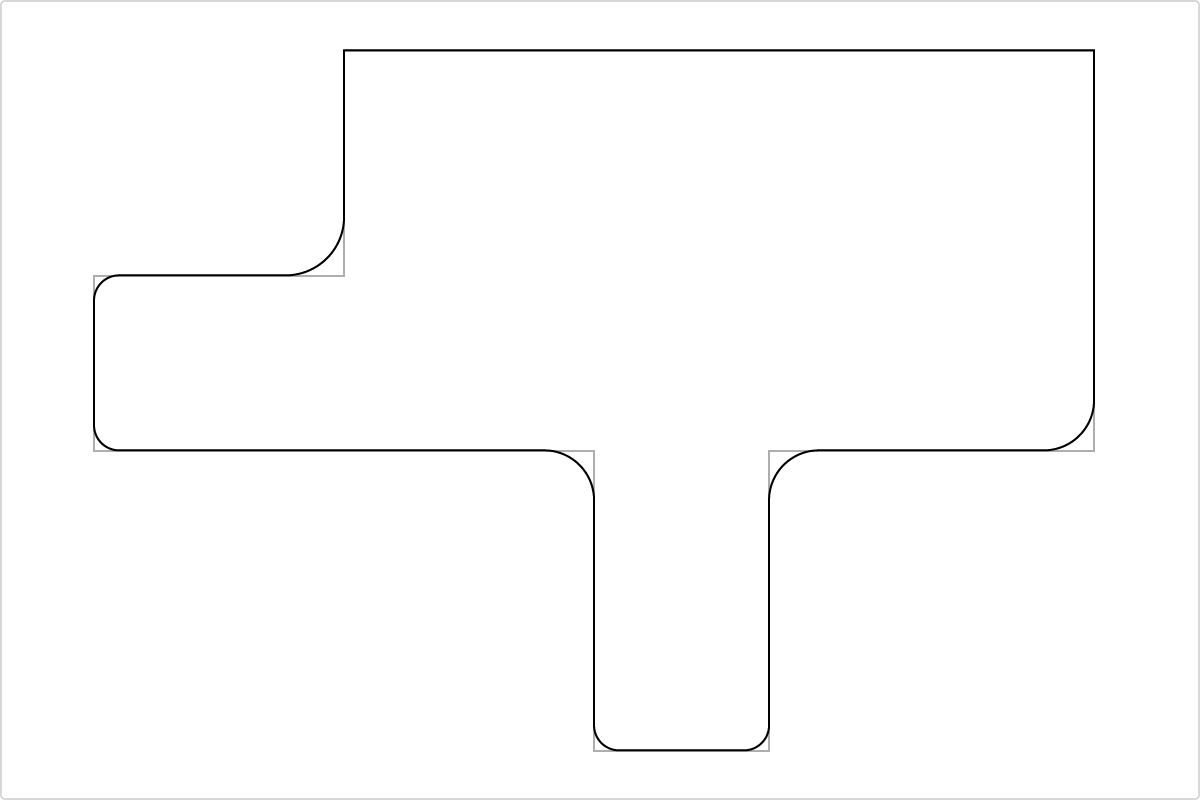
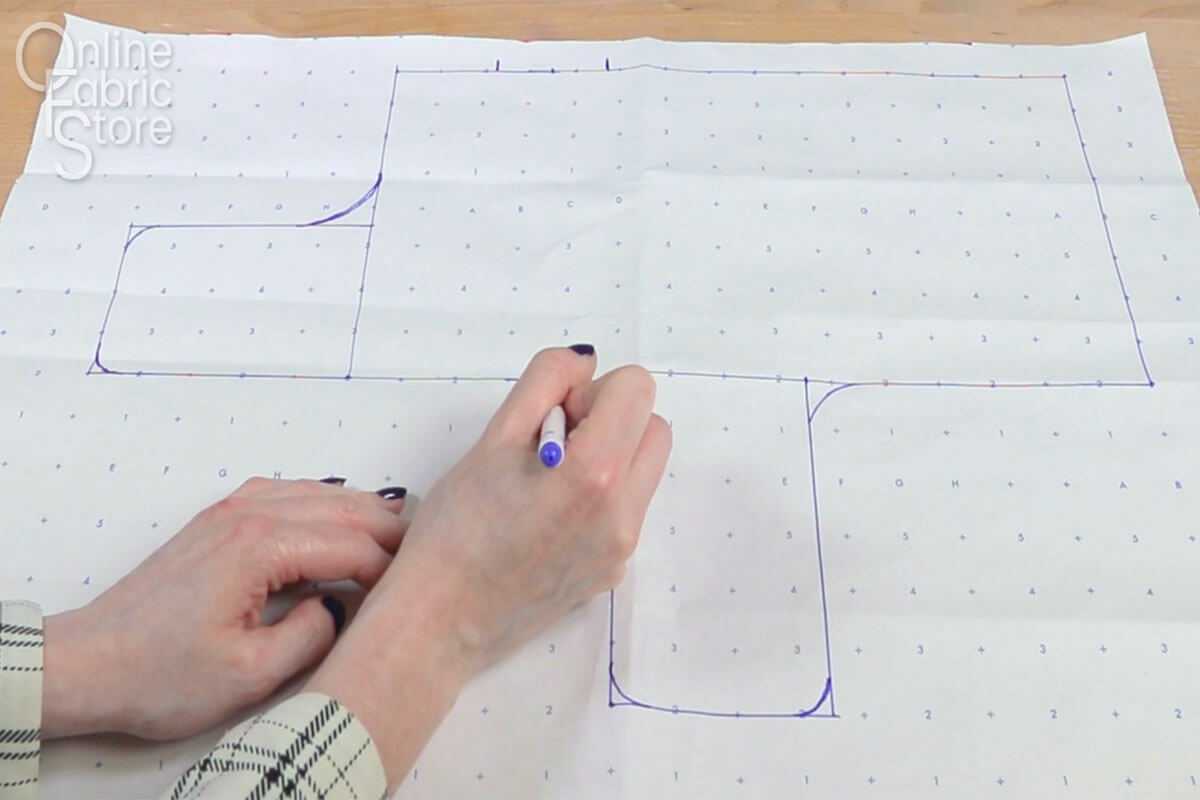
Finally add ½” for the seam allowance around the entire thing. If you are not making a harness opening, don’t add ½” to the top line.
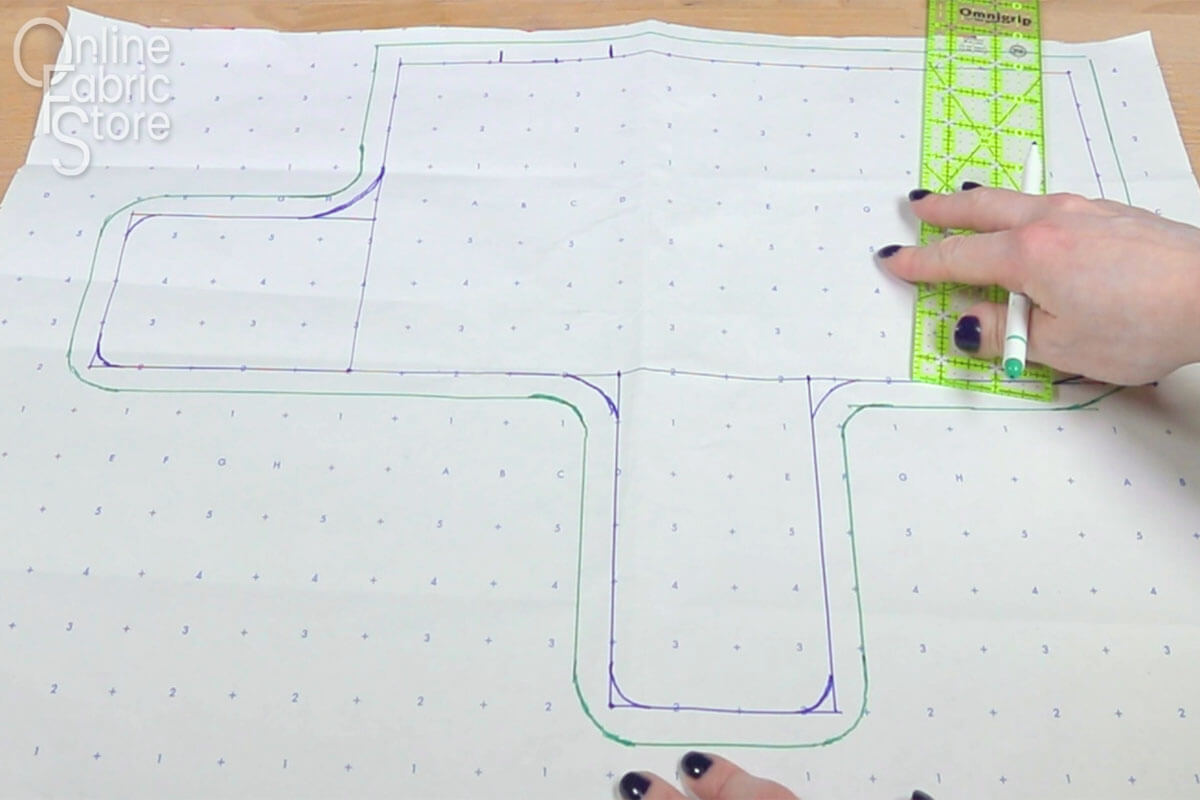
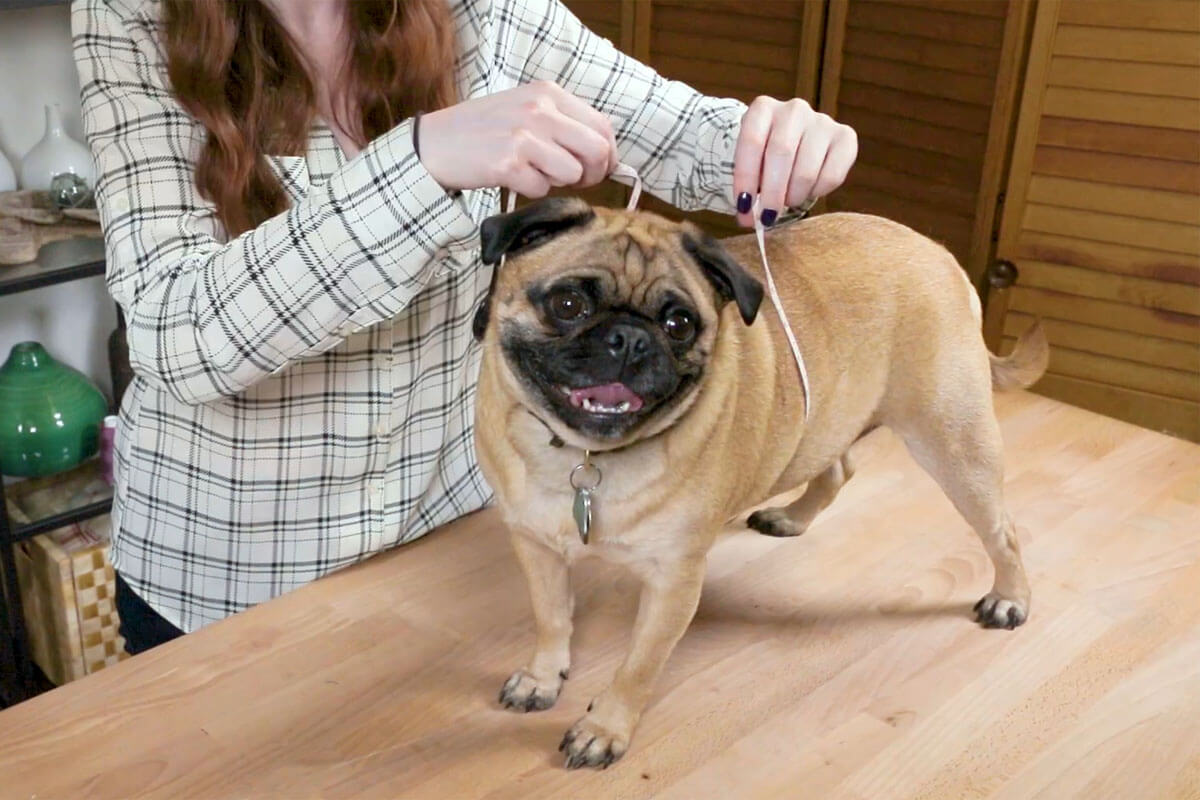
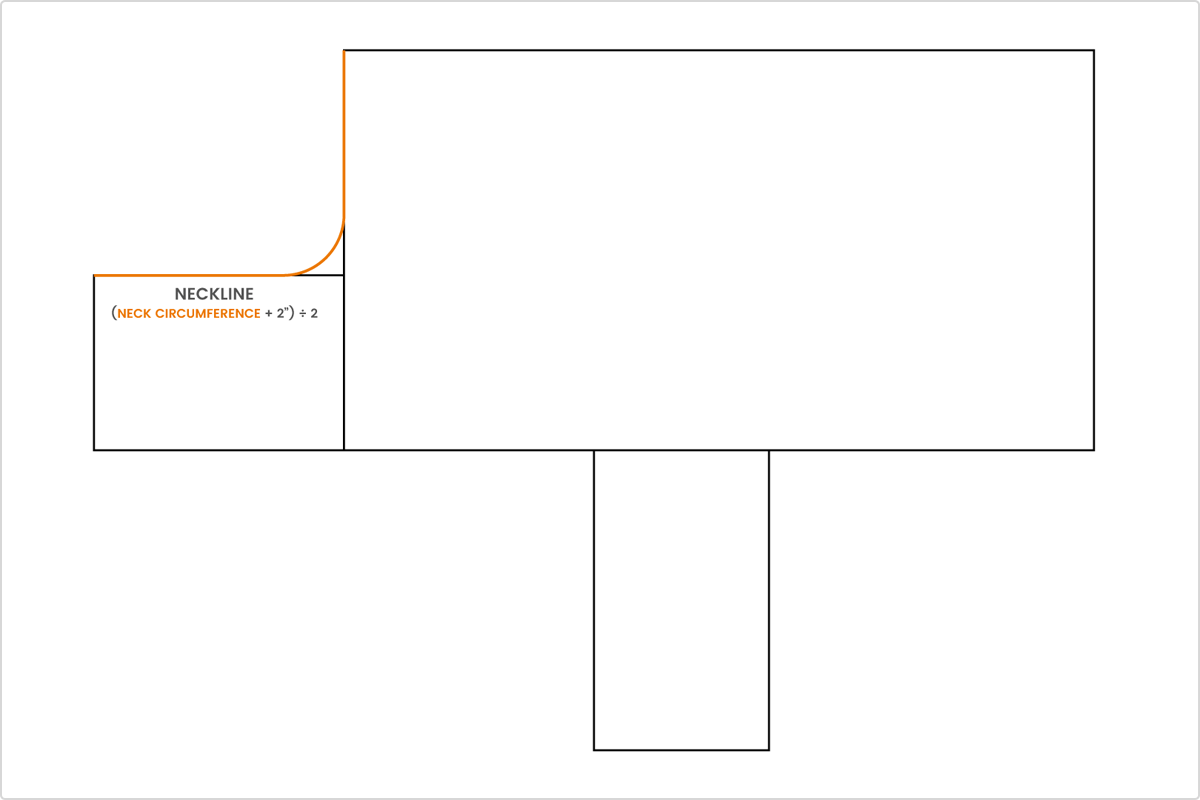
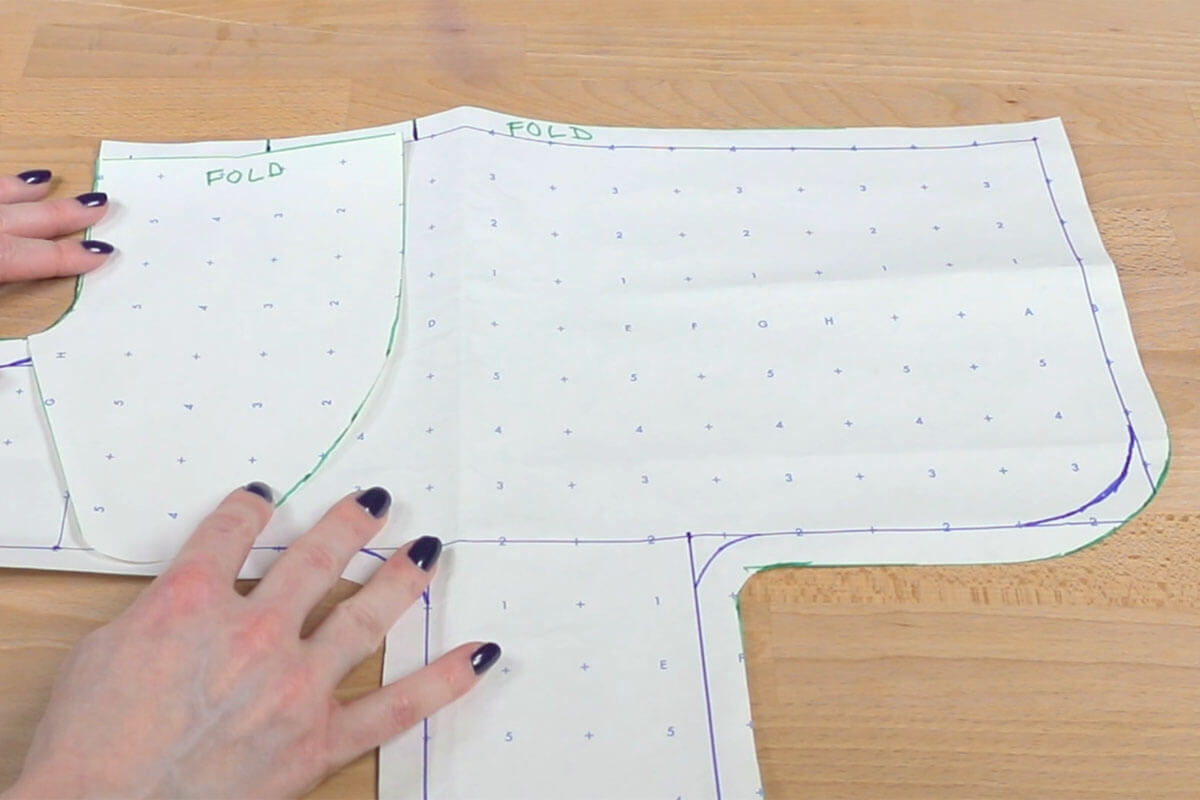
Collar Template
To make the collar piece, trace the neckline onto another piece of paper.
Draw a horizontal line at the top that is the width of the collar.
Arya: I’m making this collar 4” wide, so adding an inch for seam allowance, the template will be 5” wide.
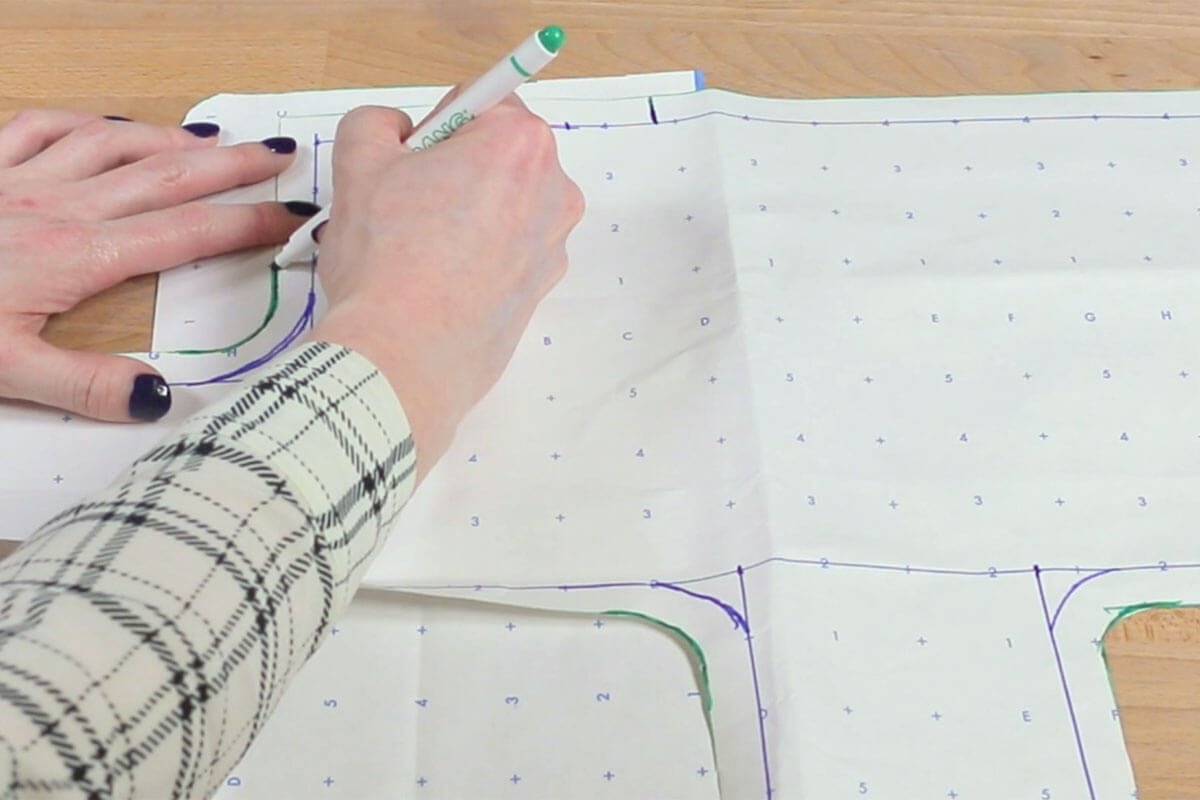
From here you can decide the shape of the collar. I started by drawing a vertical line a little before the curve of the neckline. Measure out 5” from the curve to create a dashed line. Connect the dashes and curve the bottom corner a bit.
You can do a smaller or larger collar depending on the size of the dog.
Cut out the shape and mark the top with “Fold”.
I forgot I don’t need the top seam allowance for the collar so if you added it to the top of the main body piece, cut off ½” at the top of the collar piece.
Once I cut the collar template out, I decided to change the shape a bit so I angled the bottom and rounded the corner.

It’s a good idea to cut out a scrap piece of fabric first to make sure the body template works well for your dog. Keep in mind it will be smaller once sewn because of the seam allowances but it will also be bulkier with all the layers.
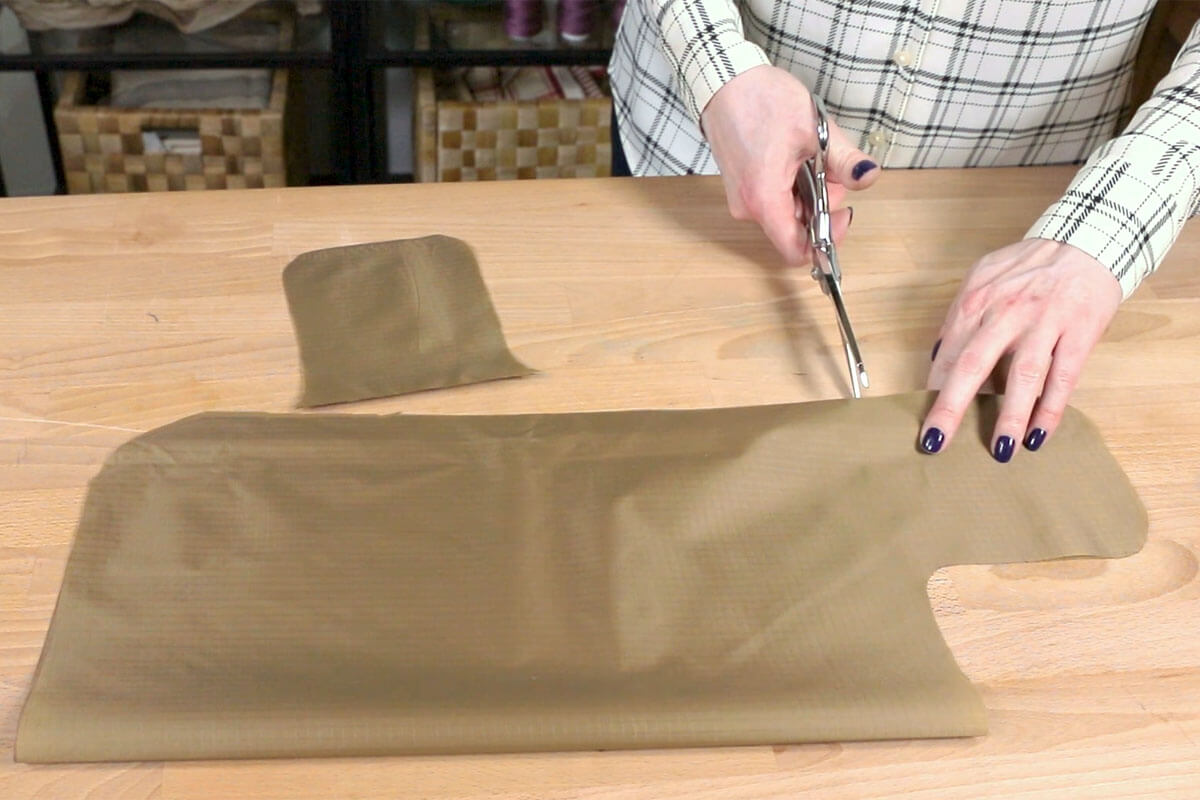
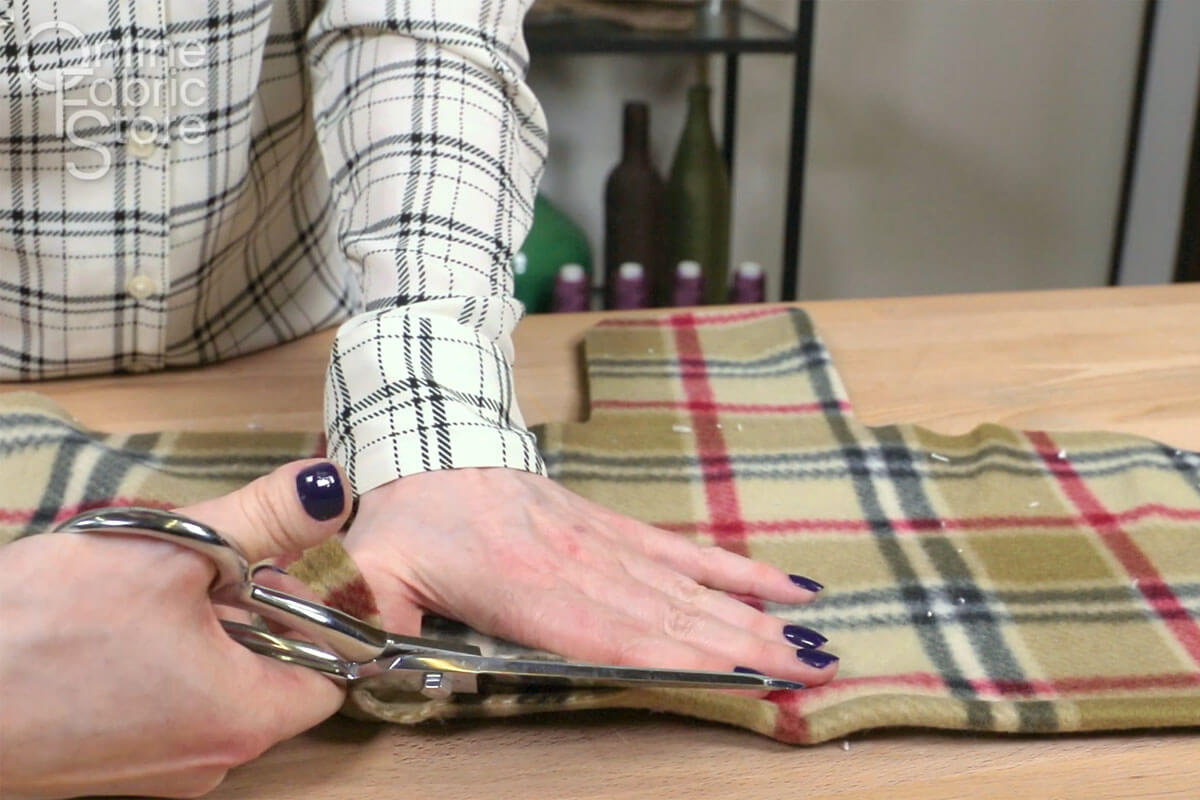
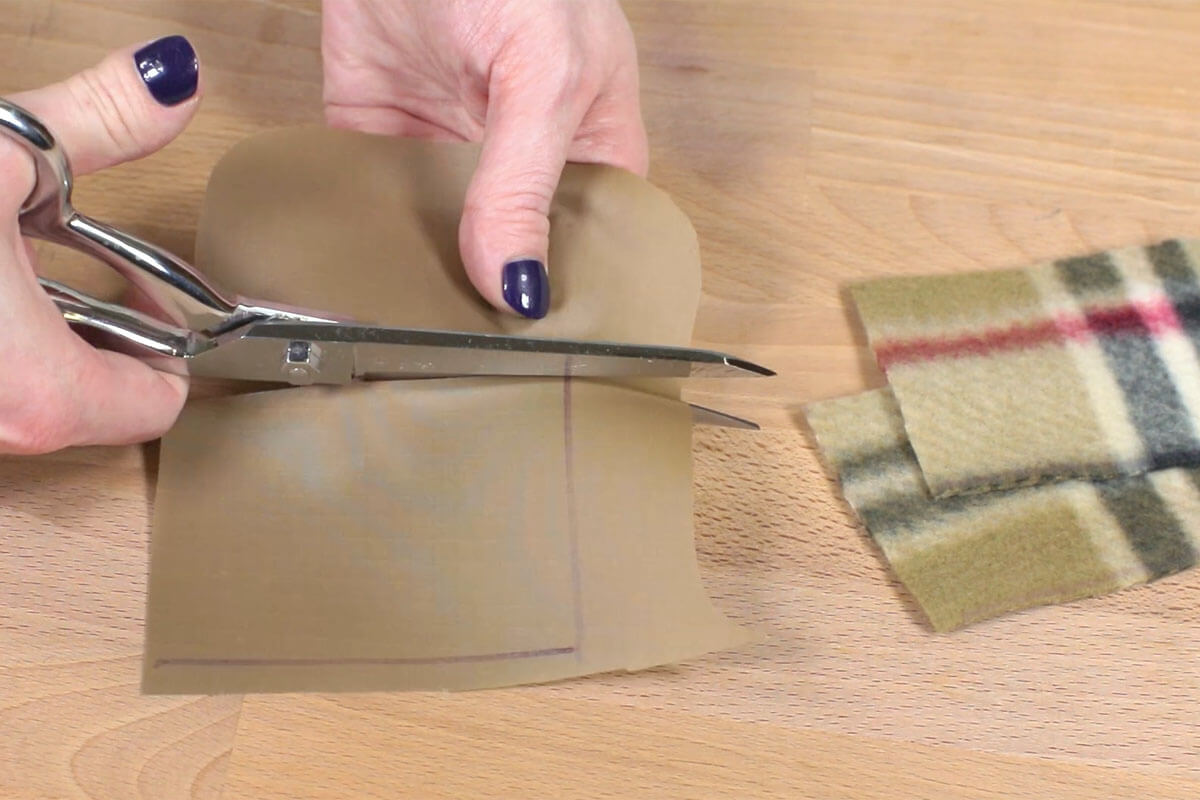
Step 3: Cut the Fabric
Fold your outer fabric in half and place the top of the template on the fold. Trace around the pattern and cut out the fabric. Do the same for the collar piece.
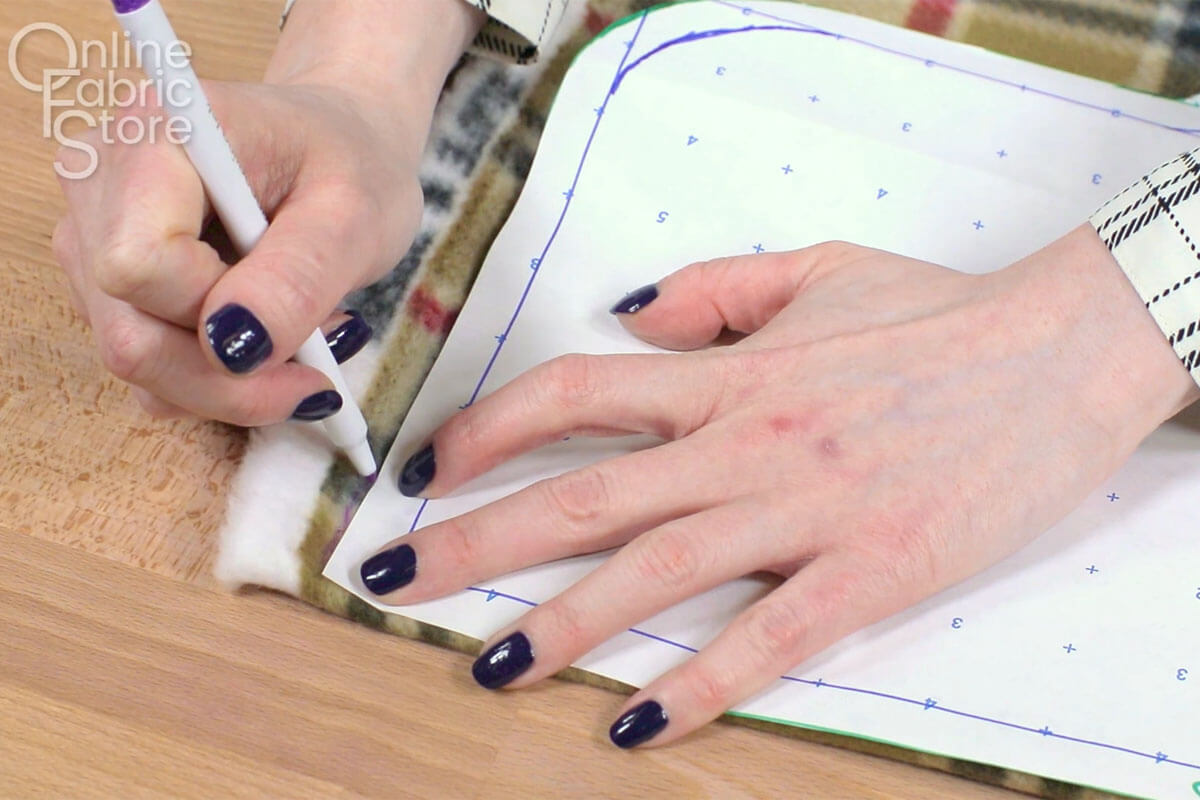
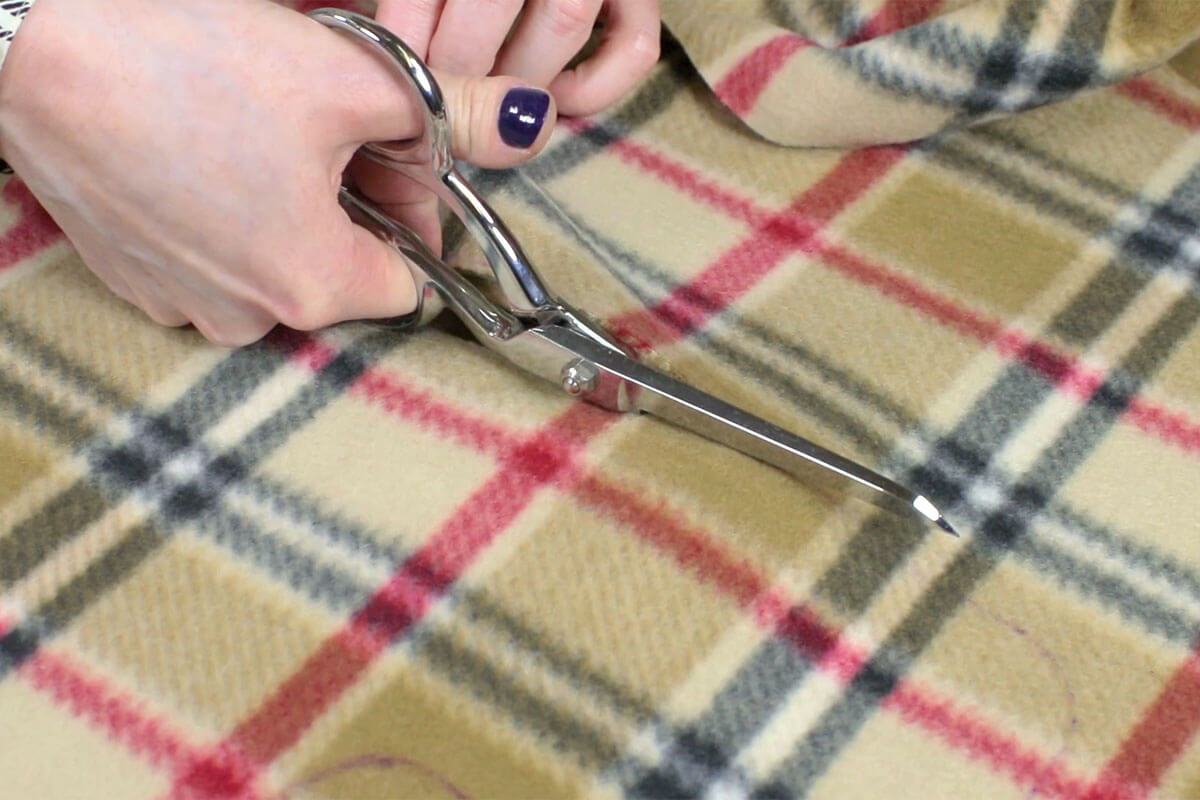
Repeat for the lining and nylon fabrics.
For the nylon, I ended up cutting off the straps because the ripstop doesn’t stretch at all and the straps will have more adjustability without the nylon.
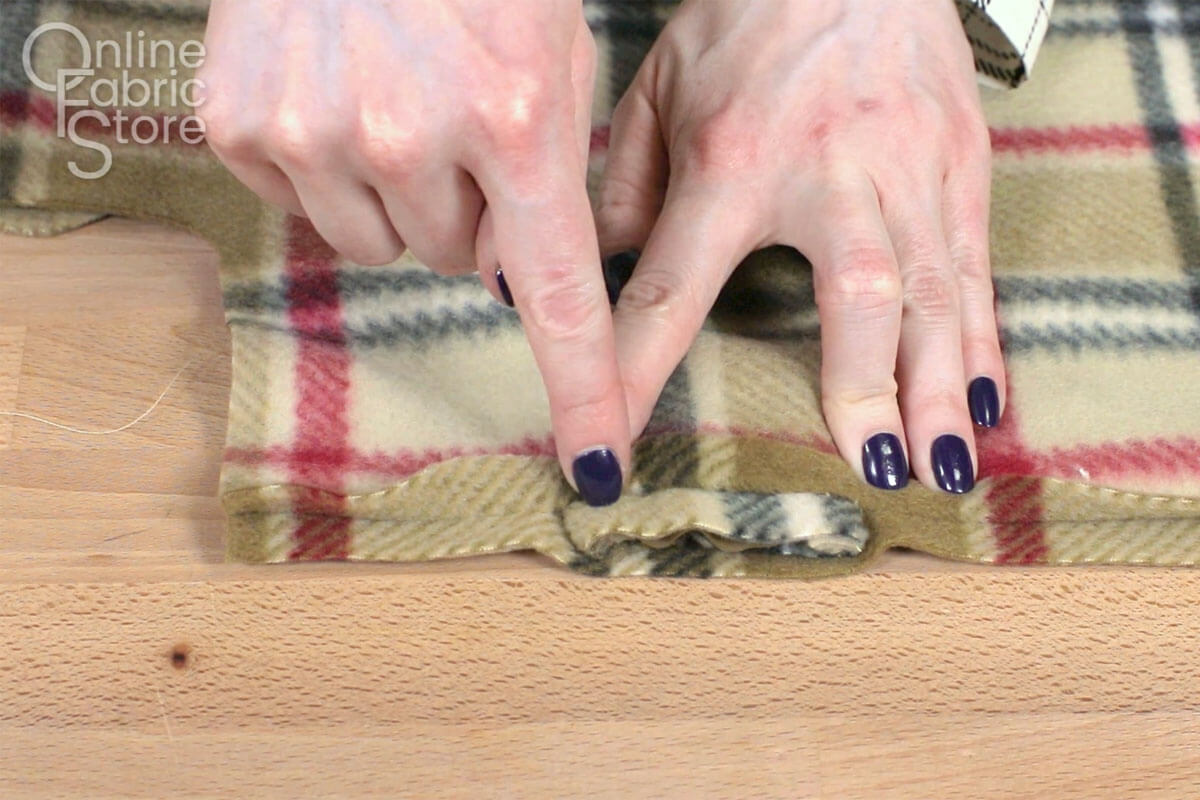
Step 4: Make the Harness Opening (Optional)
If you are including an opening for a harness, use the template to mark the opening.
Sew across the top fold with a ½” seam allowance. Stop at the mark and backstitch, then backstitch again when starting after the other mark.

Cut the fold open.
Repeat for the lining and nylon. With the nylon, open the seam and sew on both sides of the seam to keep it flat.
Cut out two pieces of fleece that are 3 ½” long and between 2 and 2 ½” wide and piece of nylon of the same size. (I started off with 2 ½” and ended up cutting off ½”.)
If your harness opening is a different length, do the length plus 1” by 2 or 2 ½”.
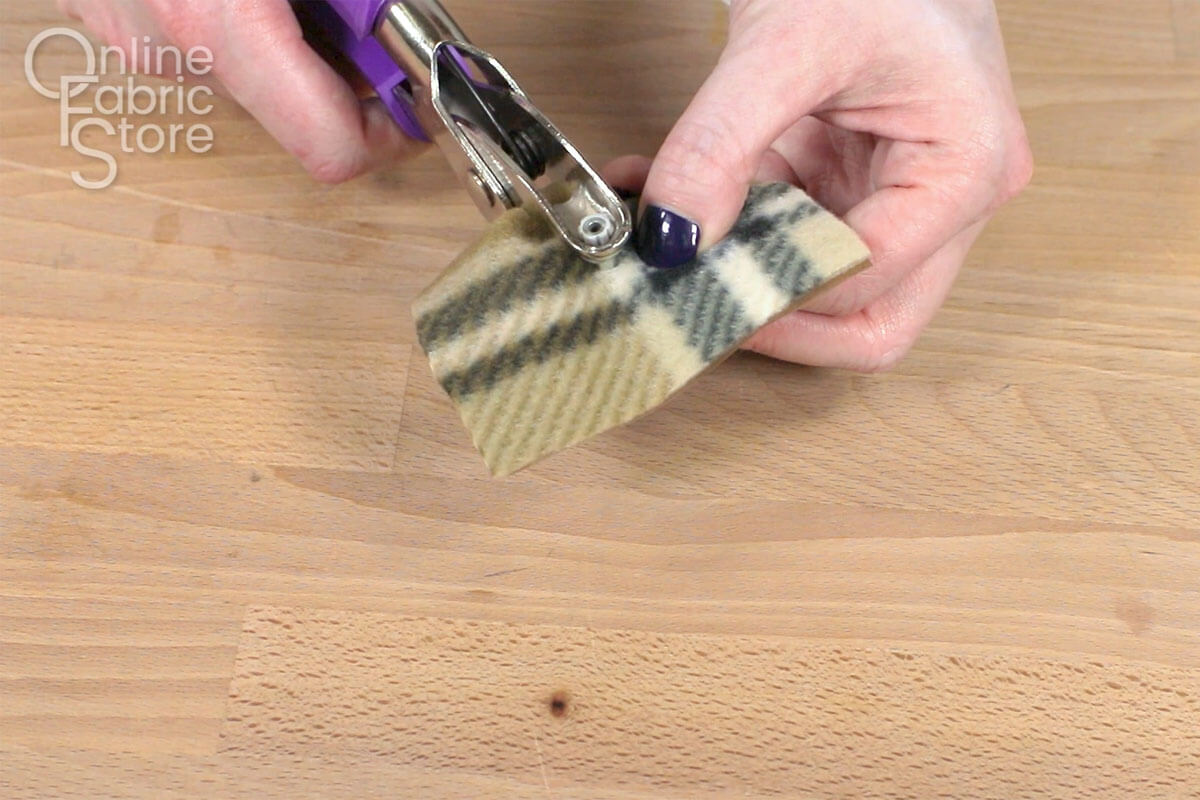
With one of the fleece pieces and the nylon piece together, attach one side of the snap in the center on the fleece side. See our tutorials for more details on attaching snaps.
You can use sew-on snaps or heavy-duty snaps like the kind I’m using. The other side of the snap will be attached later.
With the right sides of the fleece together, sew one of the long sides and the 2 short sides. I’m going to round the corners a bit as I sew.
Turn the piece right side out so the nylon is in the middle.
With the non-snap side of the flap facing the right side of the fleece at the slit, tuck the flap in the opening so the edges match up.
Sew together with ½” seam allowance.
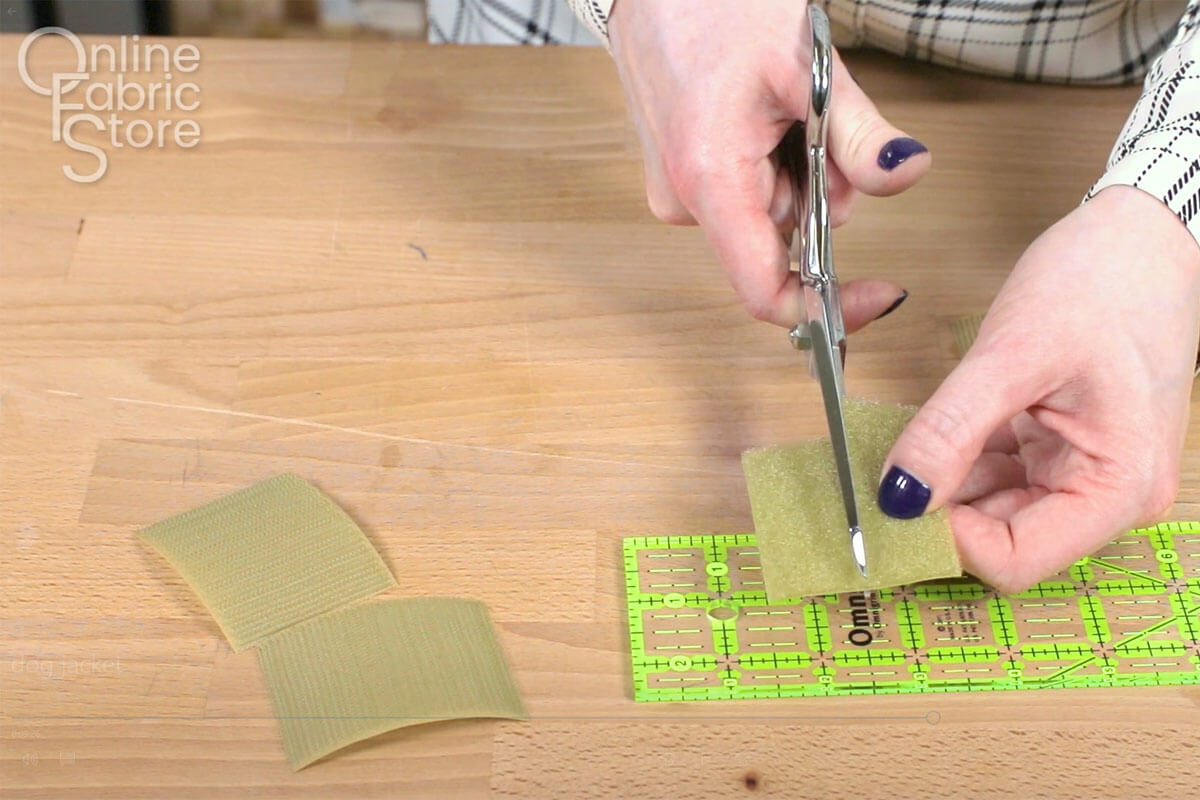
Step 5: Sew the Velcro
I used 2″ wide Velcro but you could also double up 3/4″ wide Velcro.
Cut strips of Velcro that are 2 inches less than the width of the straps. You’ll need 2 of the hook side and 1 of the loop side and cut the loop side in half so you have 2 one inch strips.
Sew the hook side to the front side of the lining with it centered and ¾” from the end. Do this for the chest and waist strap on the same side.

Sew the loop side to the front side of the fleece in the same way but make sure it’s on the opposite side from the lining.
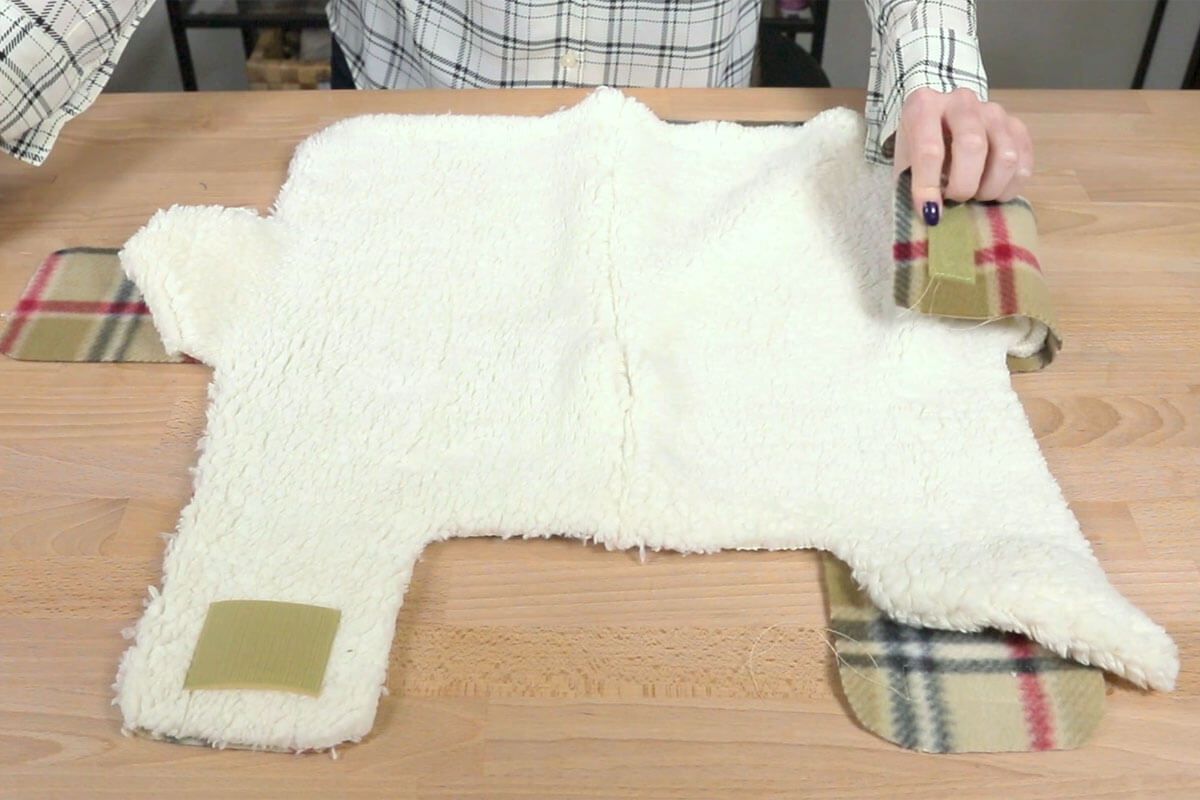
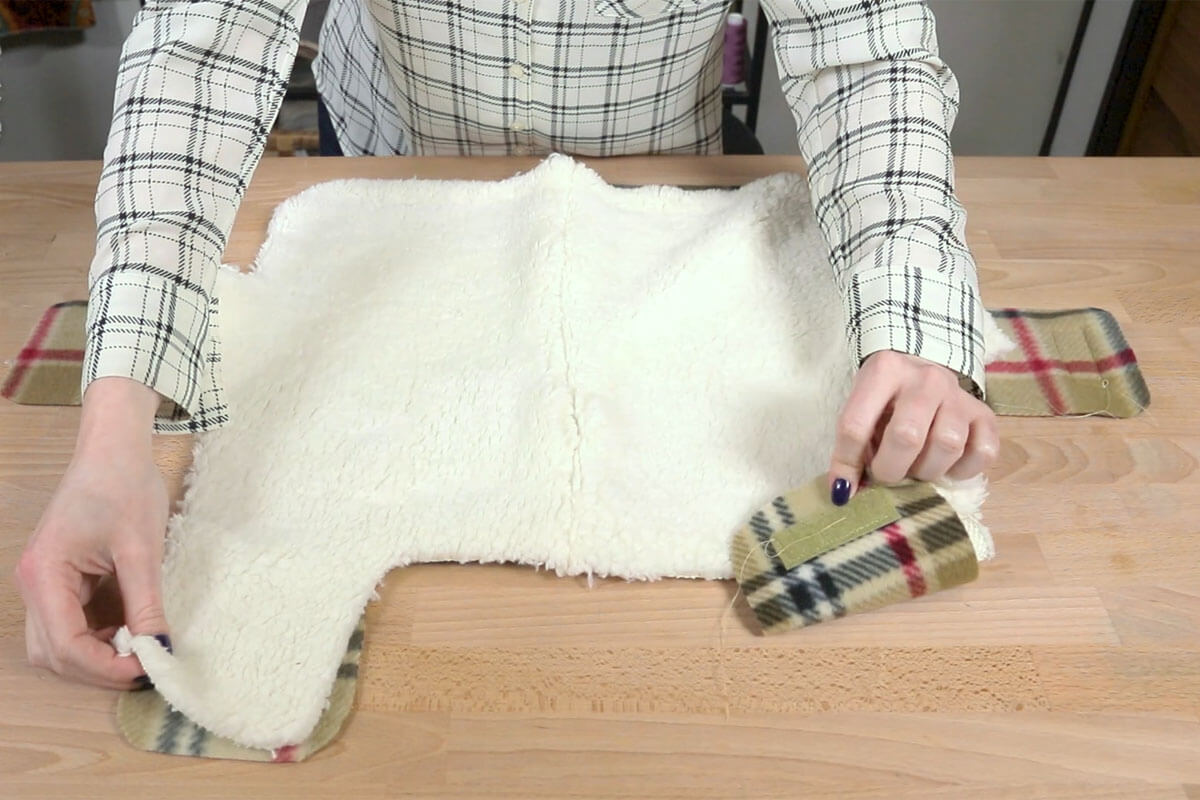
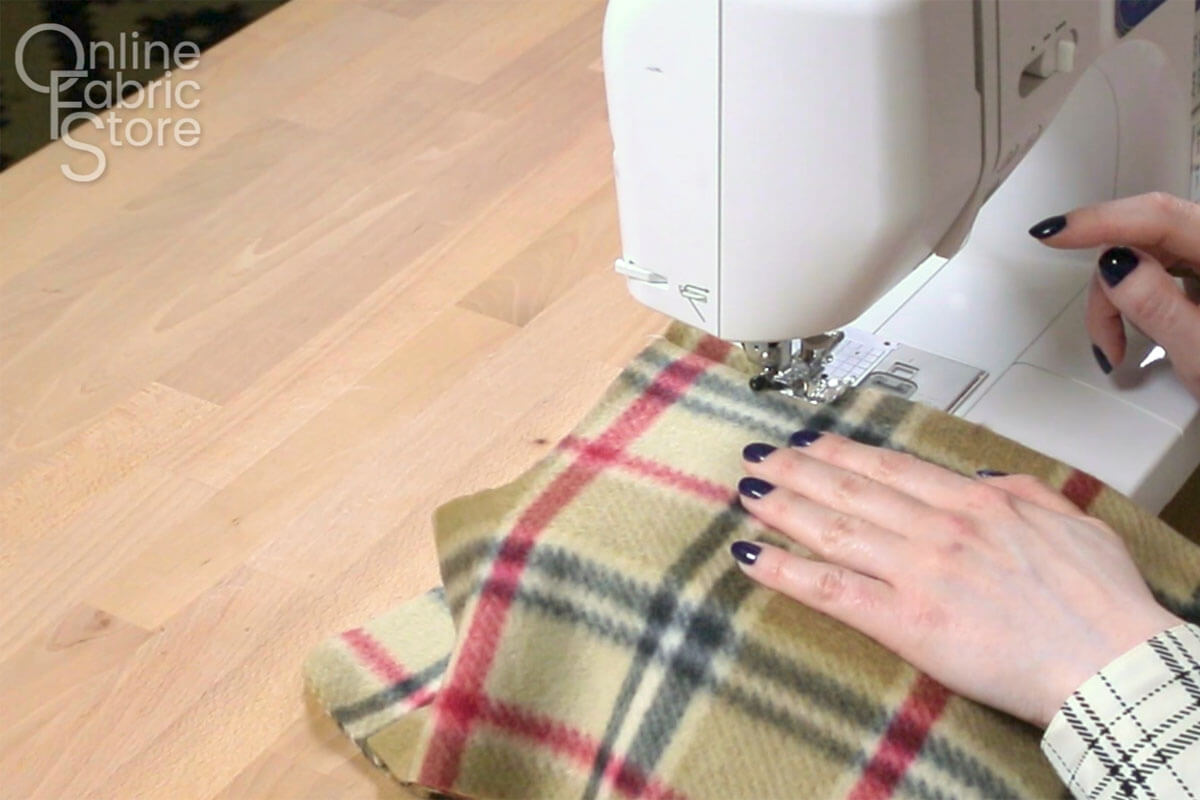
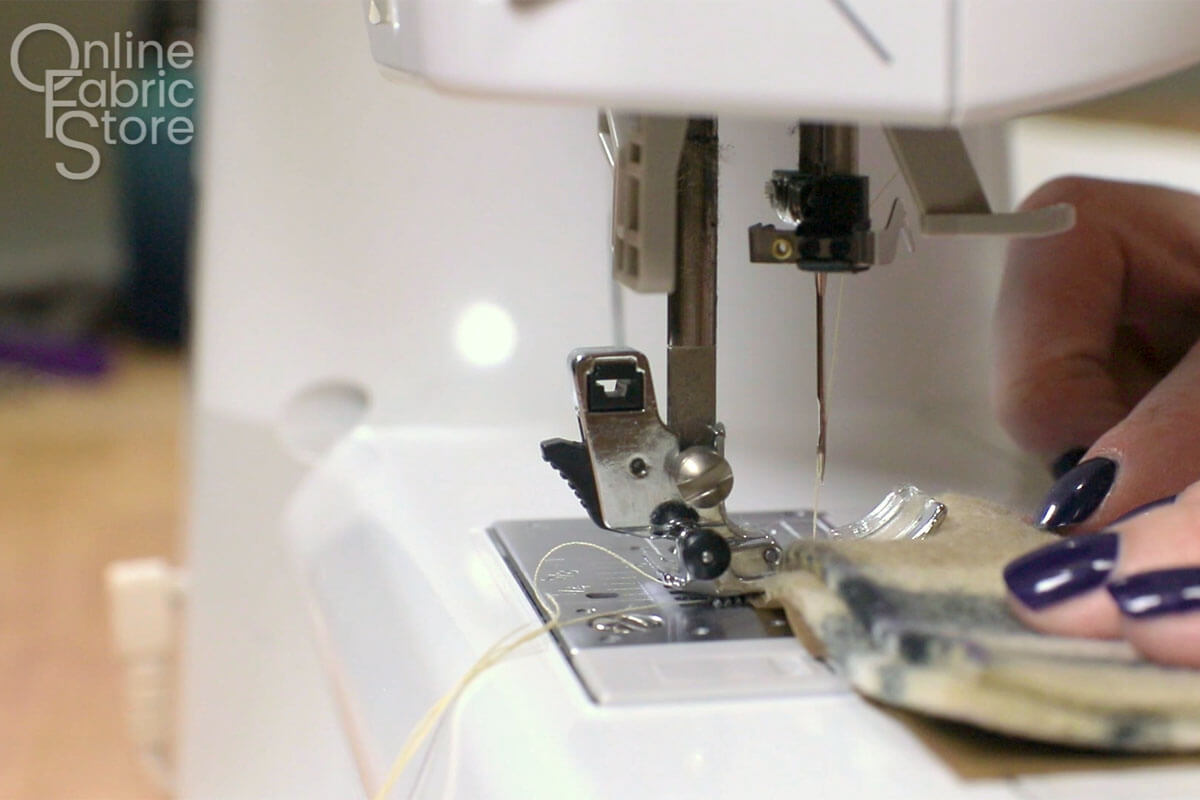
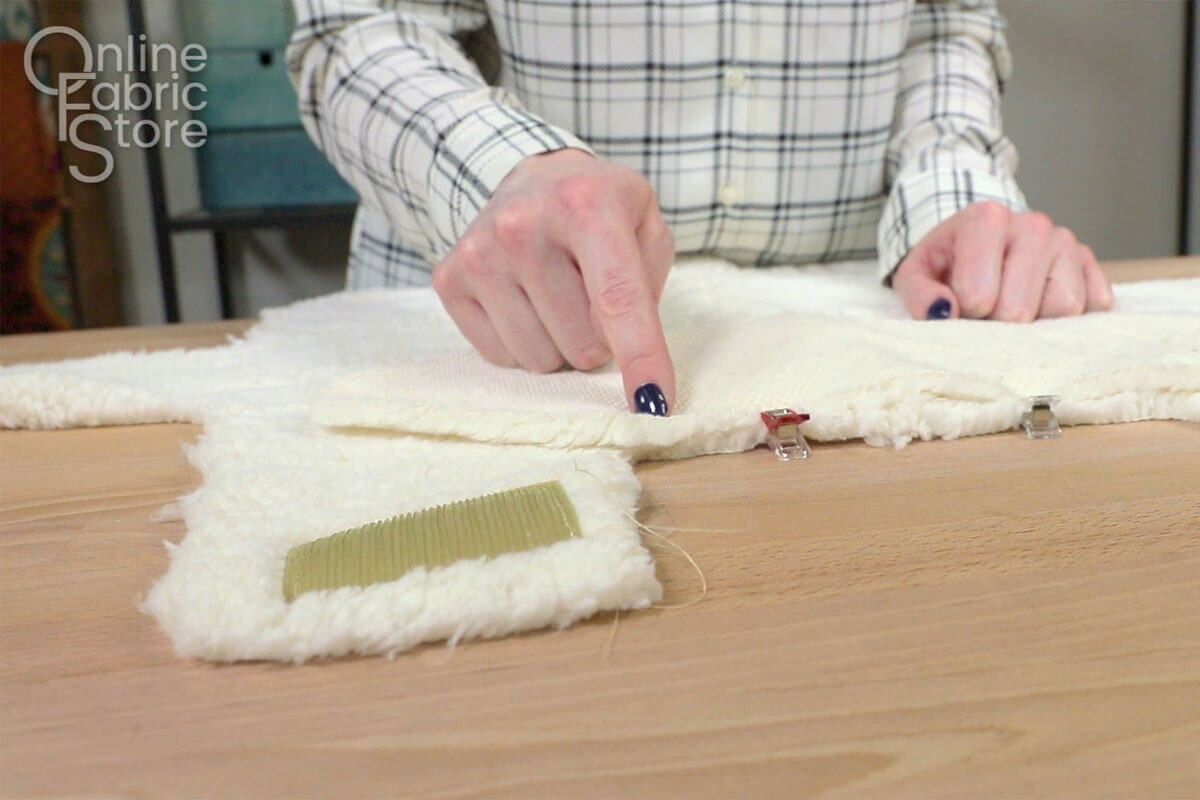
Step 6: Sew the Layers Together
Place the nylon on the wrong side of the fleece and sew around the edges except for the straps. You can sew with a long stitch length with a ¼” seam allowance or less. This is just to hold the 2 pieces together.
Sew the fleece and nylon collar pieces together as well.
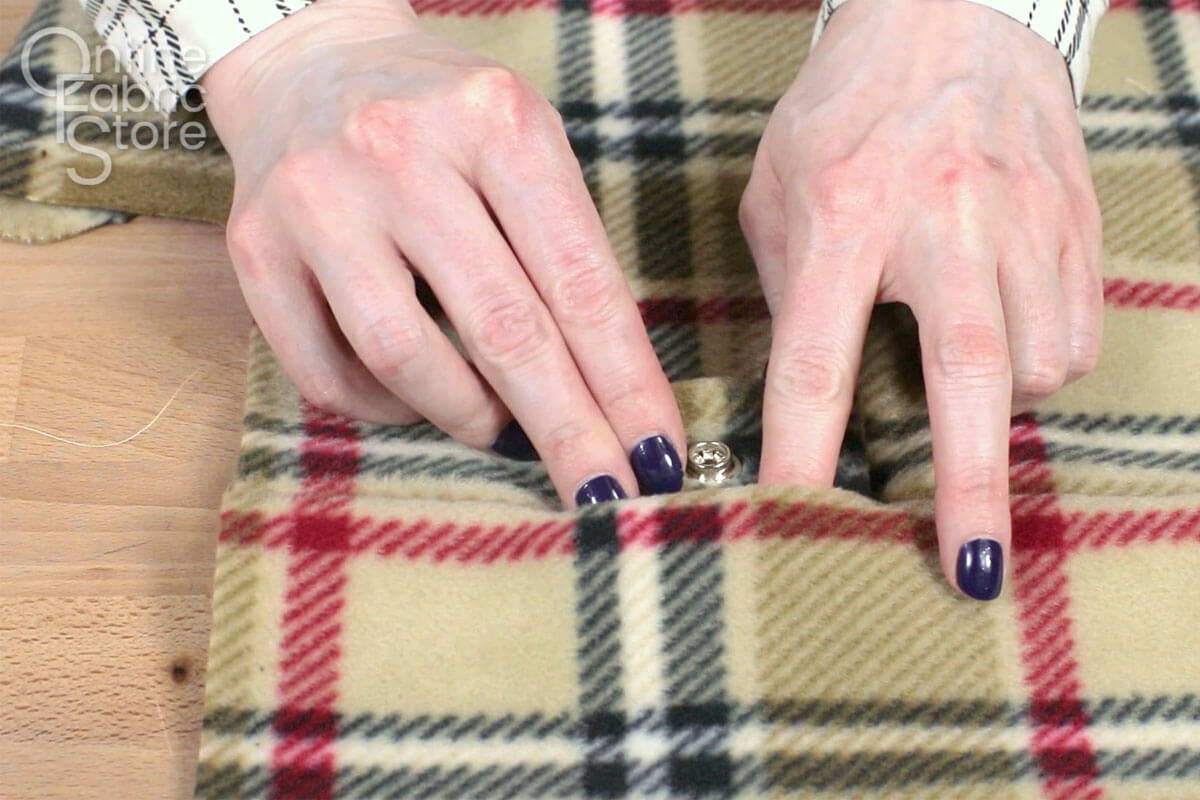
Optional snaps
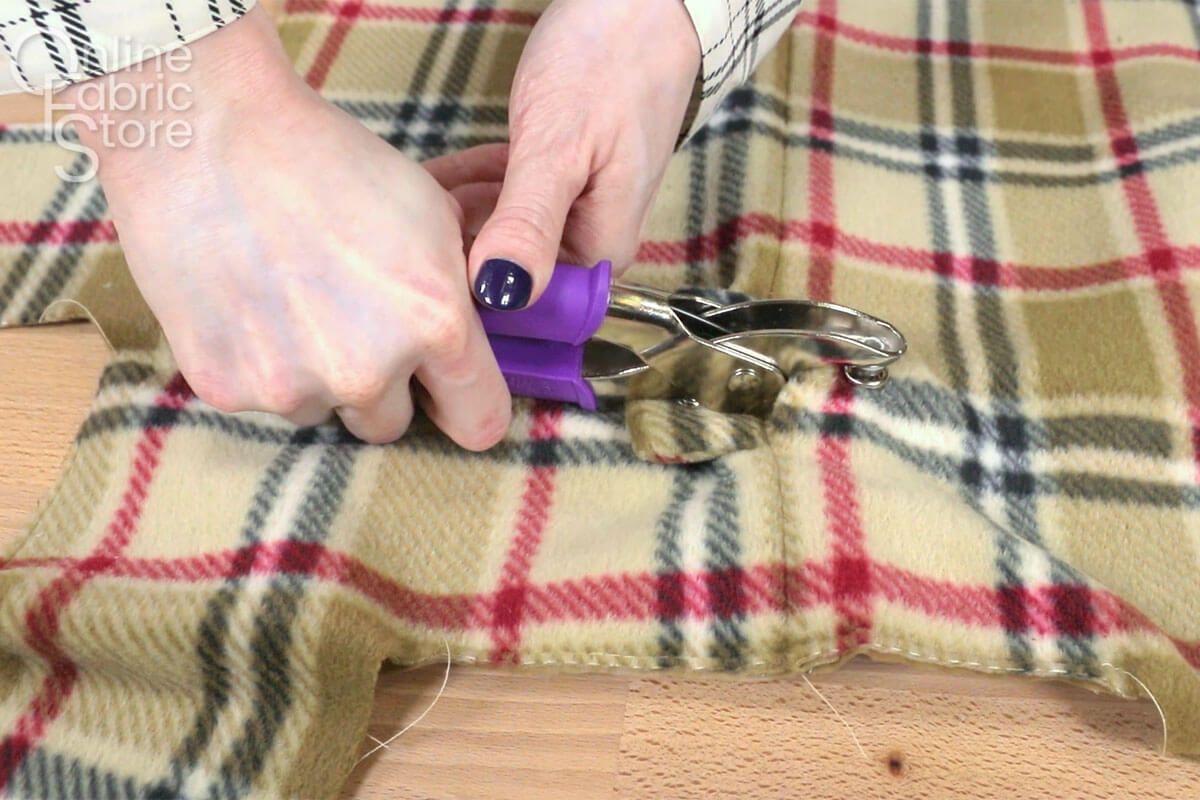
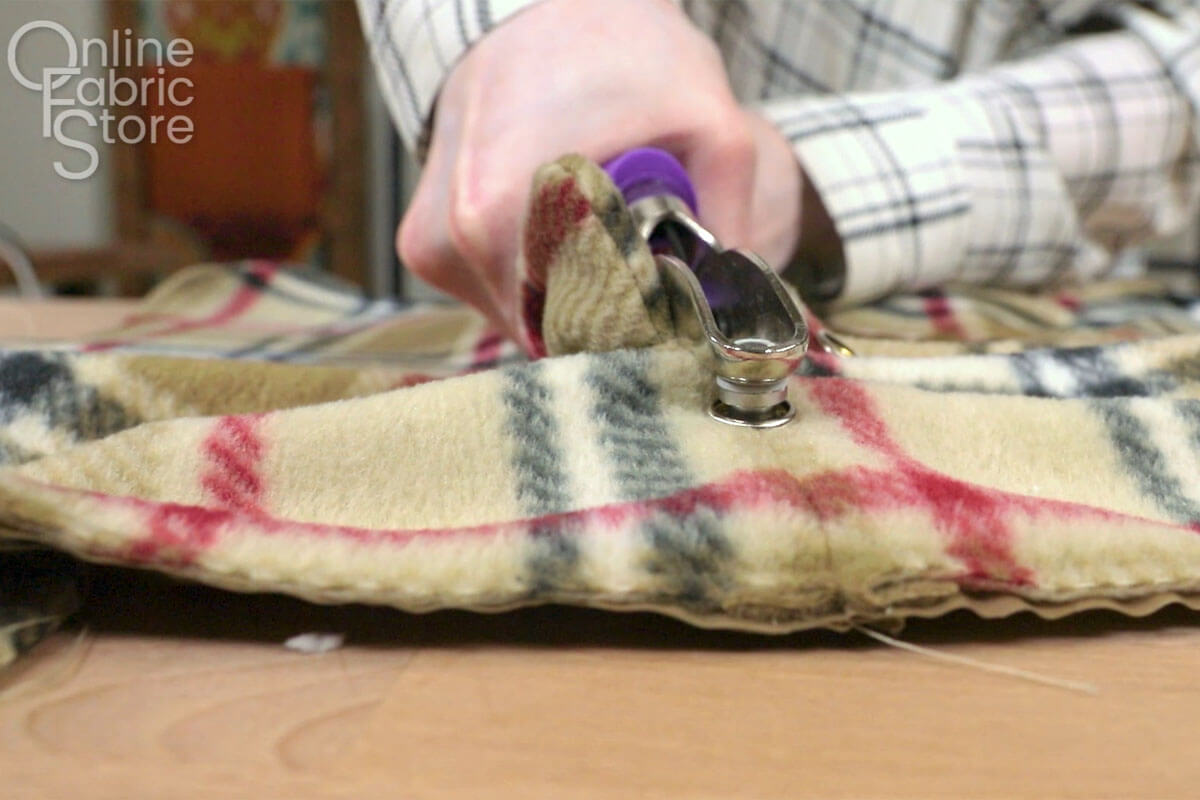
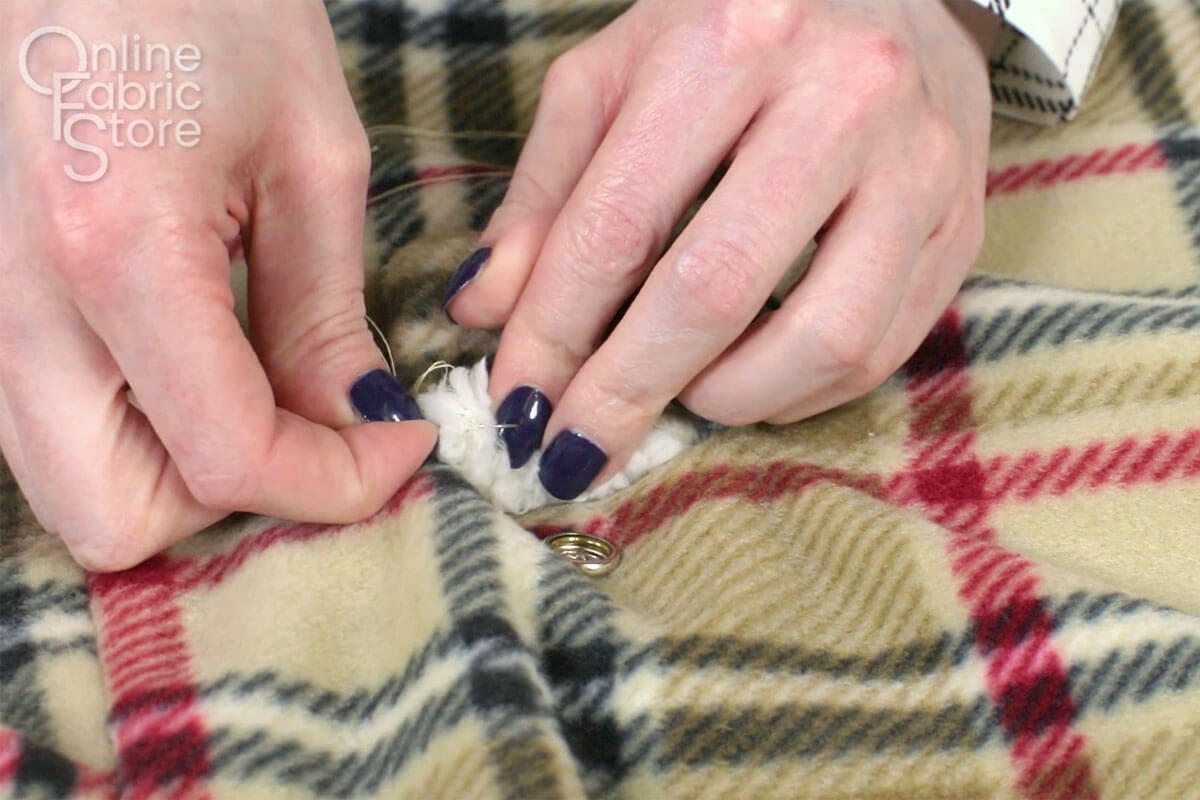
At this point, you can attach the other side of the harness flap snap, going through both the fleece and nylon. The ripstop acts as a stabilizer, making the snap stronger.
You can also add an optional snap on the collar to keep it lying flat on the back. Attach one side to the collar, centered and about 2 ½” to 3” in from the edge. Attach the other side to the back at the same distance but I’d suggest moving it to one side or the other of the seam to make it stronger.
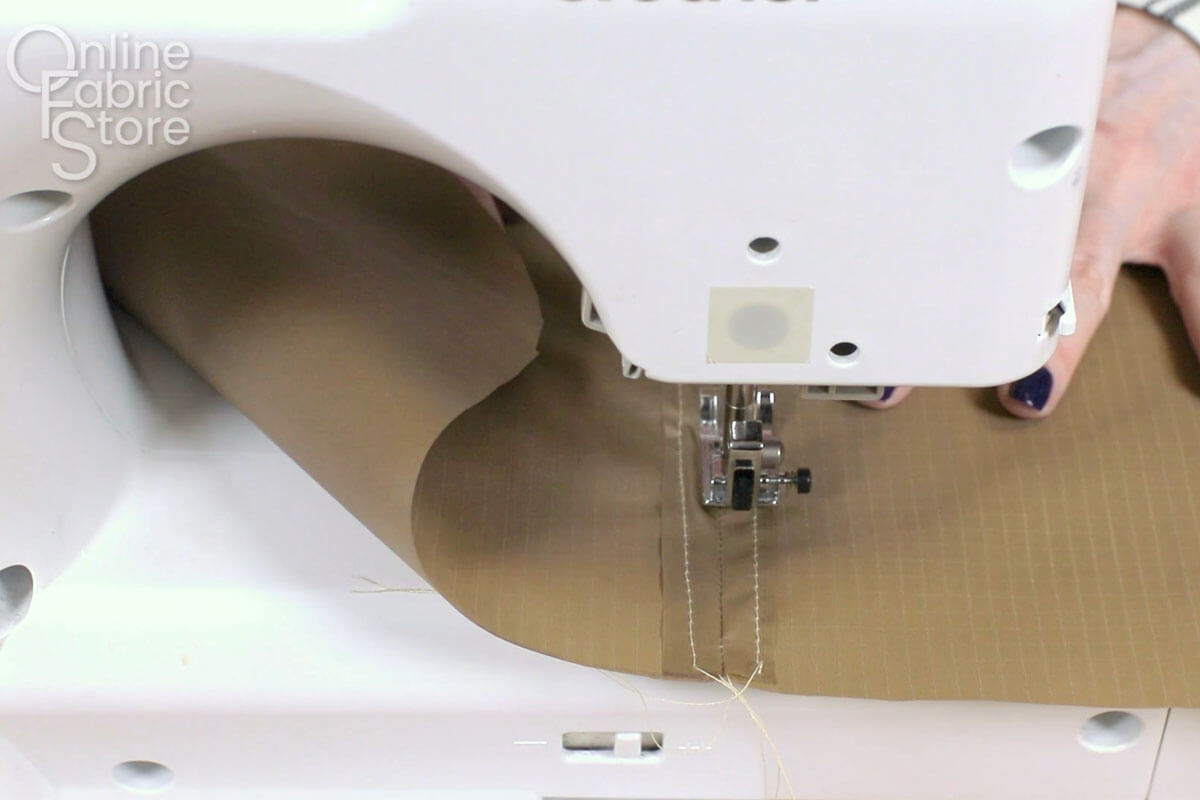
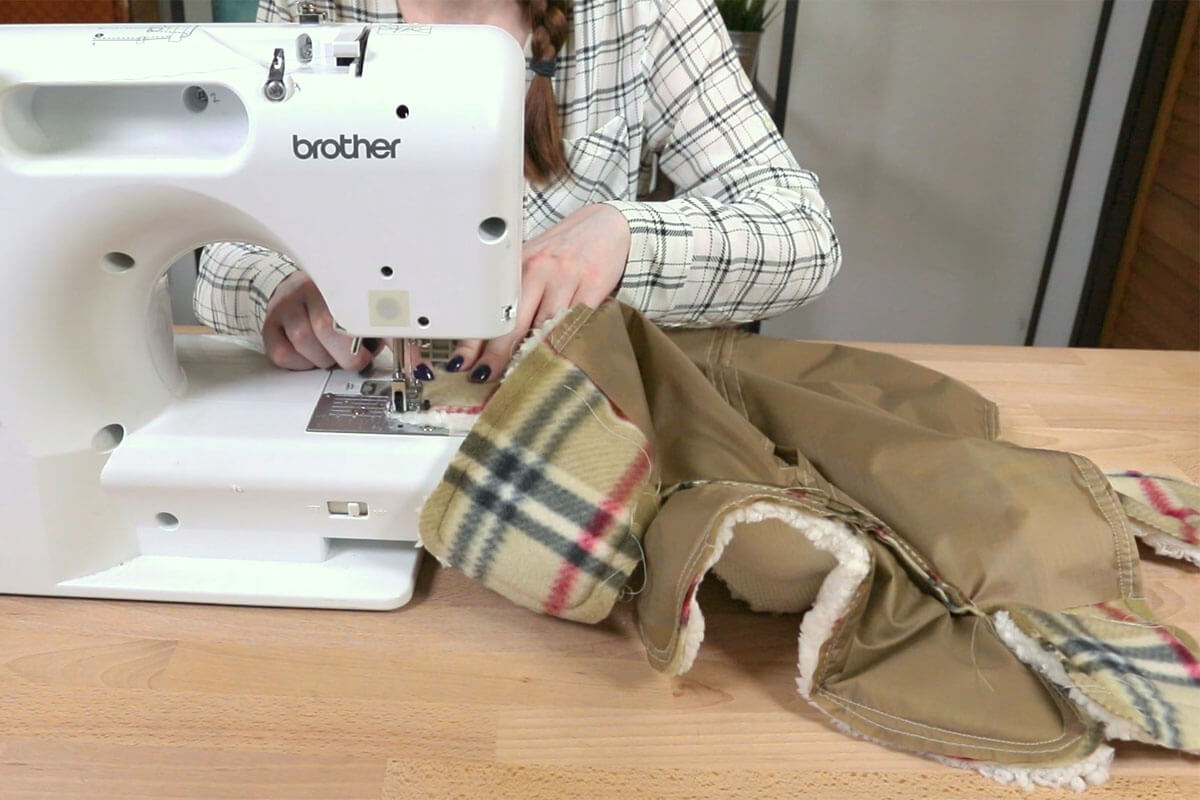
With the right sides of the fleece facing, sew the collar piece to the body.
Sew the lining collar to the body but leave a gap of about 4” in the middle.
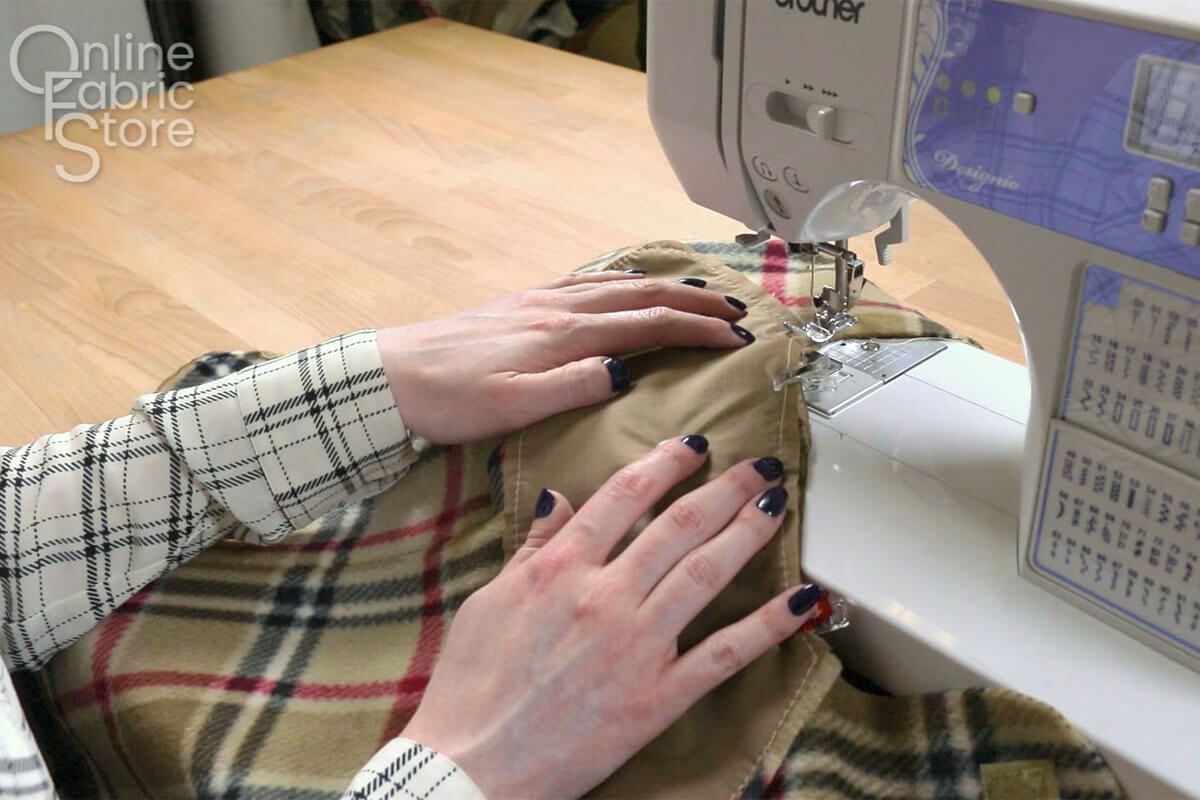
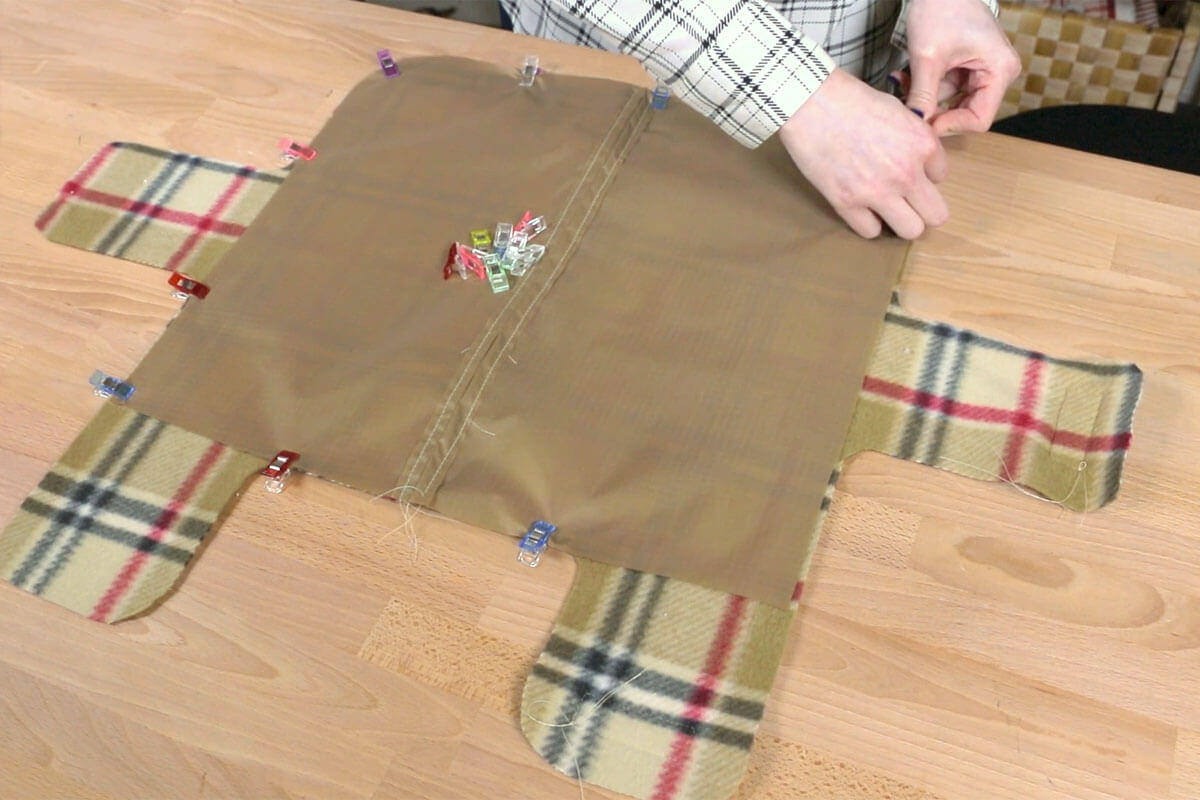
With the right sides of the fleece and lining facing, sew all the way around the edges with ½” seam allowance, including around the collar.
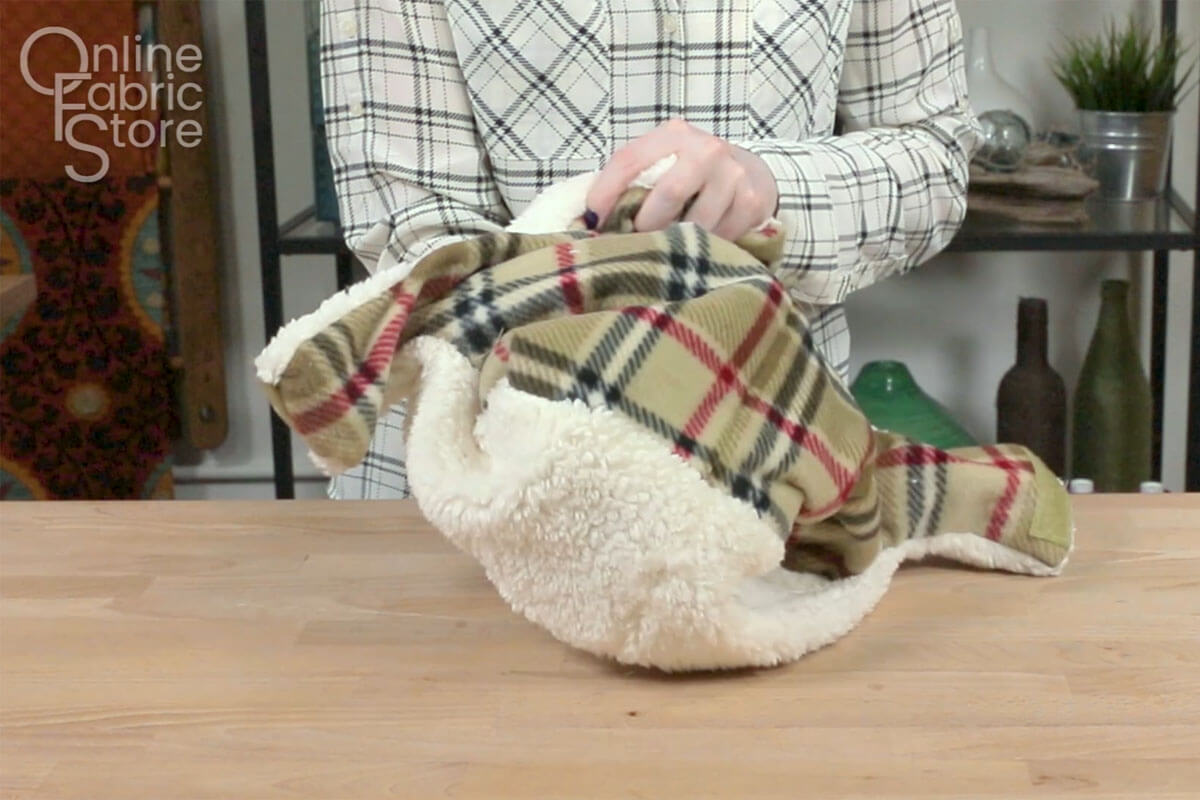
Turn the coat right side out through the opening in the collar lining.
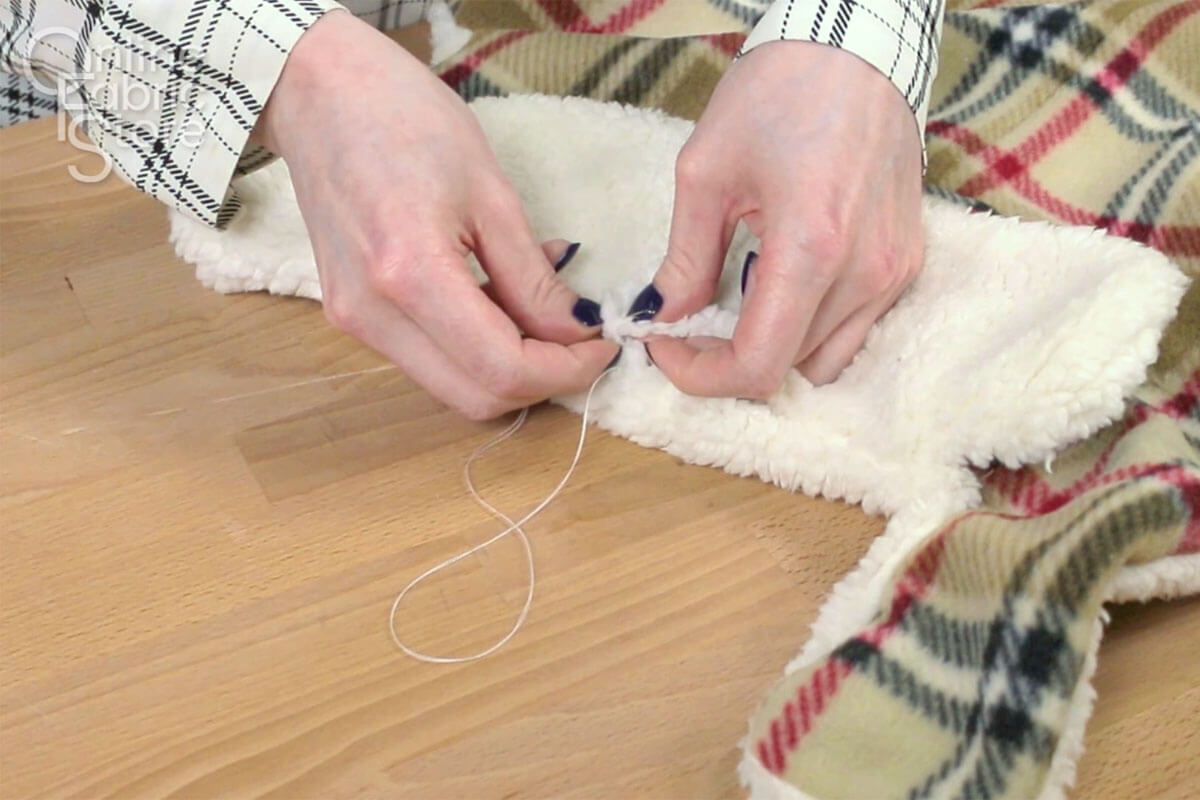
Hand sew the gap closed. See our invisible stitch tutorial for more information.
If you included the harness opening, also hand sew the fleece to the lining around the opening.
The doggie jacket is done!
-
{{#each productSuggestedQueries.results}}
- {{query}} {{/each}}
-
{{#each categories.results}}
- {{html title}} {{/each}}
{{html attributes.description}}
{{/if}}-
{{#each queries.results}}
- {{query}} {{/each}}