
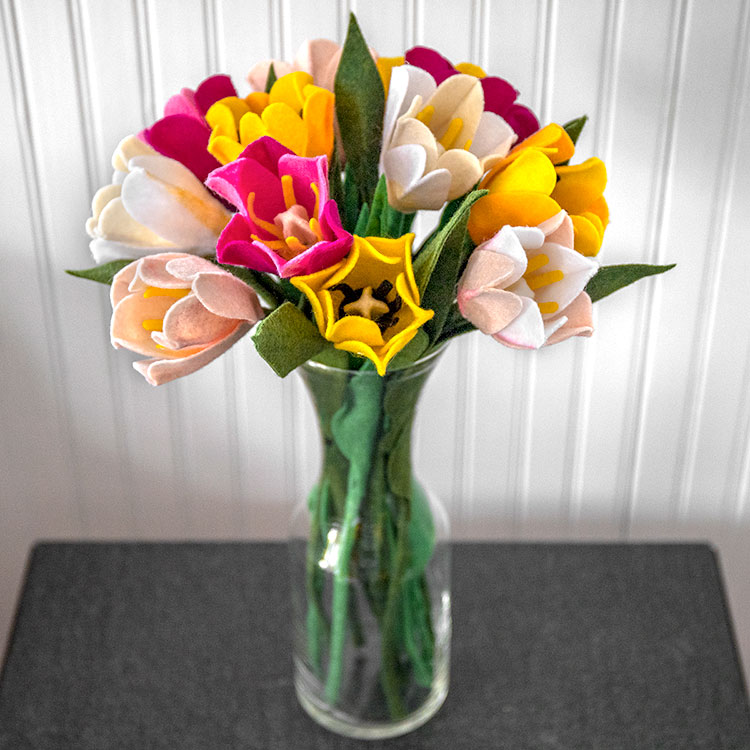
How to Make a Felt Tulip Bouquet
- By Clara
- 30 minutes
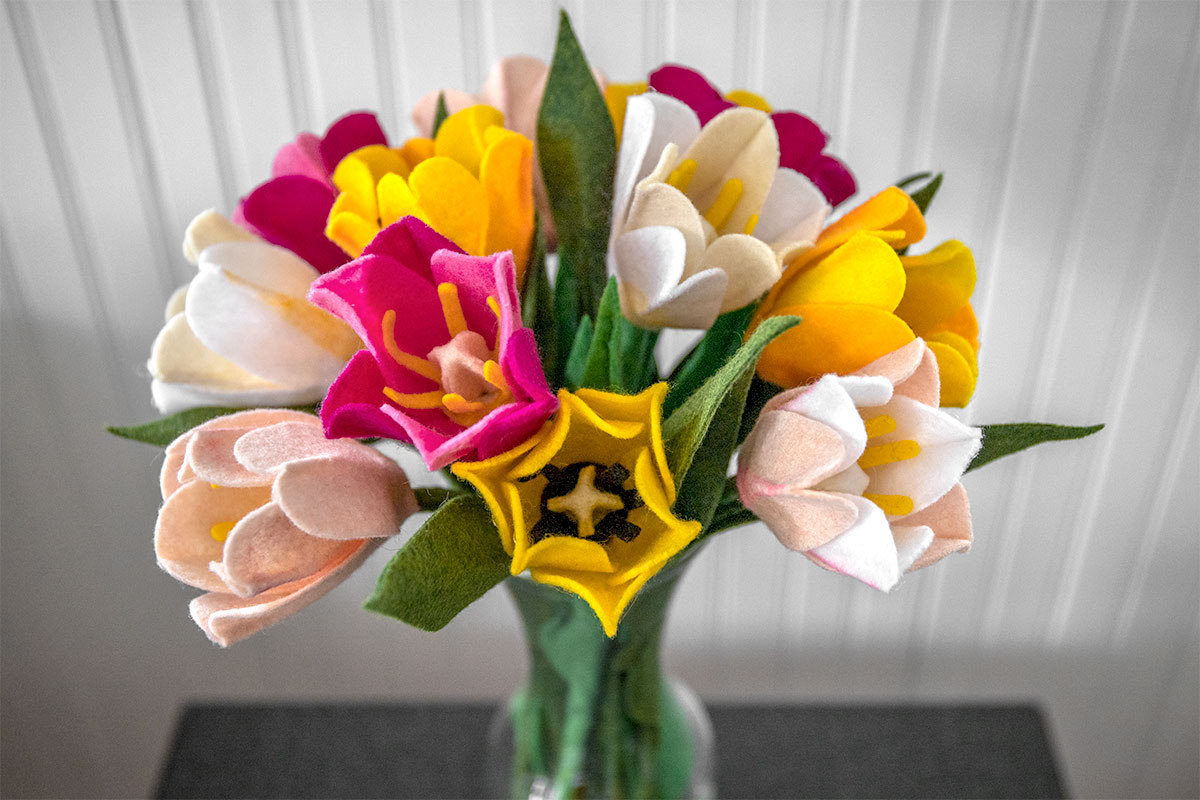
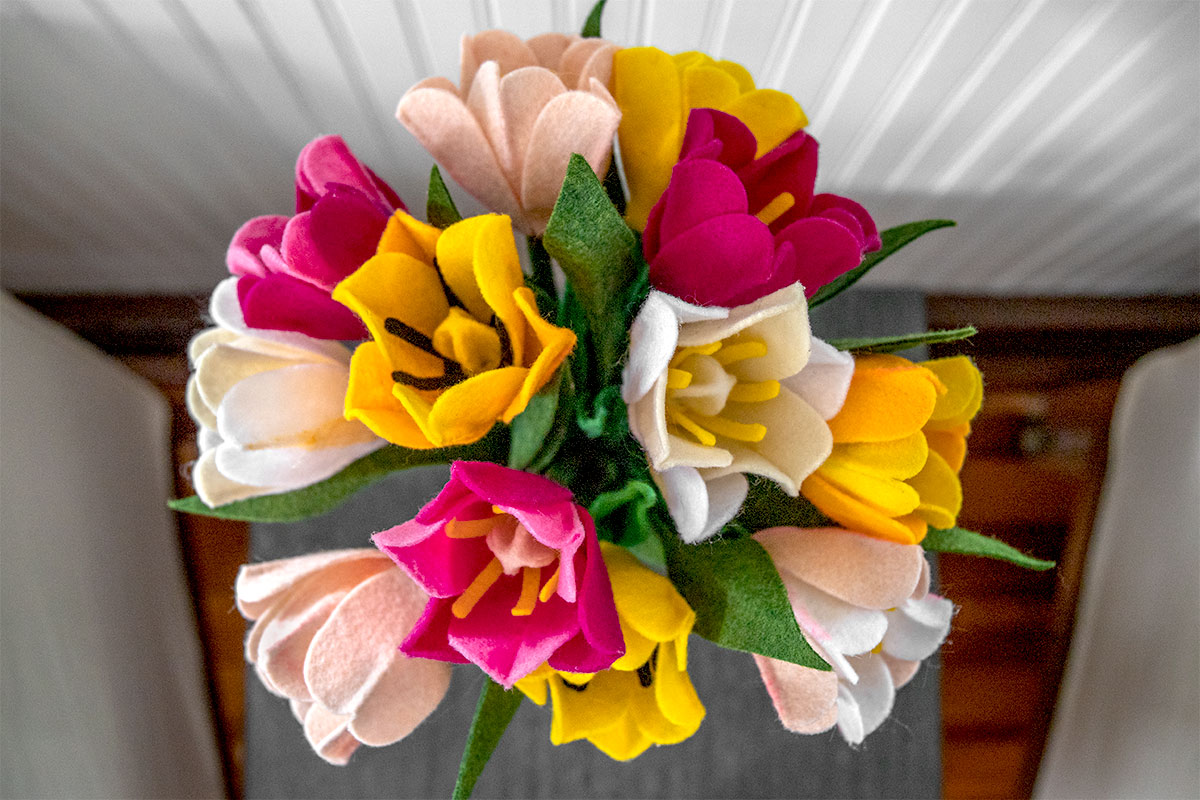
Make a beautiful bouquet of tulips that will last forever! These no sew fabric flowers are perfect for a Mother’s Day gift or other special present.
I just got a Cricut and was excited to try it out with this project. And it didn’t disappoint! But you can definitely do it with good old scissors too. We’ve provided both a PDF and Cricut compatible SVG file so you have the option of either method. Sign up to our mailing list below to download the files.
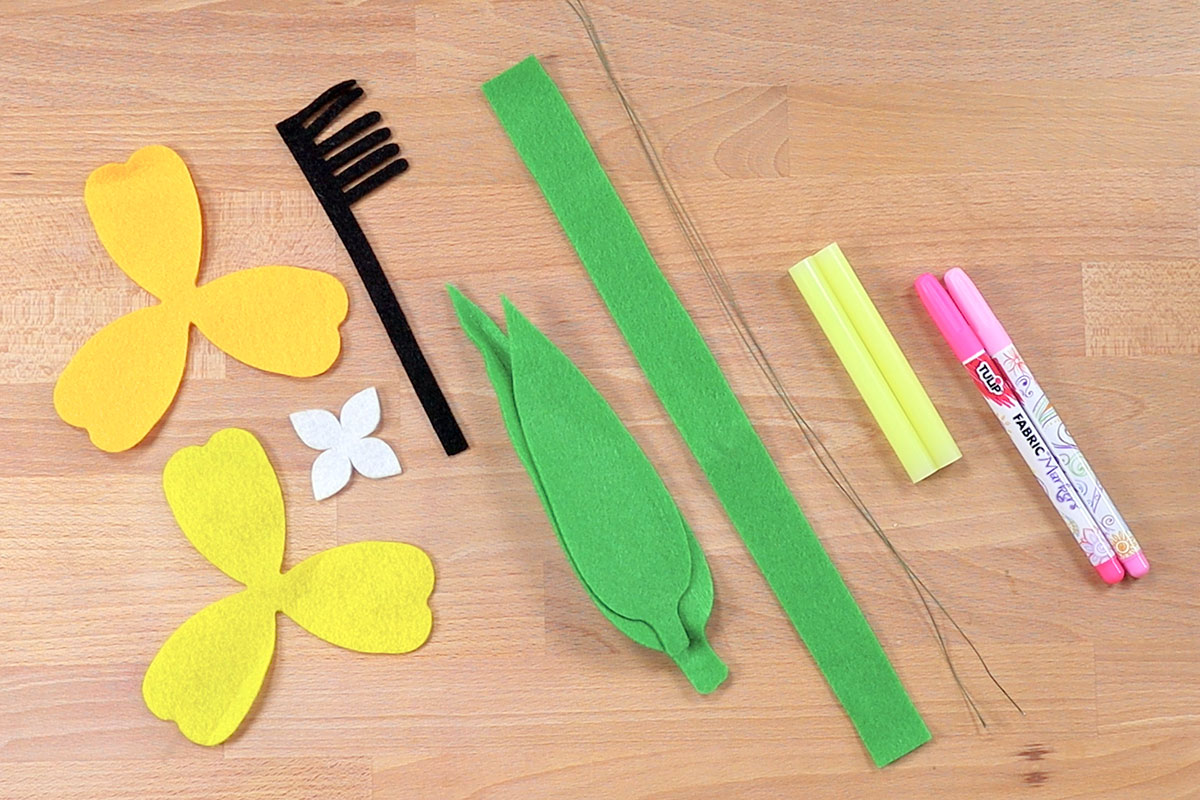
Materials
- Acrylic or wool felt
- Hot glue gun
- Floral wire
- Fabric markers (optional)
- Tulip template
Related Products


Video
Instructions
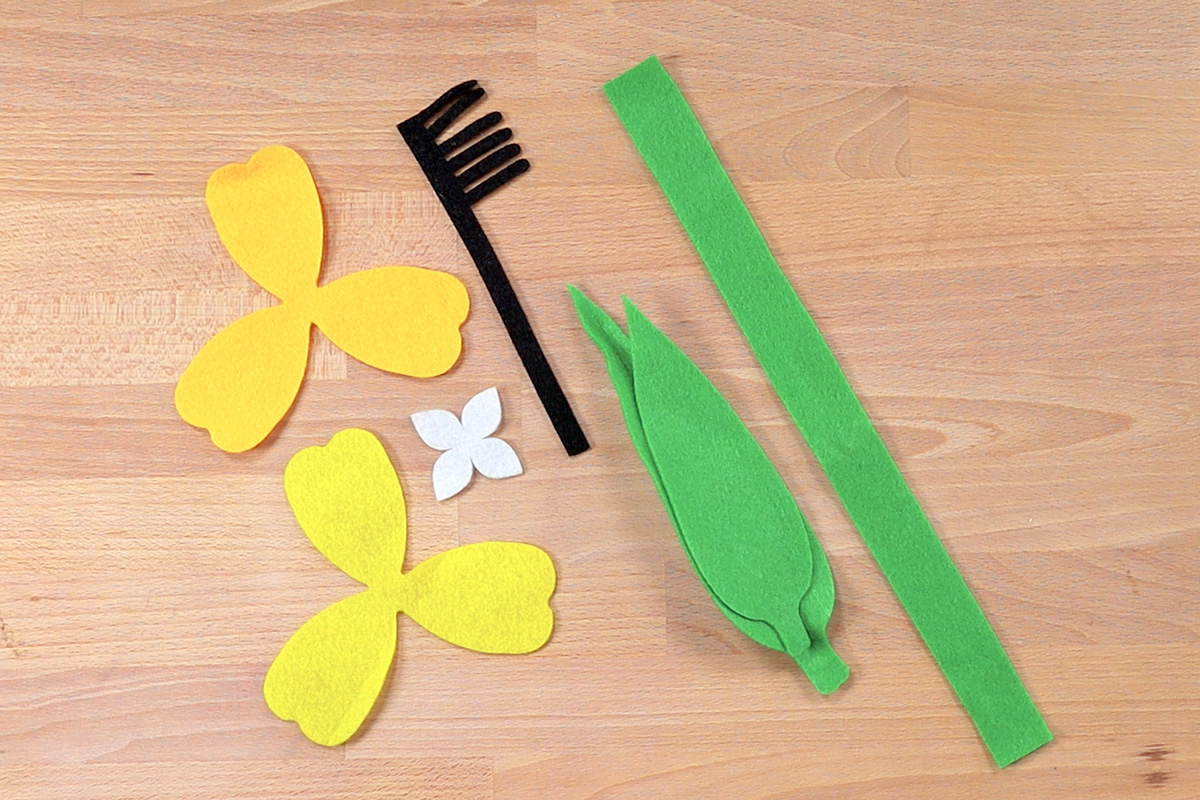
Step 1: Cut out felt pieces
Use the templates to cut out the felt pieces either with scissors or a Cricut machine.
If you’re using scissors, download the PDF, print out at full scale (100%), cut out pieces, trace onto the felt, and cut out.
If you have a Cricut, download the SVG and import into the design application. You’ll have to hide/show and duplicate shapes depending on what color you’re cutting. Make sure to choose the acrylic felt or wool felt material which uses the rotary blade.
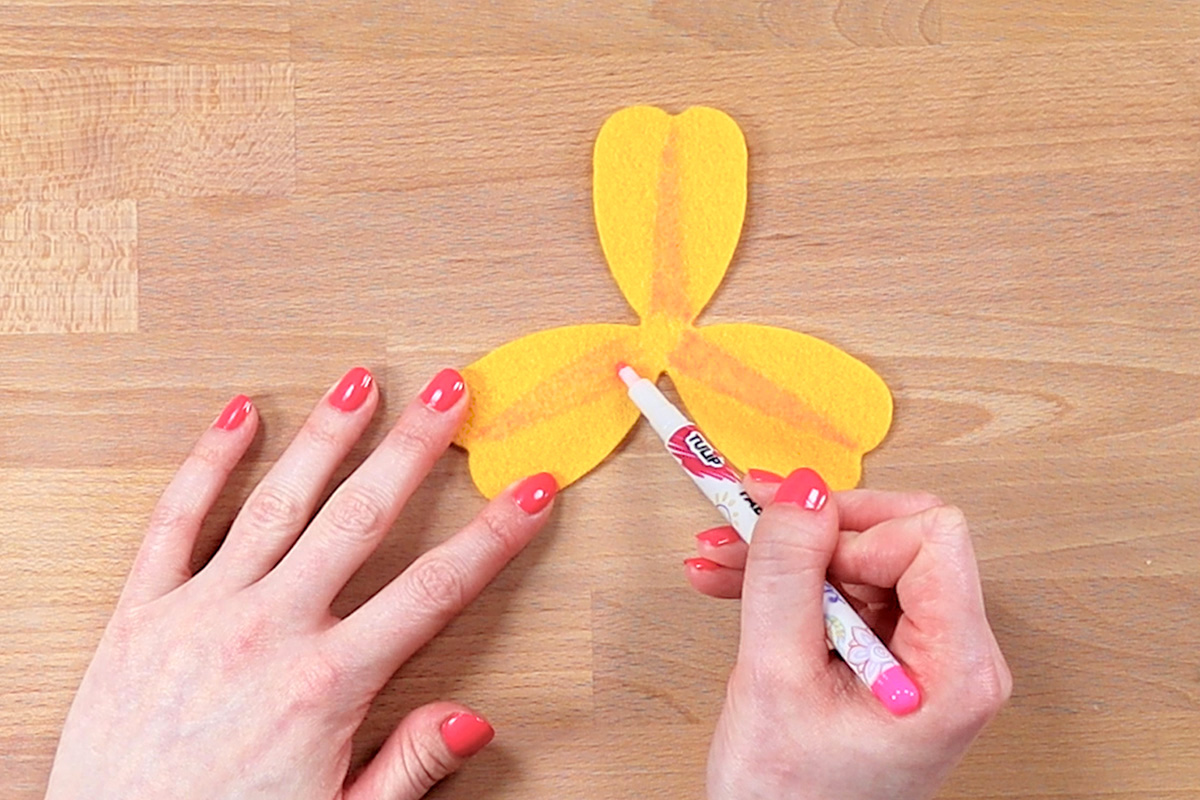
Step 2: Add color with fabric markers
This step is totally optional but using fabric markers to add a little extra detail to the petals gives the flowers a more dynamic look.
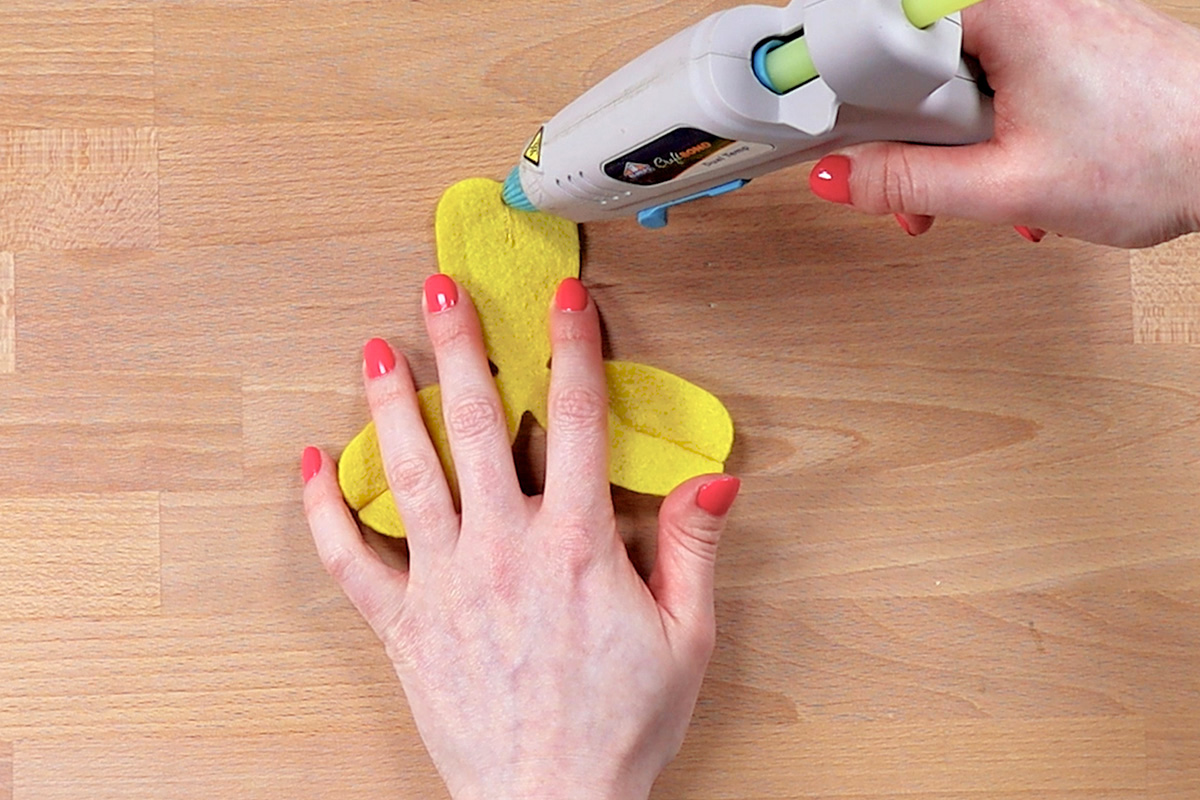
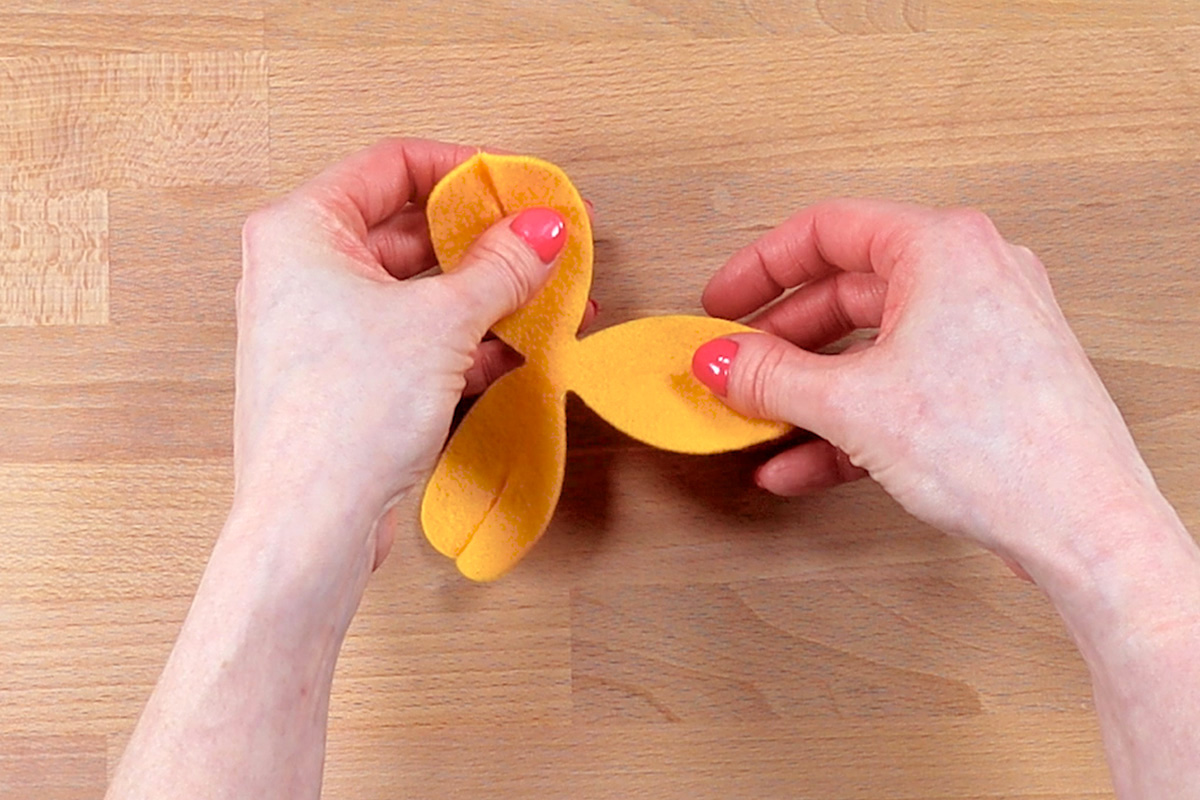
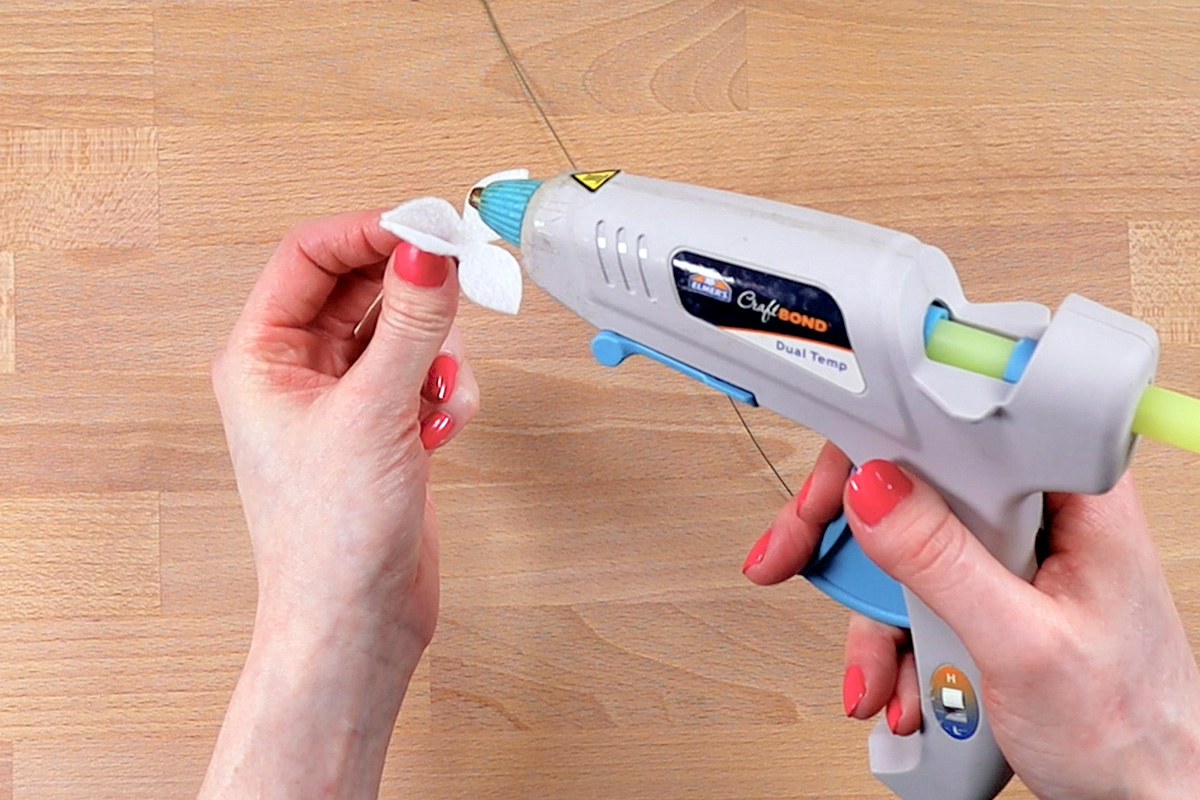
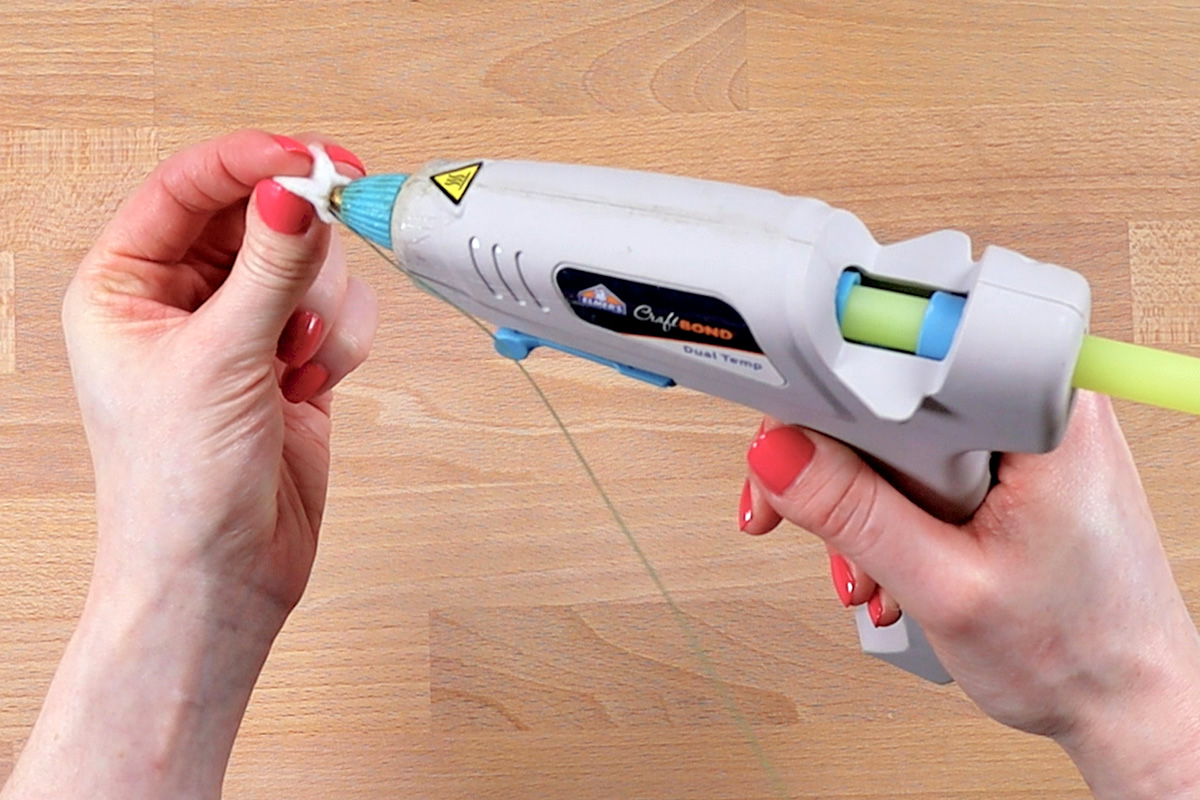
Step 3: Glue Centers of Petals
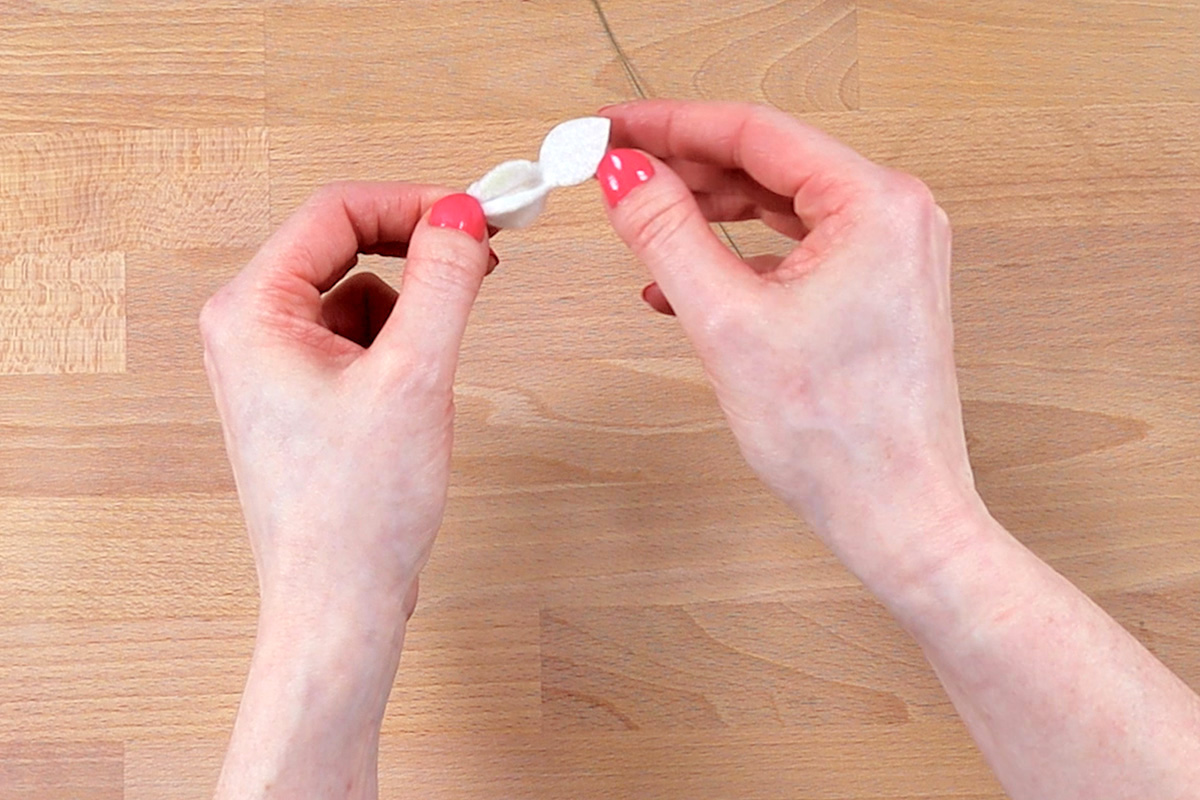
To give the petals a more 3D look, put a small line of hot glue at the top of the petal. Fold in half and let the glue cool slightly. Then open the petal while still squeezing the center to flatten the petal. Let the glue dry.
Repeat for the other petals on both pieces. I started with the inner petals to let the marker dry on the outer petals.
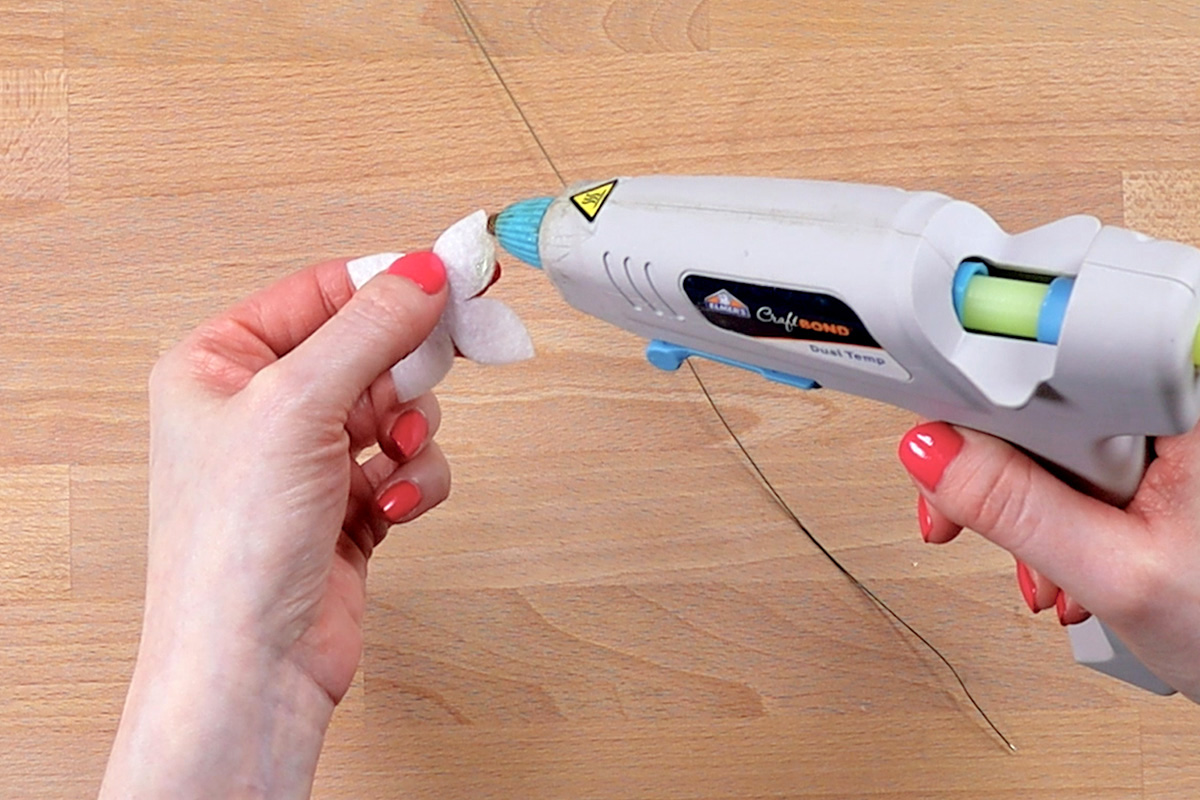
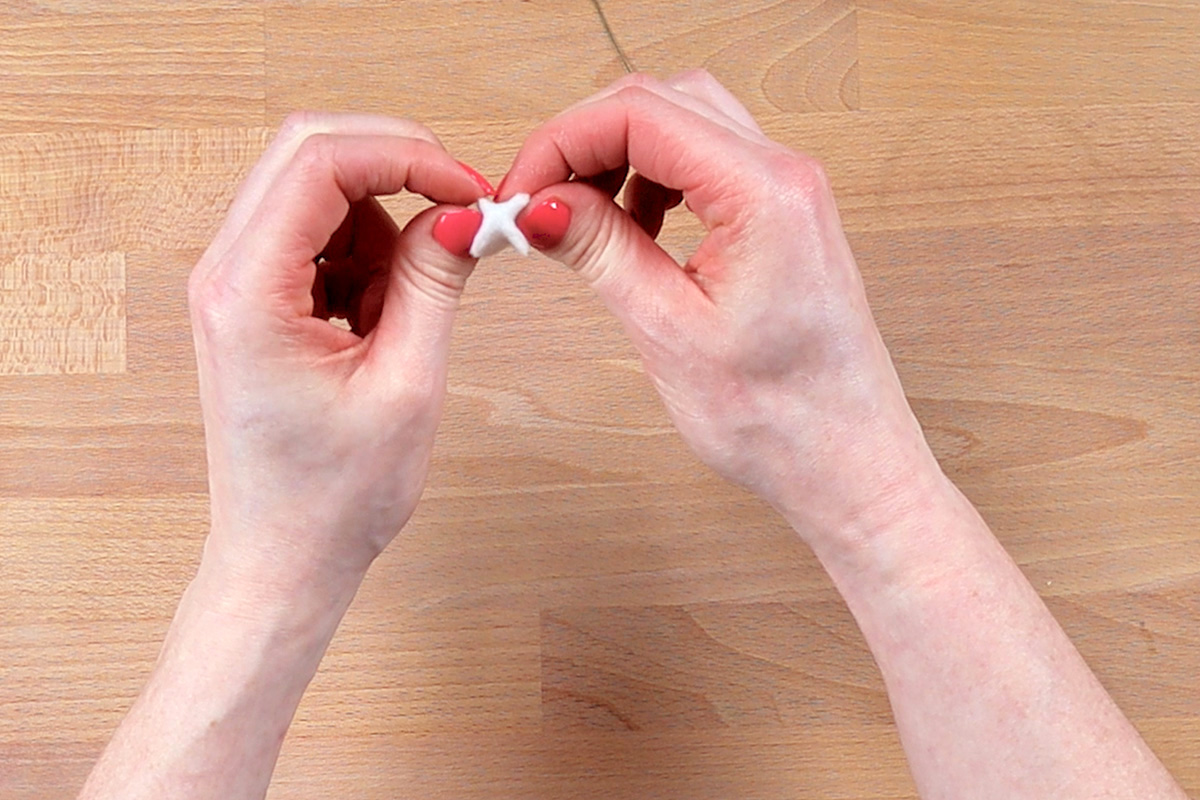
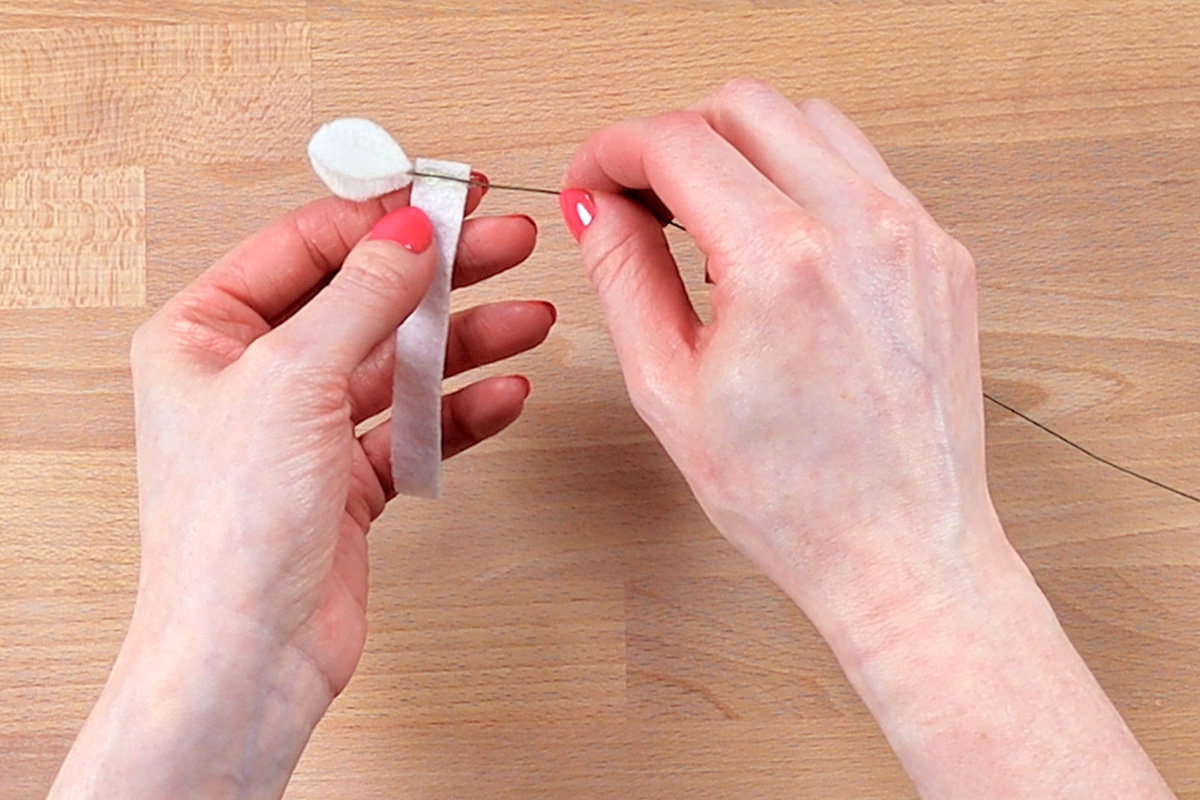
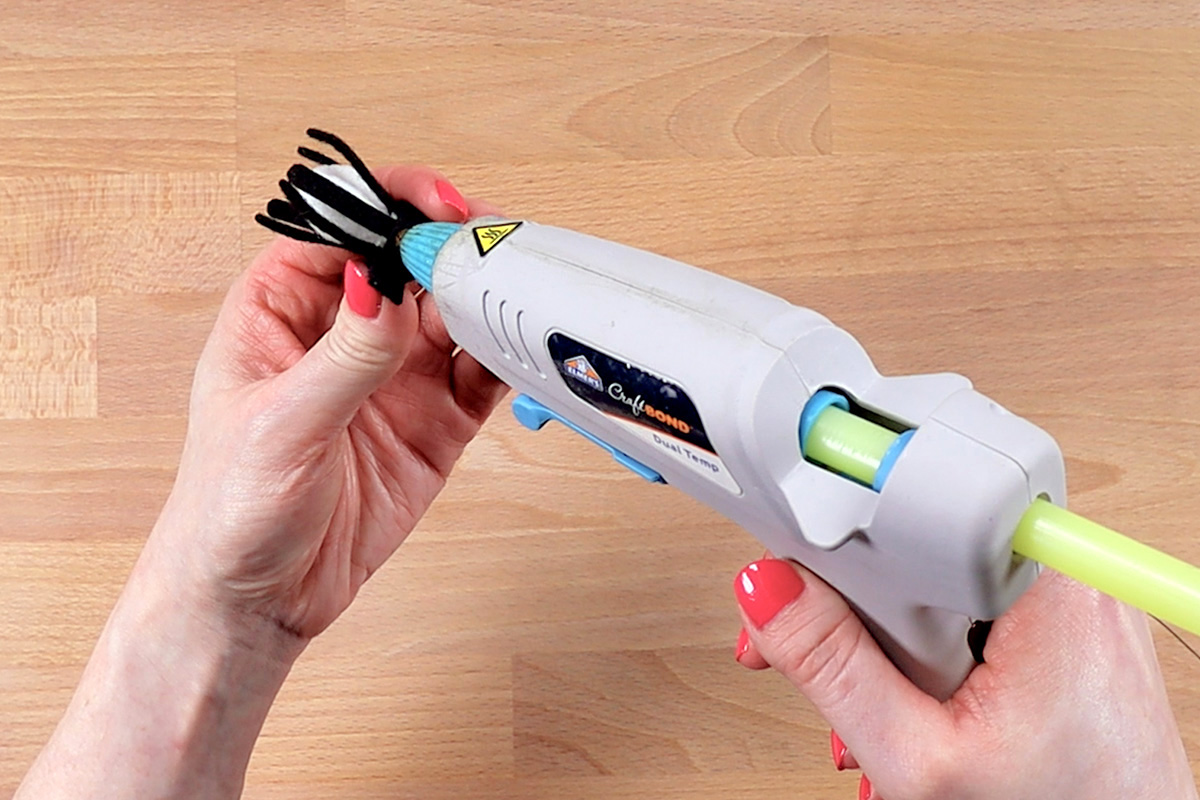
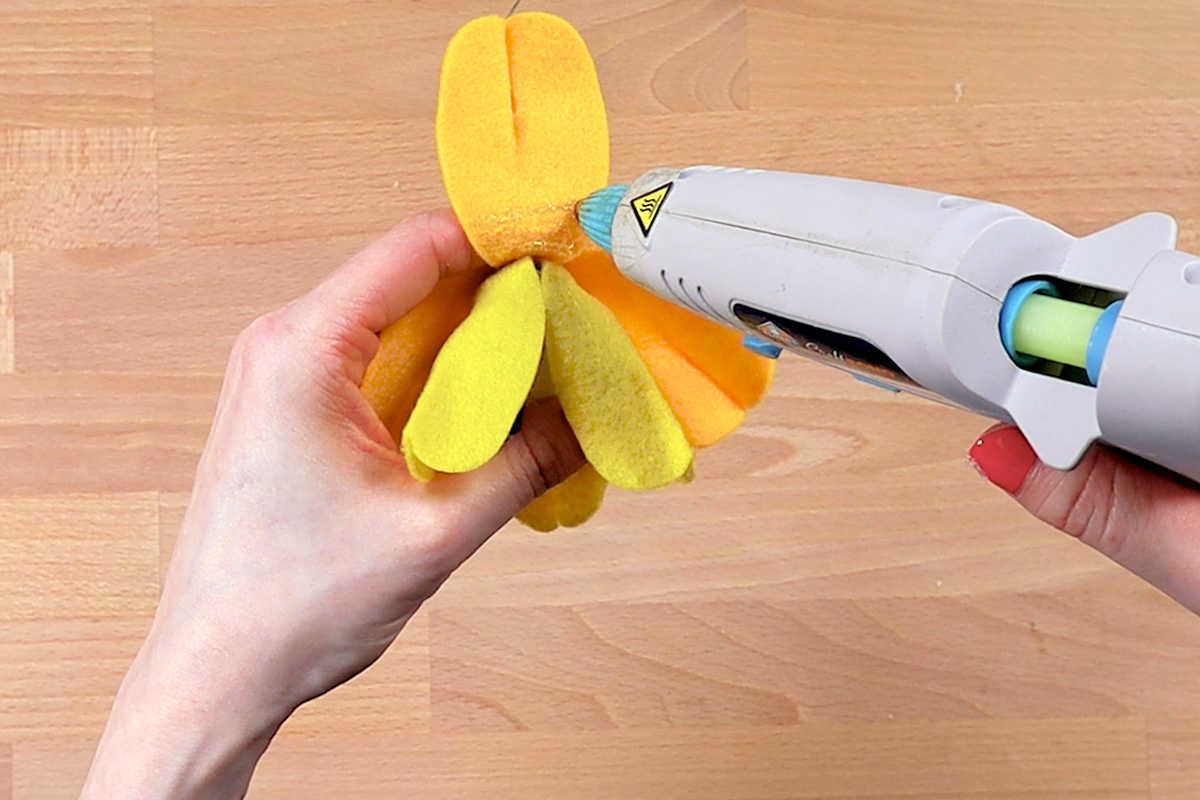
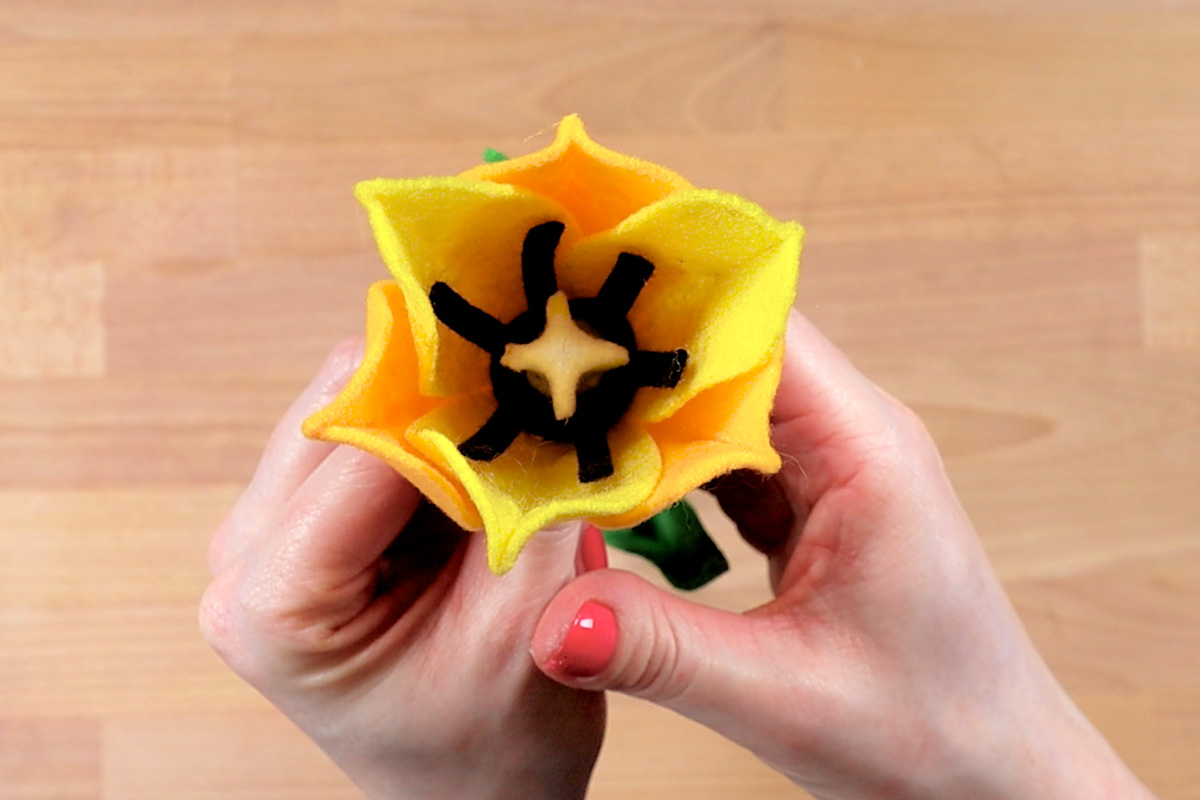
Step 4: Make flower center
Next is making the flower center (the stigma to be exact). Take the piece with 4 petal shapes and put glue on one half of the “petal”. Stick the half of the next petal to the glue and let cool.
Continue to glue the adjacent halves of the petal shapes together.
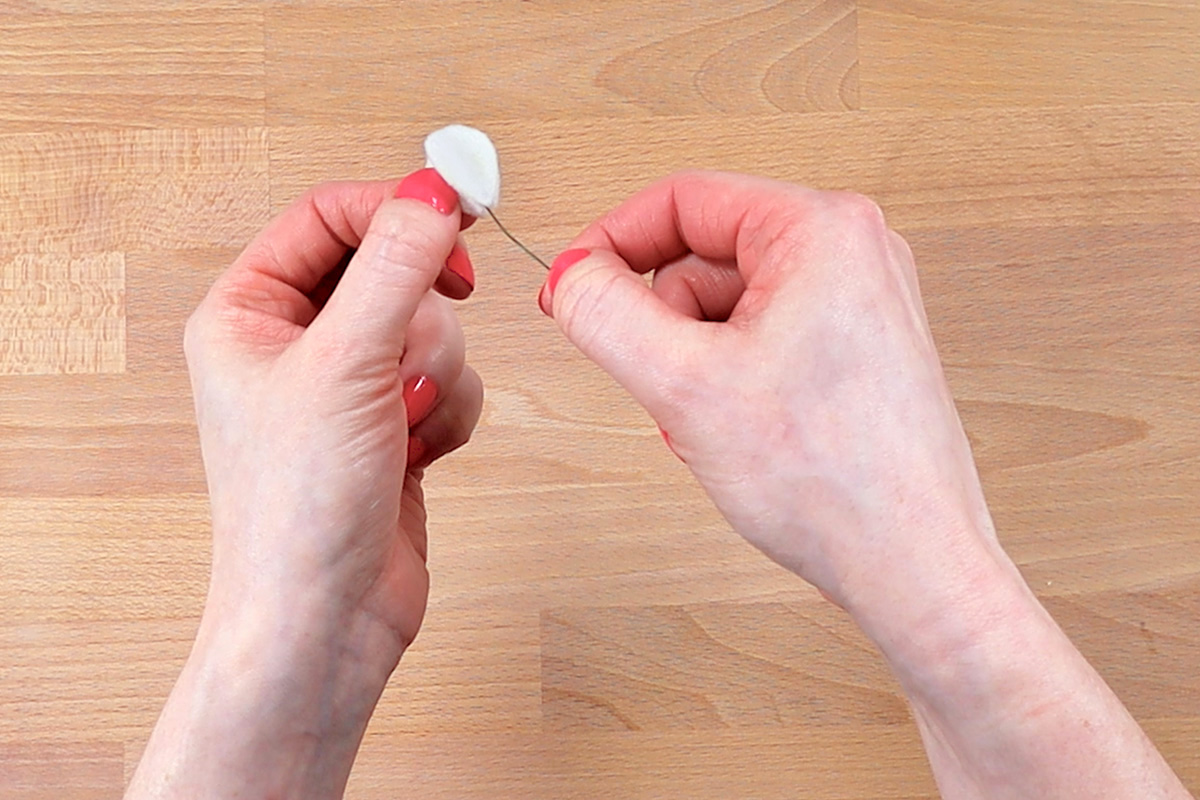
Take a piece of floral wire (or a similar wire) and stick it into the bottom opening of the shape and glue it in place. The wire I’m using is about 14″ long.
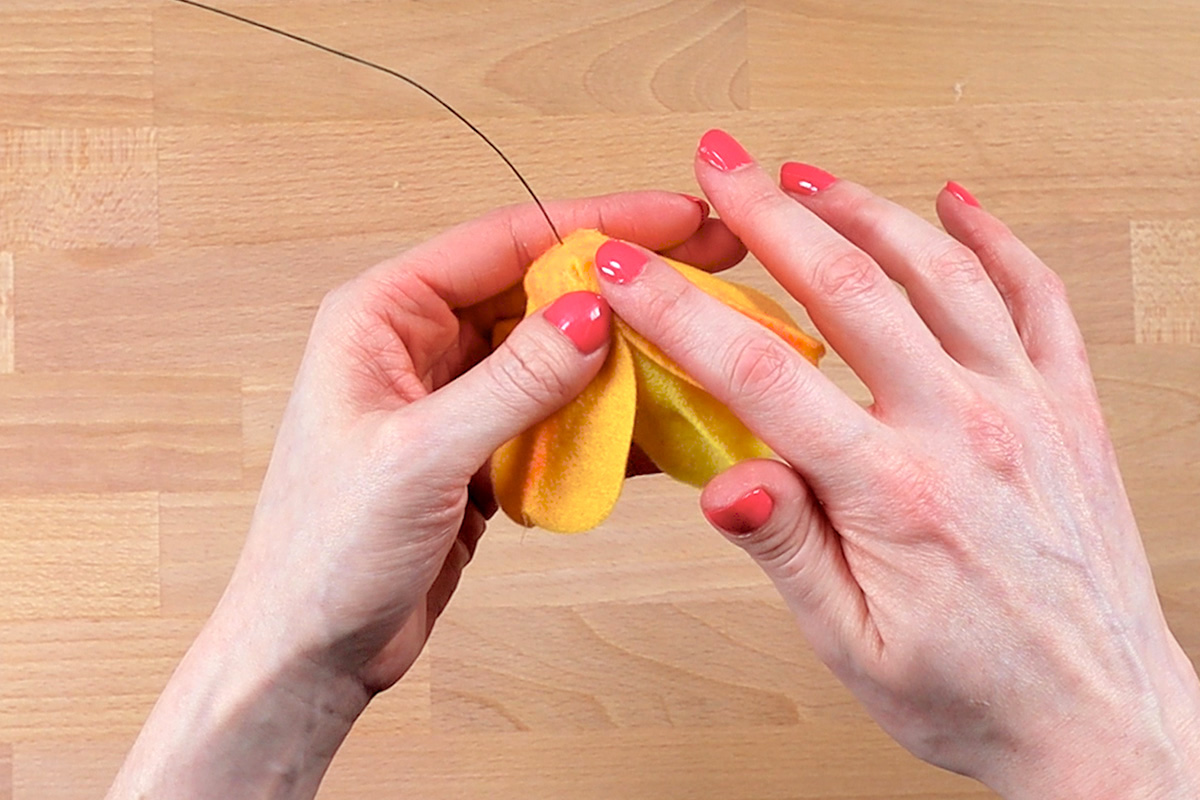
Glue the end of the small rectangular piece of felt below it. Wrap the felt and glue the other end. Don’t wrap it super tight.
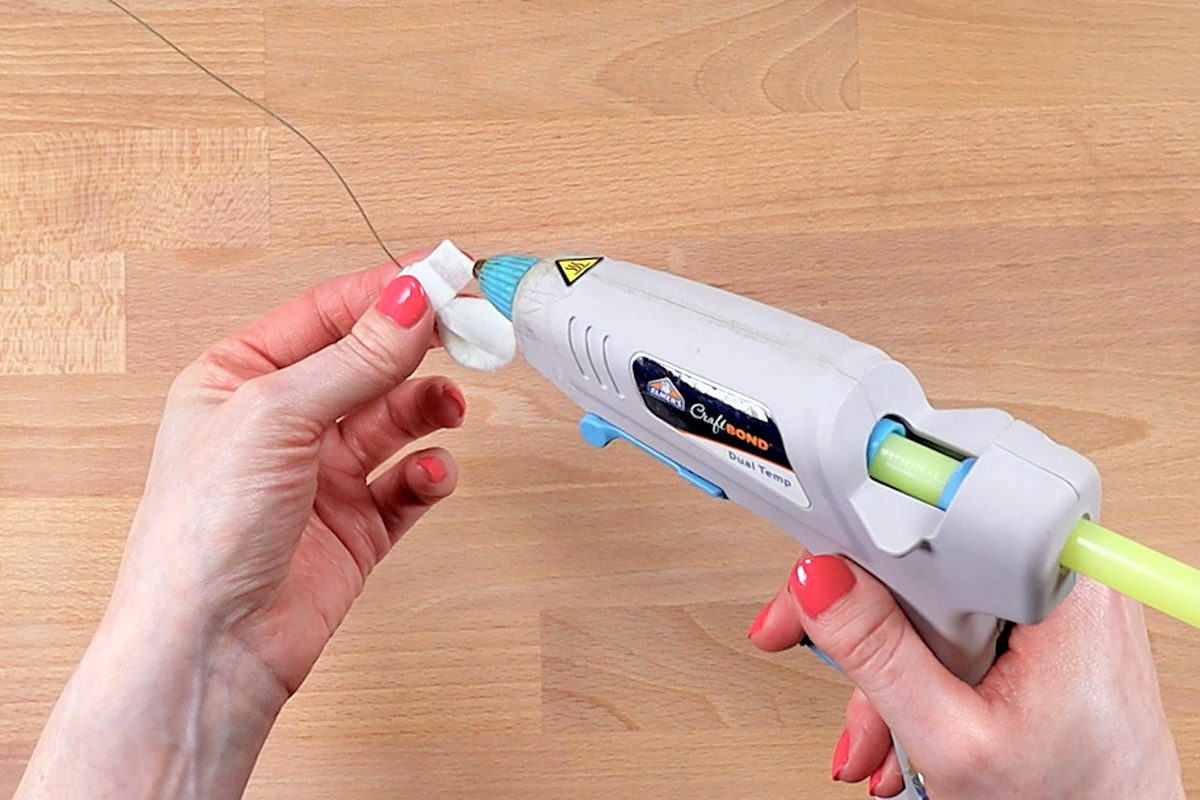
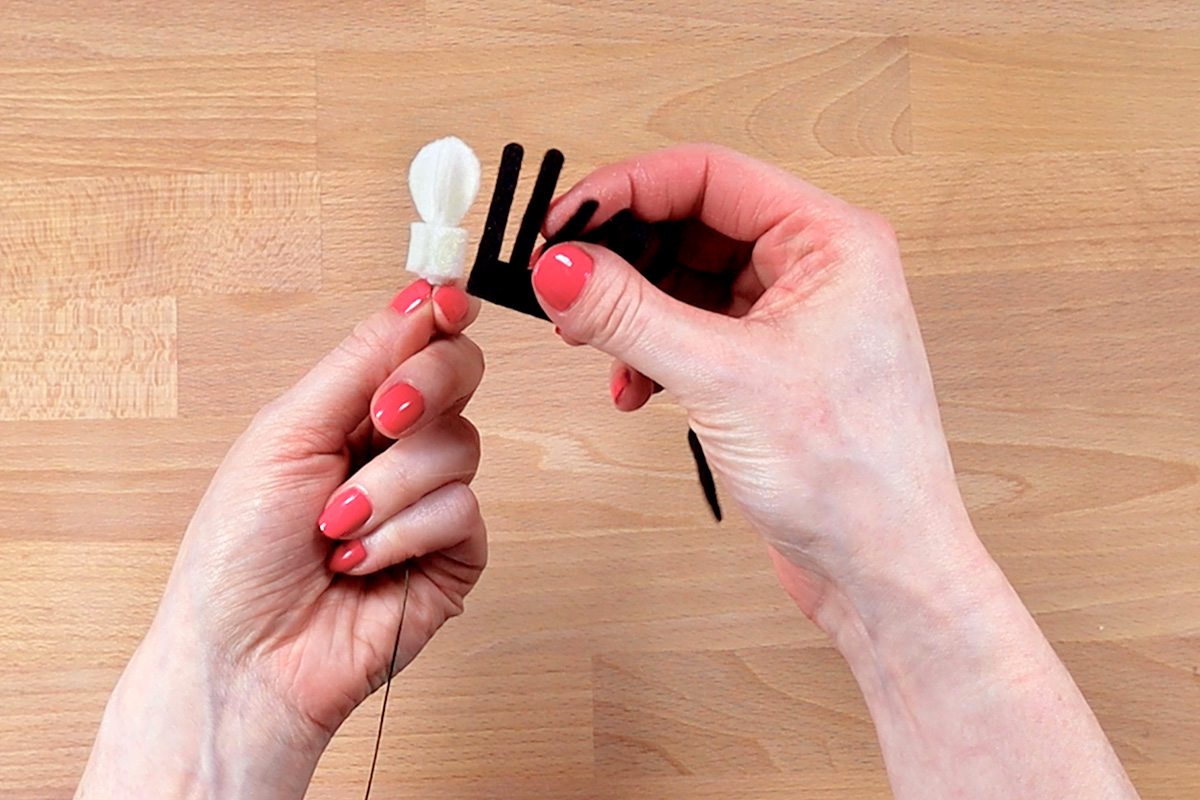
To create the stamen of the tulip, take the tooth brush shaped felt and glue the “bristle” end next to the end of the last piece. Wrap it until the 6 spikes surround the center and glue. Continue to wrap the rest of the piece and glue the end.
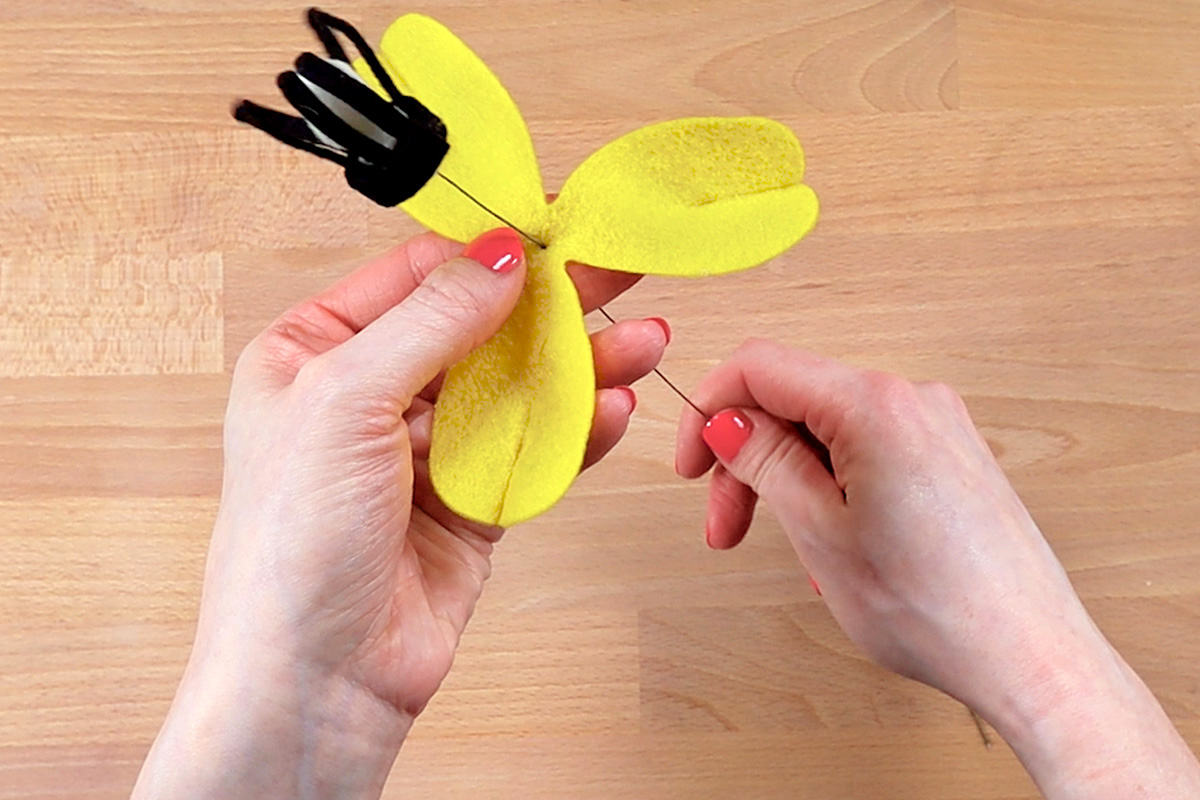
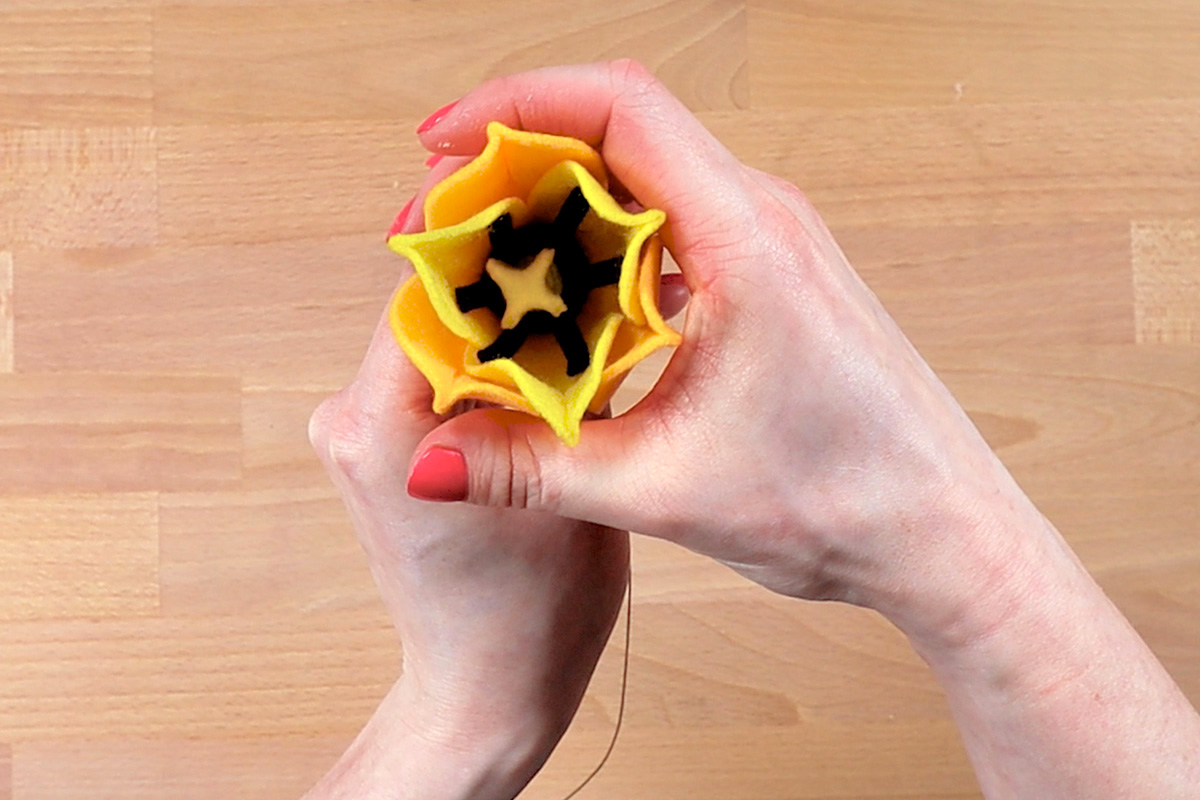
Step 5: Glue petals
Poke the end of the wire through the center of the inner petal piece and slide it up to the base of the assembled flower center.
Put glue along the outside of the base (about 1/3 of the way around) and stick one of the petals to it until the glue cools. Repeat for the other 2 petals.
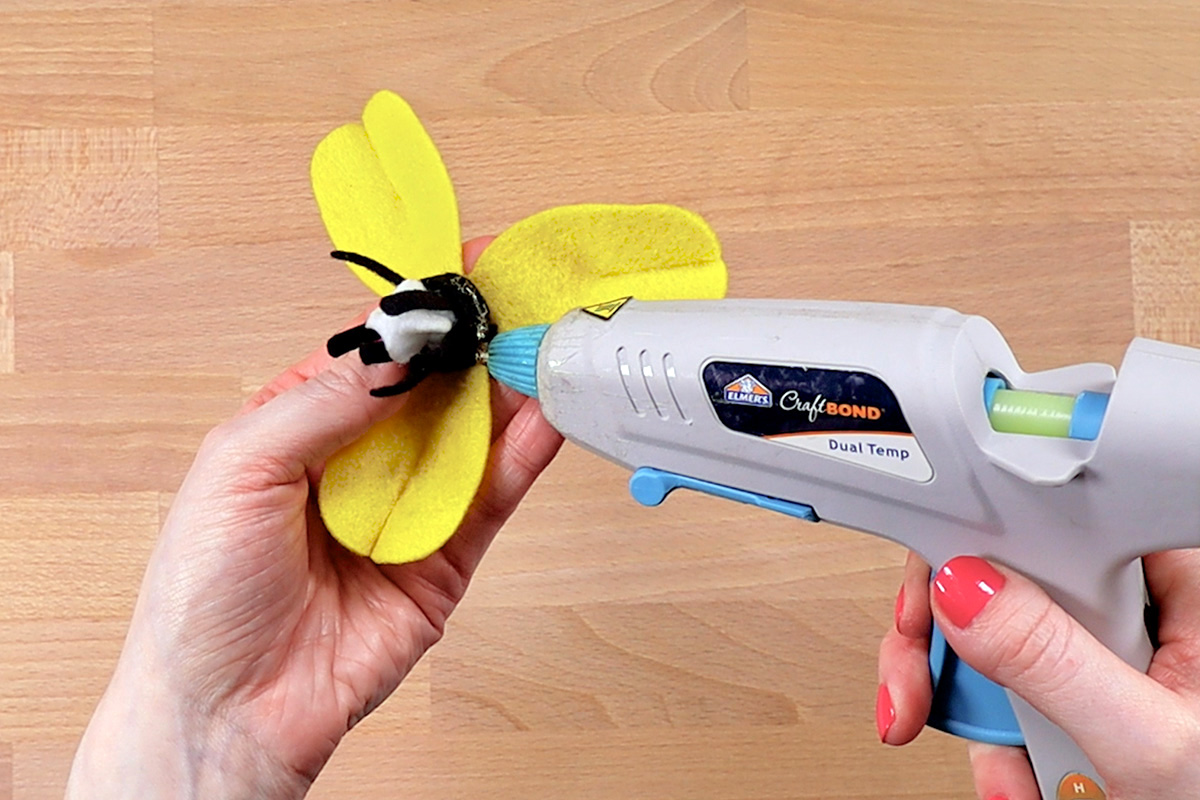
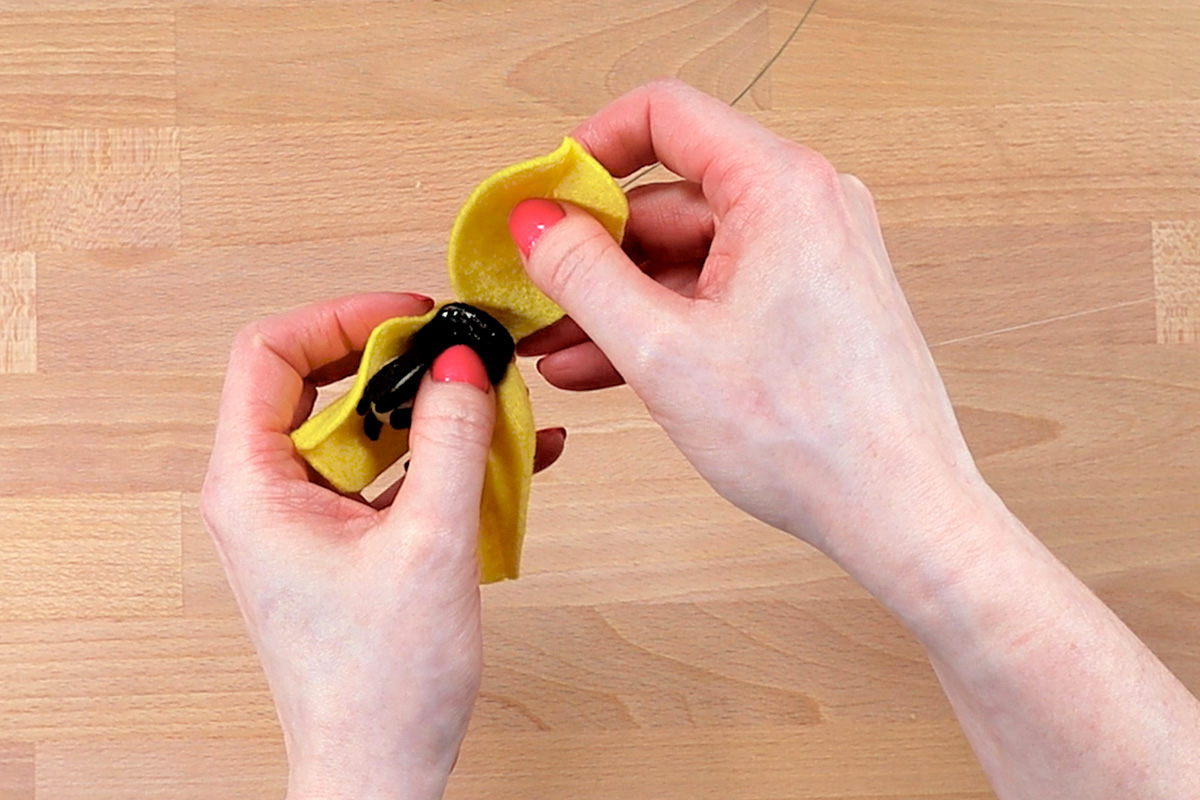
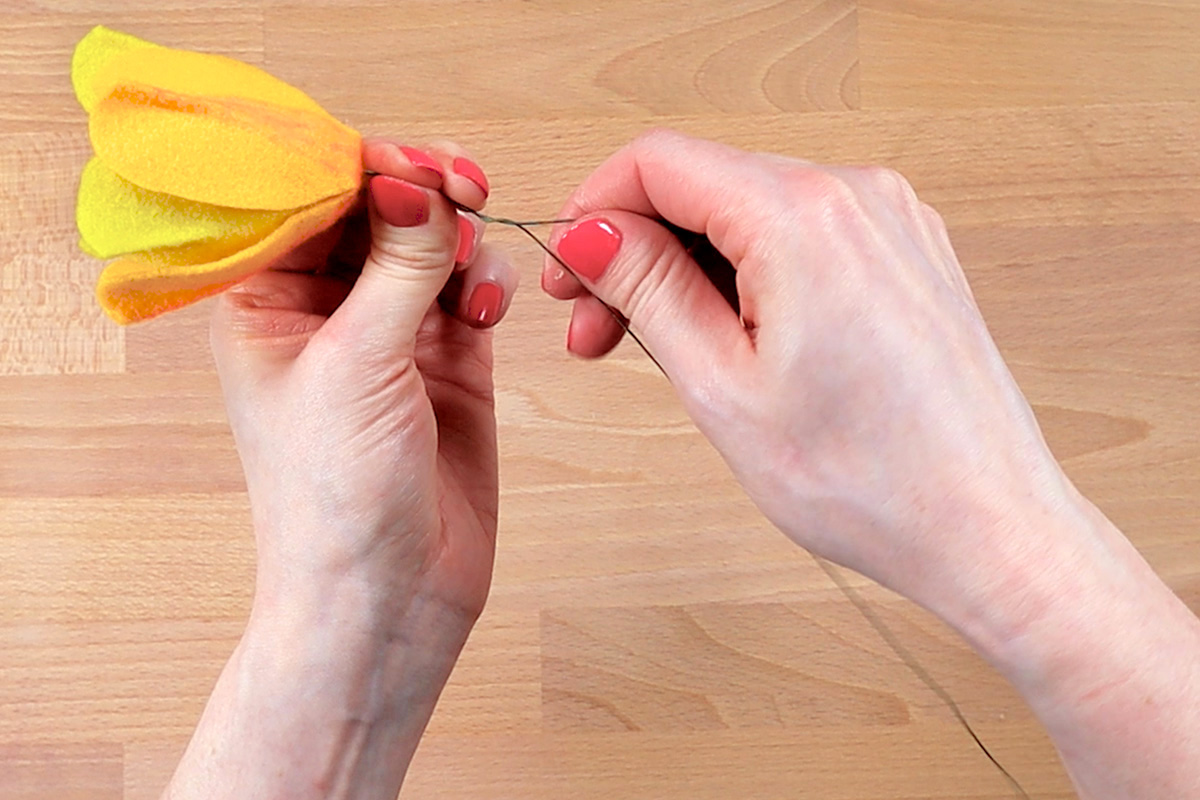
Slide the outer petal piece up the wire and position it so the centers of the outer petals are covering the edges of the inner petals.
Put glue on the bottom of each outer petal and glue to the inner petals. You may have to add a bit of glue between the petals to close any gaps.
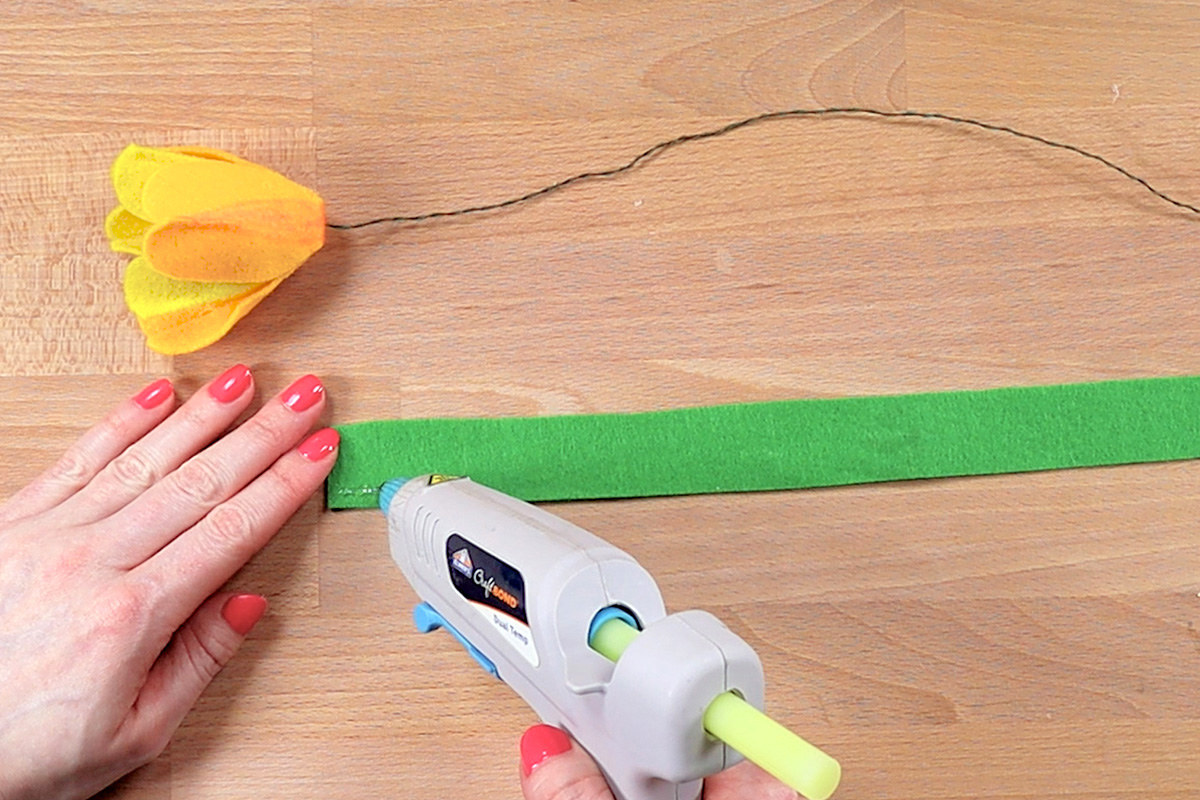
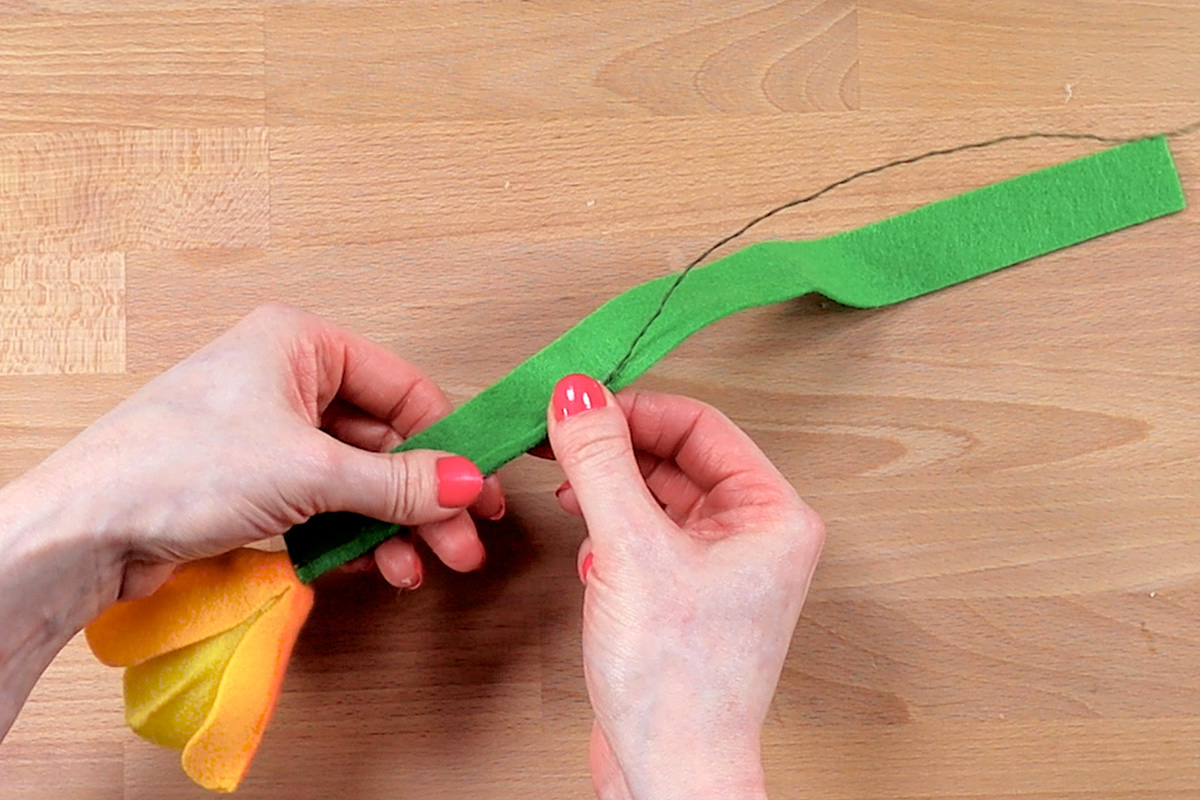
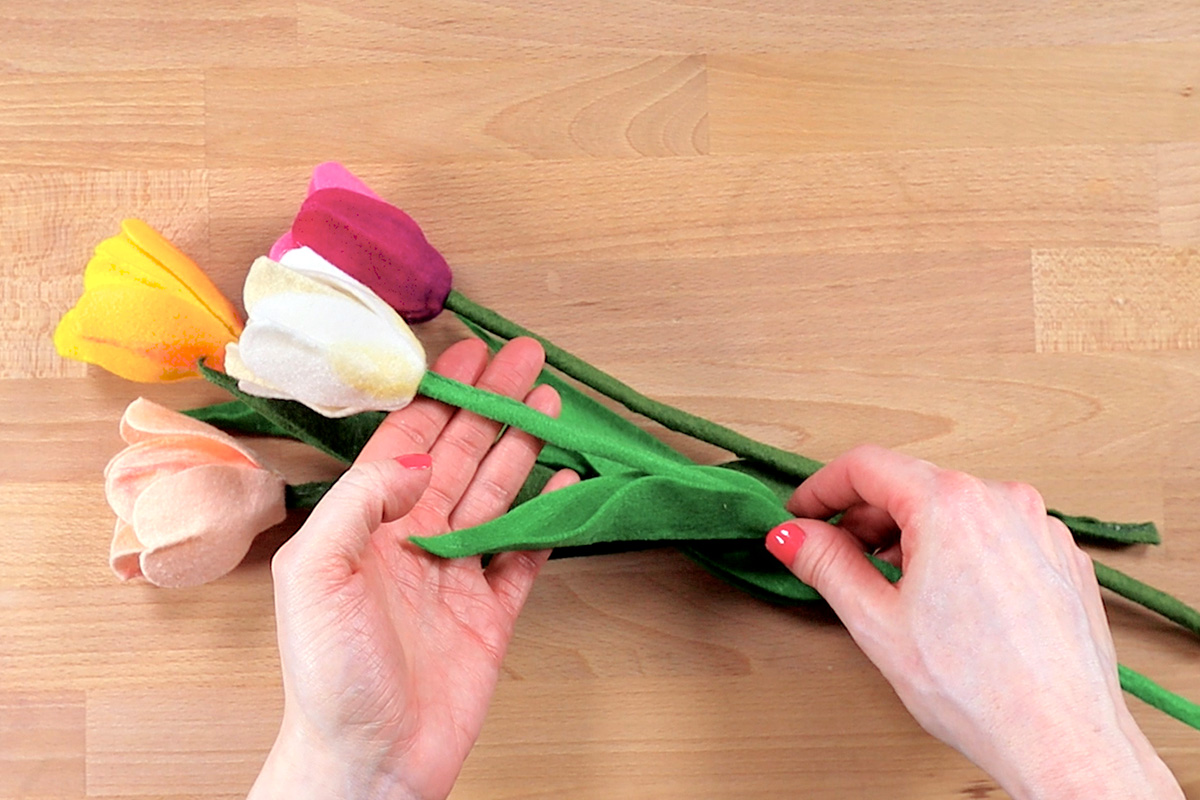
Step 6: Create Stem
I wrapped a second wire around the first to make it a little stronger but it’s not necessary, especially if you’re using a thicker wire.
Glue the wire to the edge of the green felt rectangle starting at the base of the flower. This piece is 13″ long but you can make it whatever the length of your remaining wire is.
Fold the edge of the felt over the wire as you go. Wrap the felt around the wire and glue the other edge. This seam will be mostly covered by the leaves so it doesn’t have to look perfect.
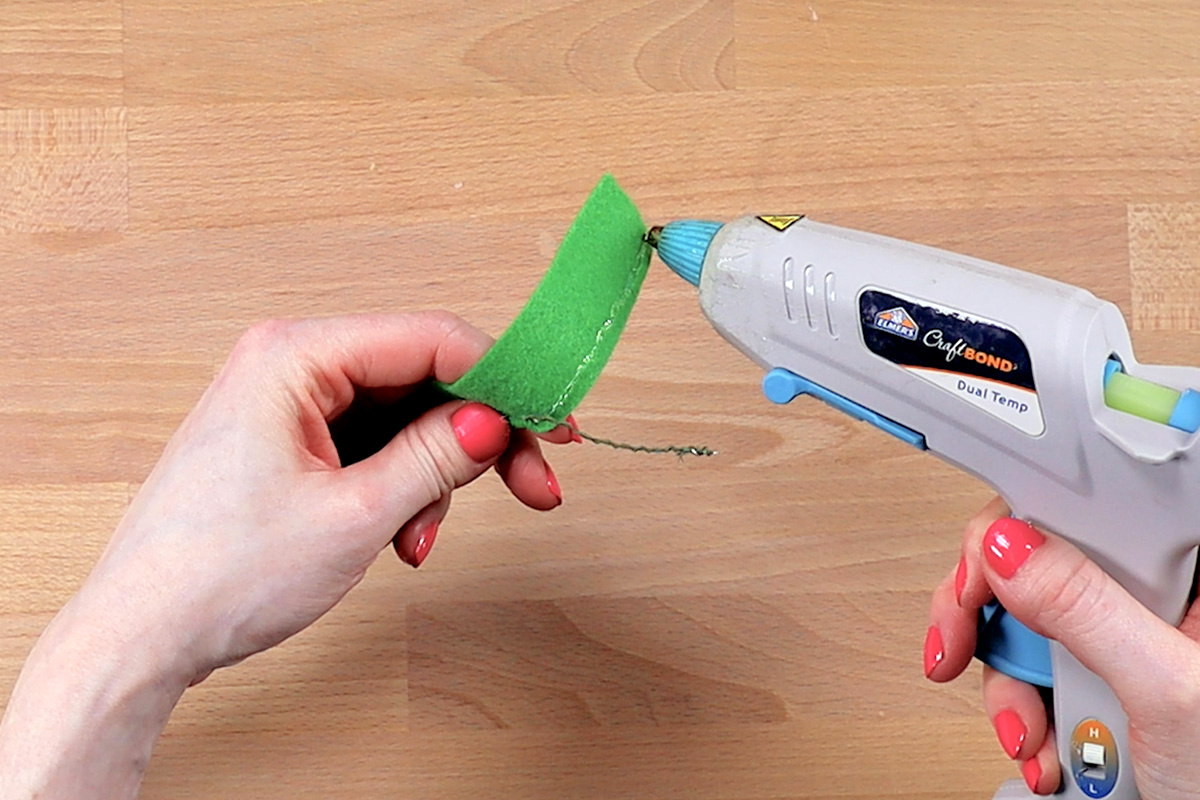

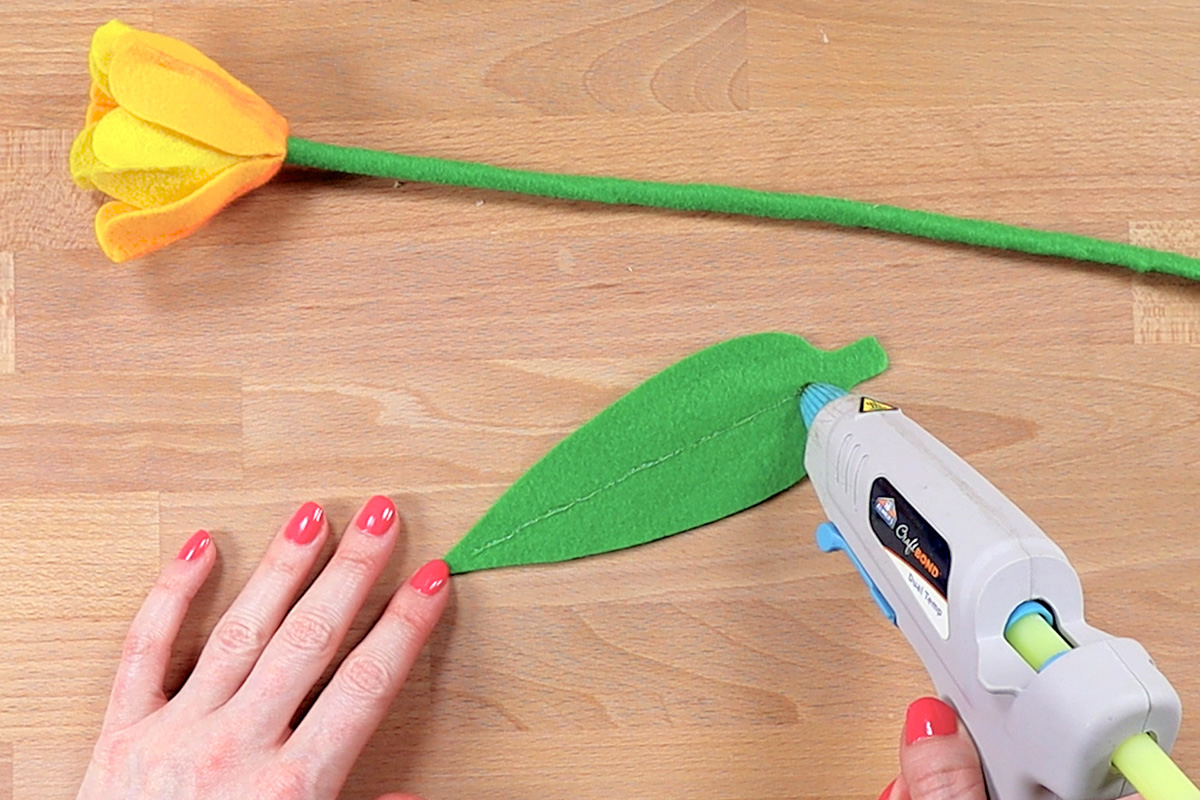
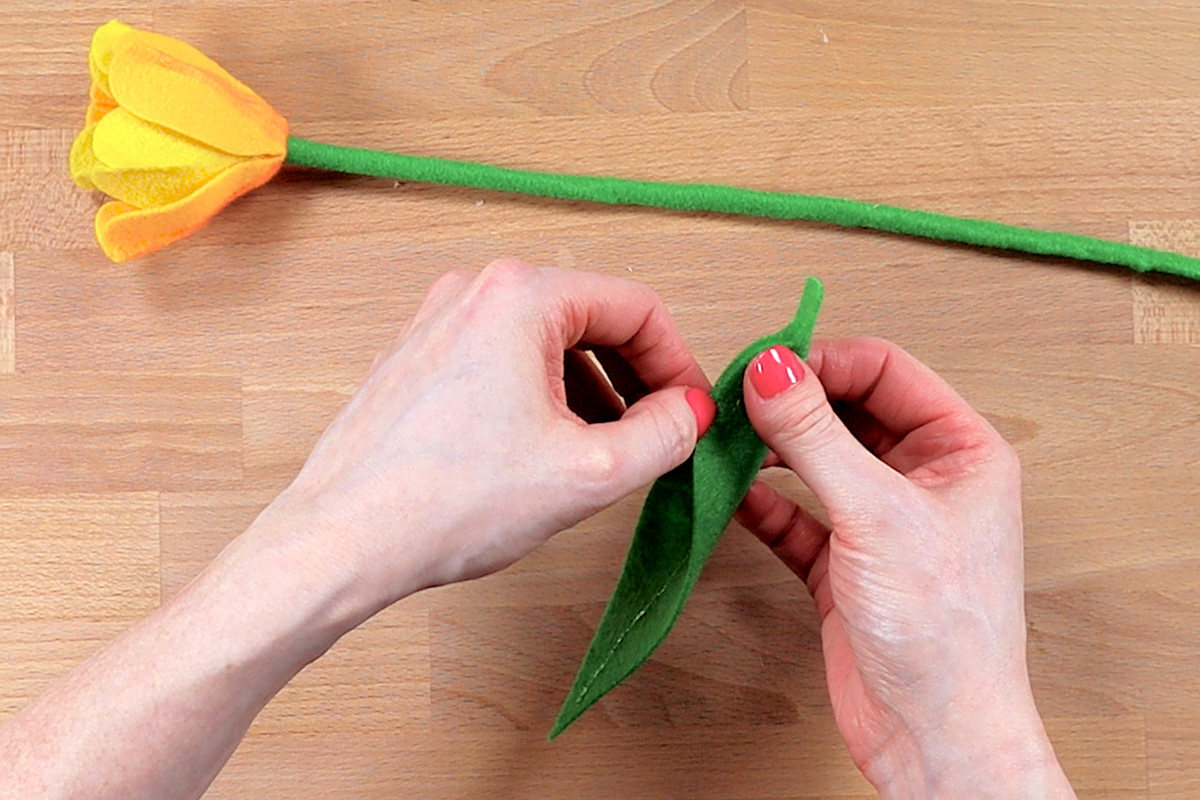
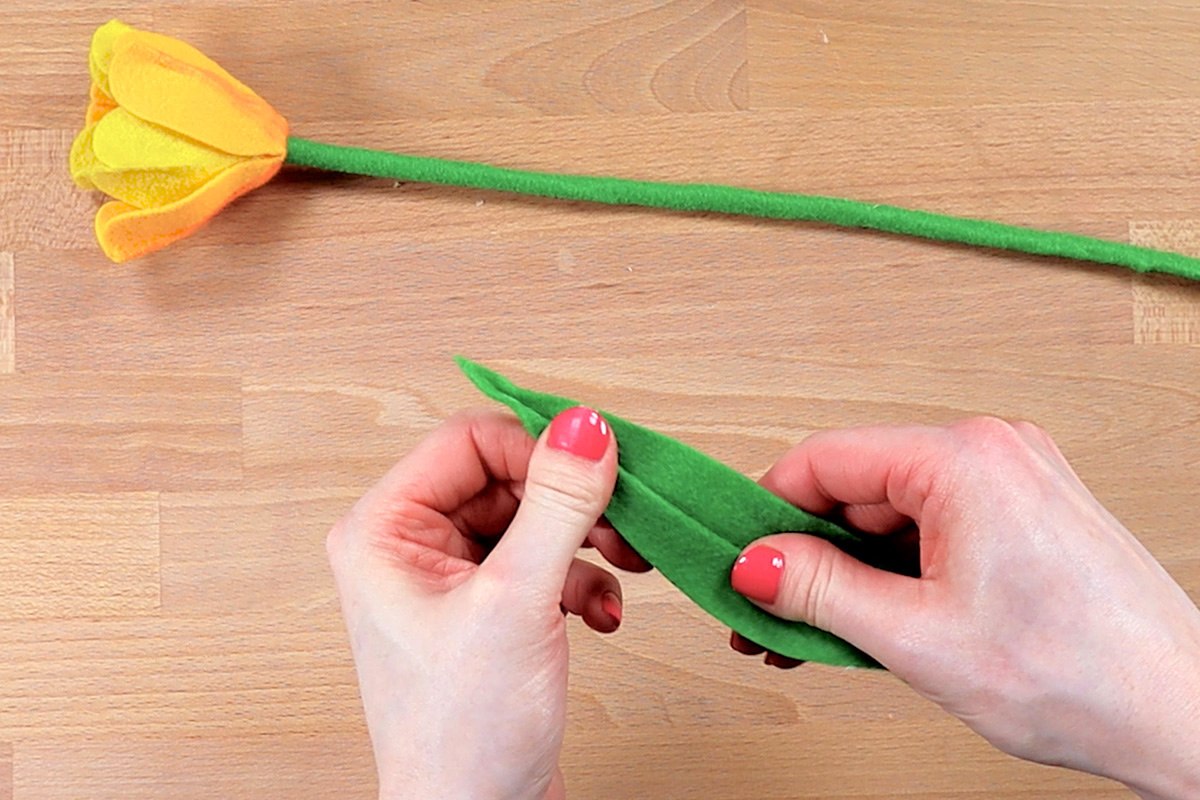
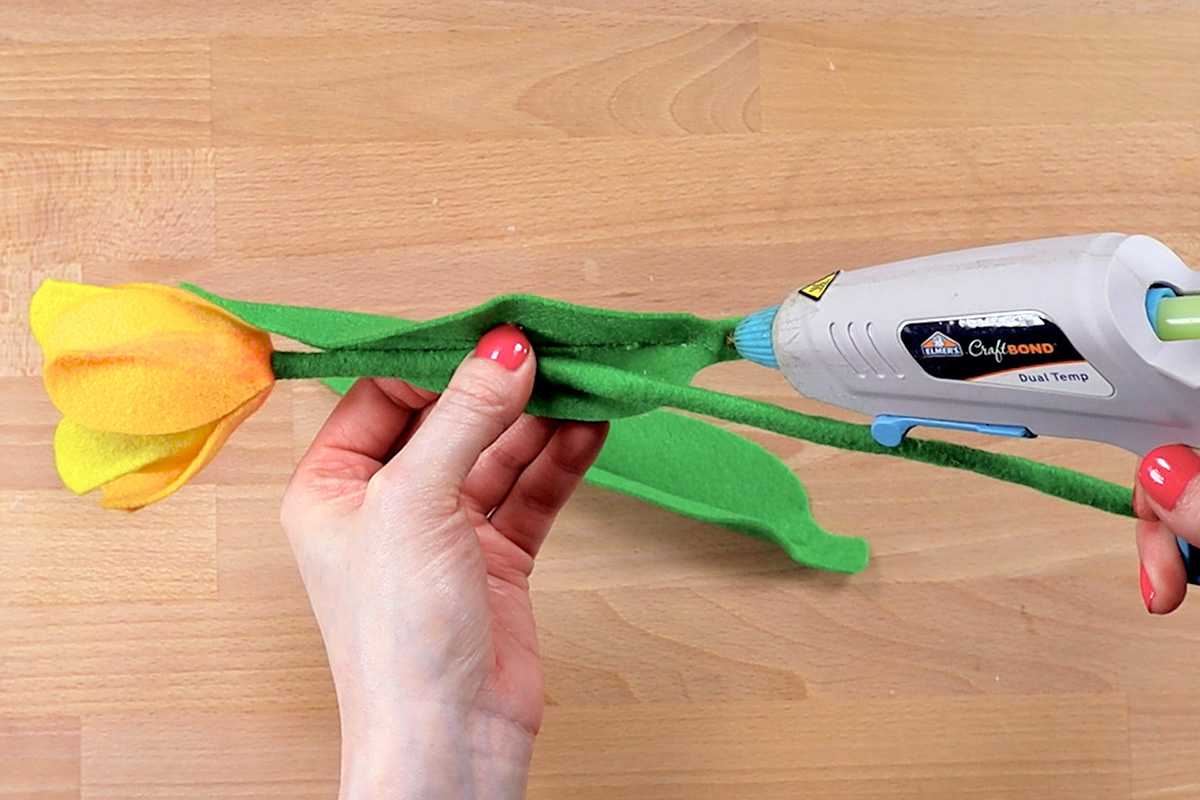
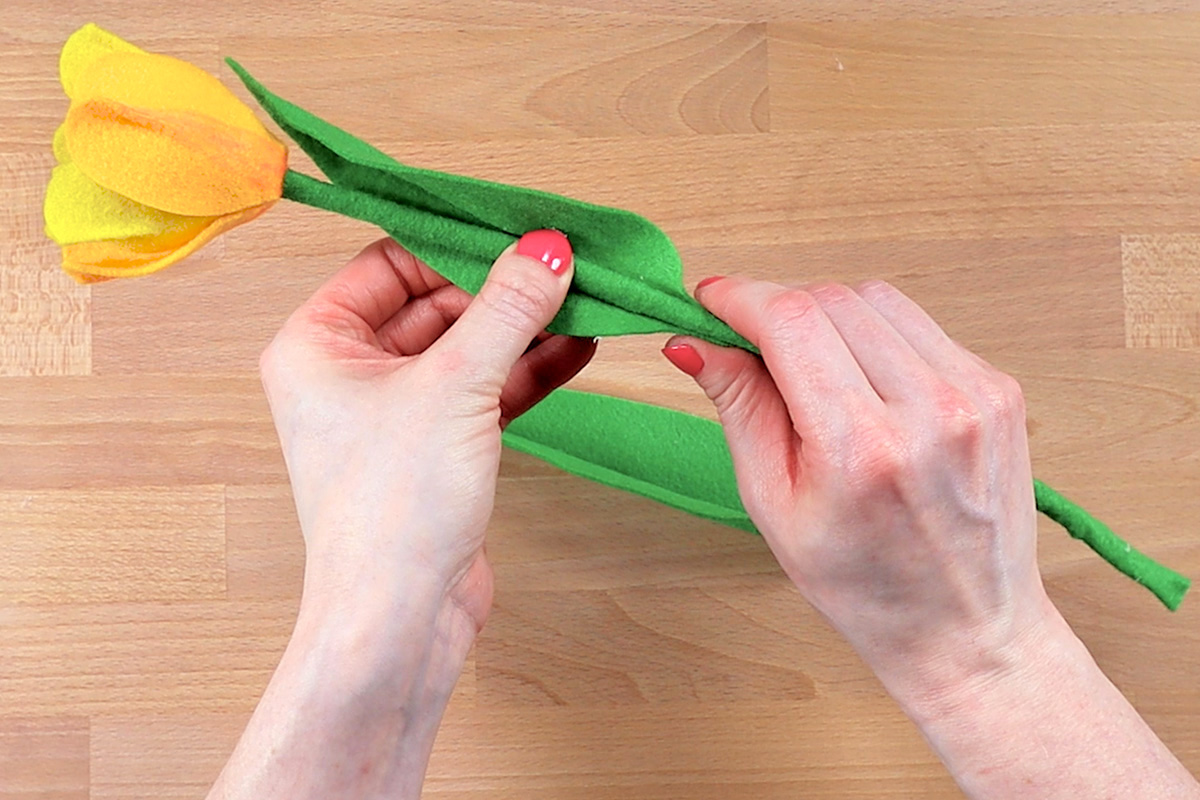
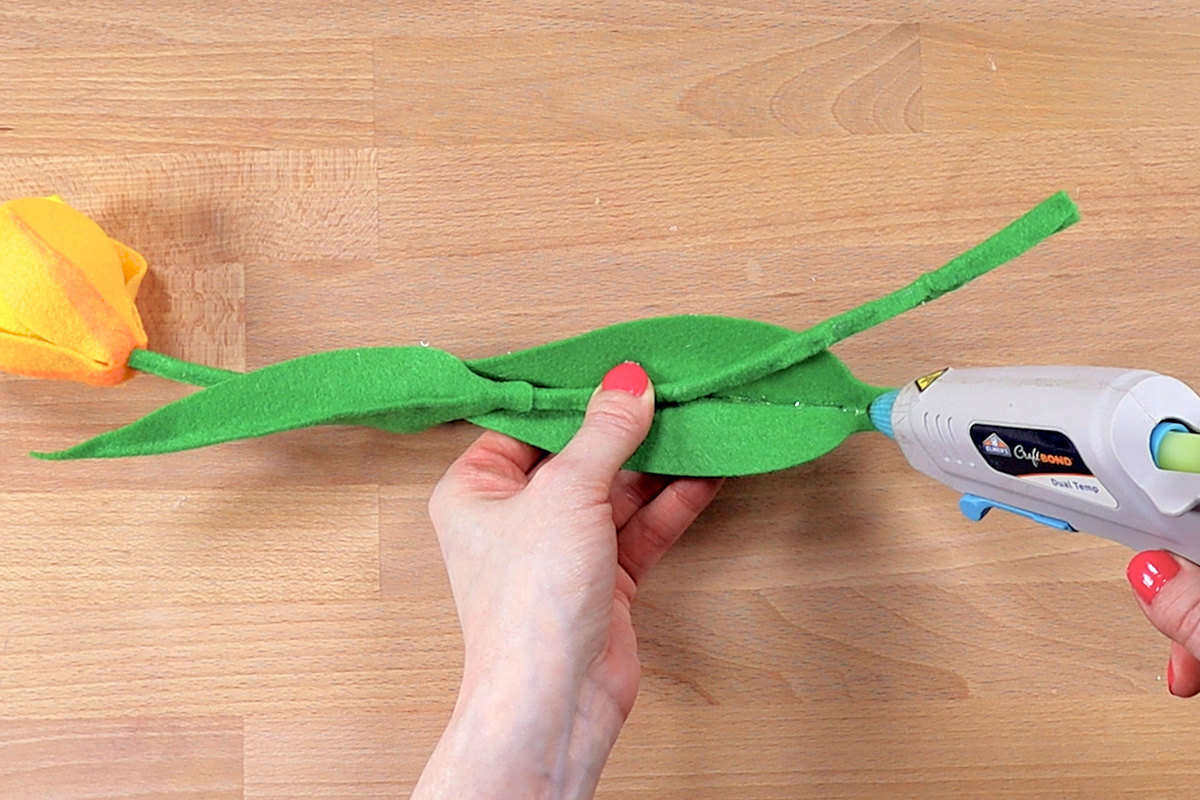
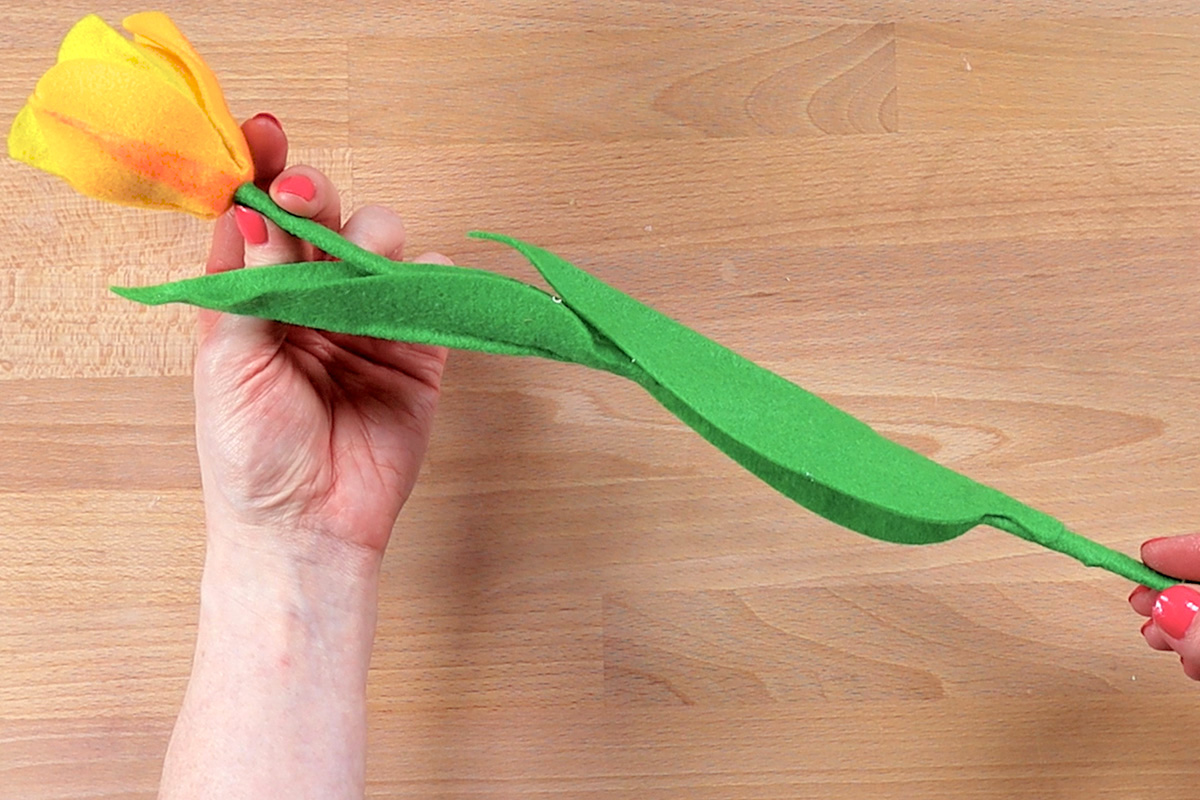
Step 7: Create Leaves
Place a thin line of glue down the center of the leaves. Fold in half then open to flatten a bit, similar to the petals. You can do this in several shorter segments so the glue doesn’t dry too quickly.
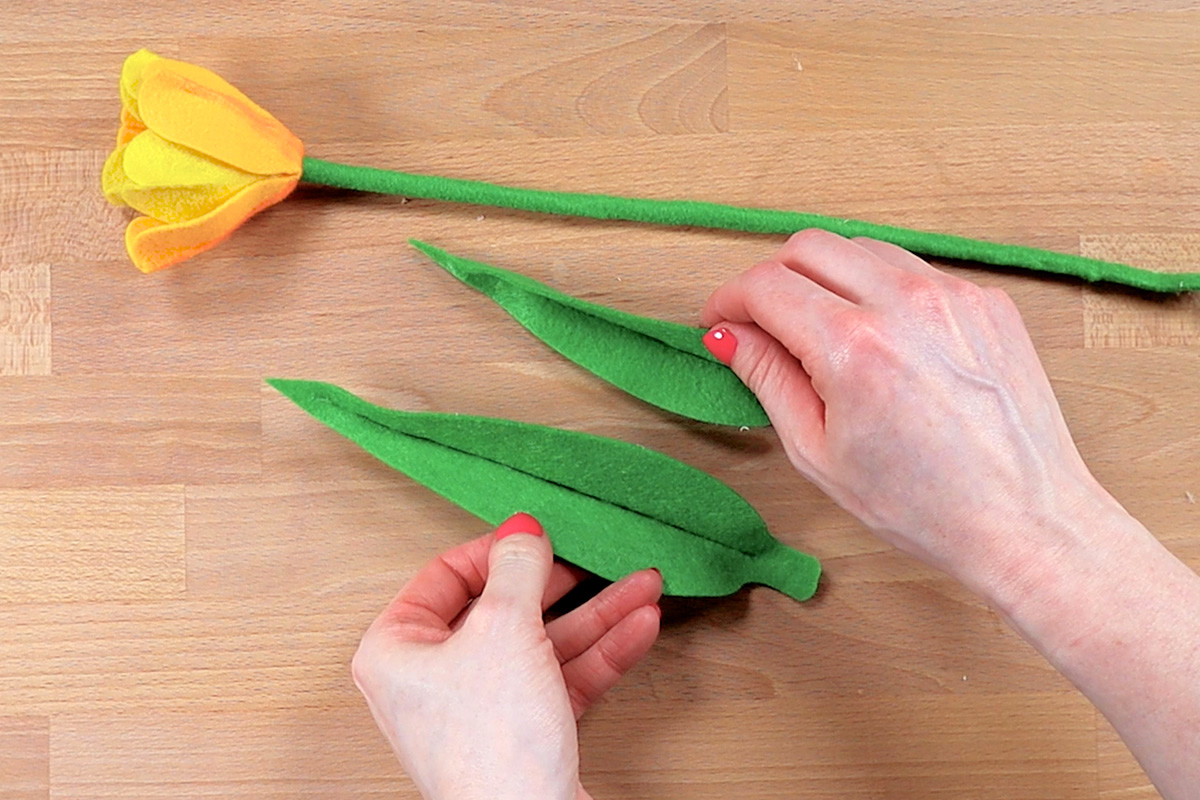
Place the smaller leaf on the stem and glue the bottom third or so of the leaf to the stem. Do the same for the larger leaf.
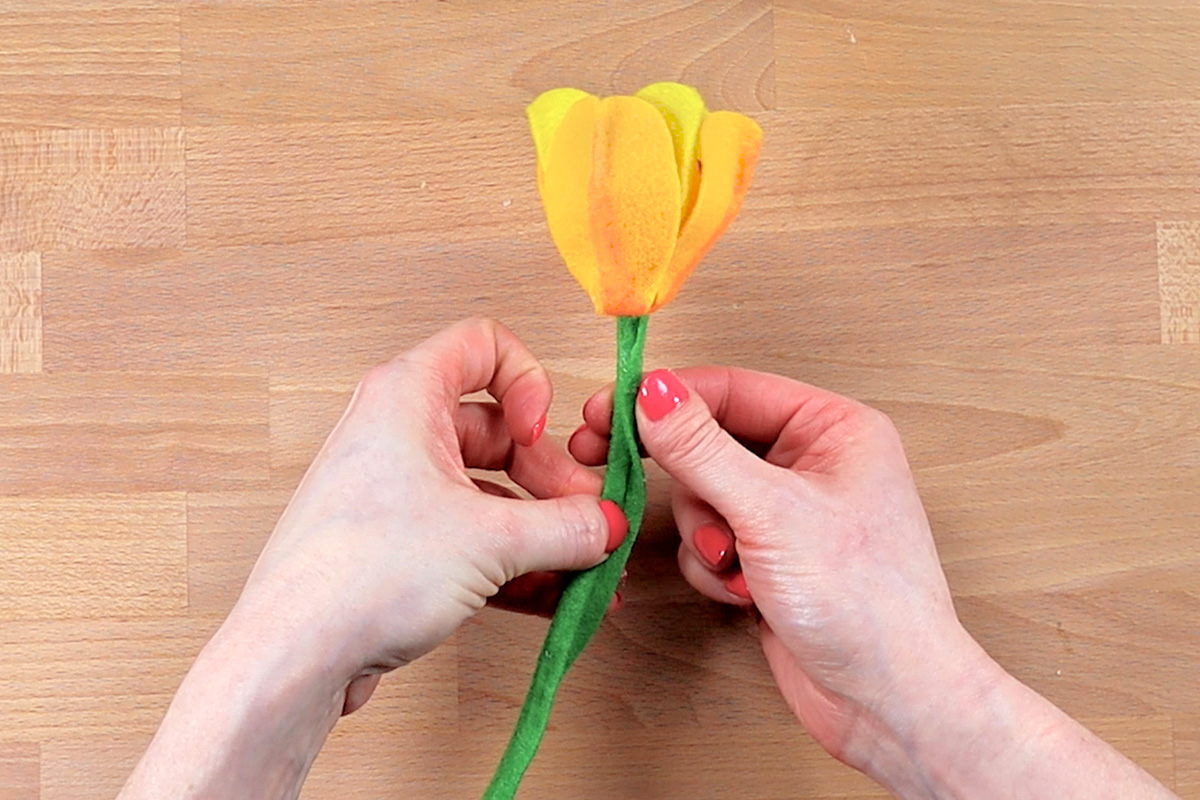
You can make your tulips in any combinations of colors you want!
-
{{#each productSuggestedQueries.results}}
- {{query}} {{/each}}
-
{{#each categories.results}}
- {{html title}} {{/each}}
{{html attributes.description}}
{{/if}}-
{{#each queries.results}}
- {{query}} {{/each}}